Introduction to the WordPress Admin Panel

Getting familiar with the features on your WordPress Admin Panel, also called the dashboard, will help you make the most of your WordPress site.
If you just installed WordPress recently, you may find the extensive menus and submenus a bit overwhelming.
Even if you have been a WordPress user for some time, it might still be a challenge to find settings and make changes.
In this article, we have listed and explained the different features of the admin panel so you can master the functions of your WordPress website.
Content:
- What is WP Admin Panel
- How to login to Your WordPress Admin Panel
- Main parts of your Admin Panel
- Conclusion
What Is the WordPress Admin Panel?
The WP Admin Panel is the backend of your site. On this WordPress backend, you can add posts and pages to your site, add functionality in the form of plugins, style your site with themes, control your WordPress settings, and do much more.
To do all mentioned above, you’ll need to login to your WordPress Admin Panel first.
How To Login In To Your WordPress Admin Panel
As the admin manager, you can access the WordPress Admin Panel by typing your login URL www.yoursite.com/wp-admin into your browser (of course replace www.yoursite.com with your site URL). With this login link, you’ll be directed to your WordPress admin login page. There you can enter your username and WordPress admin password and hit Log in. However, if you have forgotten your WordPress password, you can reset it via the Lost your Password link
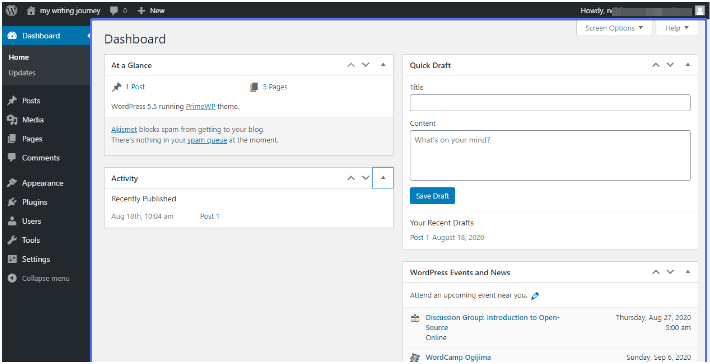
After entering the correct login details, you can then access your WordPress admin dashboard.
Main Parts of Your WordPress Admin Panel
In the Admin Panel, we have the following parts:
- Admin Menu
- Dashboard Widgets
- Admin Bar
- Screen Options
- User Info
- Help
Admin Menu
On the left-hand side of your dashboard, you will see a navigation menu. It has menu items and submenu items you can choose from to guide you to specific pages.
This is where you will certainly perform a lot of functions like creating pages, updating your WordPress installation, managing your site, installing plugins and themes, and much more.

Now we will discuss the main functions of the menu options in the sidebar.
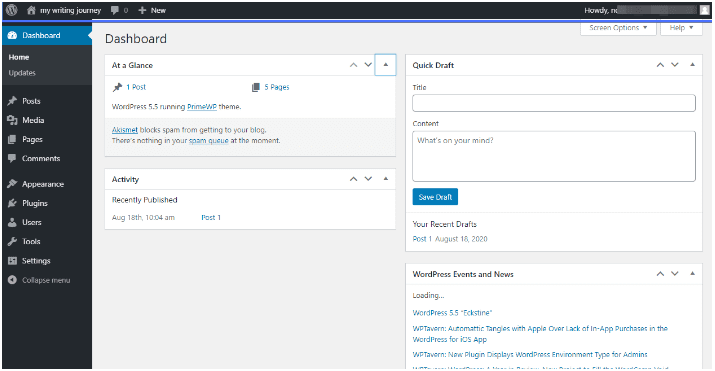
Dashboard Widgets
The first item on the admin menu is the dashboard. This page contains content areas (or widgets) that display information about your site. The “At a glance” section, for example, show the number of posts and pages on the site, your WordPress version, etc.
Beyond showing information, some widgets also perform functions. For example, you can use the ‘Quick Draft’ widget to write down your thoughts, save as draft, and later on publish as content on your site.
You can also move widgets around to display them as you please.
Posts – WordPress Admin Panel
Here you can create a new blog post, view previous posts, manage your posts, etc. To do all these, place your cursor over the ‘Posts’ menu. A submenu will emerge.
In the submenu you will see the following options:
- All Posts: This is where you will see all the published blog posts on your website. You can also edit or trash a post from here.
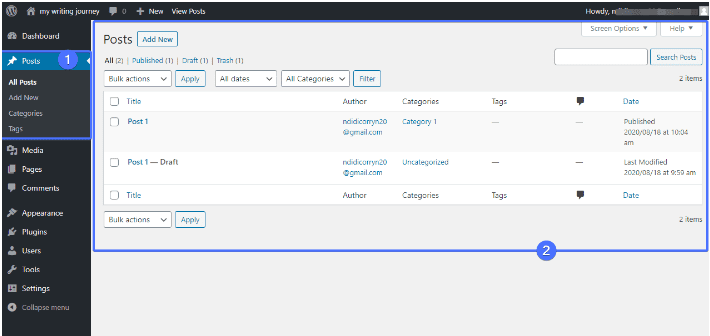
- Add New: This is where you can create and also publish new content on your site using the WordPress editor. Additionally, you can upload images and assign categories as you create a post.
- Categories: Here you can create categories with which you can group posts while creating or editing them.
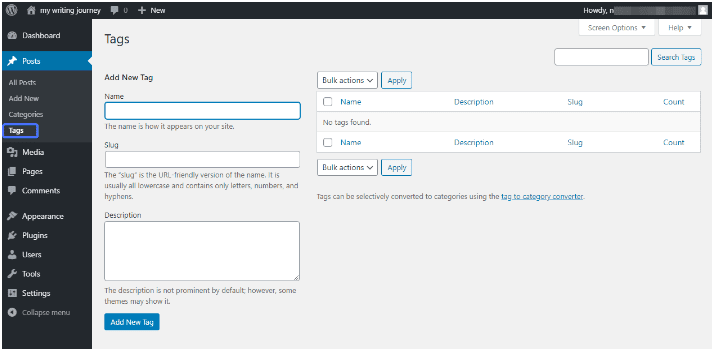
- Tags: In the tags page, you can create tags for your WordPress posts. You can also group similar posts together using tags. But unlike categories, they are optional.
Media
Another item in the WP Admin menu is the Media library. Here you can add pictures, audio, and video files to your site.
In its submenu you have the options:
- Library: Stores uploaded pictures, audios, and videos.
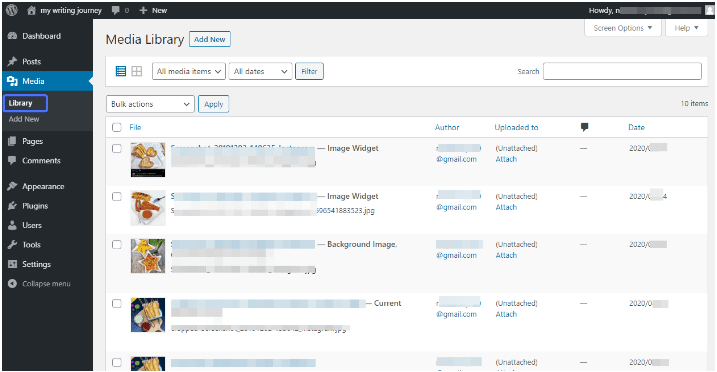
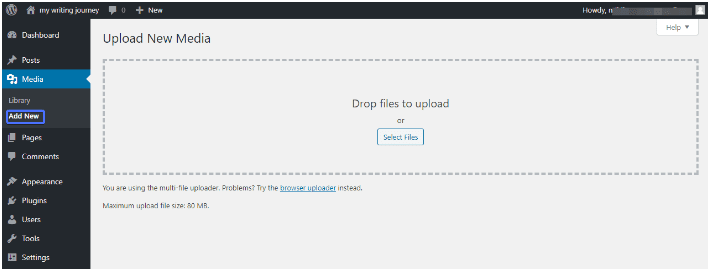
- Add New: This is where you upload new media files to your site. You can select files from your computer and upload them.
Pages – WordPress Admin Panel
On your site you may have your Homepage, About us page, Contact Us page, and any other pages your business might require. Create such pages using the Pages item in your menu.
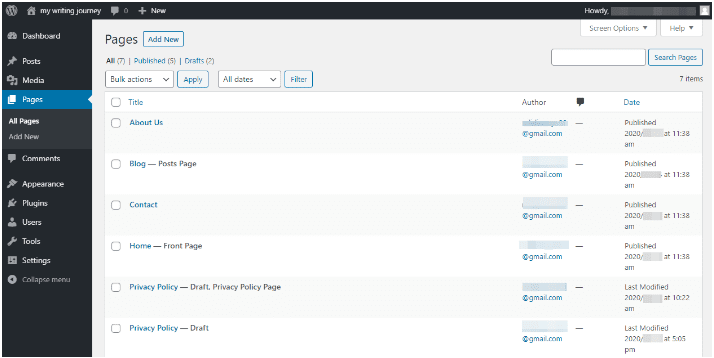
You can also add, edit, and trash your pages.
To work with pages, click on the Pages item. This will expand the submenu which contains:
- All Pages: This displays a list of all the pages you have on your site. Search for existing pages and edit them here.
- Add New: Create new pages for your website using this option. You can create an individual page, or create a page as a subpage of another by selecting a parent page on the right side of the screen.
Comments
Readers will very likely leave comments on your site. You can choose to approve their comments, mark them as spam or delete them. This is what this menu item is for.
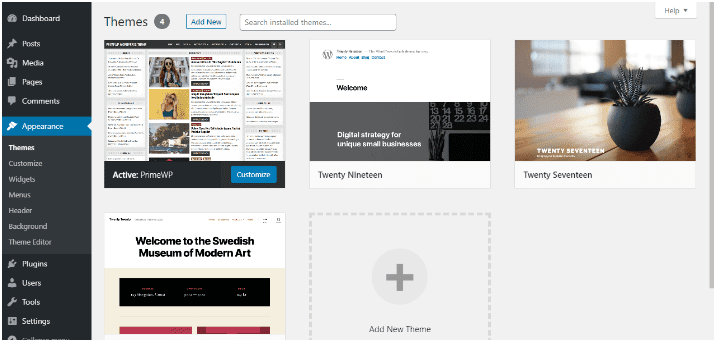
Appearance
Do you wish to change the look of your website? This is what the Appearance item is for. This is where you modify your site by customizing admin themes, as well as Widgets, Menus, and Background Options.
In its submenu are the options:
- Themes: Shows you your current theme and other themes you may have installed and wish to activate later. You can activate or deactivate admin themes here. Using the Add New button, you can also install new themes on your site.
- Customize: This lets you design your theme the way you want it. The customization options are also very easy to use. Click on it and you’ll be directed to the customization page where you can edit your site with its many features on the left bar. Easily perform actions like changing your site identity, colors, background image, etc. with a few clicks. When done, save and publish your changes.
- Widgets: enables you to add content blocks to your sidebars, footers, custom navigations, and much more.
- Menus: here you can create a new menu (such as your main navigation menu), edit your existing menus or delete a menu. You can also rearrange the menu items in the order you prefer.
- Background: this takes you to the themes customization page where you can change or remove your website’s background image. You can also change the image size and position.
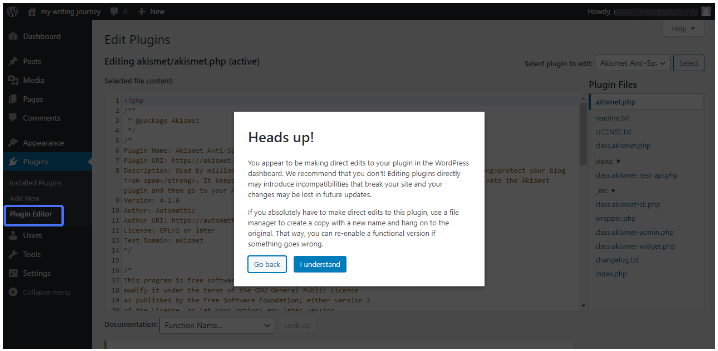
- Theme Editor: lets you make direct code edits to your theme in the WordPress Dashboard. When you try to do this, a warning box comes up.
This informs you that making code edits to your theme without the proper experience to do so will likely crash your site. So if you’re not familiar with code edits, you should contact a WordPress expert to assist you.
Plugins
We’re on to the next (and one of the most useful) item on the menu list, Plugins.
Plugins are software that add new features to your website.
So, to add Plugins to your site, click on the Plugins option to get the submenu items.
- Installed Plugins: this shows you plugins you have already installed.

- Add New: click here if you want to add new plugins.
- Plugin Editor: you can make direct edits to your plugin here, but it is best that you don’t unless you know what you’re doing. Editing your plugin code may introduce conflicts that break your site.
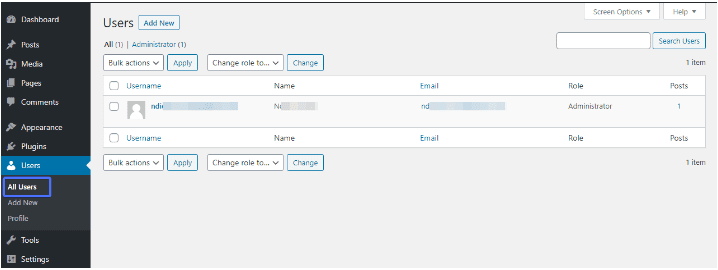
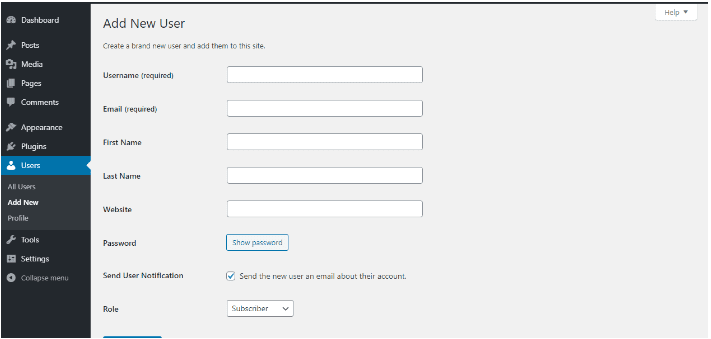
Users – WordPress Admin Panel
The Users option allows you to create a new user profile and to also assign roles and permissions to the new user. As the website owner, you can choose who is authorized to create and edit content on your site, install themes and plugins, and perform other functions.
In the submenu options you have:
- All Users: shows you all who are registered on your WordPress website. You can see the role that has been assigned to each user as well as other info, such as the number of posts they have published on your site.
- Add New: this option lets you add a new user and also assign a role to them.
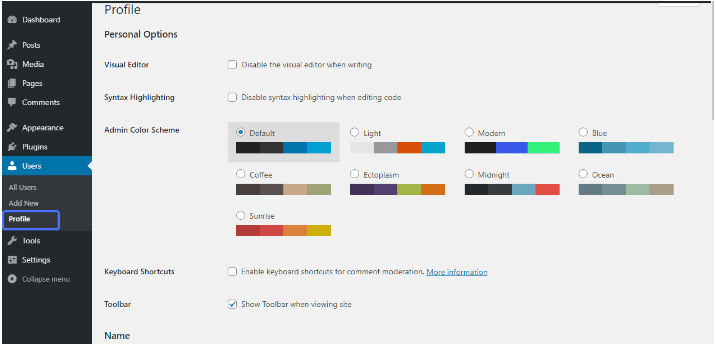
- Profile: this displays personalization options for the currently logged in user. Here, you can customize your wp admin dashboard to look different for you. Let’s say you are tired of the blue WordPress dashboard. You can change the default WordPress color scheme to a different set of colors. You can also personalize the look and feel of WordPress editors, and make changes to your profile details.
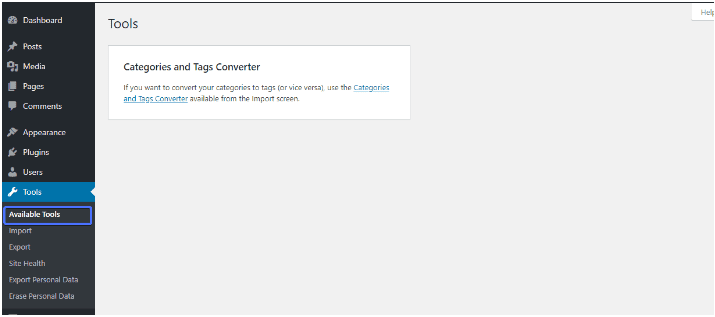
Tools
Tools provide a lot of options to simplify tasks on your website. Some plugins or themes can also add their tools here.
In the tools submenu, you have these items:
- Available Tools: any tool you have available (beside the others on the submenu) will be displayed here.
- Import: if you have contents in other CMSs, this lets you bring them into your site. You can choose any system you want to import from to get started.

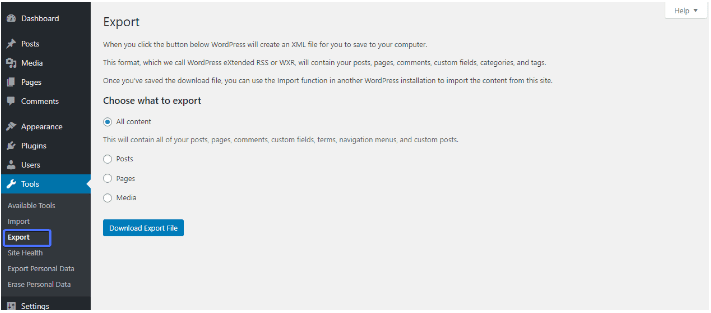
- Export: this lets you save contents like posts, pages, comments, custom fields, terms, navigation menus, and custom posts to your computer. You can then import these content into a compatible CMS.
- Site Health: shows you items that require your attention. It could be an upgrade issue or a WordPress security issue.
- Export Personal Data: allows you to export a file containing the personal data of a particular user on your site. You will be asked to input your email address to enable you to receive a request verification.
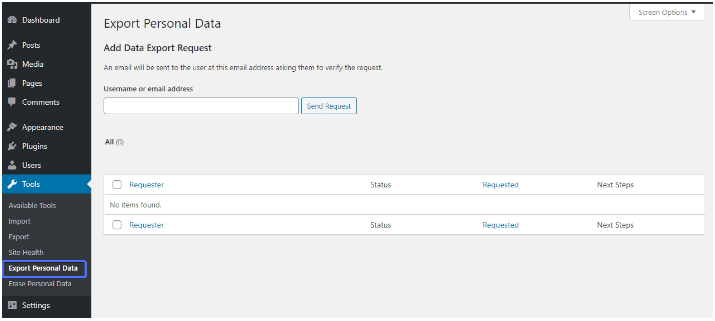
- Erase Personal Data: A user may wish to have their details deleted. This option lets you erase a user’s personal information.

WordPress Admin Panel ‘Settings’ Option
The Settings option lets you configure your primary site settings. These range from branding options, like your site title and tagline, to options that are important for the working of your site, like permalinks. Common WordPress settings include:
General
Here you can view and edit basic information about your site like:
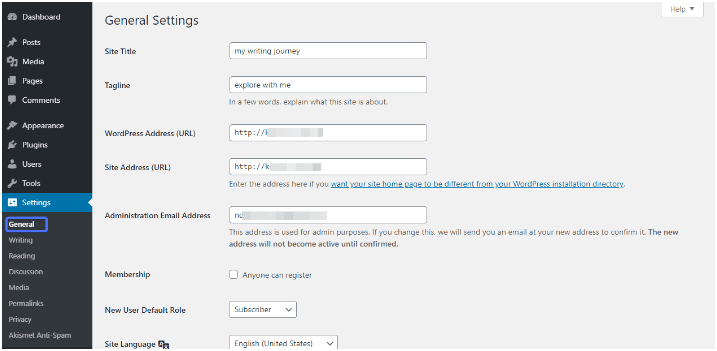
- Site title: This is the name of your site.
- Tagline: is the brief description about your site.
- WordPress URL: is the exact location of your site.
- Site Address: is the URL people use to visit your site.
- Administration Email Address: is where important information about your site will be sent to.
- Membership: checking the box next to it will allow visiting users to create an account on your website.
If you want to do this, make sure that the New User Default Role is set to ‘Subscriber’. As a result, you ensure new members get the most basic permissions.
- Site Language
- Time Zone
- Date Format
- Week Starts on.
When you make any change here, make sure to scroll down and click on Save Changes.
Writing
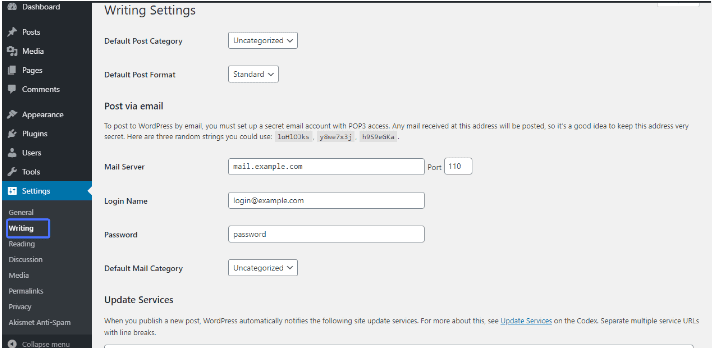
This concerns the posts that will be written on the blog. In it you have:
- Default Post Category: this is the default category that will be assigned to a post if no category is selected when the post is created.
- Default Post Format: this controls the way your posts are displayed. If you mainly want to create picture heavy posts for example, you can set the gallery format as default. Note however that your theme may not support all formats..
- The option to Post via Email is useful if you do not want to log into your dashboard all the time. You can create posts via email and publish them directly to your site.
- Update Services: this is where you list services that will be notified once you publish a post.
Remember to also hit Save Changes.
Reading
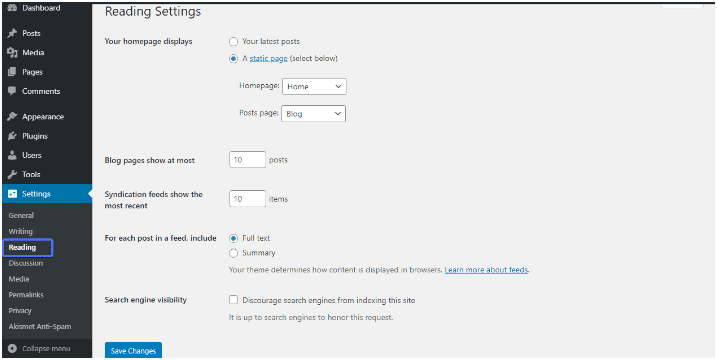
This option lets you decide how you want your front page and blog page to appear to readers.
Your Homepage displays: for this option, if you are not having a blog or news site, you should select ‘A static page’. As a result, you will use a specially designed homepage for your website.
You can also control how many posts can be shown per page, as well as whether the full text or a summary should be displayed.
If your site is still in development, you may not want search engines to index it just yet. You can tick the ‘Discourage search engines…” box to achieve this.
After all changes are made, click on Save Changes.
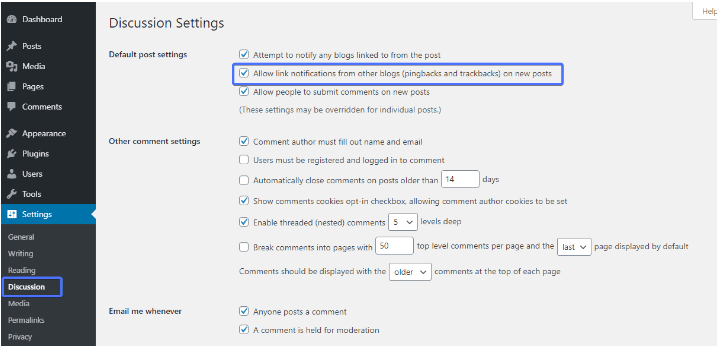
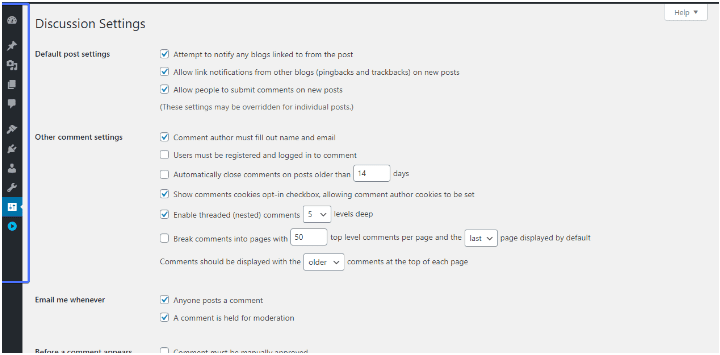
Discussion
This option deals with comments on your site. Many of its options are easy to understand, so we will explain the ones that can be confusing.
One of such is the ‘Allow link notifications from other blogs (pingbacks and trackbacks) on new posts’ option.
A ‘pingback’ is a comment you get when someone makes a post on their blog and adds a link to a post you already have on your blog.
A ‘trackback’ is the notification other websites get when you include a link of theirs on your post.
Let’s say you made a post on how to bake a cake and insert a link to another website that gives more recipes to help your readers. The other website will be notified. Consequently, authors can keep track of who is referring to their articles.
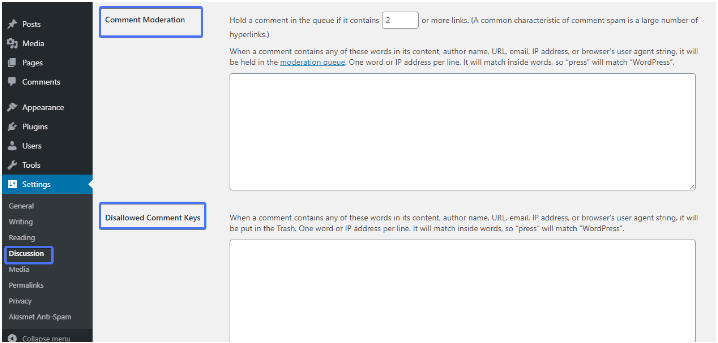
‘Comment Moderation’ field allows you to list out words, emails and URLs that would cause a comment to be held in the moderation queue for you to approve or delete.
The ‘Disallowed Comment Keys’ field lets you list out words, emails and URLs that would cause a comment to be put in the trash.
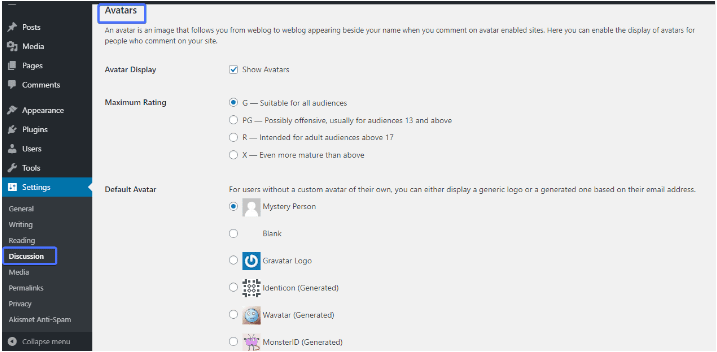
The ‘Avatars’ section lets you enable avatars for people who comment on your site. When you have made all changes needed on the WordPress Admin Panel, click on Save Changes.
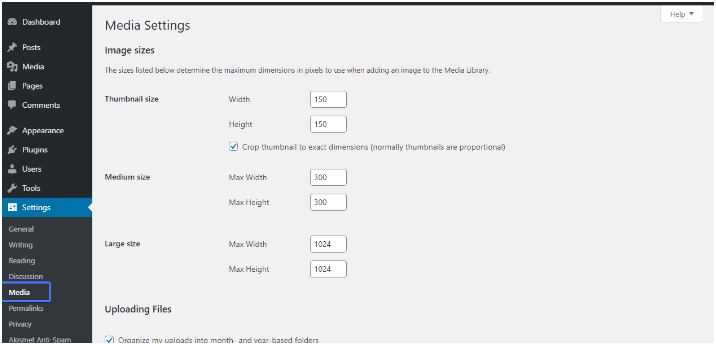
Media
This lets you customize how your images are uploaded in your WordPress install.
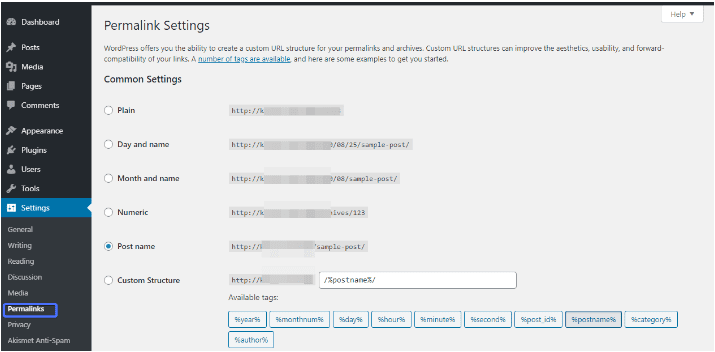
Permalinks
This option lets you control the URL structure for your site content, including posts, pages, and more.,
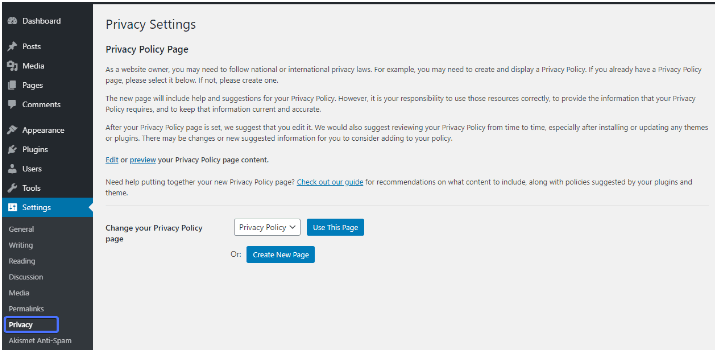
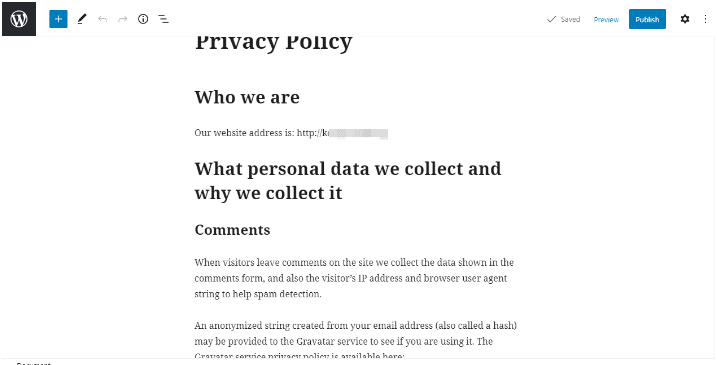
Privacy
This setting allows you to create a privacy policy for your site using either an existing page or a new page. You’ll be shown a partially filled out page. You can customize its contents with all the information your users need to be reassured of the safety of their data.
Collapse Menu
This is the final option on our Admin Menu. This feature lets you collapse the menu, consequently leaving only the admin menu icons visible.
Admin Bar
The Admin Bar is the bar on top that contains useful information and admin links like add new post, edit your profile, and see pending comments. As you install plugins, they may also add new items to the admin bar.
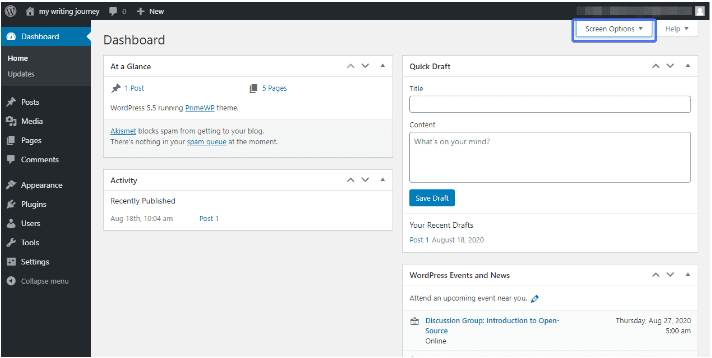
Screen Options – WordPress Admin Panel
This feature gives you the option of hiding/showing elements you want on your WordPress dashboard. To do this, simply click on ‘Screen Options’.
As a result, you’ll get different options with checkboxes next to them.
Check or uncheck the ones you want to display or hide.
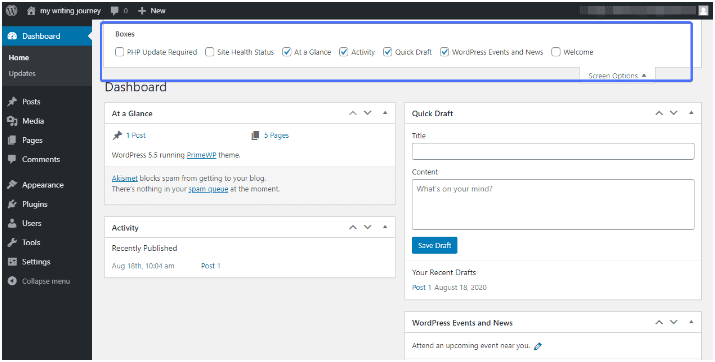
When you make changes, the admin screen will be adjusted.
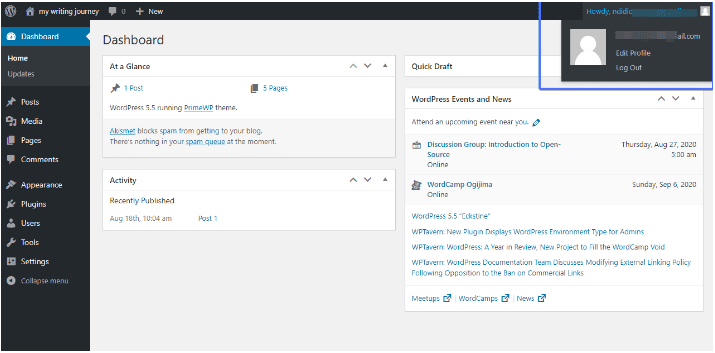
User Info
This shows the user that is currently logged in on the admin bar. When you place your cursor over it, it shows details of the user’s profile and a button for logging out.
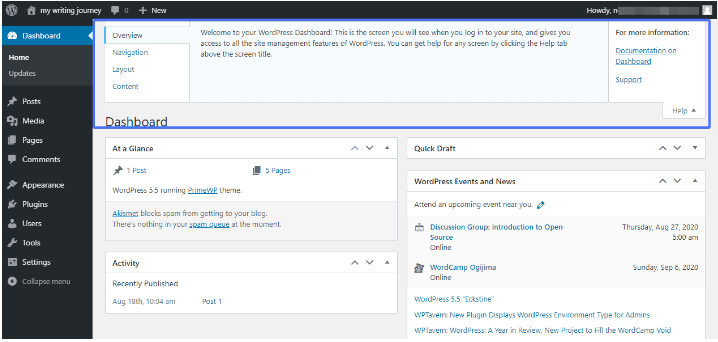
Help
The Help option provides some useful links to WordPress help pages.
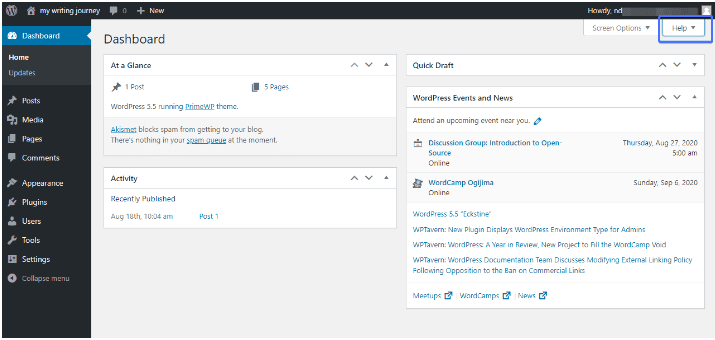
Simply click on the help icon to expand the available resources for WordPress users.
Conclusion – WordPress Admin Panel
This guide has taken you through the tools, settings, and features available in your WordPress admin panel. At this point, you should be better prepared to customize, improve, and manage your site using the admin panel.
As you do this, you may also need guides to help with the changes, updates, publishing, and other activities you do on the site. Our WP College is a great resource for WordPress tutorials and fixes.
If you found this article helpful, please bookmark it for reference in the future. And if you have further questions about this topic, please let us know in the comments below.