How To Integrate Salesforce Form In WordPress
 Attracting readers to your site is one thing, making them stick with you is another. One of the easiest ways to succeed at both is to set up WordPress – Salesforce integration on your website.
When visitors fill in their details via a WP contact form, Salesforce collects the details automatically and stores them for possible follow-up.
Using this and other Salesforce tools, you can convert your visitors to customers.
Find out further reasons why you should integrate Salesforce with WordPress and how to do it.
Content:
About Salesforce
Salesforce is one of the foremost Customer Relationship Management platforms in the world.
It has one primary objective – to manage all interactions and relationships with customers and prospects.
With Salesforce, you can safely store a client’s details, identify all sales opportunities, manage your marketing campaign, and record service challenges – all in a central place.
Anyone within your team can see the state of communication between client and company, what a customer bought, when they purchased the item, etc.
As you would expect, it aids better collaboration between team members and improves productivity.
About WordPress
WordPress is the most used Content Management System in the world. Currently, there are more than 455 million WordPress sites in the world. And with about 2 million fresh downloads every year, WordPress is obviously here to dominate the web.
The platform is free (you only have to purchase a domain and WordPress hosting plan), easy to use, and flexible. It also has amazing design options. With it, you can design eye-catching websites and beautiful contact forms.
Why Integrate WordPress and Salesforce
WordPress in itself is a powerhouse. Integrating it with Salesforce takes it up a notch. With both platforms, you can effectively manage your leads, close more deals, and follow up with your customers.
If you do not integrate both platforms, here is how your work will flow:
- A visitor comes to your site, loves your content, and signs up.
- You collect the customer details
- And you visit Salesforce.com to enter the new details
Another new visitor signs up and you go through the same process. This is surely a waste of time. You can achieve better results by integrating a Salesforce account with your WP site.
In other words, with WordPress Salesforce integration, you’ll enjoy automatic data synchronization. This means you do not have to enter each WordPress lead manually. Also, all form submissions are sent to the Salesforce CRM.
As a result, you can have improved sales and business performance.
How to Integrate Salesforce into WordPress
There are several methods of integrating Salesforce with WordPress. The method you choose depends on a couple of factors:
- What are your specific needs?
- How much information would you like to collect?
- After collecting a customer’s details, how would you want it organized?
Let’s dive into the methods of integrating Salesforce with WordPress.
Method 1: Salesforce Web-to-Lead Function
Salesforce has a package for everyone, including Website owners. You can generate a form on the Salesforce platform and place it on your website. It’s called the Web-to-Lead function in Salesforce.
This is the quickest and cheapest way of integrating WordPress with Salesforce. However, the design options you get via this means are limited.
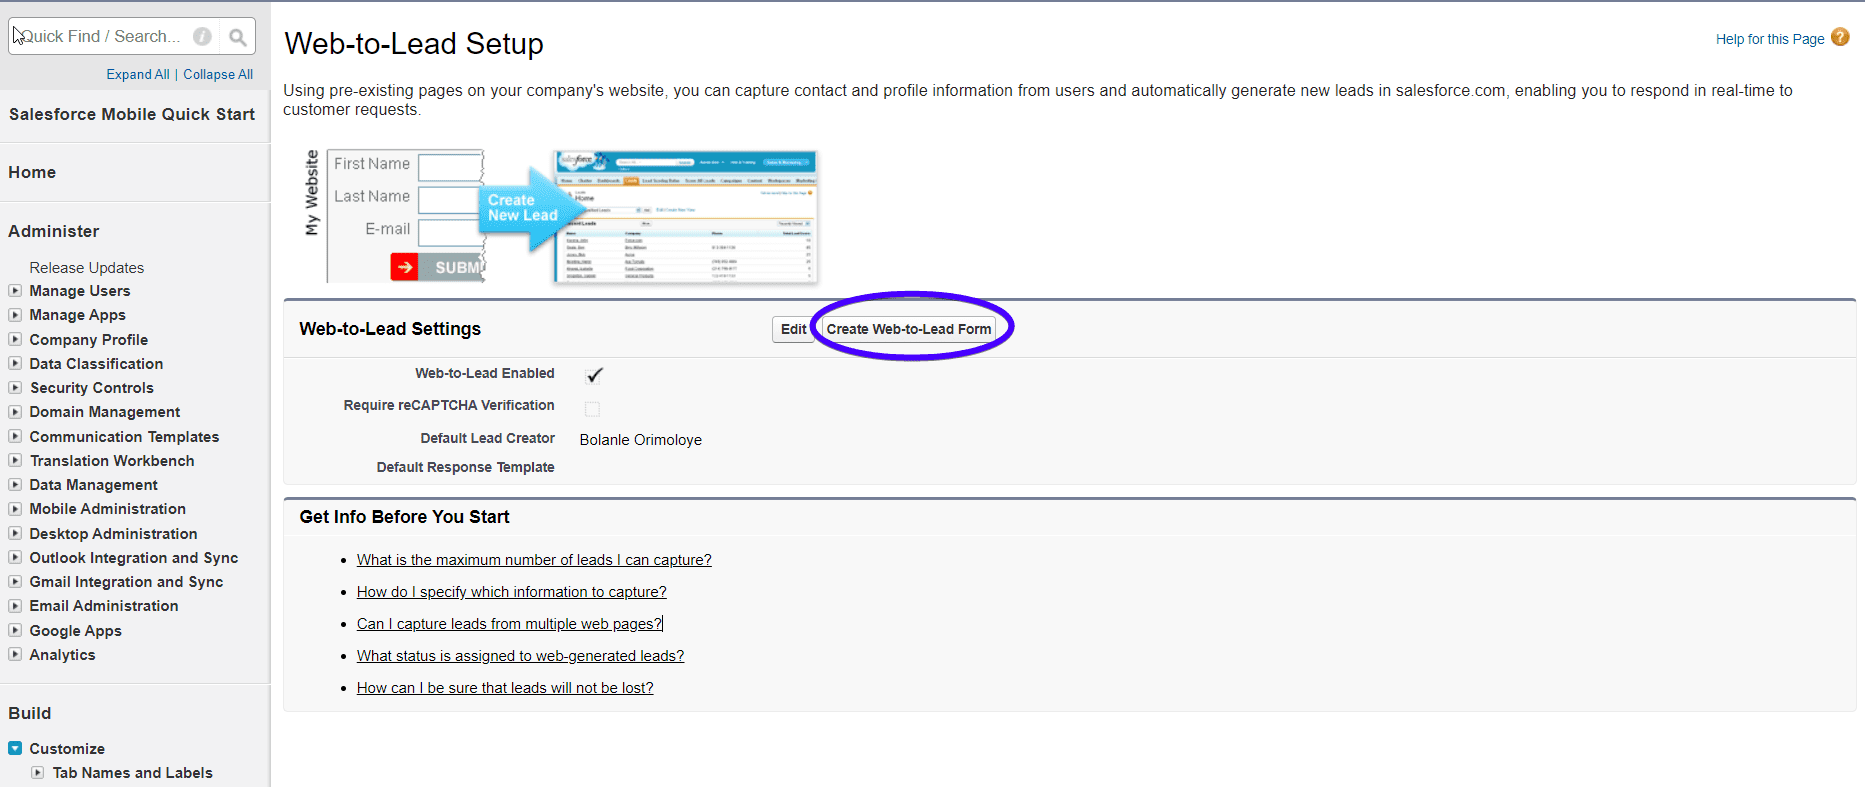
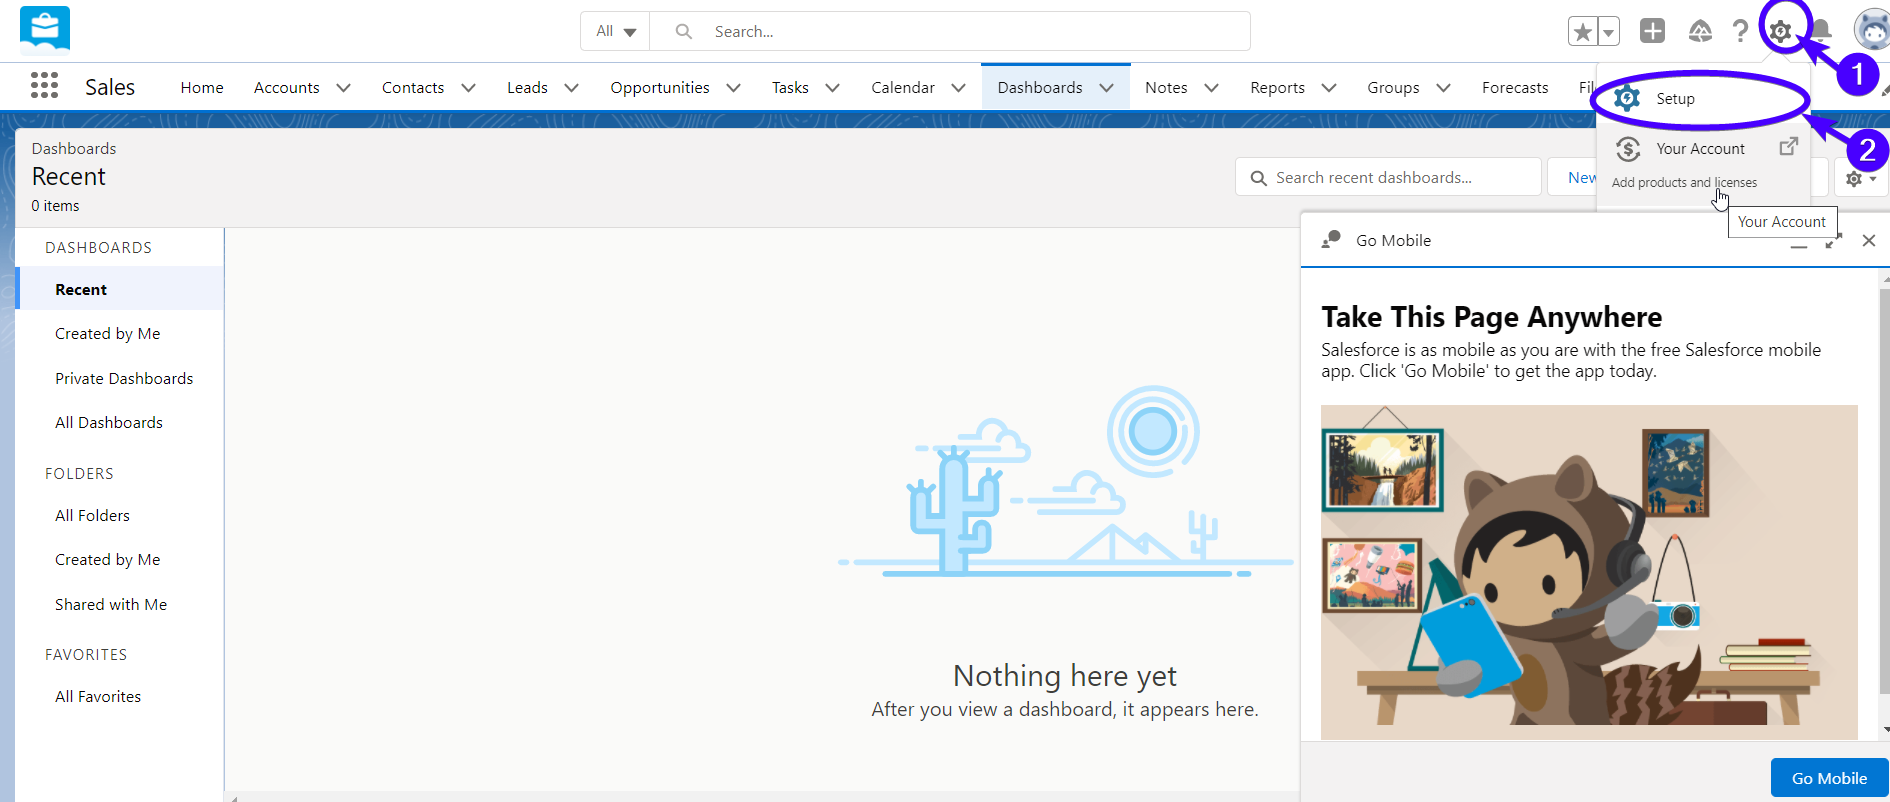
To get started, log in to your Salesforce account and click on the gear icon. Select the ‘Setup’ option from the dropdown.

Then search for ‘Web-to-Lead’ and click on it (located under marketing).
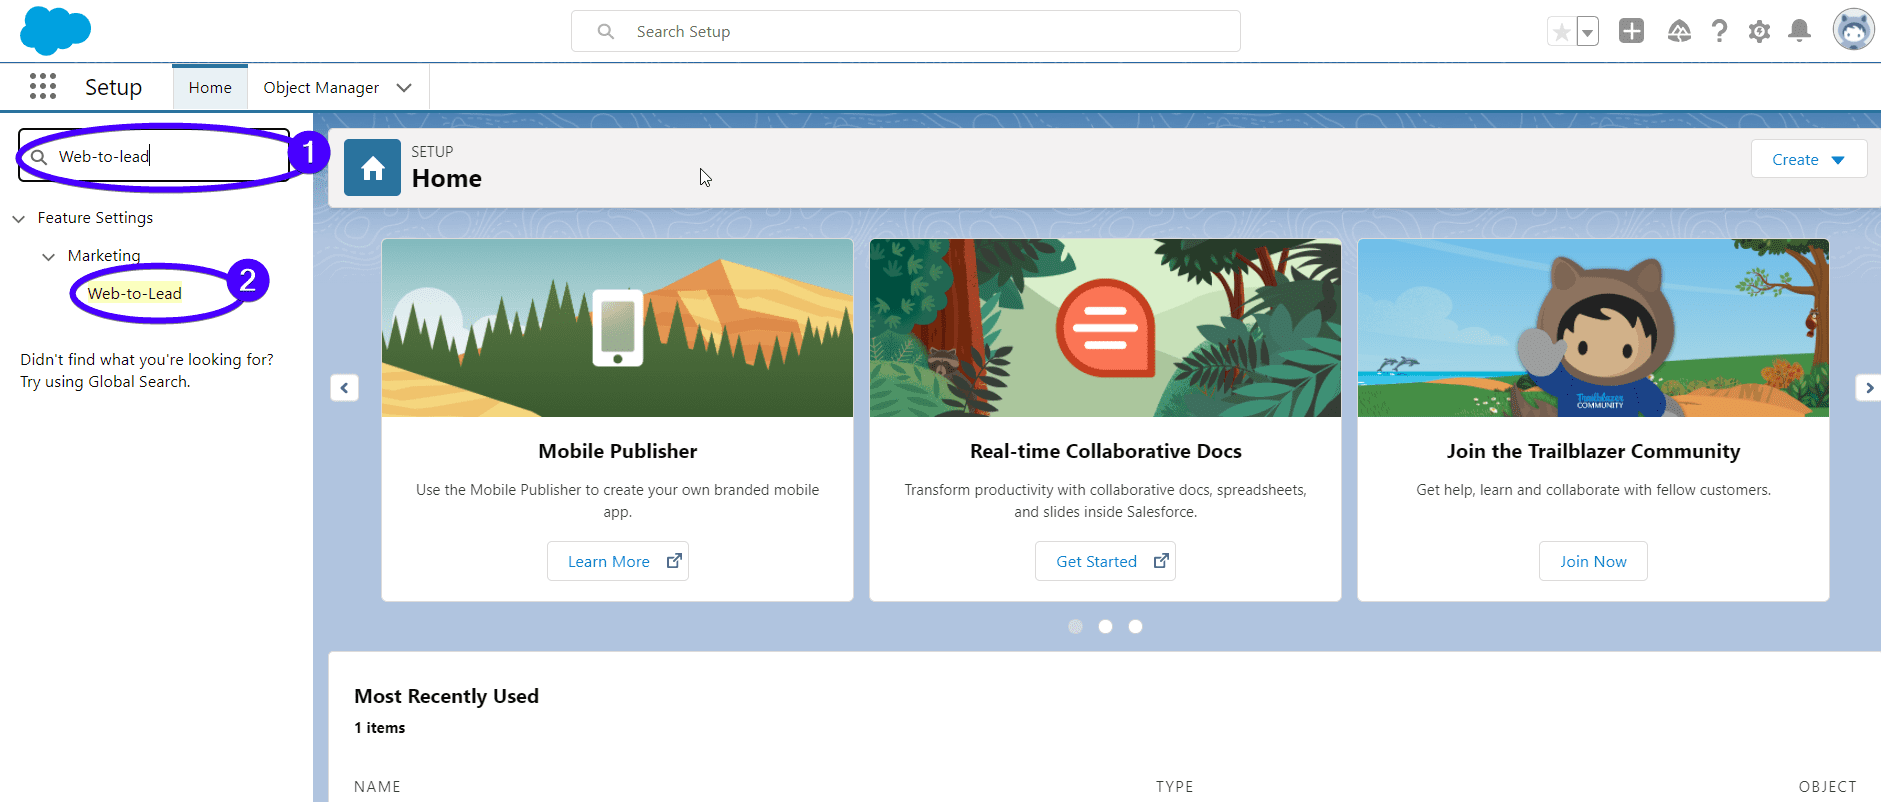
You’ll see a ‘Create Web-to-Lead Form’ button. Click on it.
Next, select the fields to include on your Web-to-lead form.
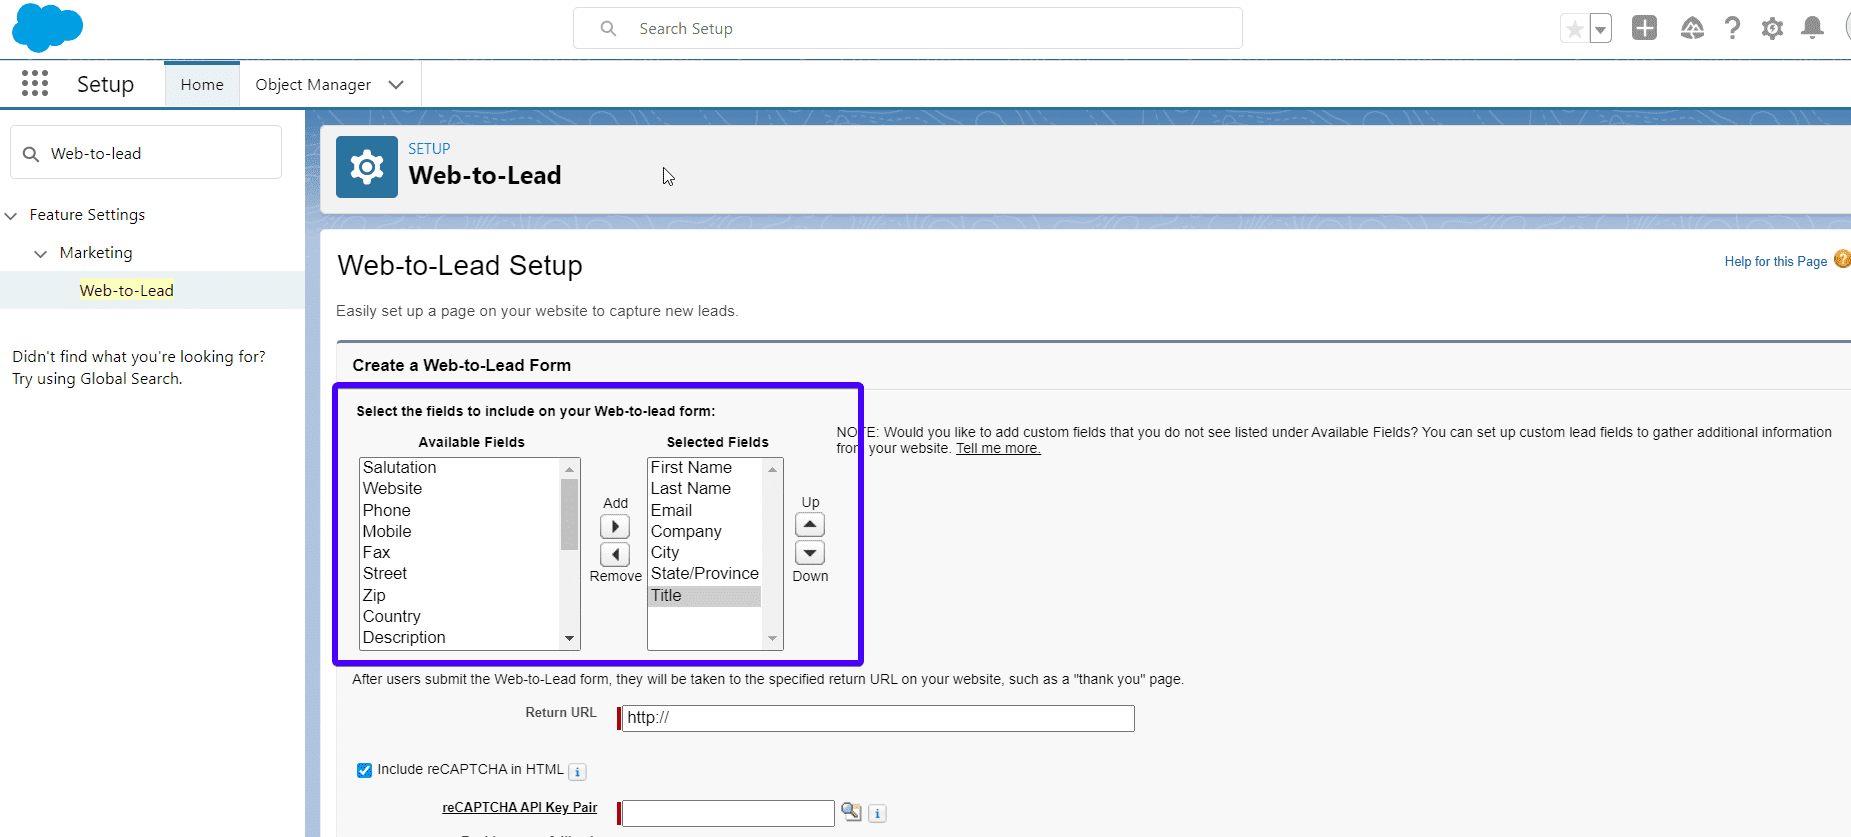
You can also enter a return URL where users will be directed after submitting the form. This can be a ‘Thank You’ Page.
If you’d like to protect your form using reCaptcha, check the box and enter your reCaptcha API key pair. These keys can be generated by anyone with a Google account. But if you don’t want to use reCaptcha, uncheck the box.
Finally, click Generate.
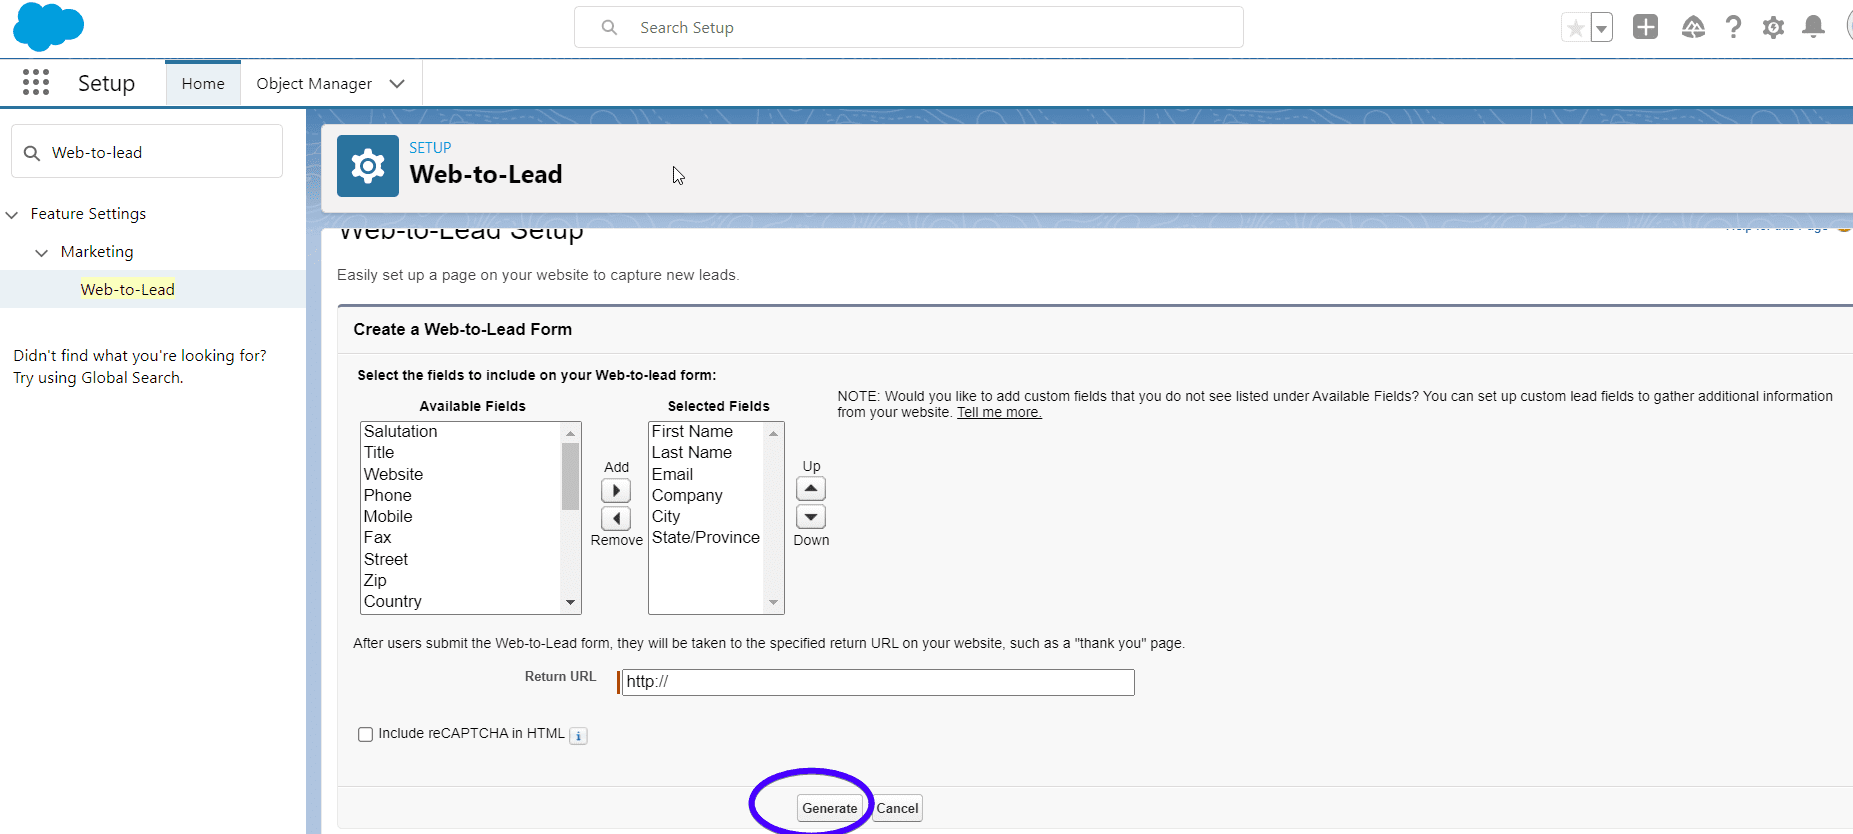
This will generate an HTML embed code.
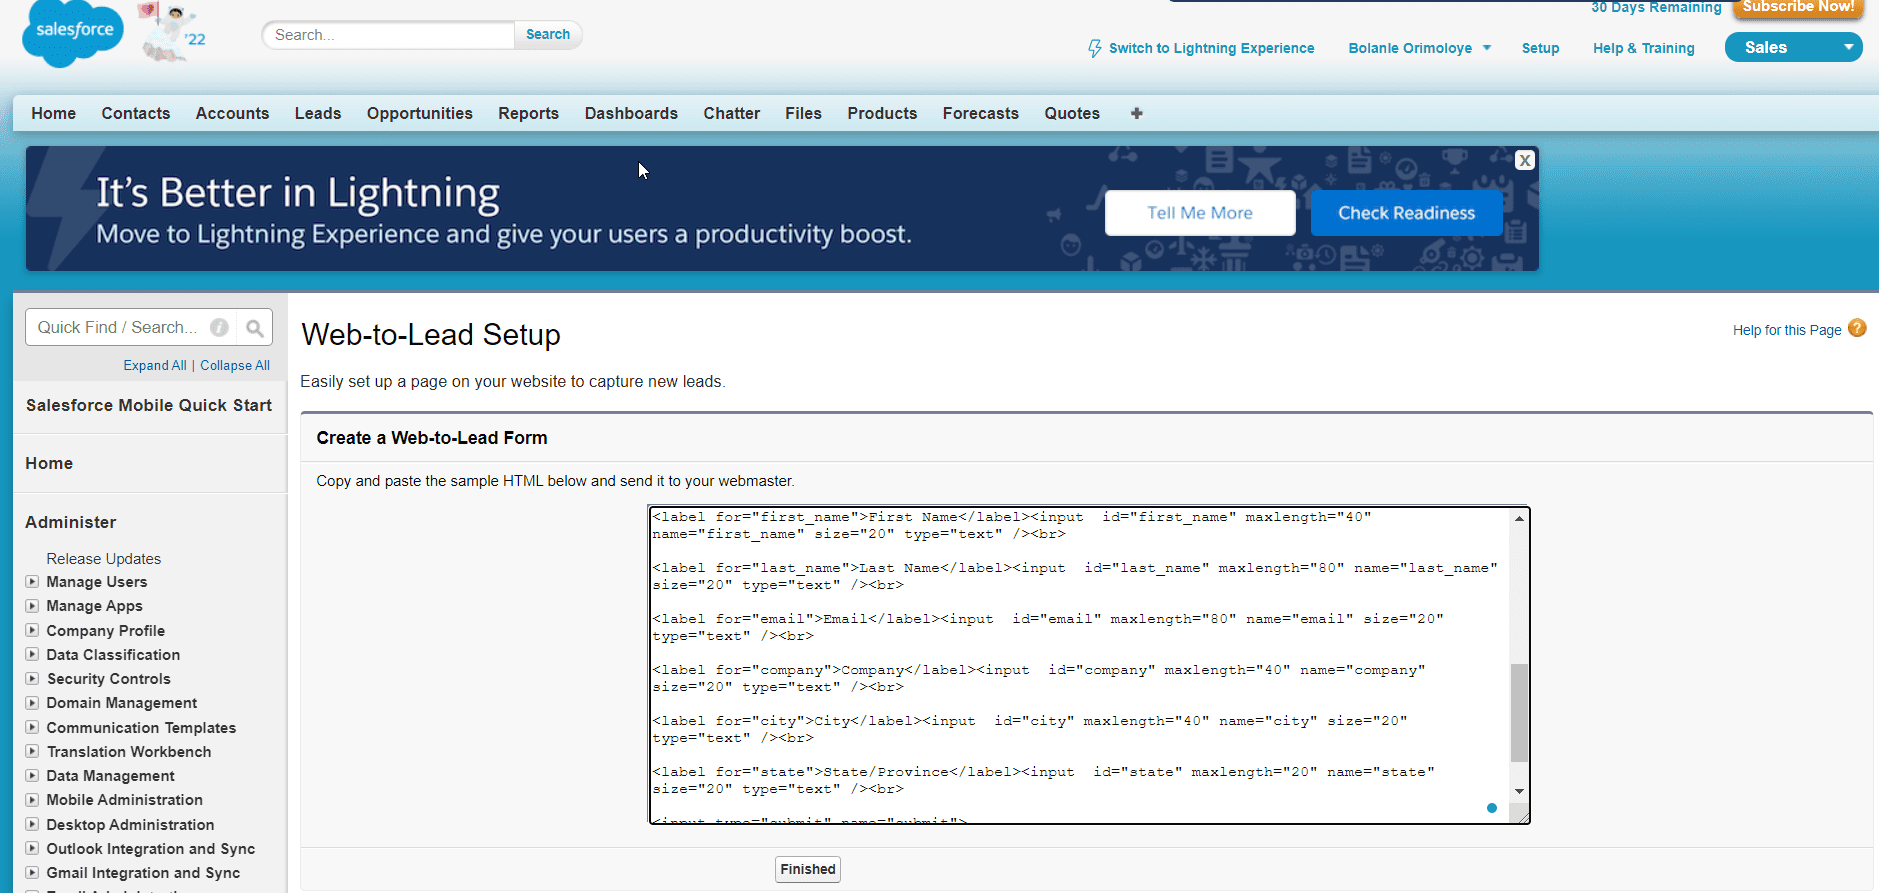
This is the code to add to your WP site.
Now, copy it and head to your WordPress Dashboard. Once there, go to Pages and either add a new page or open an existing one for editing.
If you are using the Classic editor, switch to “Text” and paste the code.
If you are using the block editor, add an HTML block and paste into the code.
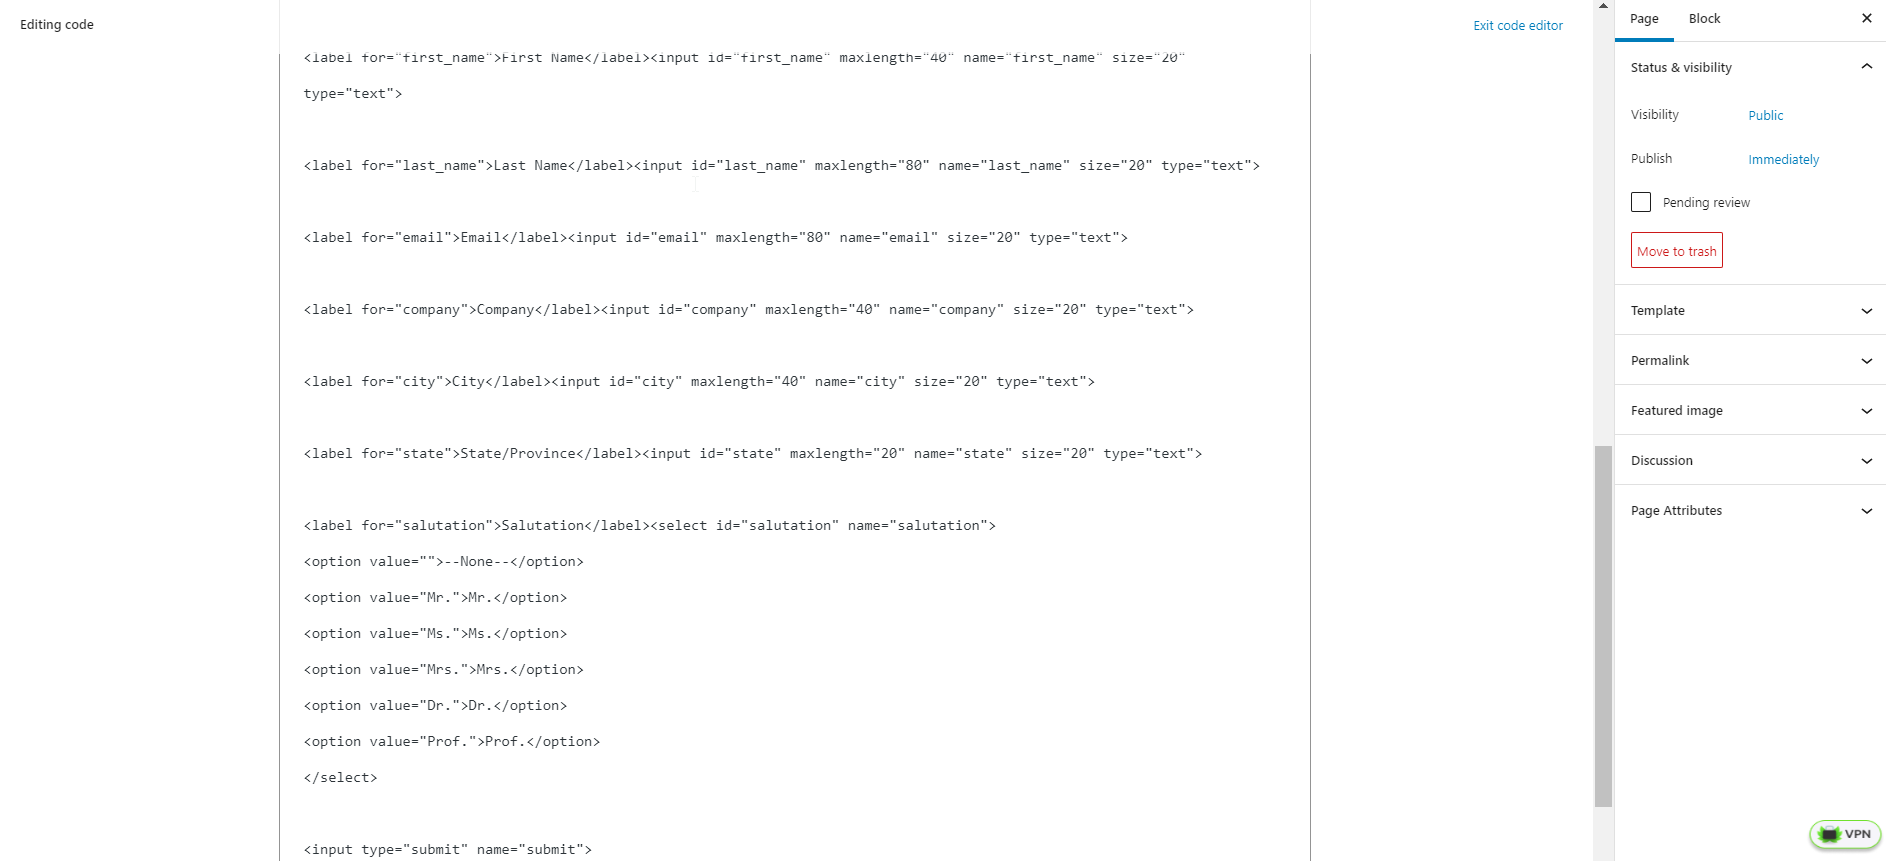
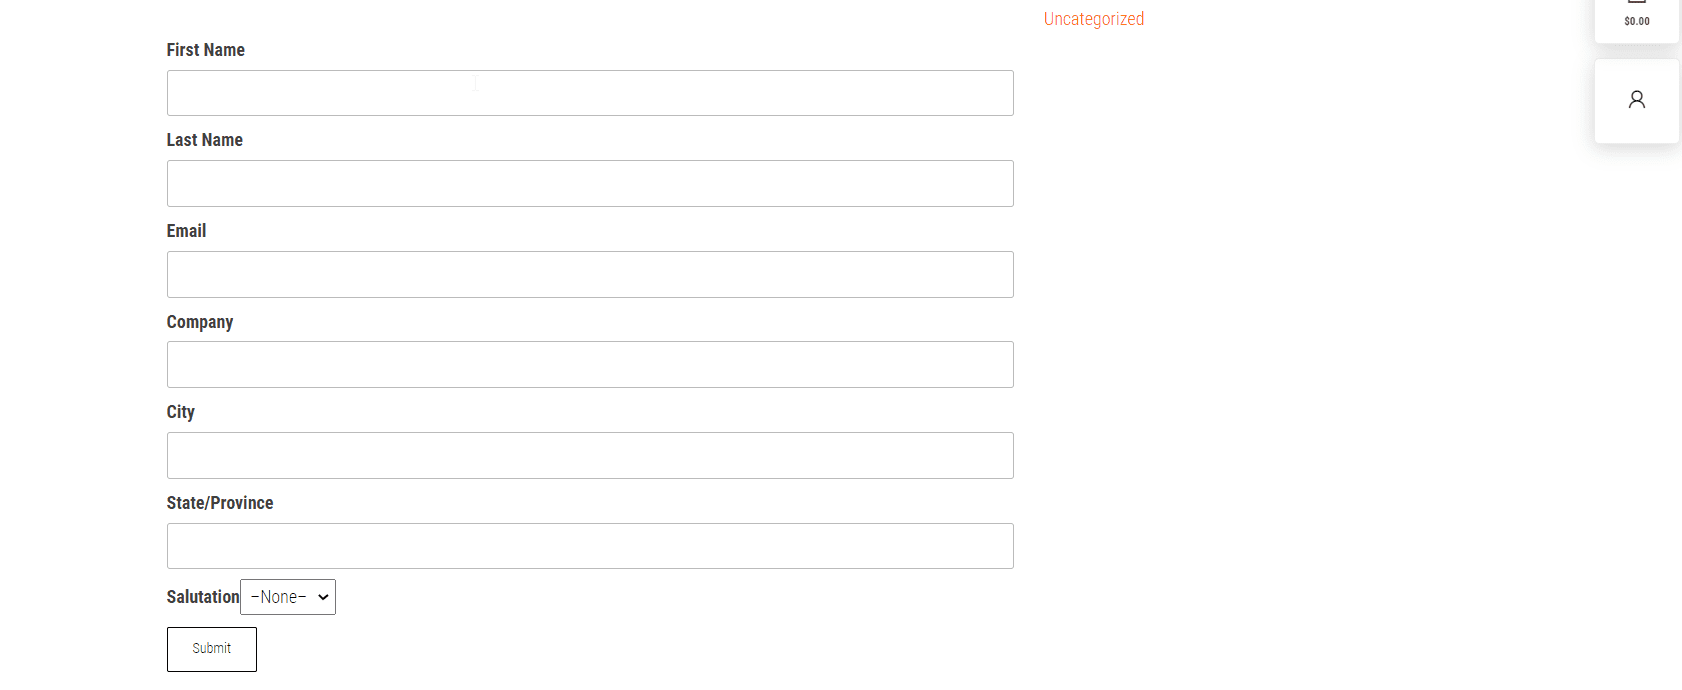
Lastly, save your changes. Here is a preview of the form on our front-end.
Method 2: Using the Salesforce Web-to-Lead WordPress Plugin
Using a WP plugin that has the Salesforce web-lead function is a more user-friendly option. Instead of navigating both platforms, you can manage your forms only from the WP admin panel.
One great plugin to use for this is the Brilliant Web-to-Lead for Salesforce plugin. It is reliable and recommended by Salesforce for this purpose.
To get started with this method, follow the next steps:
Step 1: Install plugin
Firstly, install the plugin and activate it on your website.
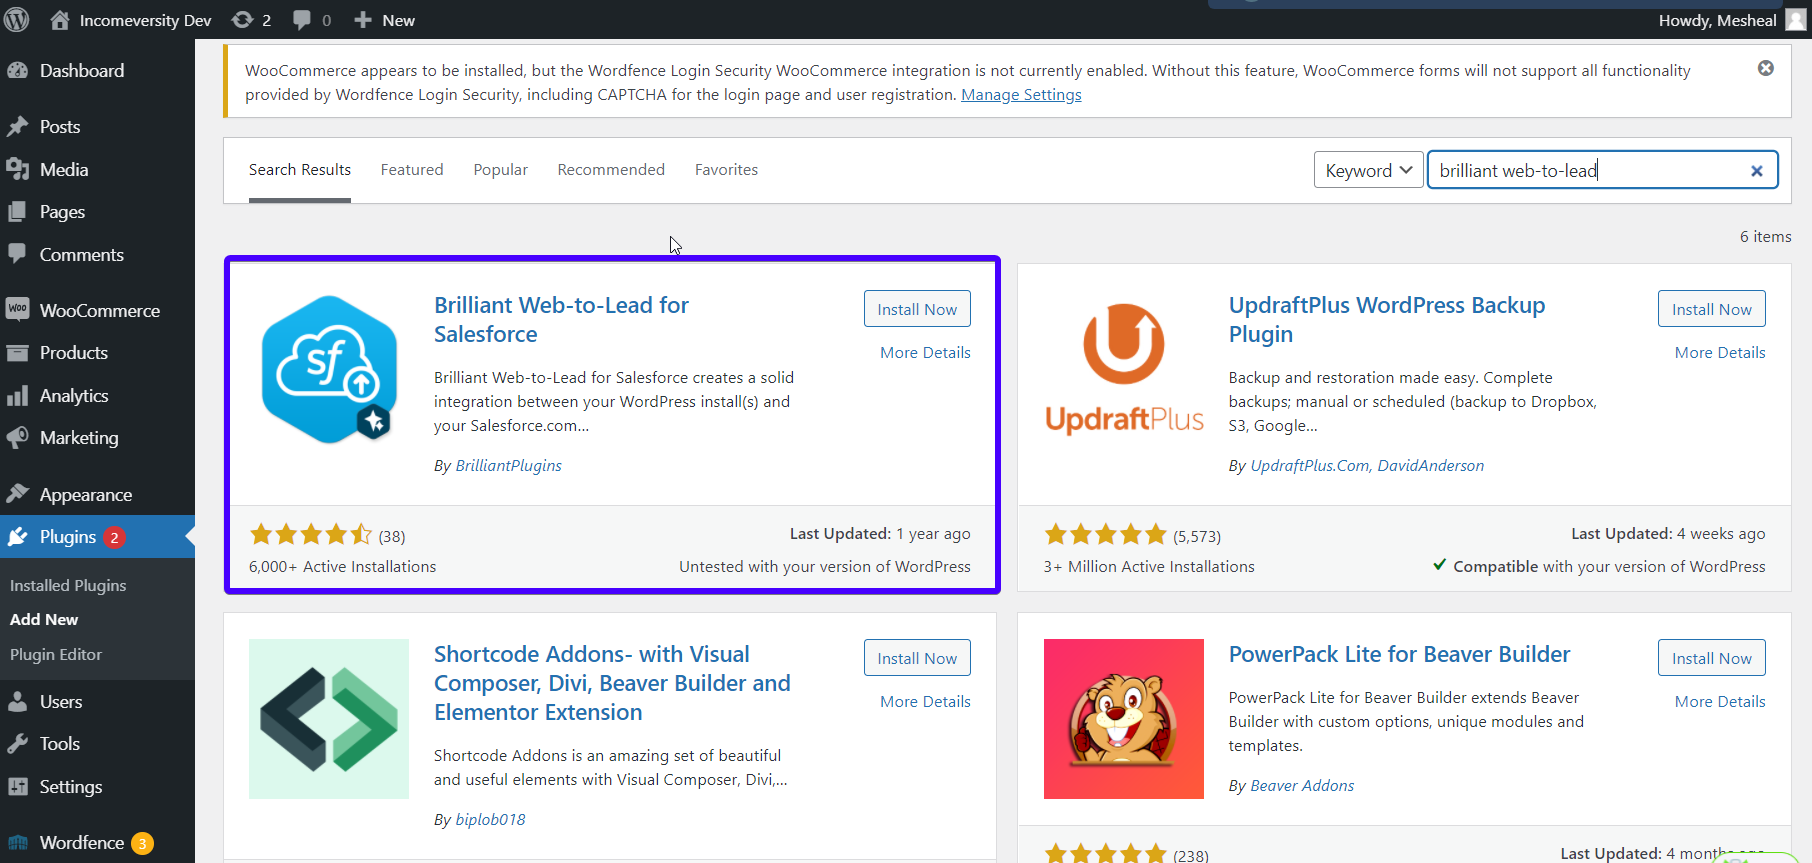
If you do not know how to do it, read our guide on how to install a plugin.
Next, go to Settings >> Salesforce on your WP dashboard to configure the plugin. You’ll get an error message requesting your Salesforce Organization ID. To input this, click on the Settings link.
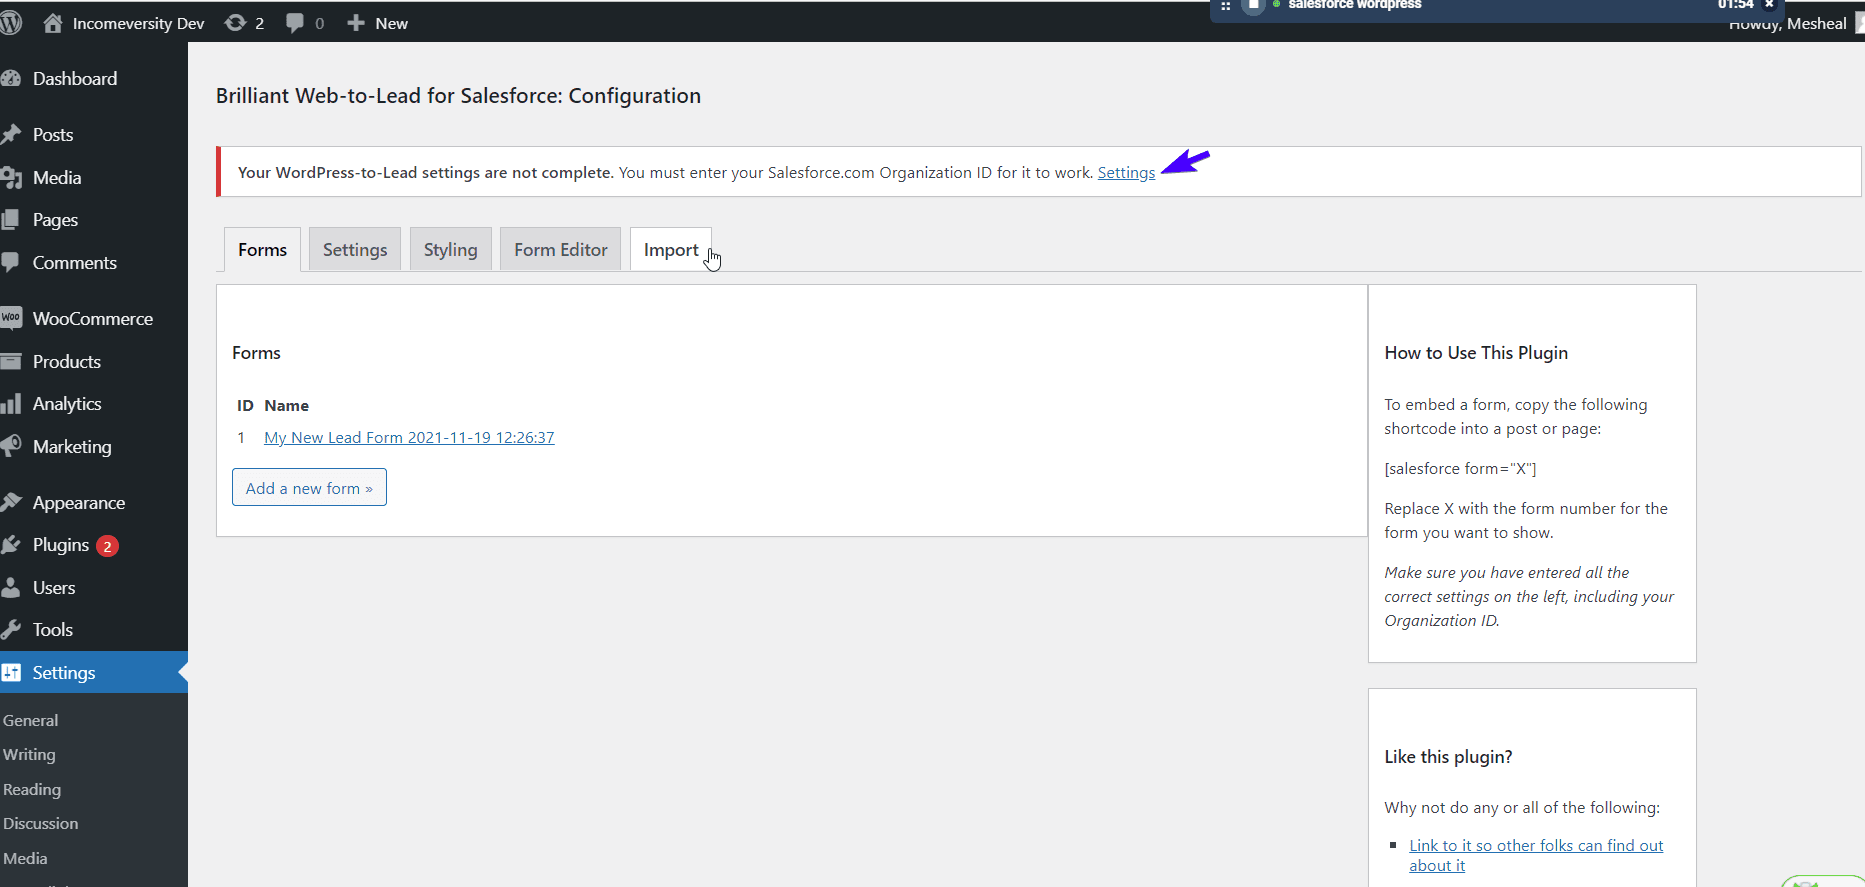
In the next page, enter your Salesforce Organization ID. If you do not know how to find your salesforce.com organization ID, you’ll learn how in the next section.
How to get your Salesforce Organization ID
Head on to your Salesforce dashboard, then click on the settings icon which looks like a gear. Select Setup.
Then, scroll down to the Settings category (on the left side of your screen) and go to Company Settings >> Company Information. Find the field with the title ‘Salesforce Organization ID’.

Copy it. That is your Salesforce ID.
Step 2: Enter Salesforce ID
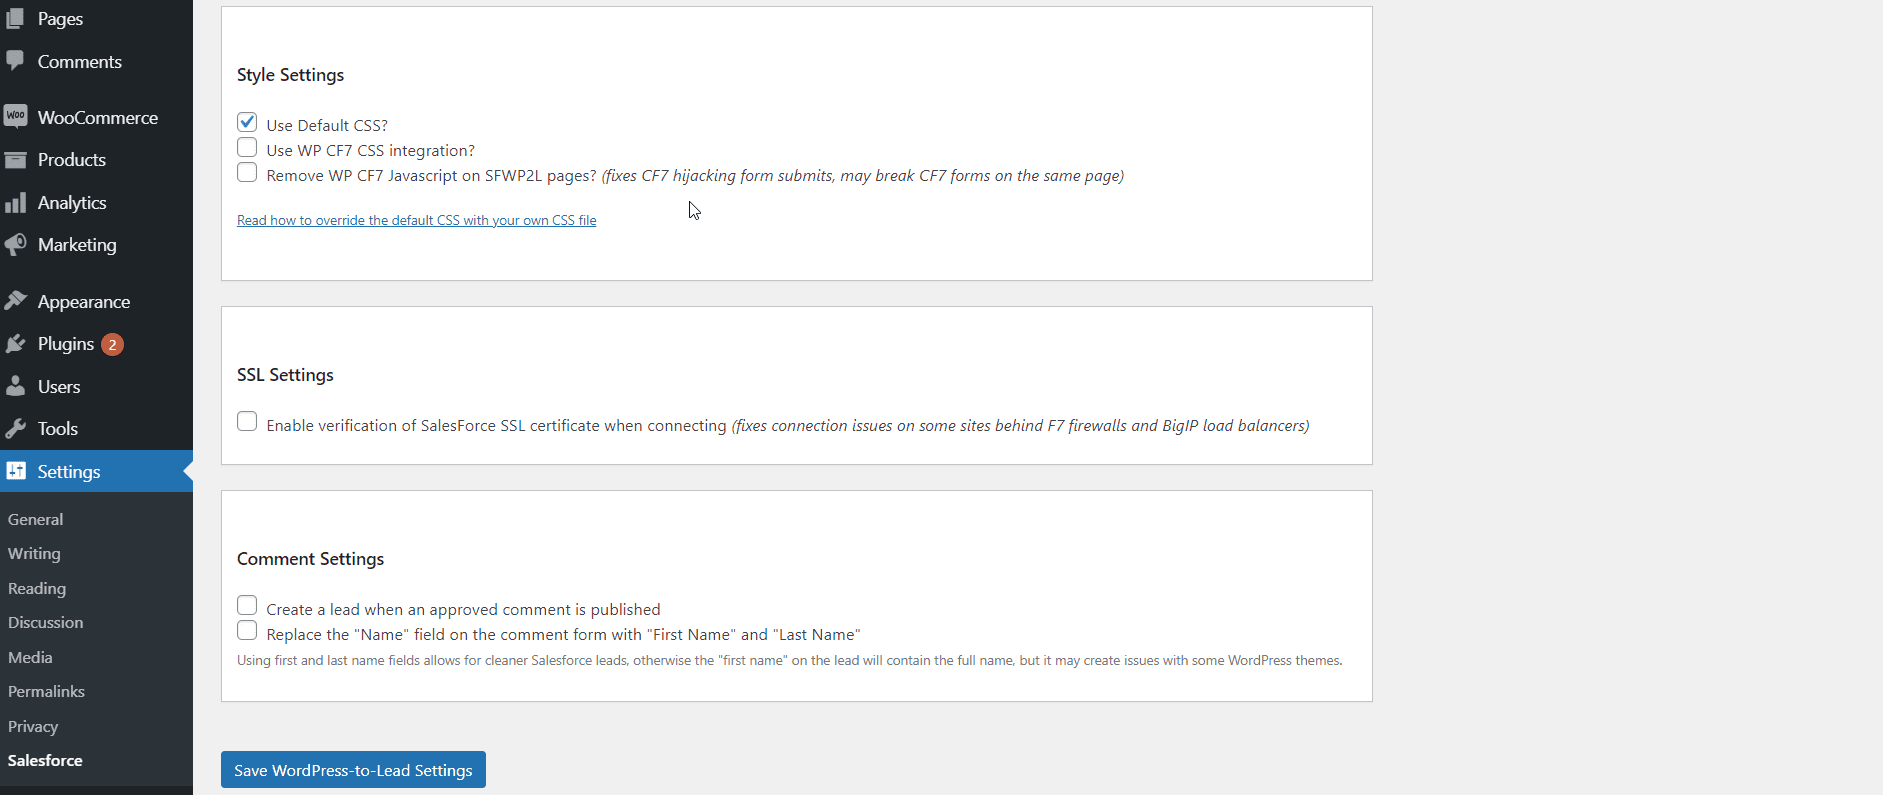
Go back to your WordPress admin panel and fill in your organization ID in the required field. Go ahead and make further configurations. For instance, you can set the message that goes out after submitting a form.
Finally, click the Save WordPress-to-Lead Settings button.
With this, you have integrated WordPress with Salesforce.
Step 3: Configure form
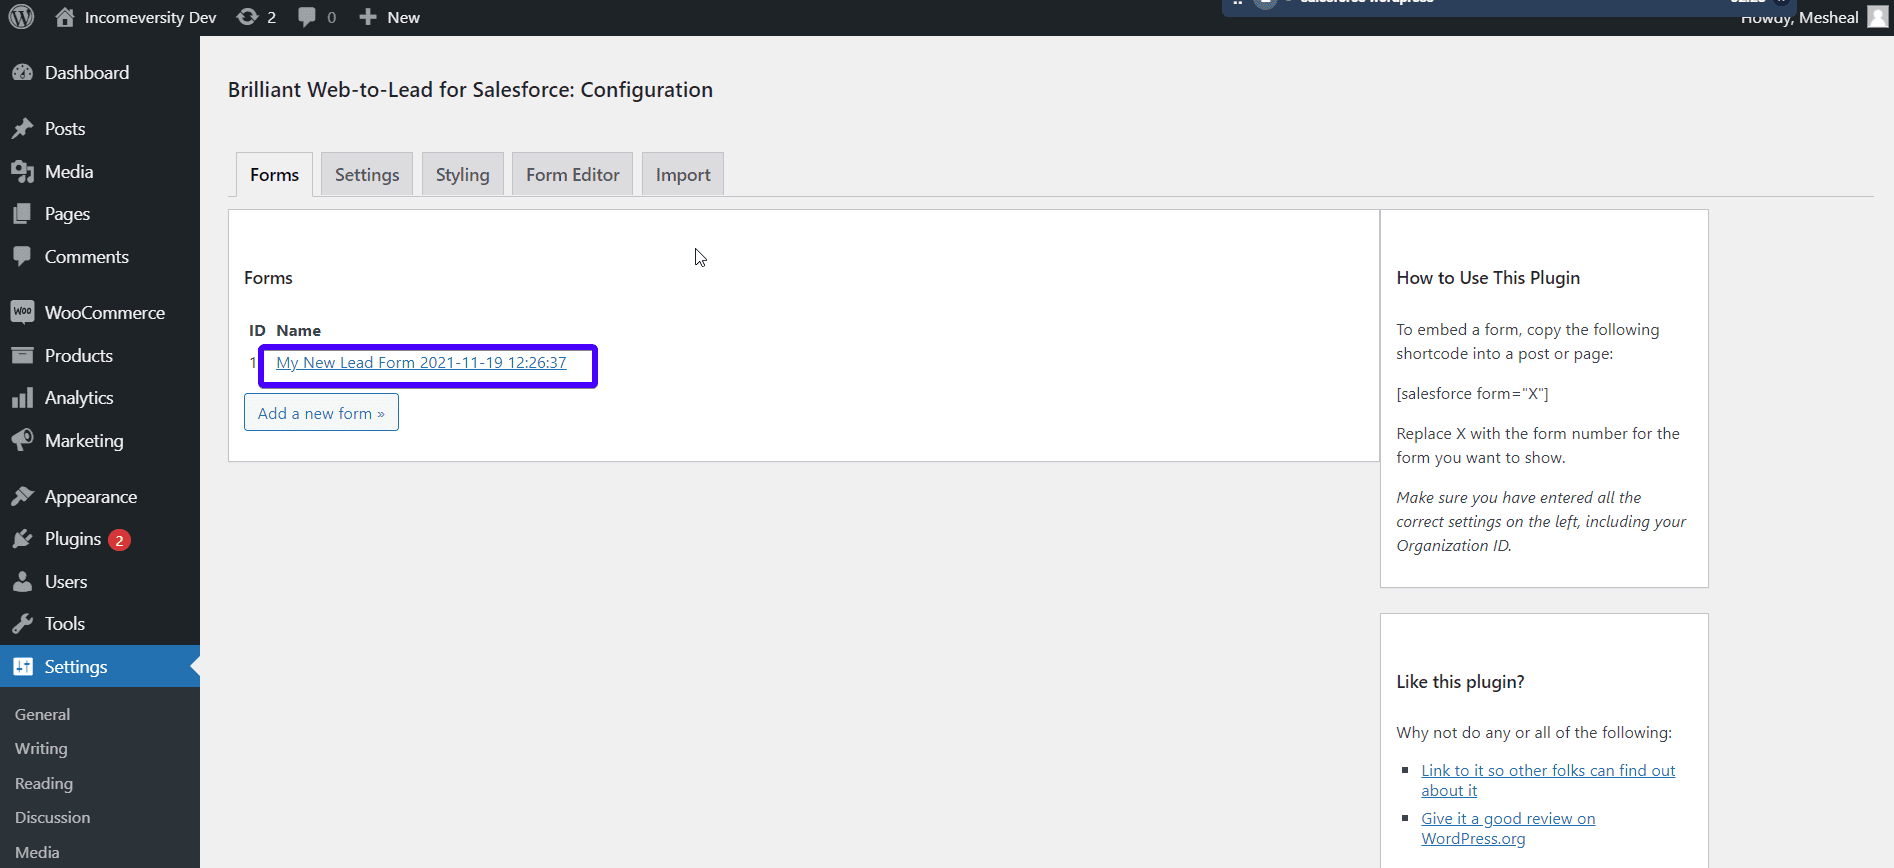
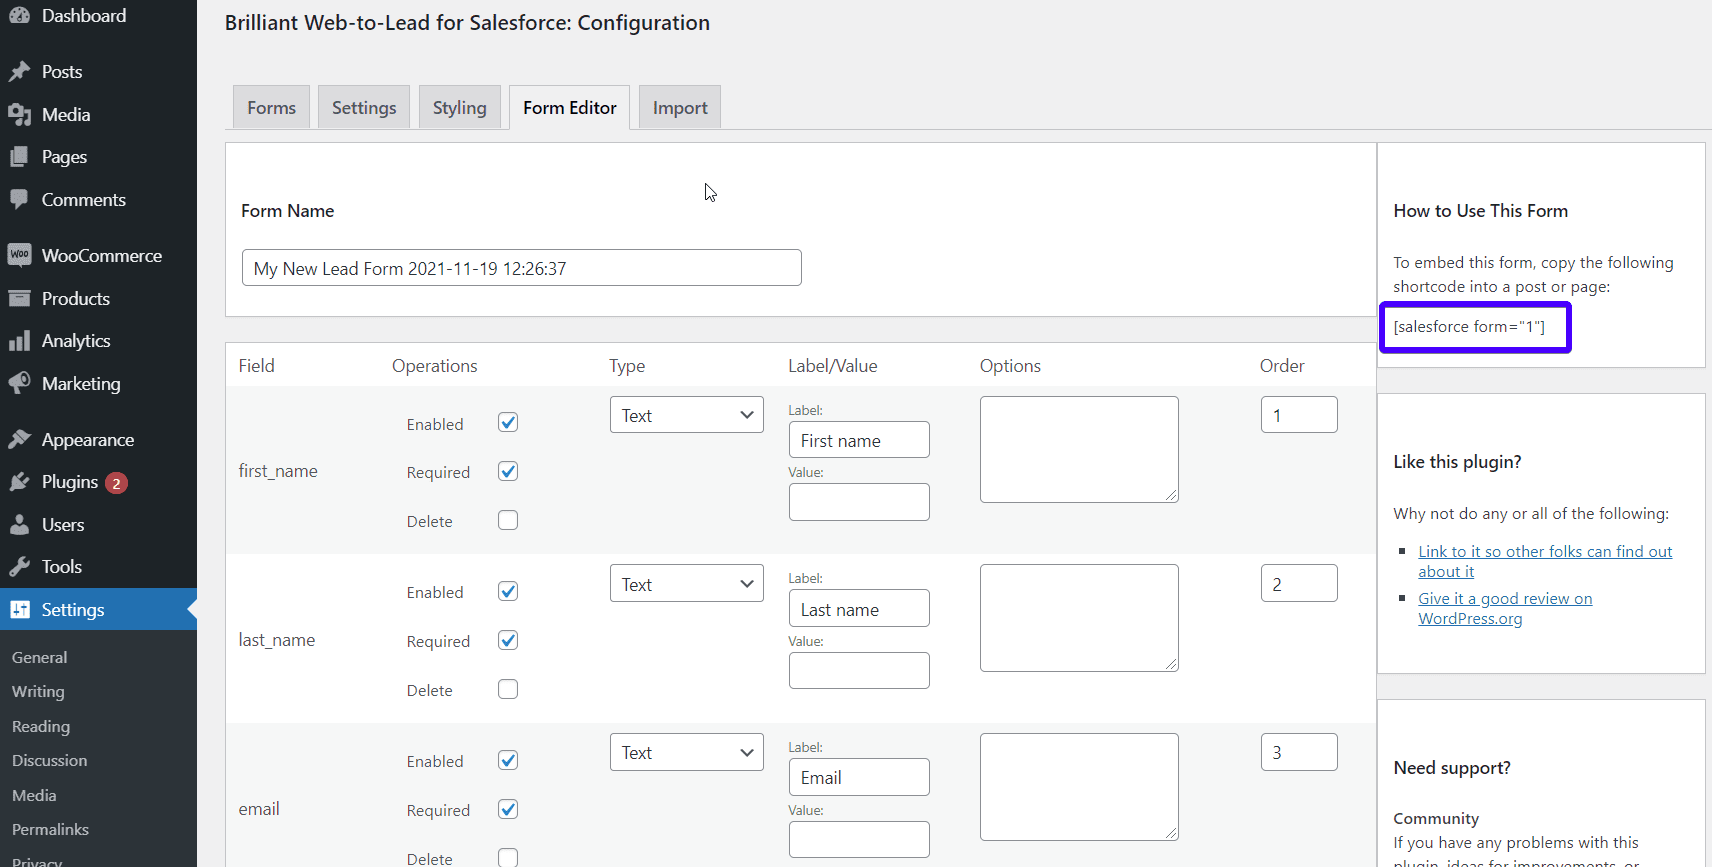
The Brilliant web-to-lead salesforce plugin generates a form for you automatically. You may either configure it or create one from scratch.
Still on the Settings >> Salesforce page, click on the “Forms” tab. Next, click to open the autogenerated new lead form as shown below.
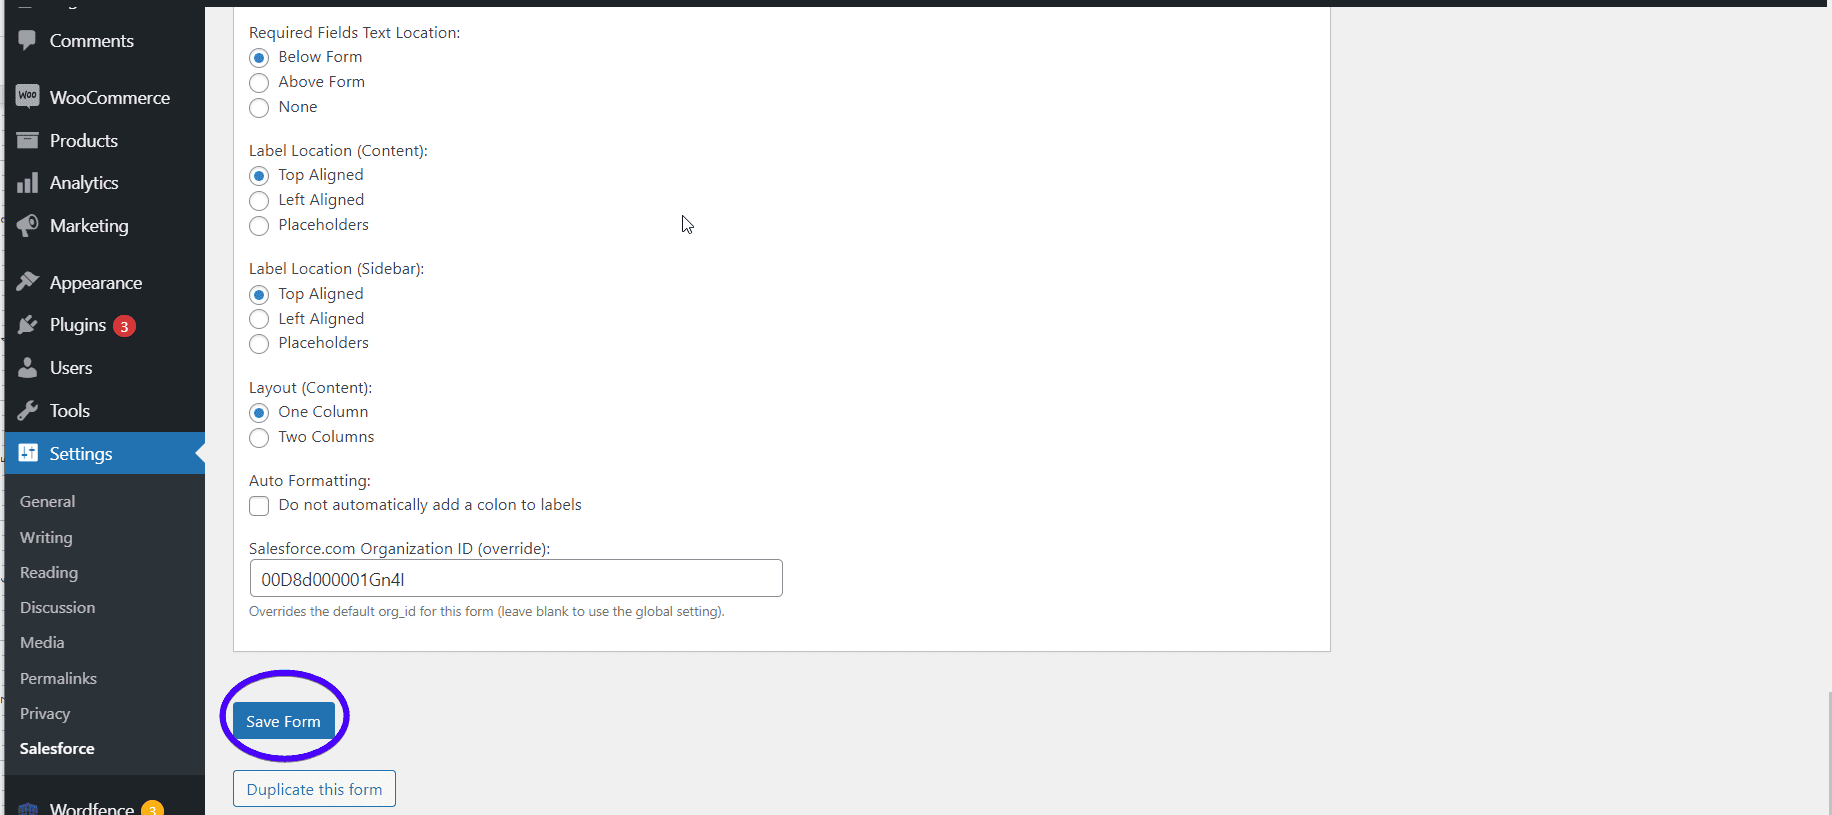
Feel free to customize each field. Also, set the details you would like to collect from your visitors – their first names, last names, emails, phone numbers, address, etc.

You can also set the form type, the button text, success message, and other important details.
Finally, click the Save Form button.
Step 4: Embed the form in WordPress
Each form created has a unique shortcode attached to it. The shortcodes allow you to embed the forms on your WP pages and posts.
To find the shortcode for each form, click the Form Editor tab. You’ll find the shortcode on the right side of your screen. Copy it.
Next, go to Pages on your WP dashboard. You may either create a new page or open an old page for editing.
If you still use the classic, simply paste the shortcode into the editor.
On the other hand, if you have upgraded to the new WordPress block editor, go to where you want the form to appear. Then, add a shortcode block and paste the shortcode into the block.
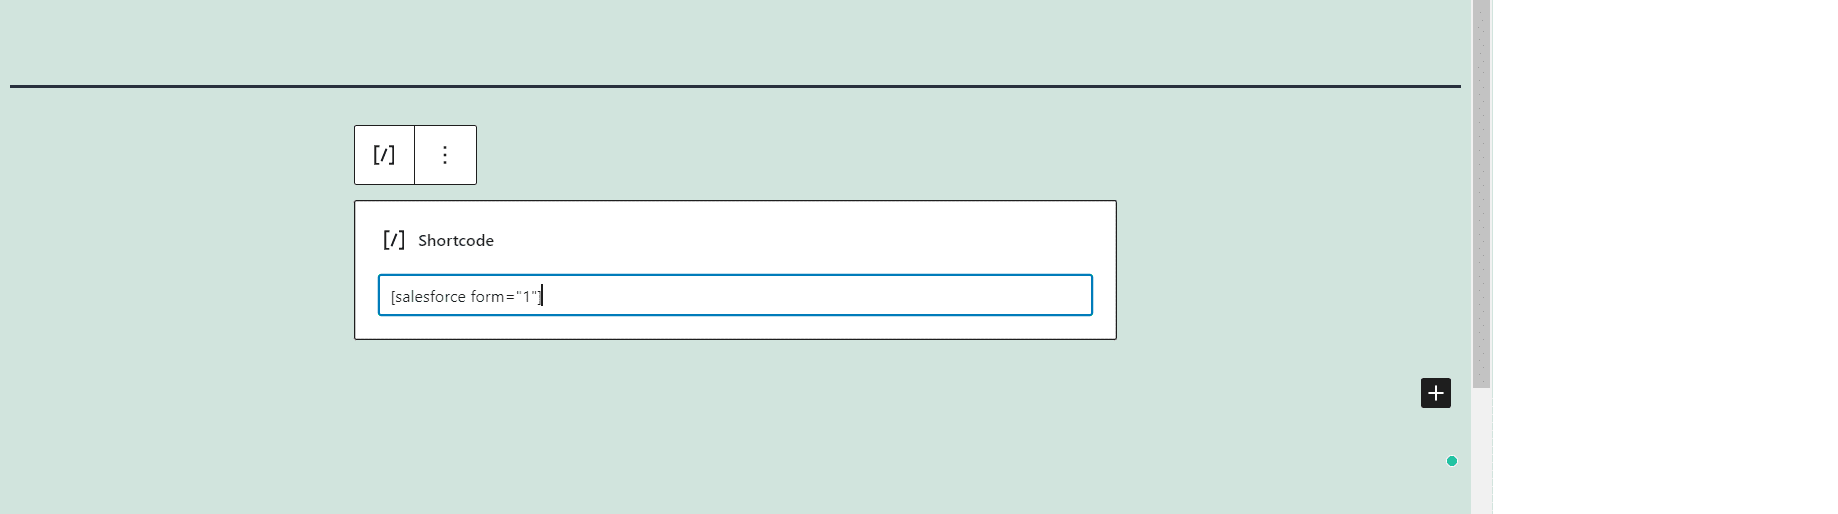
Finally, update, or publish the page. This is how to connect Salesforce with WordPress.
To test what you have just done, visit your new page and fill out the form. You’ll have a first-hand experience of what happens when a customer sends a message.
Method 3: Using WordPress Form Plugins
Another option is to use a premium WordPress form builder with a Salesforce addon. Examples of plugins you can use include WPForms, Gravity forms, Ninja forms, Contact form 7, Formidable forms, etc:
-
WPForms
This is a popular and powerful form builder in WordPress. However, you only get the Salesforce functionality when you purchase the Elite plan ($299.50 per year) or buy the Salesforce addon.
It allows you to create contacts, leads, accounts, and custom objects in Salesforce without coding.
The Salesforce addon works with all WP forms including your contact forms, WordPress lead magnets, sign-up forms, etc.
Each of the forms on your site can create a different Salesforce object. If you would like to control which entries to save on Salesforce, you can use the WP forms conditional logic. It helps to create simple and automated rules for each form.
Further, for users with multiple Salesforce accounts, WPforms allows you to link each account to your WordPress site.
-
Gravity Forms
This is another tool used for creating web forms. If you already have this form builder, you can integrate it with SalesForce using the Salesforce for gravity plugin – a third-party plugin.
It allows you to send all form submissions to your Salesforce account immediately. You can also track, manage, and update your contacts automatically. The plugin costs $30.
-
Ninja Forms
Ninja forms is another WP form builder plugin that comes with a Salesforce extension. That’s about $49 for a single site.
You may also hop on the Agency membership plan which comes with all CRM integrations. It’s $249 per year.
-
Contact Form 7
To add or update your Contact Form 7 plugin submissions to your Salesforce account, you can purchase the Contact Form 7 – Salesforce CRM Integration plugin ($30). This will enable you to connect an unlimited number of contact form 7 forms to the Salesforce CRM.
You can also upload your form files to your Salesforce account.
Conclusion
When the world’s most popular CRM and the most used CMS work together, amazing things happen. It’s like a match made in heaven. While WordPress helps to collect data, Salesforce helps you to manage them and turn them into profit.
We discussed how to integrate WordPress with Salesforce. The methods include:
- Salesforce web-to-lead function
- Using the brilliant Salesforce web-to-lead WordPress plugin
- Using form builder plugins for WordPress.
Thankfully, you can do the integration yourself without touching a line of code. For more How-to tutorials, please check our WordPress blog.