WooCommerce Shipping Classes – How to Setup and Use

How can WooCommerce Shipping Classes option help you in successfully running your online store business? Shipping cost is a big deciding factor for most online shoppers looking to make a purchase. Products with zero shipping fee, most often than not, enjoy higher preference than those with a fee.
As a WooCommerce store owner, you might want to sell your products at zero shipping rate so as to attract more customers. Well, this might be possible if you sell items that weigh very little.
However, if your product has a significant weight, shipping at zero rate puts your business at the risk of going belly up. The key is finding a healthy balance between zero and premium shipping cost.
Thankfully, WooCommerce can help you achieve this balance in your product shipping, thanks to one of its powerful features: Product Shipping Classes, or just Shipping Classes for short.
As the name suggests, Shipping classes lets you group your products based on different shipping options like weight, shipping zones, price, and quantity.
In this article, we will be diving deep into this option – WooCommerce Shipping Classes. What are they all about? How do you set them up? And how can you use them? These and many more questions will be answered shortly.
Content
- Shipping classes: an overview
- Key concepts in shipping classes
- Steps to creating your first shipping class
- Conclusion
Shipping Classes: An Overview
Shipping Classes in WooCommerce is a feature that lets you, as a store owner, set shipping cost for your products based on criteria.
The idea behind Shipping Classes is to save you from spending so much time setting up shipping methods and shipping costs based on weight, quantity, or preference.
Basically, the way Shipping Classes work is this. First, you create a group in WooCommerce which contains a certain type of product based on grouping criteria. The product categories are referred to as Classes.
Then for each category, you set shipping rules and cost.
How to Set Up Shipping Classes on WooCommerce
Thankfully, you don’t need a third-party WooCommerce plugin to get up and running with shipping classes.
To get started, log into your WordPress admin dashboard and navigate to WooCommerce >> Settings

Next, click on the Shipping tab.
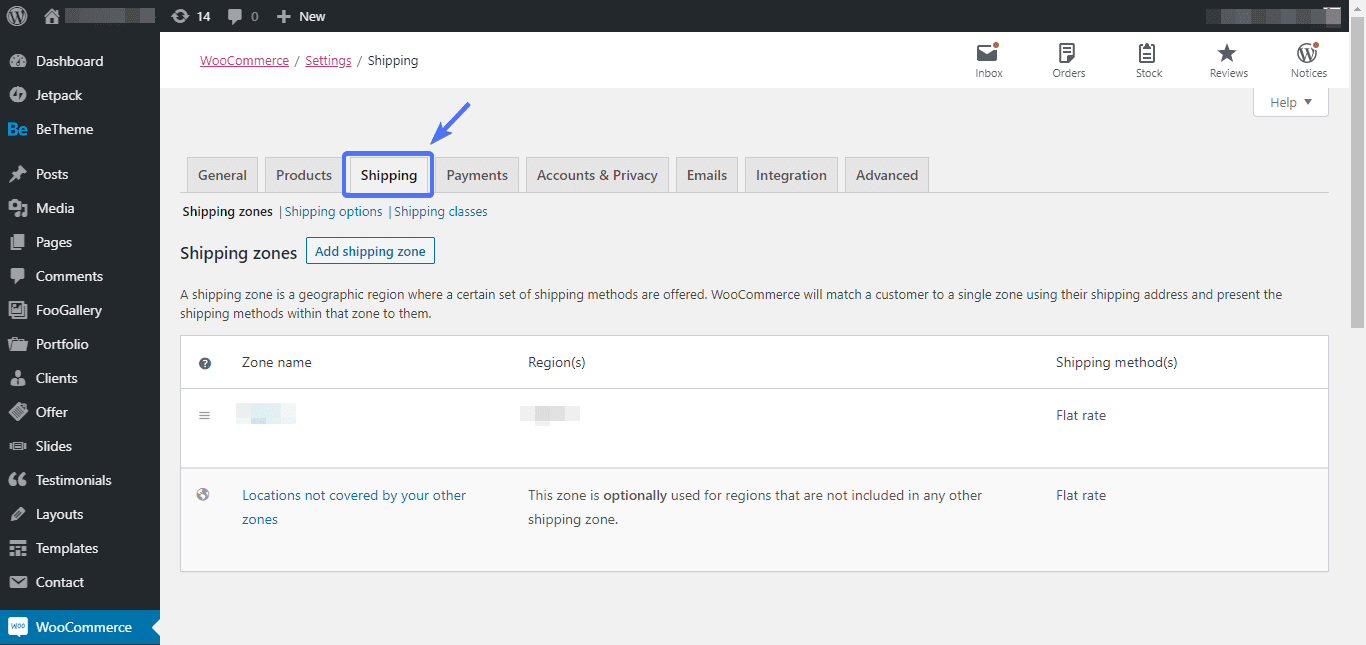
This is where your journey with WooCommerce Shipping Classes begins.
The next step is to start creating Shipping Classes, and assign products to them.
But before that, it’s important you understand some key concepts about Shipping Classes, as we will be using them quite frequently.
Key Concepts in Shipping Classes
Shipping Zones
Simply put, WooCommerce shipping zones are geographic areas where you send shipments. This area could be a city, country, or even a whole continent.
For instance, New York, Netherlands, Africa – these are all shipping zones you can define in WooCommerce.
Setting up WooCommerce shipping zones makes it possible to calculate appropriate shipping rates based on the address a customer put in. That way, your customers won’t be frightened away by expensive shipping costs.
Shipping Methods
Shipping methods define how shipping rates are going to be calculated for your customers. In WooCommerce, there are two major shipping methods: Standard and Premium.
Standard shipping methods are of three types: Flat rate, free shipping, and local pickup.
And for Premium Shipping, we have table rate shipping, API based shipping, and per product shipping.
Flat Rate Shipping
This shipping method attaches a fixed shipping fee to a product item. WooCommerce will calculate the shipping fee on checkout based on the shipping zone, weight, or size of the order.
Free Shipping
As the name suggests, customers are charged zero shipping fee, regardless of their shipping zone. However, taxes may be applicable depending on the location of the customer.
Free shipping is best used when you are looking to entice shoppers to purchase more items from your store. So, use them tactfully.
Local Pickup
With this method, the product is sent to a pickup location nearest to the customer. Shipping fees are then calculated based on shipping settings created by the store owner.
Table Rate Shipping
Here’s how the table rate works. First, you create a table listing all your shipping zones. Then you define the cost of shipping each product item to each of the defined zones.
It calculates shipping rates based on weight, order quantity, etc. You also have the option of calculating shipping fees per item, and percentage basis.
API Based Shipping
At times, shipping rates are determined by carriers, and not really the store owner. For instance, if you use WooCommerce Fedex Shipping solution, Fedex’s shipping rates may vary from time to time.
As such, you need a way to automatically update your shipping rates as soon as that of your carrier changes.
This is where API based shipping comes to play. Most carriers like UPS, Canada Post, DHL Shipping, etc, allow you connect to their WooCommerce Shipping Solution via their API.
Now you’ve understood some of the important terms we will be using in this guide, here are the steps to setting up your first WooCommerce Shipping Class.
Steps to Creating Your First Shipping Class
Step 1: Give Your Class a Name
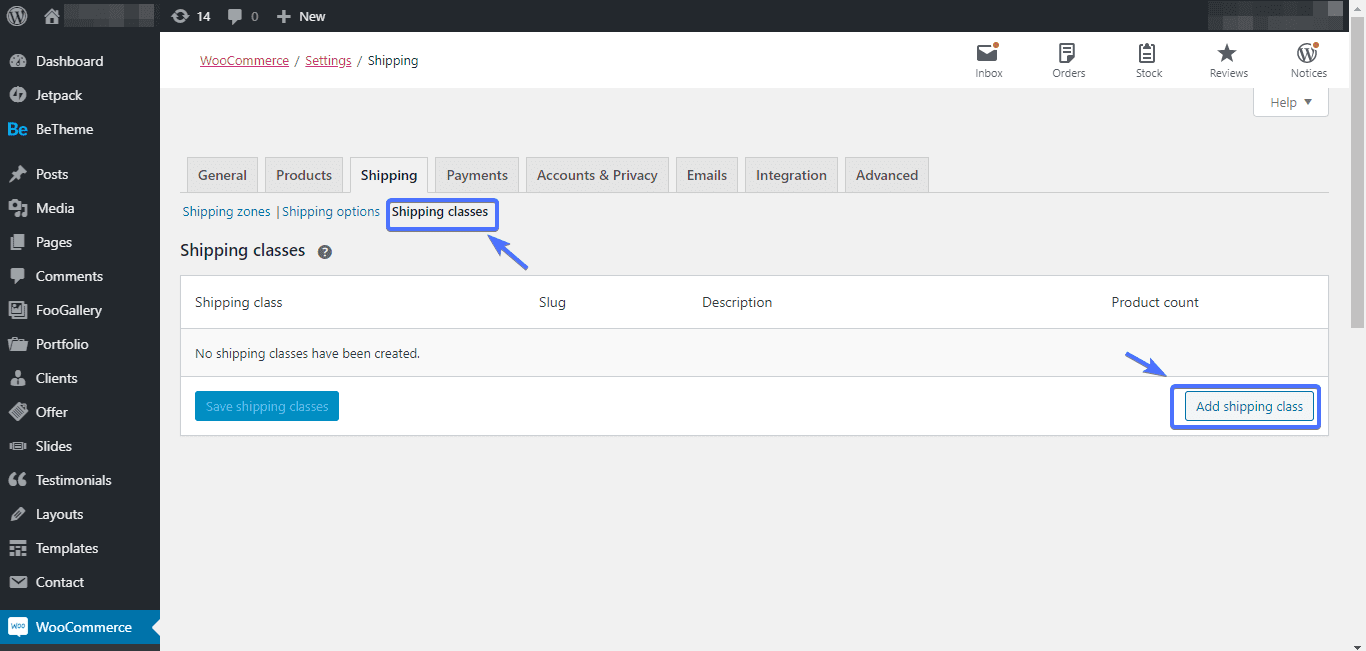
Starting from where we left off, click on the Shipping classes, and then the Add shipping class button.
On the next screen, type in the shipping class name. The slug is the SEO friendly URL to a shipping class. You can leave it out as it will be automatically generated using the name of your class.

Lastly, create a description for the class. You don’t have to be too serious with it – class descriptions won’t be visible to your customers.
With all that done, save changes by clicking Save shipping classes.
You can always edit the shipping classes after saving them. To do so, mouse over the shipping class you wish to make changes to. Then click Edit – you will find this right beneath the class name.
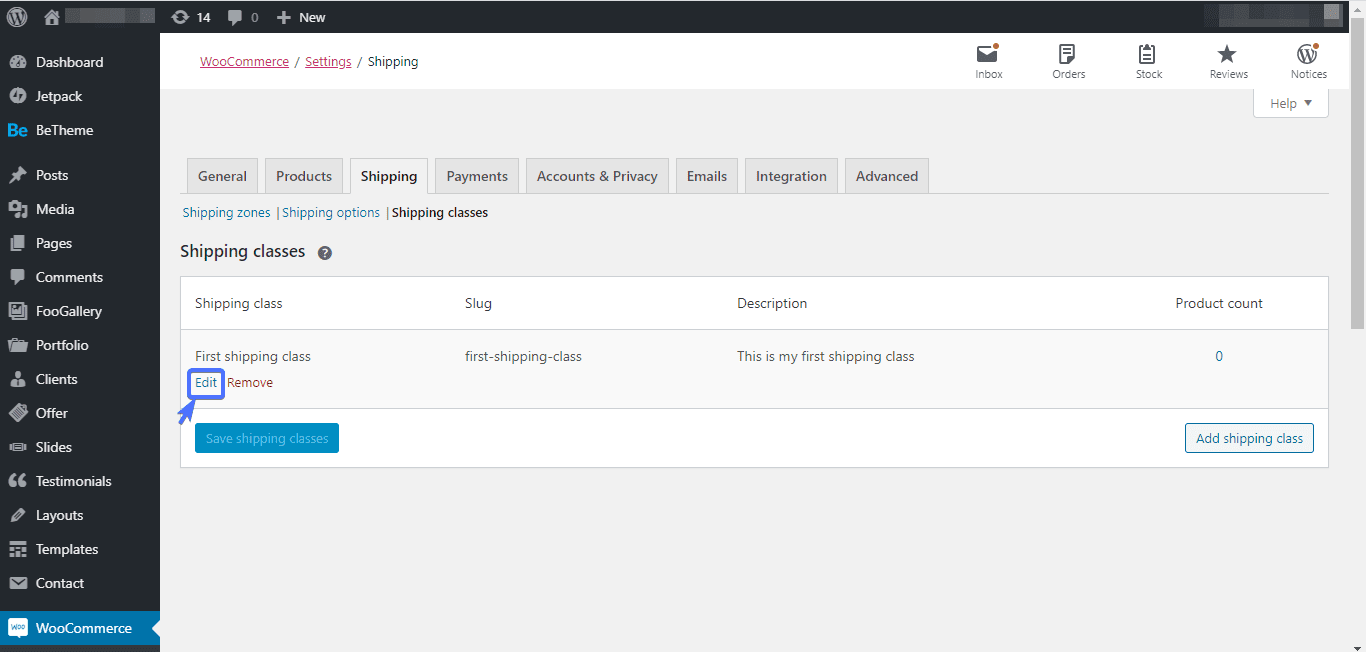
You also have the option of deleting a WooCommerce shipping class. To do that, click Remove.
Step 2: Assigning WooCommerce Shipping Classes to Products
With the shipping class created, your next task is to assign products to the class you have just created.
To do that, navigate to Products >> All Products
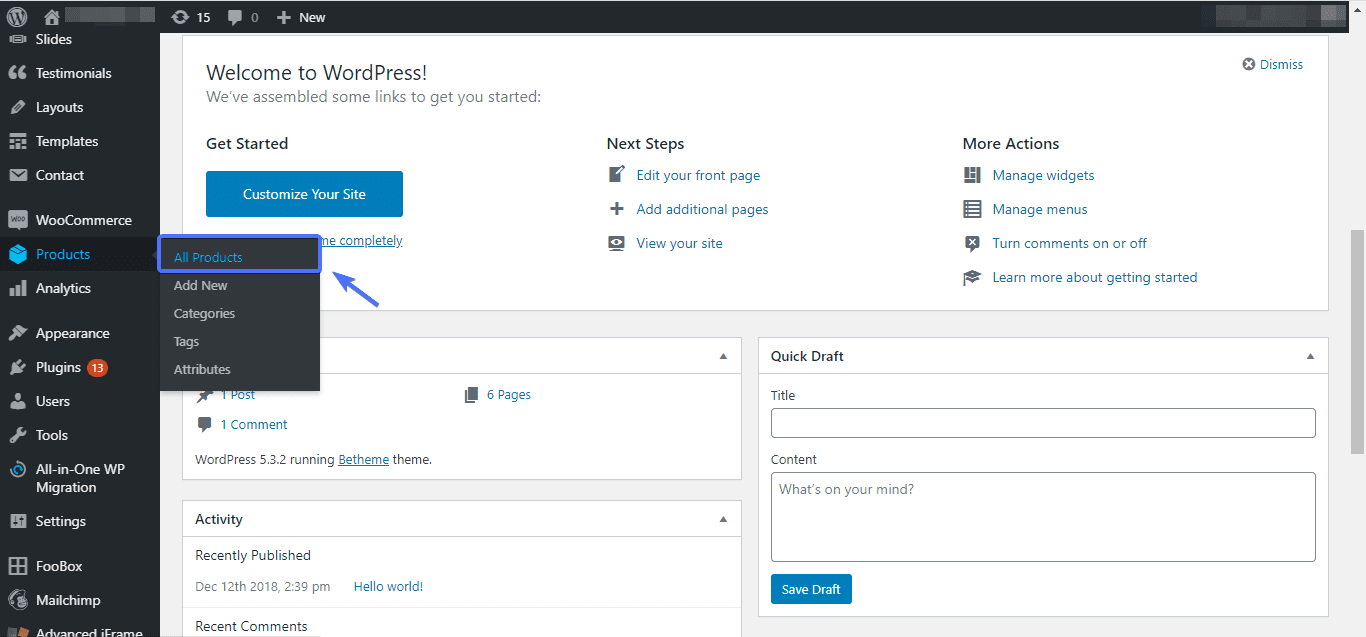
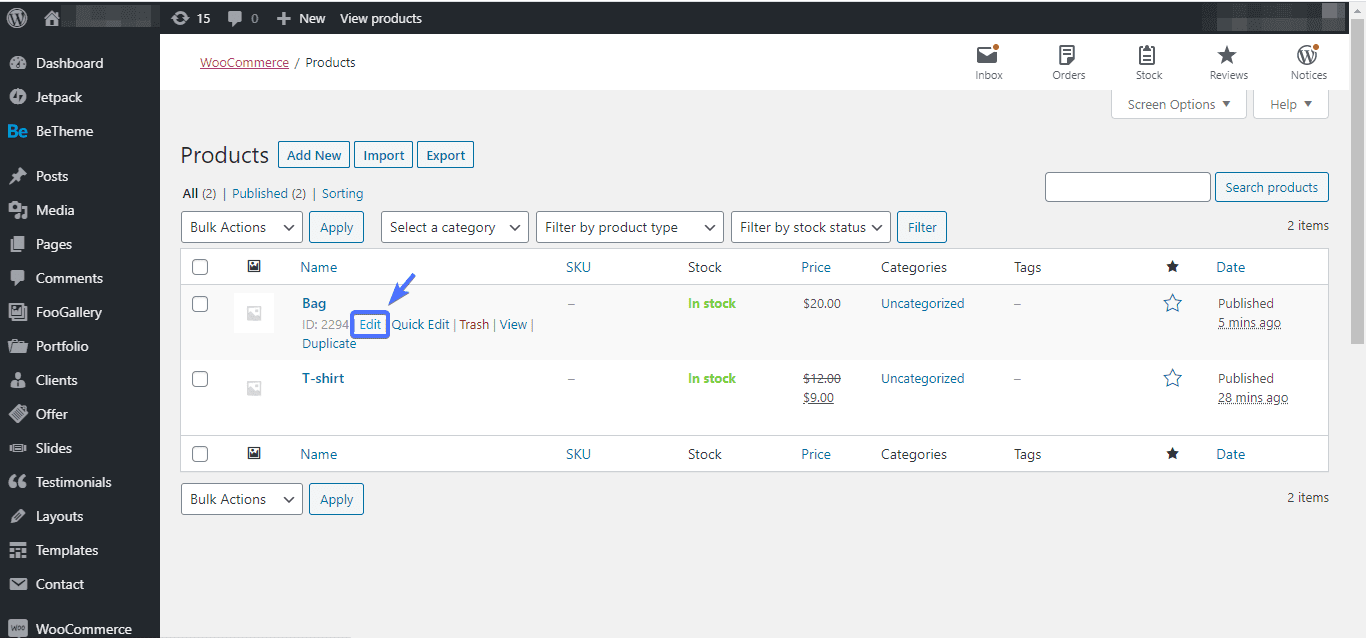
You will see a list of all the products you have on WooCommerce. Mouse over the product you wish to assign a class to, click Edit.
With the Edit page opened, scroll down a little and click Shipping.
In the dropdown box, select the class you wish to assign the product to.
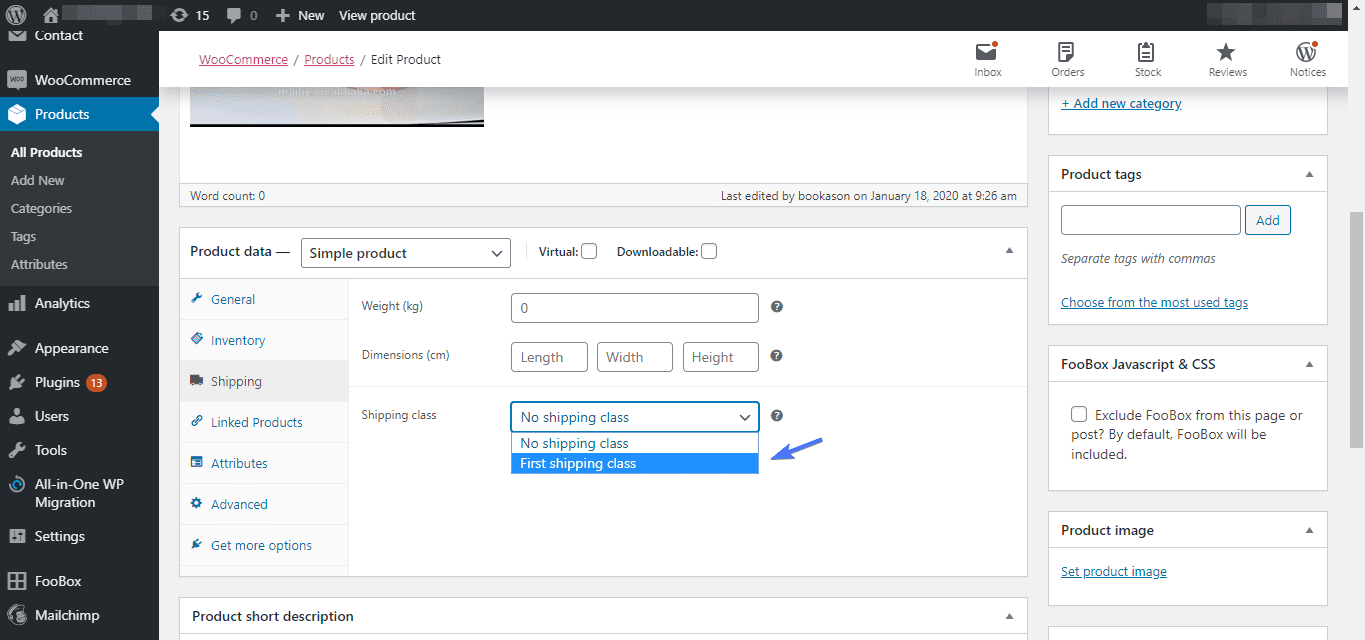
For this example, we assigned a product to First shipping class.
After selecting the shipping class, hit the Update button.

What if you wanted to assign several products to a class at a time? WooCommerce lets you do that, and here’s how to go about it.
Start by selecting all the products you want to group together. With the products selected, click the dropdown box and select Edit and then click the Apply button.
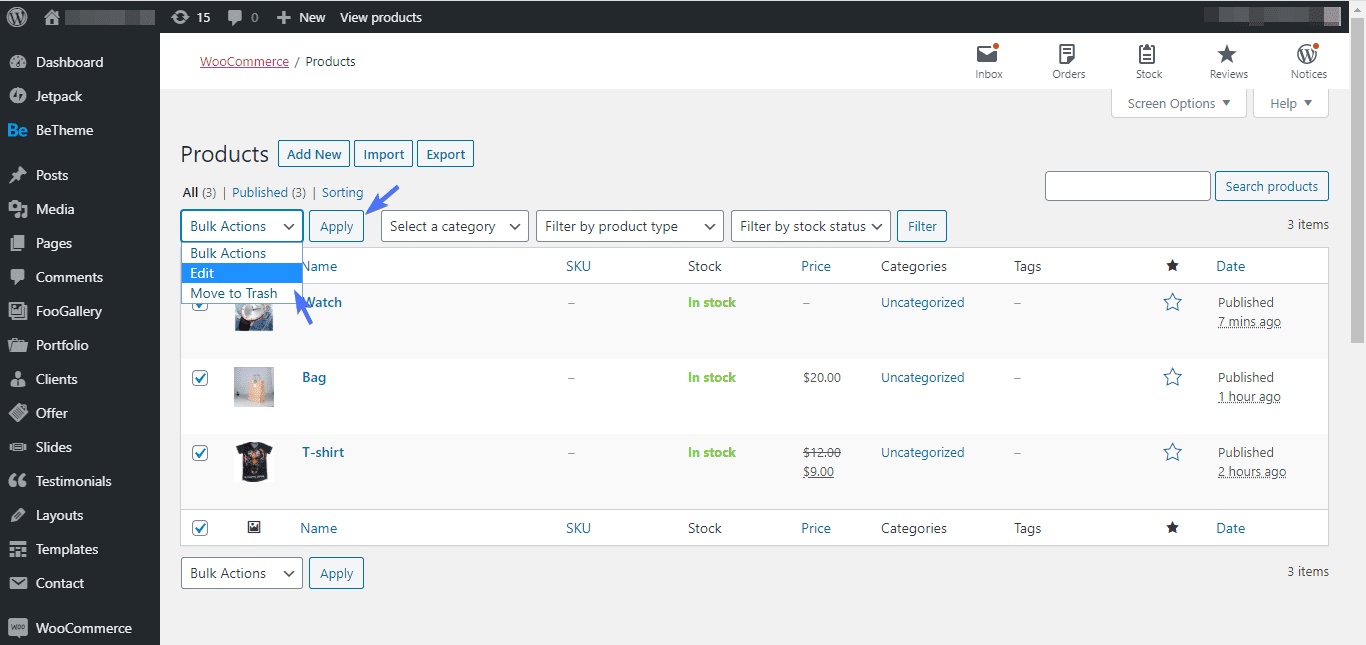
After clicking the apply button, a bulk edit page will appear. From the dropdown select the class you wish to assign the products to.
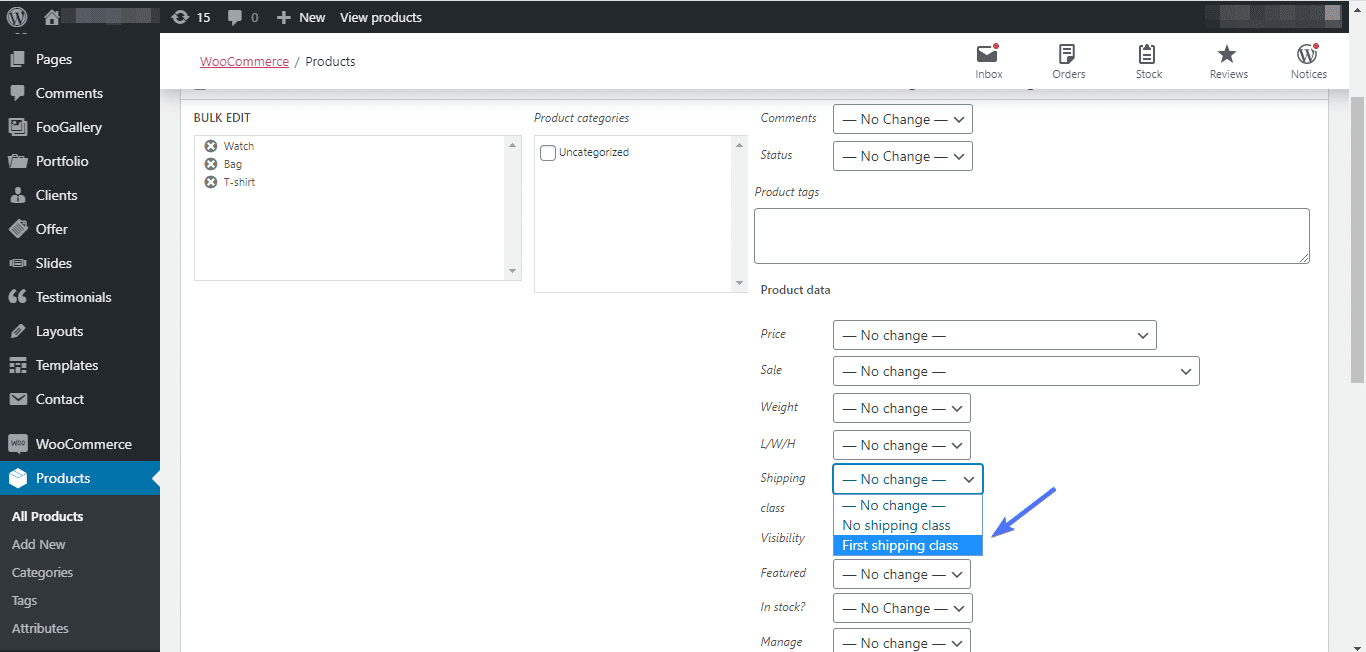
Finally, scroll down and click Update.
Step 3: Set Up Your Shipping Zones
The next step after creating and assigning products to shipping classes is to create shipping zones.
So once more navigate to WooCommerce >> Settings>>Shipping. Then click on the blue Shipping Zones link.
By default, WooCommerce would have created a shipping zone based on your location. You can continue working with it, or create a new one. For reference purposes, we will be creating a new zone. So click Add shipping zone.

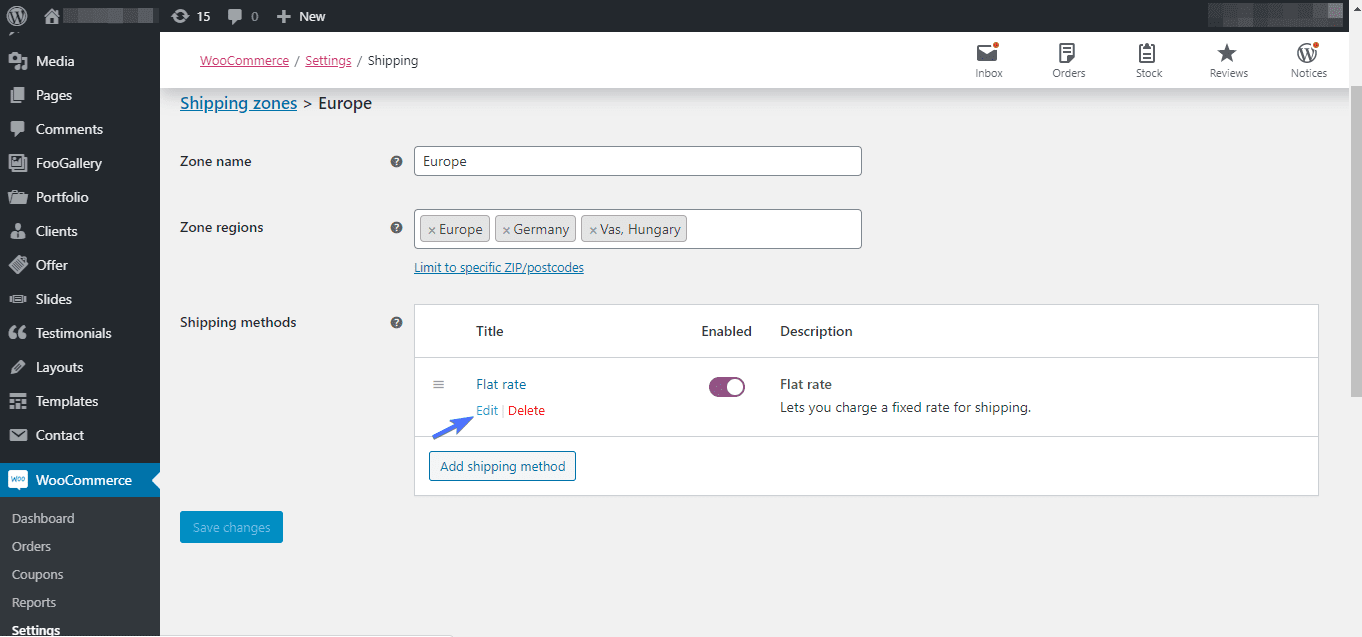
Set a name for the zone, and then from zone regions select geographical areas you are looking to target.
For example, we set Europe as our zone and then selected regions within Europe.

When you finish, Save changes.
Step 4: Adding Shipping Methods
While still on the Shipping zone page, click the Add shipping method button.

Upon click, select the shipping method you would like to use. We will be setting Flat rate shipping method for reference purposes.
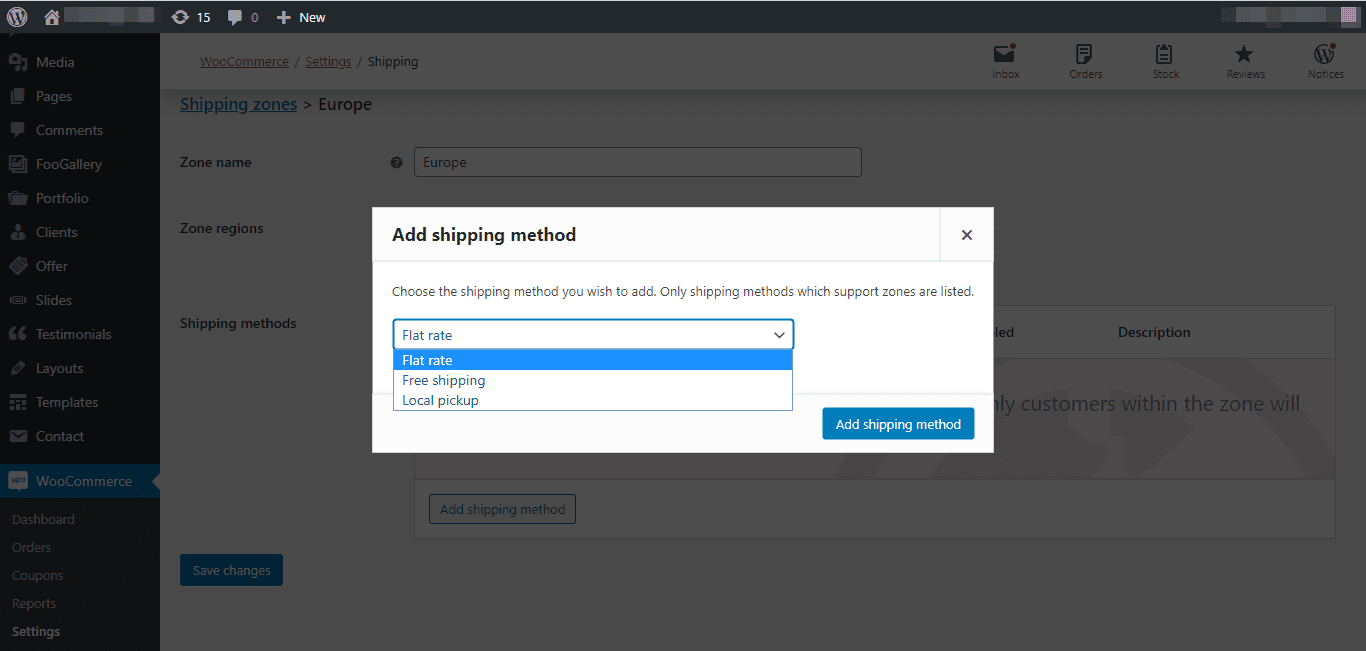
After selecting a shipping method, click the blue Add shipping method button.
At this point, you are halfway setting up your shipping method. The next half is making the shipping method applicable to your WooCommerce shipping class.
Mouse over the shipping method you have just added and click edit.
A popup screen will appear. This is where you get to edit your shipping cost.
Here’s an example:
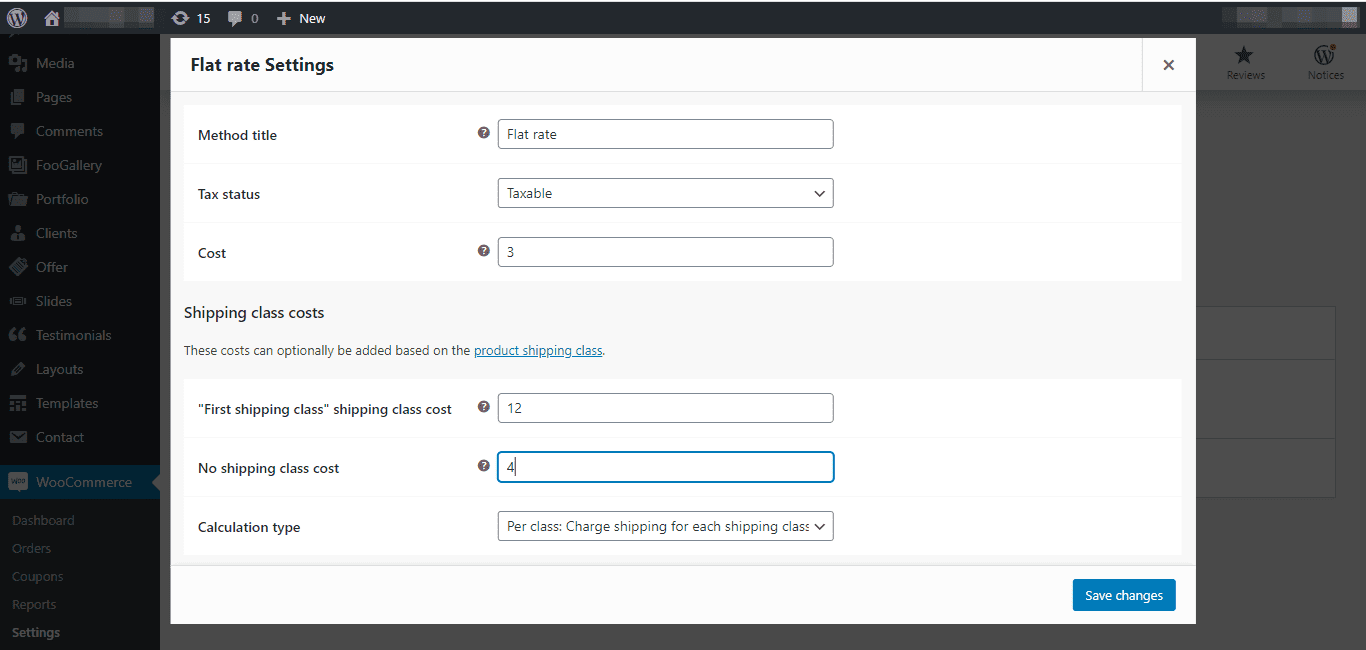
From the screenshot above, you can see that we set our cost as $3. This is the flat rate (fixed) for shipping to this zone.
The shipping class cost of $12 is applicable to all products that belong to the shipping class “first shipping class”. Note that class costs are also subject to shipping zones.
Finally, WooCommerce will charge a shipping cost of $4 for items that don’t belong to a shipping class.
With that, you are done. But before saving changes, ensure that you set the Calculation type to Per class.
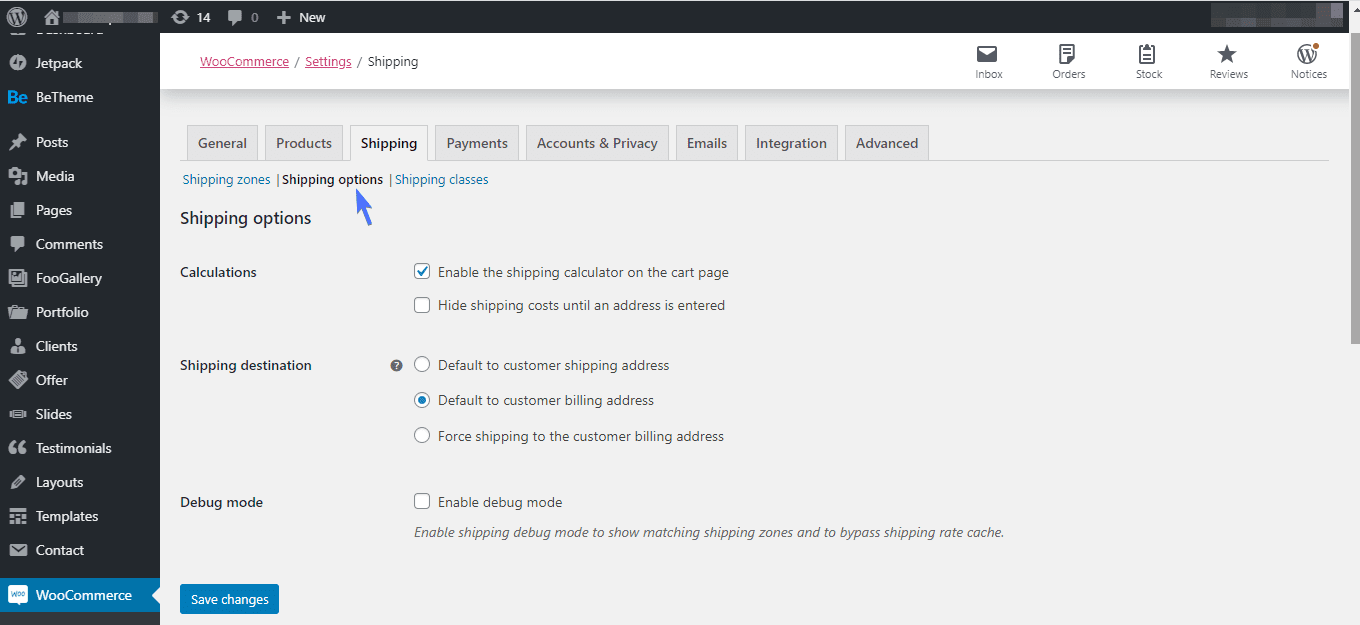
Step 5: Optional Settings
There are other configurations in WooCommerce with regard to shipping classes. For instance, you can make a shipping calculator shown on your checkout pages. That way, your customers will find out how their total shipping cost was arrived at.
To access these settings, navigate to WooCommerce >> Settings >> Shipping >> Shipping options.
Conclusion
In this guide, we covered how to set up WooCommerce Shipping Classes and the options it offers you.
But you can take things beyond basics, especially if you run a large store. For this to happen, you need to install some third-party addon or shipping plugins for WooCommerce.
An example is Shippo; a plugin for WooCommerce that takes shipping to a whole new level. With it, you can create print labels, sync all your sales channels in one place, and do lots more. And it’s free to start. Of course, if you need additional shipping features, you can upgrade to a pro version.
If you found this guide helpful, kindly share it.