WordPress two factor authentication – How to Setup 2FA
WordPress two-factor authentication (2FA) is an extra layer of protection used to reinforce your site’s login page.
Your WP login page is the gateway to all your valuable content. Simply using a username and password is no longer safe. Malicious hackers test out several usernames and passwords until they get it right.
This is why you should add that extra security layer to your website. Enable two-factor authentication in WordPress. It ensures better security for your site.
WordPress plugins are useful in implementing two-factor authentication(2FA) on your site. In this guide, we will show you a step-by-step process to set up a 2FA on your site.
Content:
Why Use WordPress Two factor Authentication?
Two-factor authentication uses a 2 step process in granting access to your site on the WordPress login screen. You need more than your username and password to log in. Besides those, you need another verification method to confirm your access.
WordPress’s two-factor authentication offers a second layer of security for the site’s admin users. Thereby ensuring better security for the site.
Passwords are weak because they could be deduced or hacked. They are also susceptible to brute force attacks. This makes use of passwords alone unreliable.
Whereas two-factor authentication for WordPress offers a second step authentication. And this makes up for the weaknesses of passwords.
The process of 2FA requires two out of three things that concern you to prove your identity.
- What you know
- Something you have
- Who you are
Currently, two-factor authentication uses what you know, such as your passwords. And also what you have, such as a mobile phone or an email account. It confirms a user’s identity when the verification code it sends to the user’s mobile phone or email account is entered at the point of logging in. The verification code completes the login process.
Two Factor verification option has been highly effective in user authentication. The reason for this success is because a hacker most likely will not have access to your password and mobile phone at the same time.
Ways to Setup WordPress two factor authentication
Side note: You may consider signing up for our WordPress maintenance service which covers site security. We will take care of 2FA, hardening, and all other aspects.
To set up two-factor authentication, you have to use suitable 2step verification plugins for WordPress. 2step verification works when the user receives a verification via SMS or phone call. Other methods include push notification and QR code authentication on a mobile phone.
Verification via QR code is when the user receives a verification code on the Google authenticator app. Another similar app for this purpose is Authy authenticator.
You can get Google authenticator app from google play store for android devices, or the app store for ios devices. Also, you can install it on any smartphone.
Using Google Authenticator App
The Google Authenticator App method requires the installation of the App on the mobile phone of the user who wants to login. The app works by generating codes every sixty seconds. The six digit code that’s generated by the app serves as a onetime password(OTP). This OTP authenticates a user at the point of login after username and password verification.
To use second factor verification, you first need to have the google authenticator app ready on your phone.
Next, it requires the installation and activation of a compatible 2FA plugin on your WordPress site. For this guide, we’ll use the Two Factor Authentication Plugin.
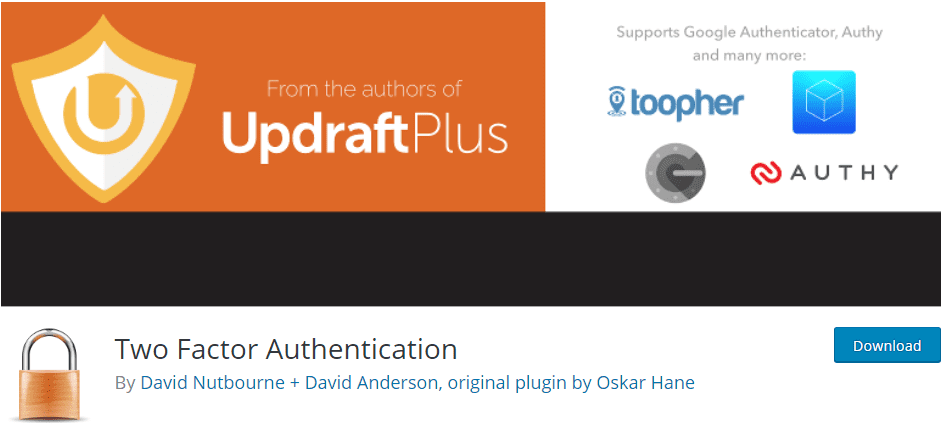
Install and activate the plugin on your site. Two factor Auth icon will appear on your WordPress dashboard.
![]()
Setting up WordPress two factor authentication: Scan a barcode option
On the admin area of your dashboard, click Two Factor Auth > Two Factor Authentication settings page.
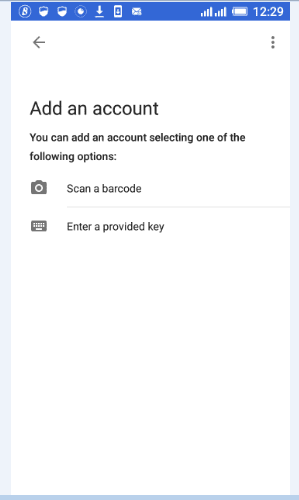
Next, open the google authenticator app and on the Add an account page, choose the Scan a barcode option.
First, scan the QR code by placing your phone’s camera over the code.
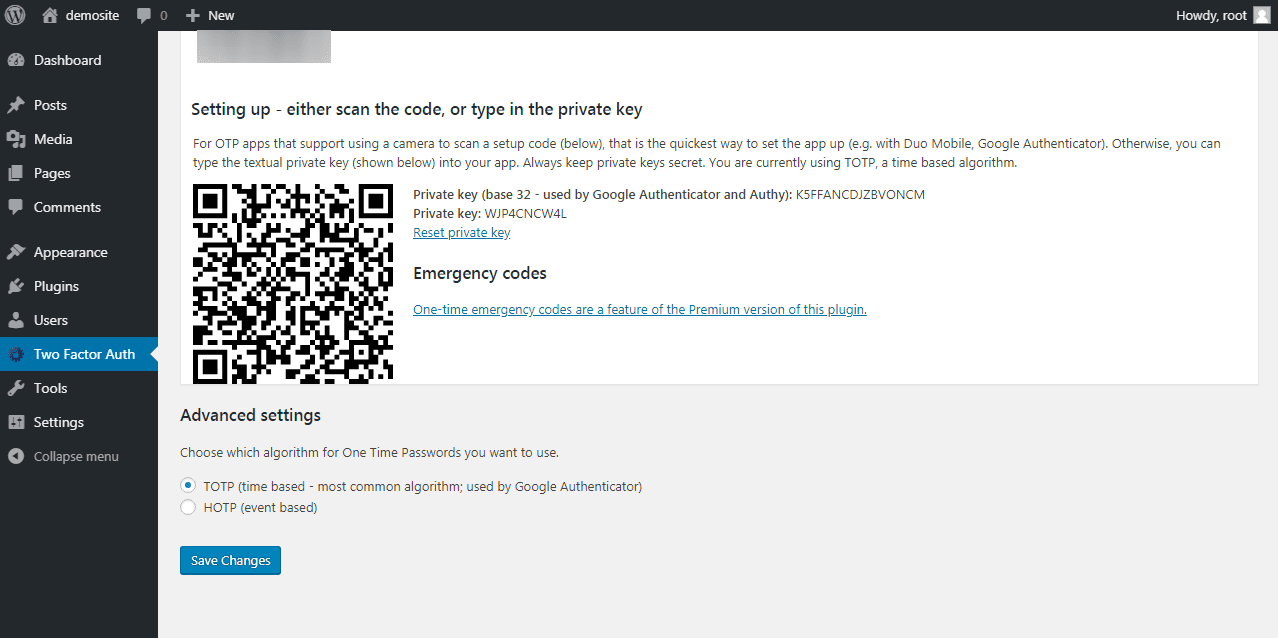
After scanning the QR code, a six digit code appears on the screen of your app. This code will correspond with the code on the plugin’s Settings page. Next, click Save Changes on the plugin’s Settings page.

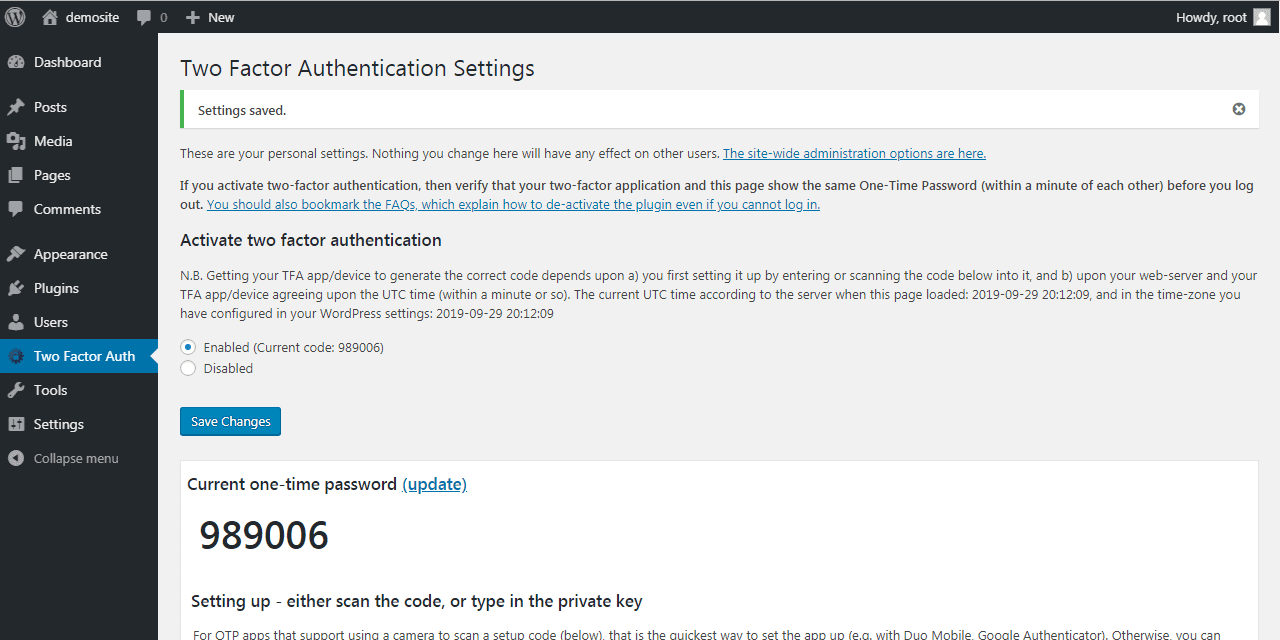
To find out if your 2step verification settings have worked, log out of your site and log back in.
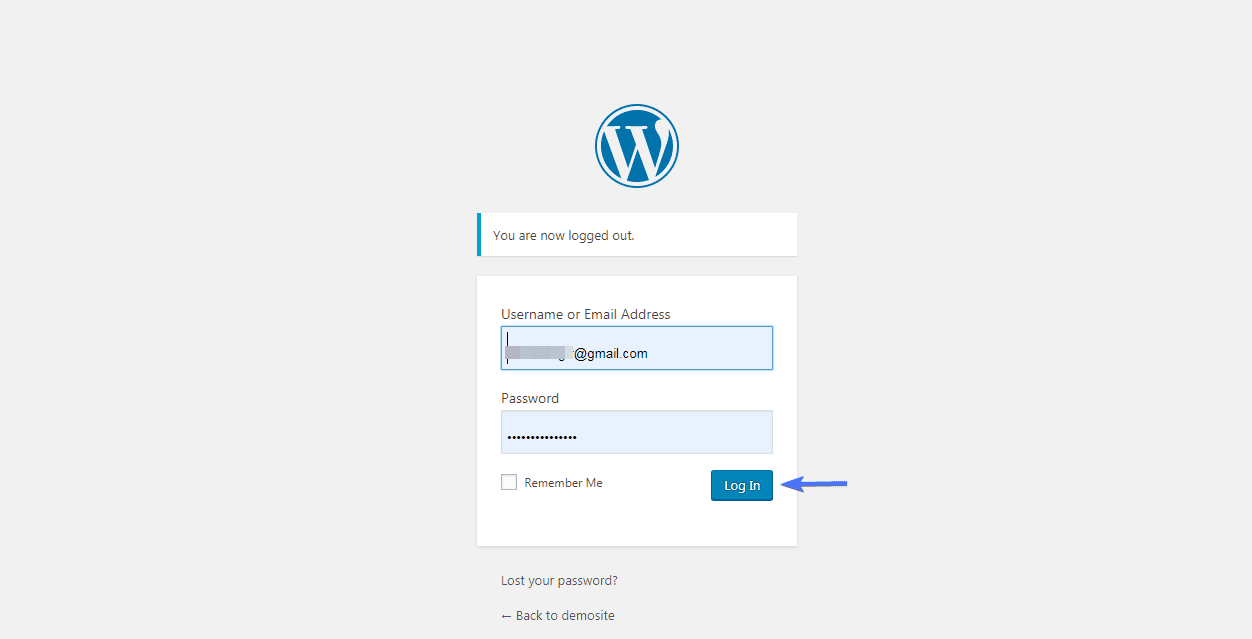
Enter the code that the google authenticator app displays on your phone into the login page of your site. And click Log in.
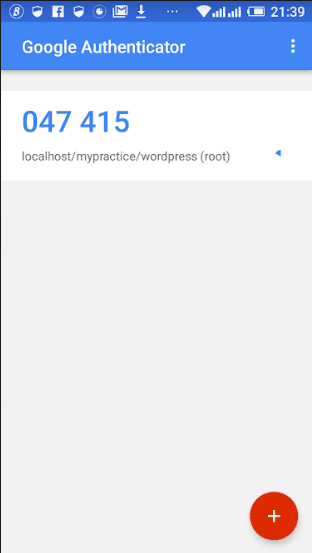
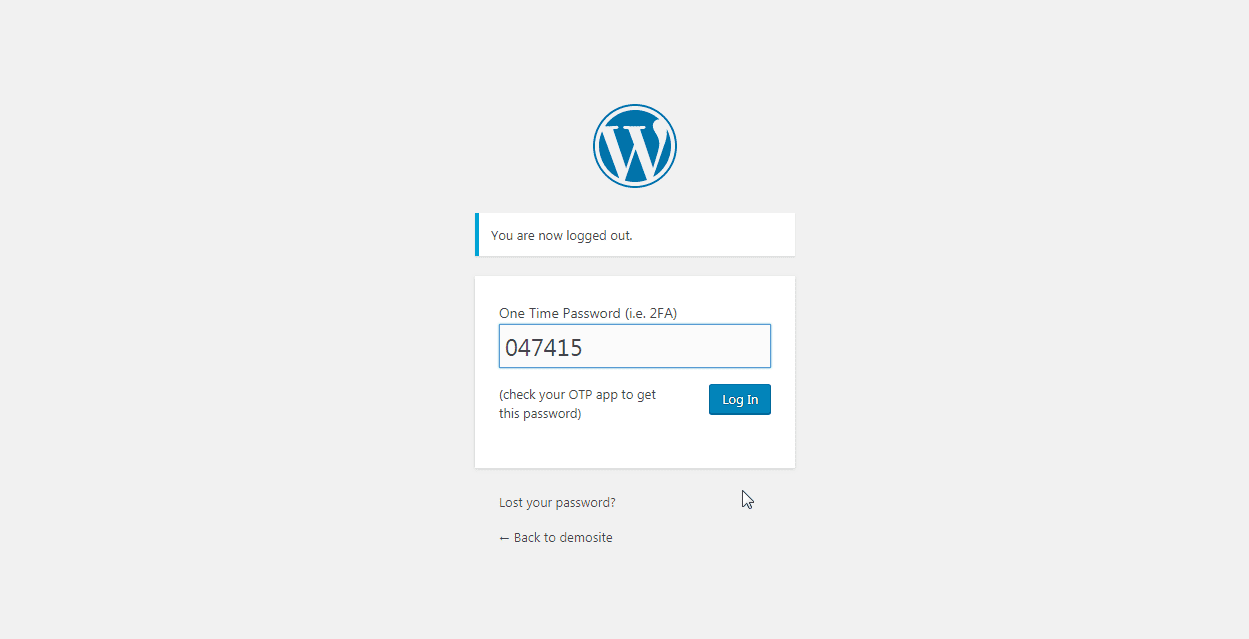
After clicking the login button on the login screen, the code grants access back into the site.
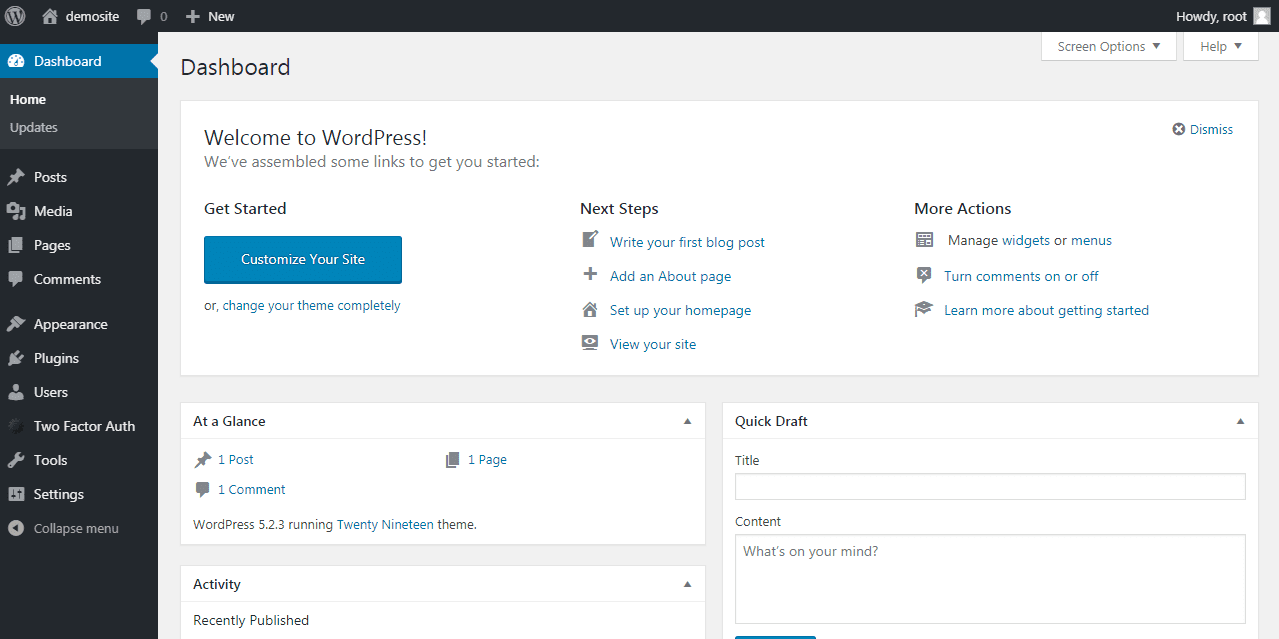
As seen, 2factor authentication is now implemented on your site. More so, you can only gain access into the site by entering the codes generated by the Google app into the login screen when required.
Setting up WordPress two factor authentication: Enter a provided key option
Although the scan the barcode option is much easier, you may choose to use the provided key option.
First thing you need to do is select the Enter a provided key option on the google authenticator app on your phone. Still on the app, set an account name.
Next, type the Private key(base 32) that displays on the plugin’s settings page into the app accordingly. Press Add thereafter.
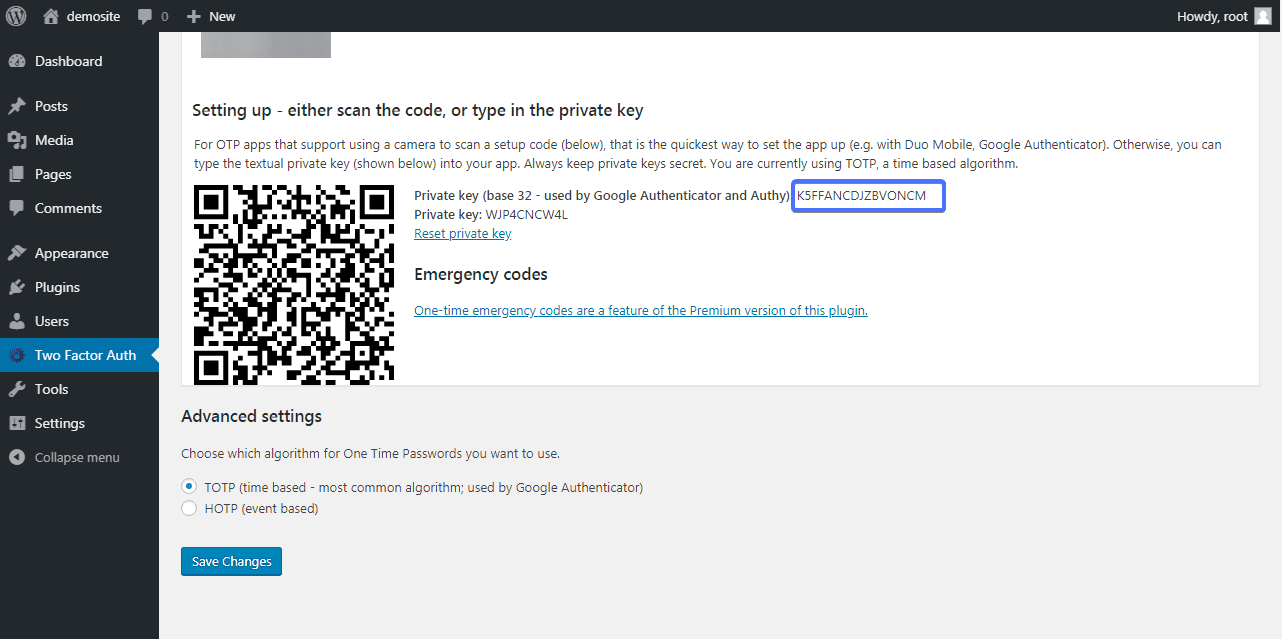
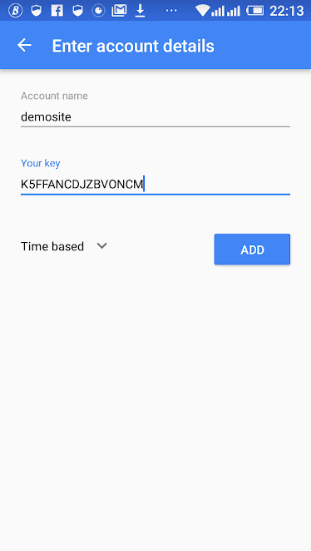
A new account is added to your app with the name you created for the account. Also added to the account is a new code, which is the same as the code on the plugin’s set-up page. Click Save changes on the plugin’s page.
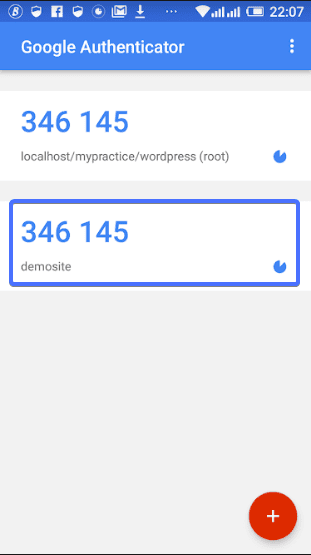
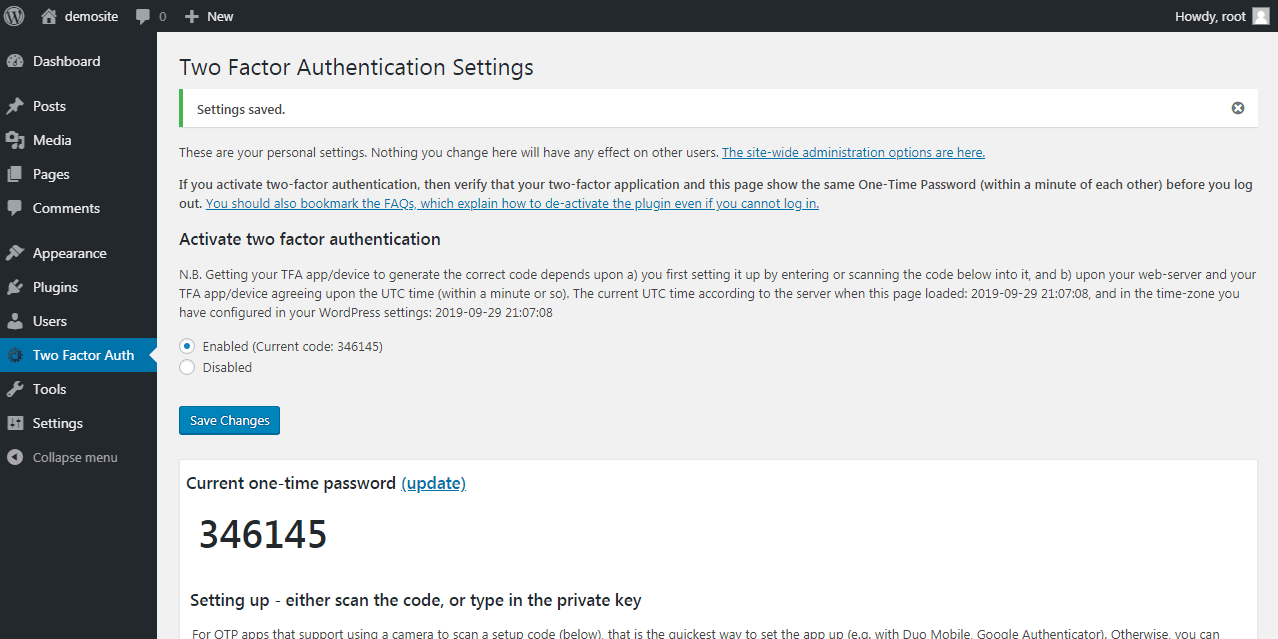
Two factor WordPress authentication is now active on your site. Let’s log out and log back in to verify 2FA on the site.
Enter the six-digit code that Google authentication app displays on the phone’s screen into the login page of your WordPress site. Click Log in.
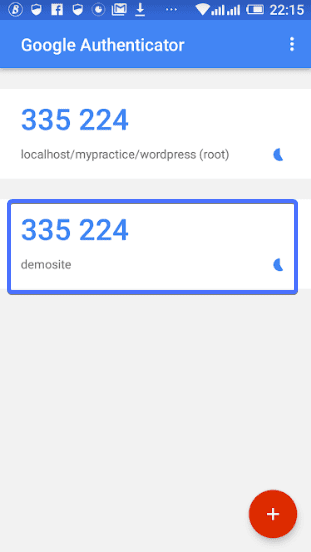
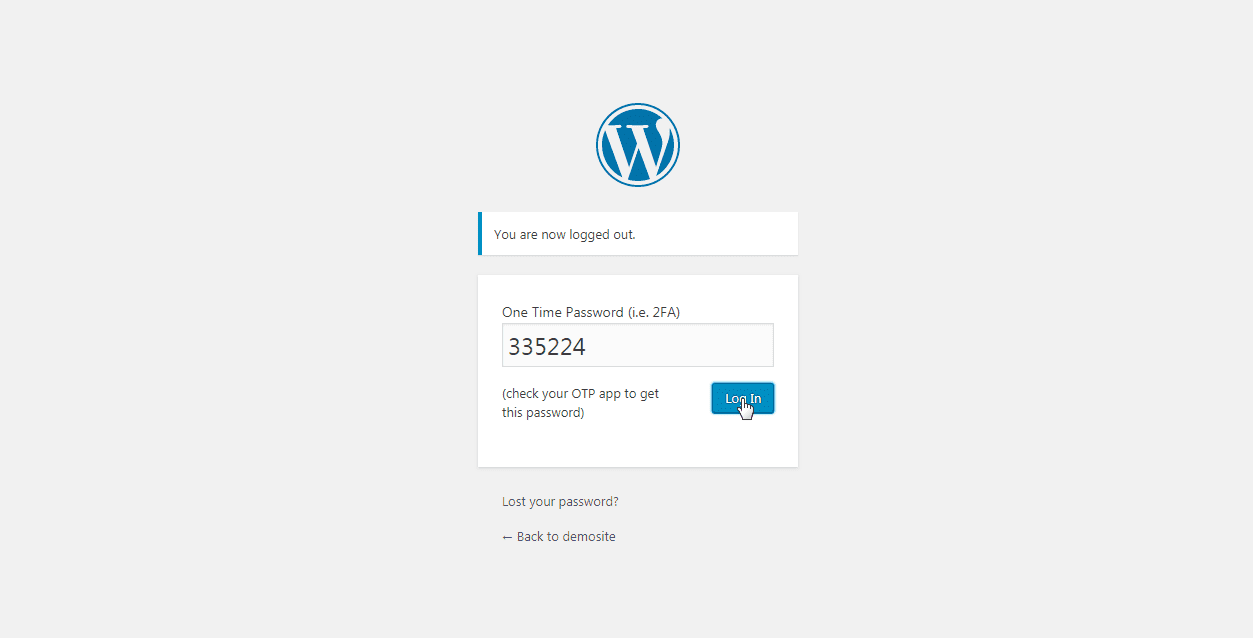
The 2F verification grants access to the WordPress site.

Using Push Notification on a Mobile Device
This method lets you receive a notification of a login attempt on your phone after entering your username and password at your site’s login page.
For this guide, we will use the Google Authenticator – Two Factor Authentication (2FA) Plugin.

First, install and activate the Google Authenticator – Two Factor Authentication (2FA) Plugin. The plugin offers multiple choices for securing the login page of your WordPress site. We’ll show you how to use the Push notification option.
After activating the plugin, on your WordPress admin area, click on its icon on the dashboard.
![]()
There will be a brief tour of the miniorange Google Authenticator 2FA plugin. The tour will show you how to navigate the plugin settings screen on your site. You may choose to click Next to complete the tour. Otherwise, click End tour to skip and continue setting up push notification 2FA on your WordPress site.
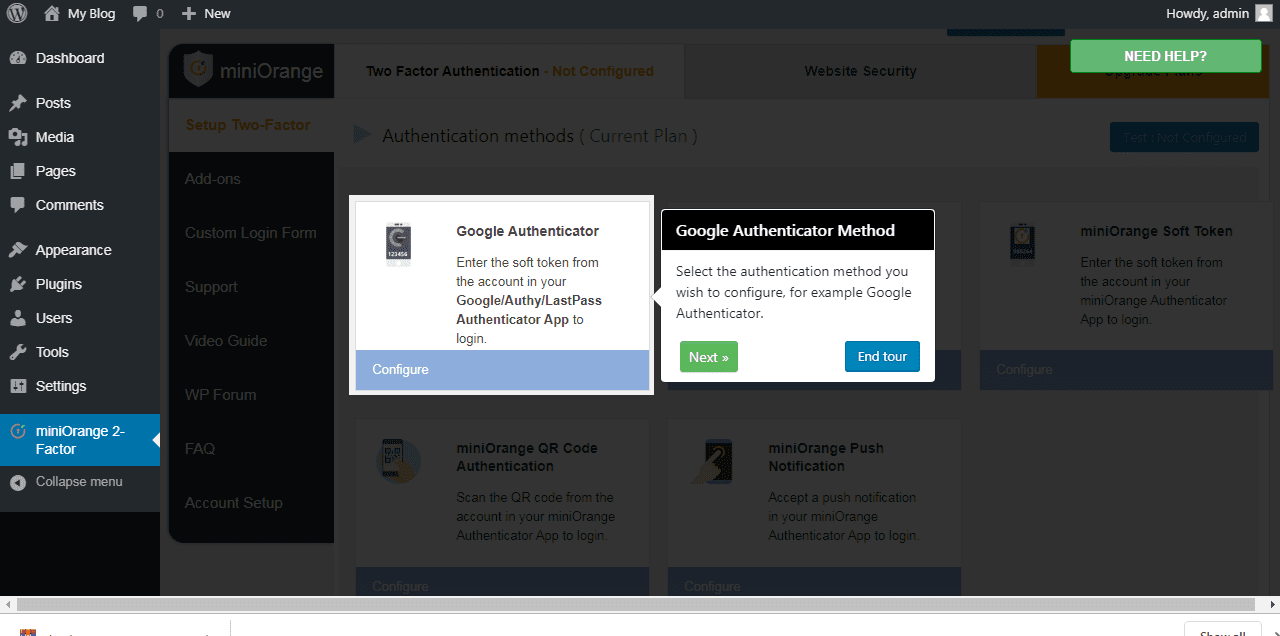
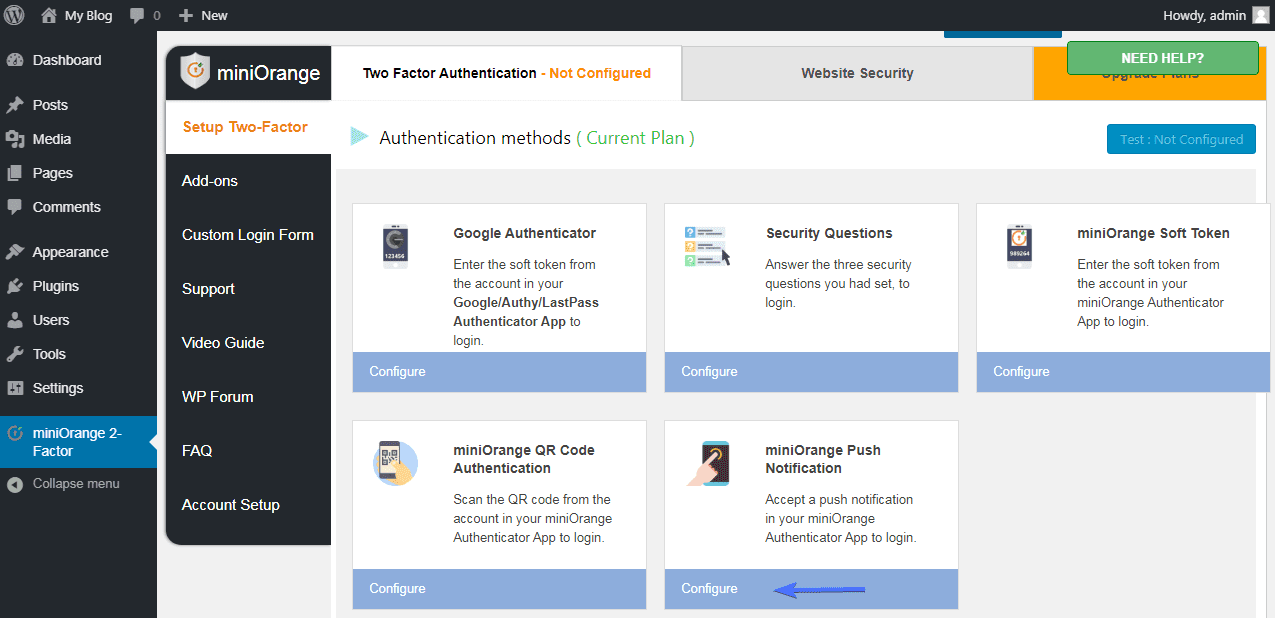
When the tour ends, your screen becomes clear, and all the 2FA options will be visible. Click Configure for ‘miniOrange Push Notifications’ option.
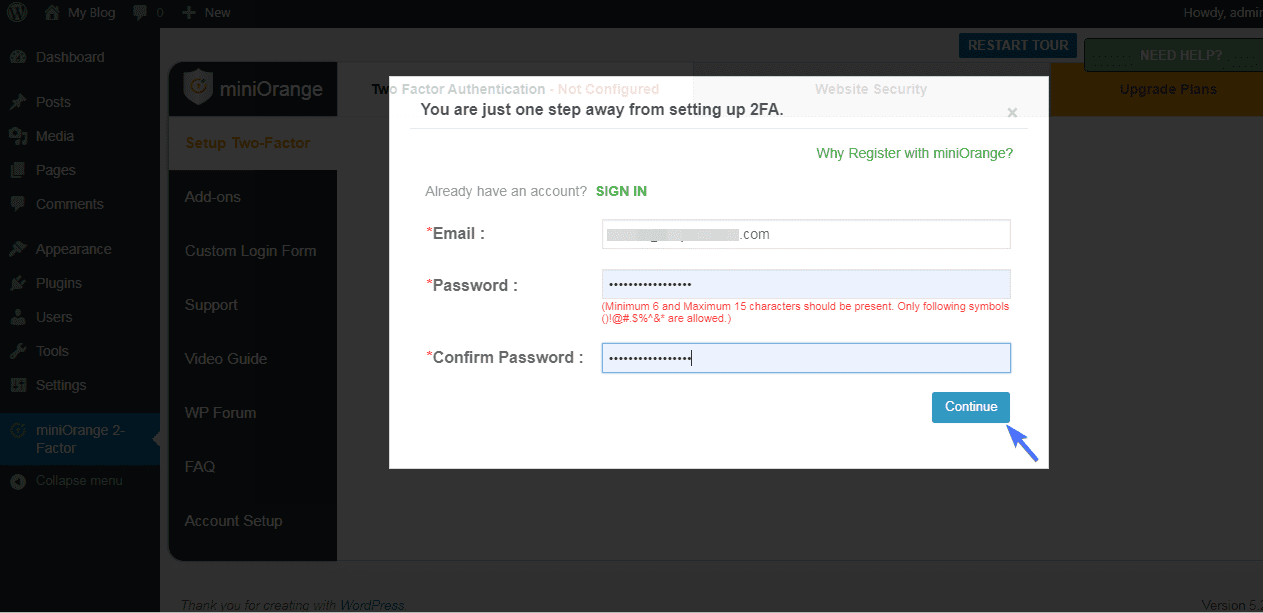
A window to register your account with miniOrange opens, and the email address associated with your site will display. You may keep it or change it to another email.
Next, enter the password that you want to use for the plugin account in the field provided. Re-enter the password to confirm it.
Finally, click Continue.
Enabling Push Notifications on Your Phone
Step 1: You have to download miniOrange Authenticator App for your smartphone or any other mobile device. You can get it from App Store for iPhone users, or from Google play store for Android users.
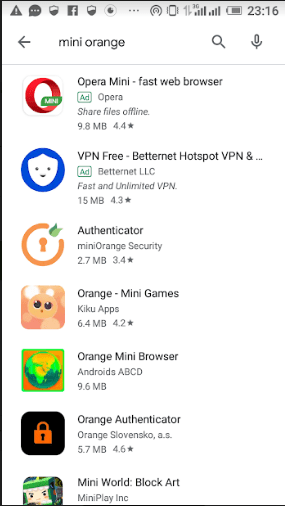
We are using an Android device and Google play store for this WordPress two factor authentication article. On your smartphone or mobile device, search for mini orange on Google Play Store. Thereafter, select Authenticator from the result list as shown below, download and install on your device.
When that is done, click on Configure your phone button on miniOrange settings page on your computer screen.
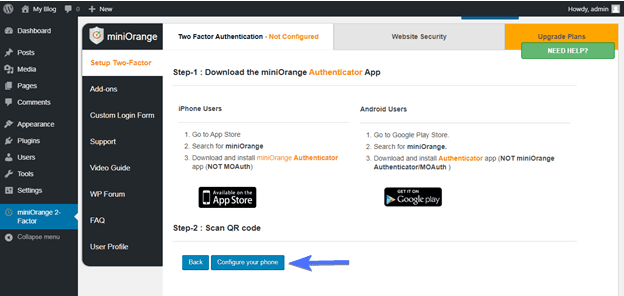
Step 2: A QR code will display on the screen, and a message to prompt you to scan the code will display as well.
Place your phone’s camera over the QR code to scan.
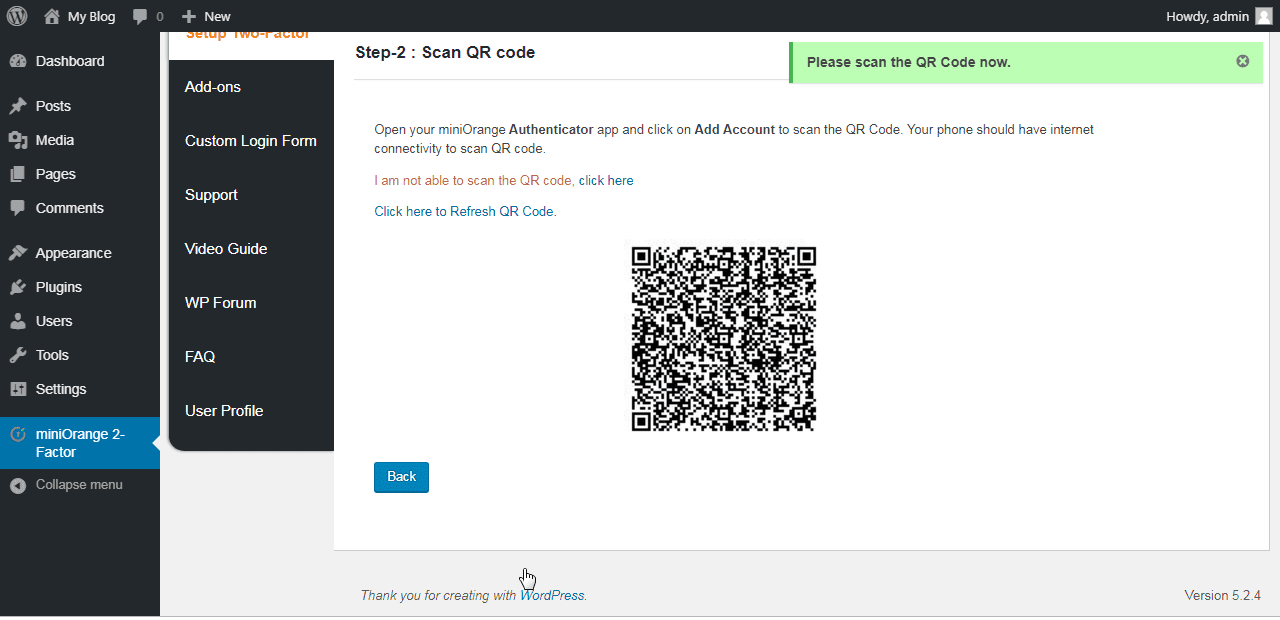
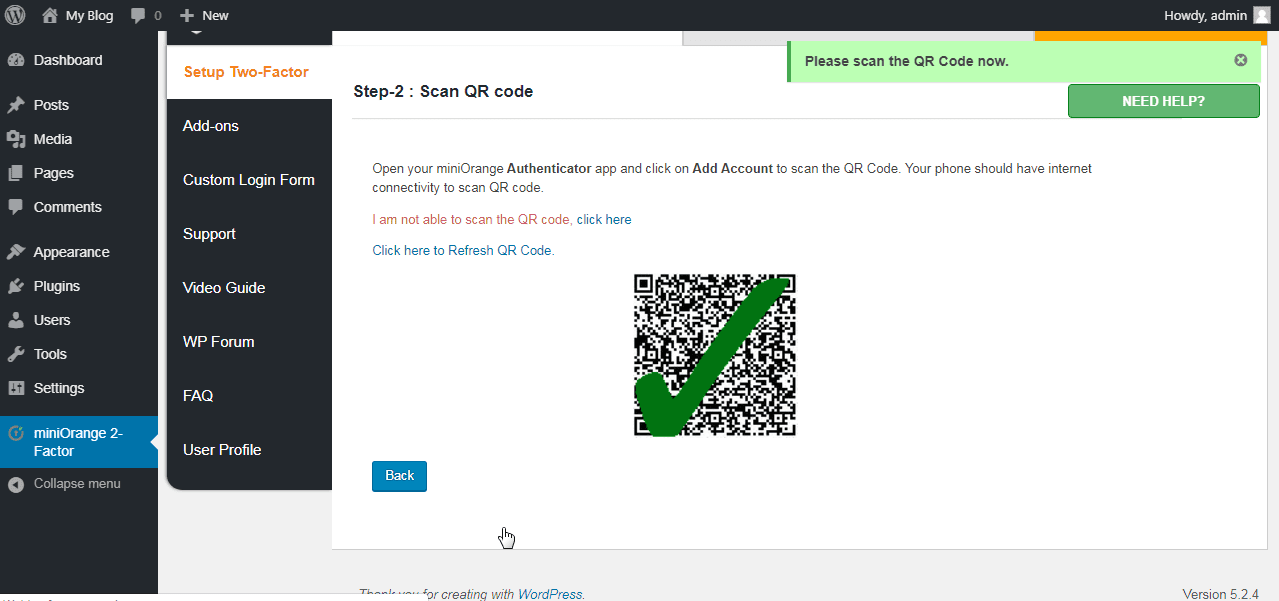
When Scan QR code process completes, the code will have a large green check sign on top of it. This shows that the scan is successful.
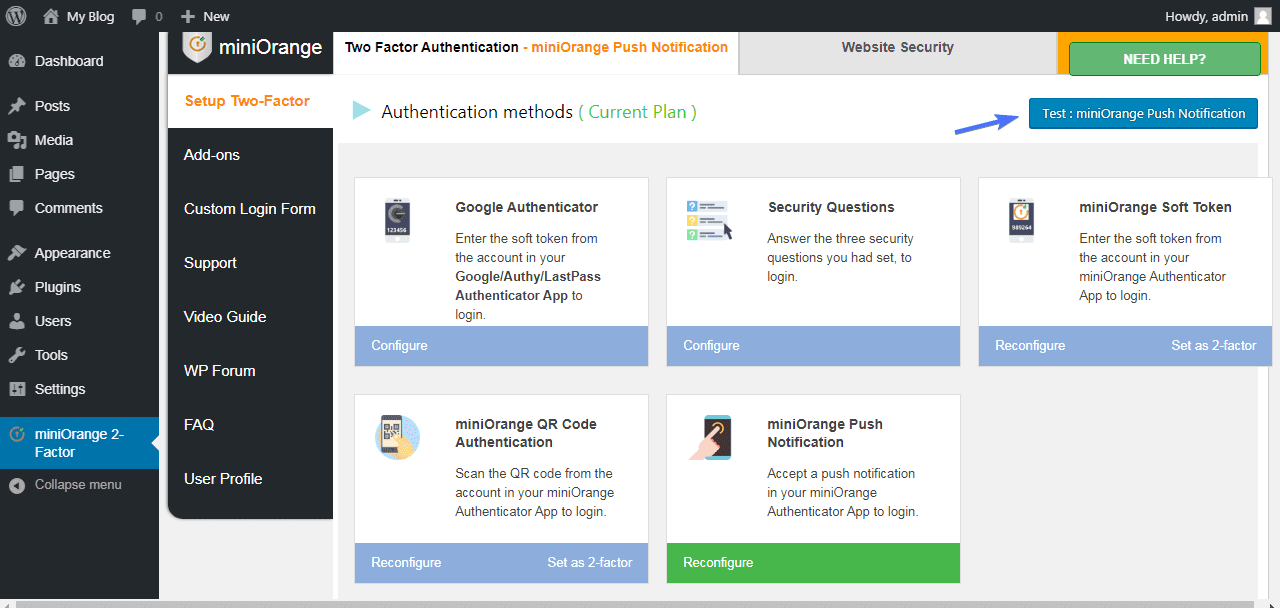
The Push Notification option Configure bar is now the color green. This means that Push notification option was successful. To test run it, click on Test miniOrange Push Notification.
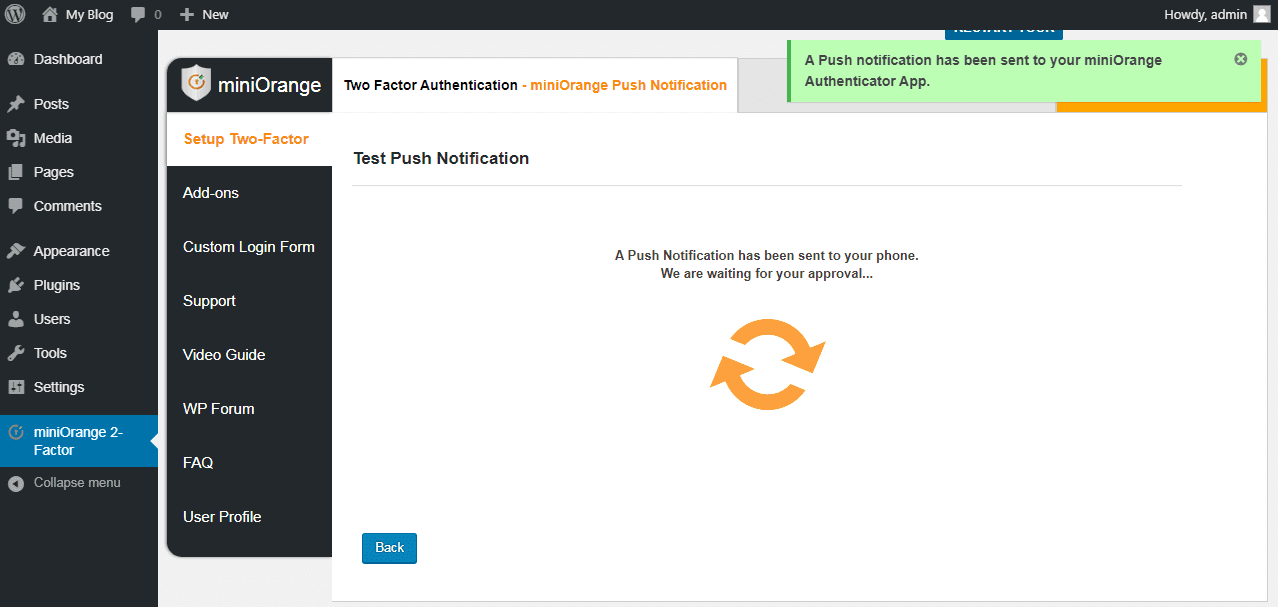
The plugin sends a push notification to your phone notifying you of a login request to your account.
Click ACCEPT to accept, otherwise you may click DECLINE.
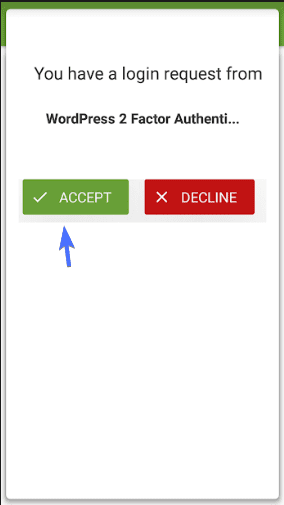
After you accept the request, the plugin page on your site will show that you have successfully completed the test.

Test if plugin actually works
As usual, we have to test if the plugin actually works to implement a second layer verification on the site.
Log out of your site and try to login again.
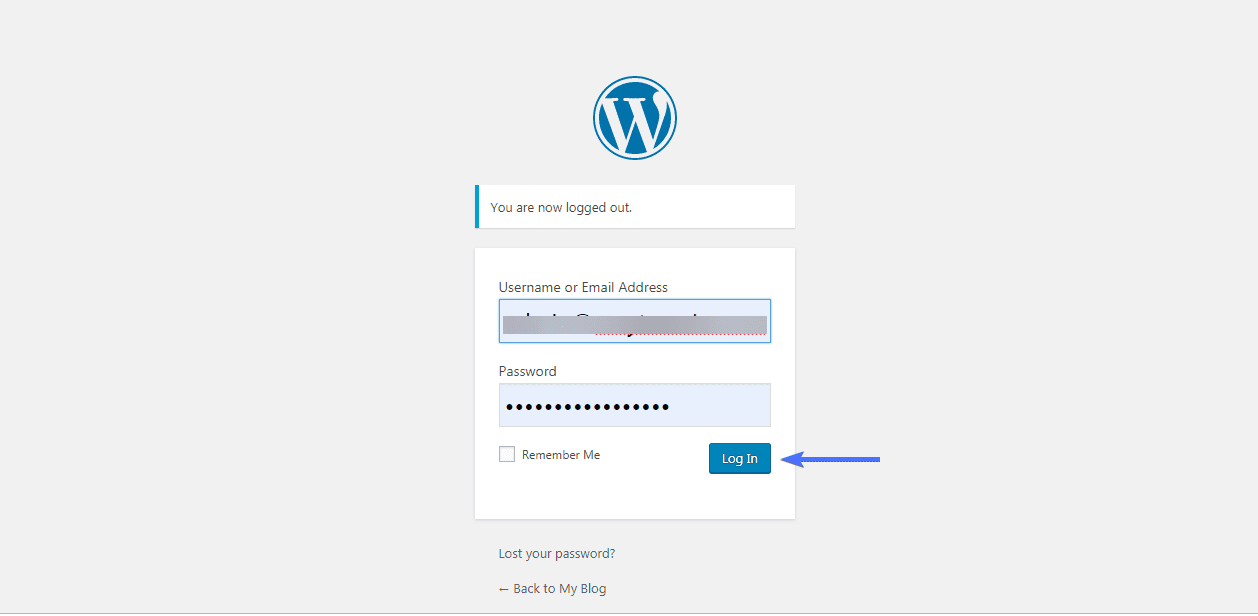
After your username and password verification, a push notification is sent to your phone.
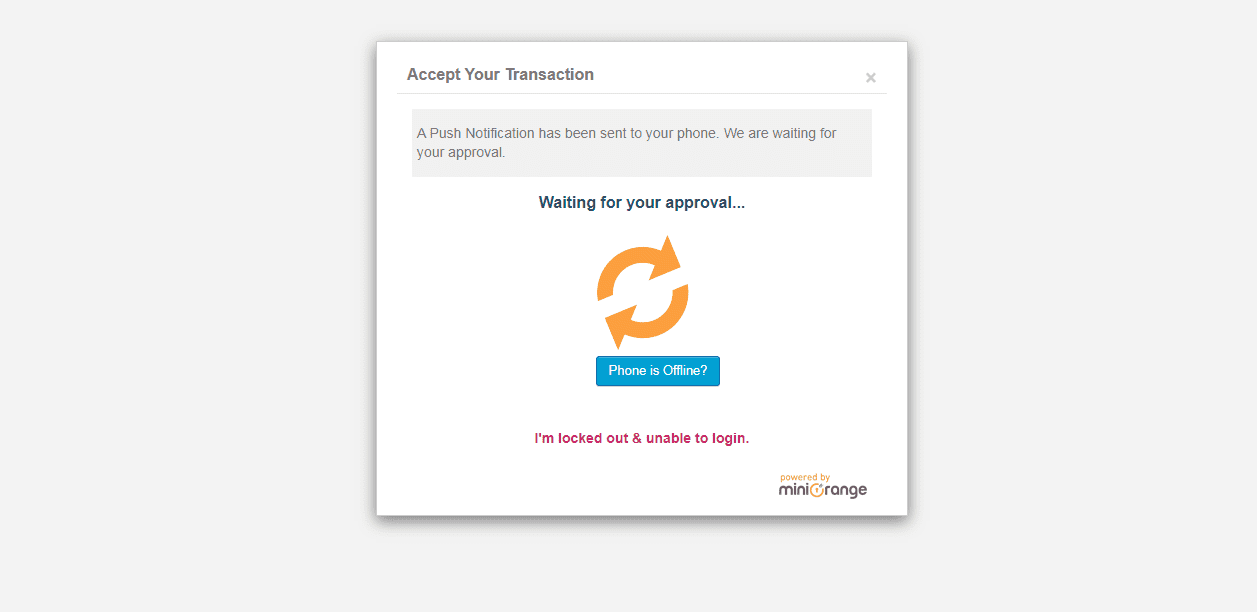
Accept the login request.

And here we are, back in the dashboard area of the site.
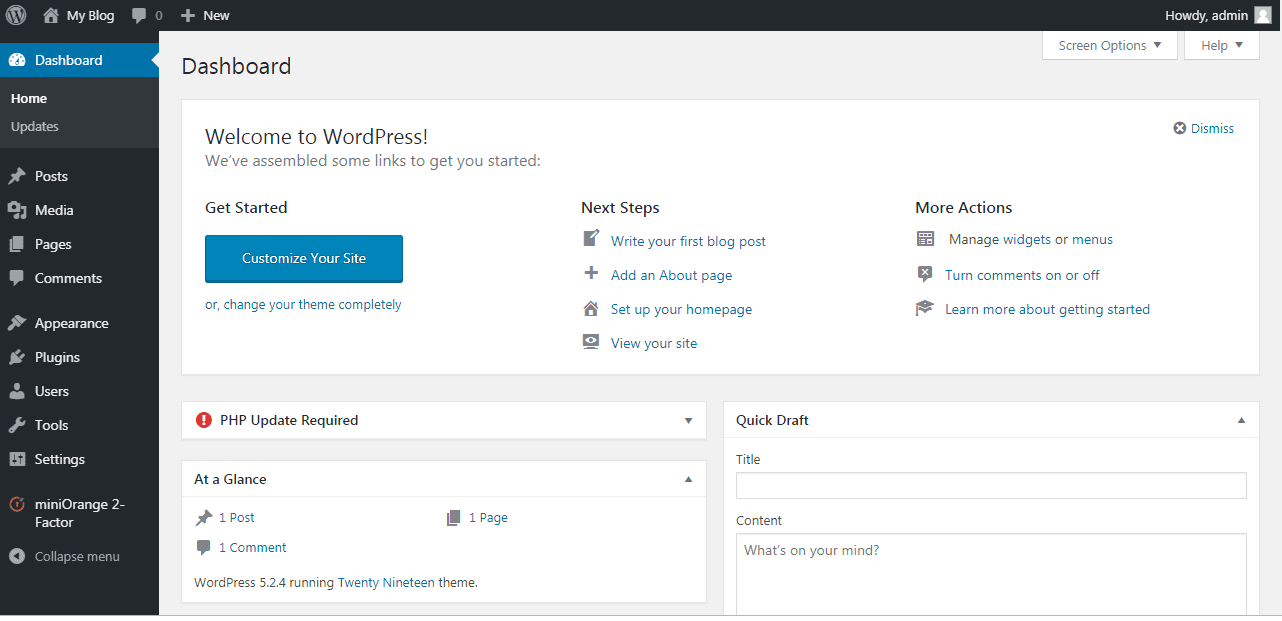
And that’s it! We have implemented two factor authentication in WordPress using Push notification.
Using WP 2FA WordPress Plugin
WP 2FA is a WordPress two-factor authentication plugin that supports multiple authentication apps, including Google Authenticator, Authy, FreeOTP, and many others. This flexibility allows users to choose the authentication app they prefer, making it easier to increase your website’s security by reducing entry barriers. The plugin also includes several administrator options, including the option to enforce 2FA on the website users via configurable policies, giving you complete control over the implementation of 2FA on your website.
Furthermore, the app supports both TOTP and HOTP protocols. While the latter is not as secure, it allows you to offer two-factor authentication to users who might not have access to a smartphone. Of course, you have the option of disabling it from the admin panel should you so desire.
Get Started with WP 2FA
To get started with WP 2FA, download the plugin from the WordPress repository, and once installed, click the activate button. Once you activate the plugin, the wizard will start, walking you through the initial configuration steps in a matter of seconds.

Click Let’s get started! to start the initial plugin configuration.

In the next screen, choose whether you want to activate TOTP, HOTP, or both. As briefly touched upon earlier, the TOTP protocol requires a 2FA app to be installed on a smartphone while HOTP sends an OTP (One Time Password) via email – making it an excellent option for users who might not have a smartphone.
Here, you can also choose whether you want to enable backup codes, which users can use to log in should the primary 2FA method be unavailable.
Once you’ve made your choices, click on Continue Setup to continue to the next step.

In the third and last screen, you can configure the 2FA policies to select whether you want to enforce 2FA for all, some, or none of the users. When 2FA is not enforced, users will still have the option to set up 2FA if they want to, but it will not be mandatory.
WP 2FA Settings
By default, users for whom 2FA is enforced are given a 3-day grace period to set up 2FA. The grace period can be extended, reduced, or removed entirely from the plugin’s settings.
Users that have 2FA enforced will be prompted to configure 2FA the next time they log in. A friendly wizard makes the entire process a breeze.
In the first step of the wizard, depending on plugin configuration, users will need to choose between TOTP and HOTP.

If they choose TOTP, the wizard will provide a key, which the user must scan using their favorite authentication app.

Once completed, all that’s left to do is to click the I’m Ready button to complete the process. The next time the user logs in, they will need to use 2FA to log in to WordPress successfully.
WordPress two factor authentication – Conclusion
In this guide, you have learned how to enable Two-Factor Authentication for your WordPress site. The steps listed are rather easy to follow. You should be able to enable twofactor authentication for WordPress without hassle.
So, if you solely manage a site with WordPress, it is important to enable 2FA on your site. It is even more important to have this when you have several people working on a site. Two factor authentication will provide the much needed extra WordPress security.
To learn more about securing your site, please read our WordPress Security guide.


