5 Best WordPress Access Control Plugins
WordPress access control gives you complete control over what users can do on your website. It’s one of the features of WordPress that allows you to decide who can access various parts of your website and the actions they can take.
WordPress default access control is limited, so using access control plugins is necessary for better user role management.
This article outlines the five best WordPress Access Control plugins to help you manage access to your website.
Content:
- Understanding WordPress User Roles and Permissions
- What are the User Roles in WordPress
- 5 Best WordPress Access Control Plugins
Understanding WordPress User Roles and Permissions
WordPress access control is a feature that allows website owners to restrict people from specific permissions or privileges on their site. It involves controlling what users can do on the front end or back end of a WordPress website.
WordPress has a registration feature, which you can turn on to allow users to register on your website. Once a user signs up on your site, you can assign specific roles to them. The user role specifies the capabilities and permissions you want each user to have on the site.
By default, registered users will be assigned the “subscriber” role, which offers no unique capability. But if you want the user to be able to do much more, you can move them to an advanced user role.
For instance, let’s say you run an online store with a team of three people, including a marketer, a content writer, and a website developer. All of these people need varying access to the website:
- The marketer would want to be able to access relevant customer signup details, like emails and phone numbers.
- The content writer would need access to create pages and posts to publish and edit content.
- The website developer, however, would need access to various parts of the site to fix bugs, improve the design, and ensure it runs optimally.
Thankfully, WordPress provides several user roles that allow you to provide a sufficient level of access to each user.
What are the User Roles in WordPress?
WordPress comes with five default WordPress user roles. You can assign any of these roles to users based on the level of access you want them to have.
- Subscriber role
- Contributor role
- Author role
- Editor role
- Administrator role
- Super Admin role
Here’s a breakdown of each of these roles:
| User Role | Description | Access Level |
| Subscriber Role | They have very limited access to manage their profile and comment on posts. | Very limited |
| Contributor Role | They can create new posts but cannot publish them. They’ll need to submit the posts for review and publication by someone with advanced access. | Limited access |
| Author Role | They have access to create and publish their own posts. They can also modify their own posts and moderate comments. They can’t access other users’ posts or comments. | Considerable Access |
| Editor Role | They can create, publish, and manage their own posts. They can also edit posts and comments made by other users. | Advanced access. |
| Administrator Role | The administrator is the ultimate access manager on the website. They have all administrative privileges to add and manage users, plugins, and themes, and they can also modify site settings, including codes. | High level of access. |
| Super Admin Role | Super admins have administrator access across various websites, WordPress multisite access, and the capability to manage multisite networks. | Highest level of access. |
5 Best WordPress Access Control Plugins
There are several plugins out there that can make managing user access on your WordPress site easier.
We have outlined the top 5 WordPress access control plugins. Now we’ll look at each one of them and how to use their top features.
User Role Editor Plugin
User Role Editor is a free WordPress access control plugin with over 700,000 active installations. The plugin allows website owners and administrators to easily control users’ access and capabilities on their WordPress websites.
It is easy to use and comes with several amazing features. The plugin allows you to do the following:
- Manage users’ access to various capabilities, like creating, editing, and publishing posts.
- Posts and page view restrictions for specific user roles
- Edit existing user roles
- Add custom user roles
- Make a copy of existing user roles
- Network admin for multisite management and more.
How to Use User Role Editor Plugin
To use this plugin, you have to first install it.
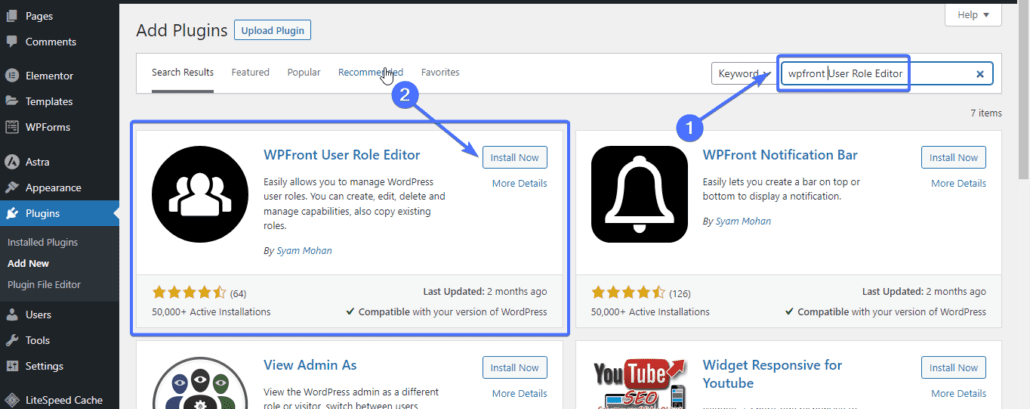
So to do that, go to Plugins >> Add New from your WordPress dashboard.

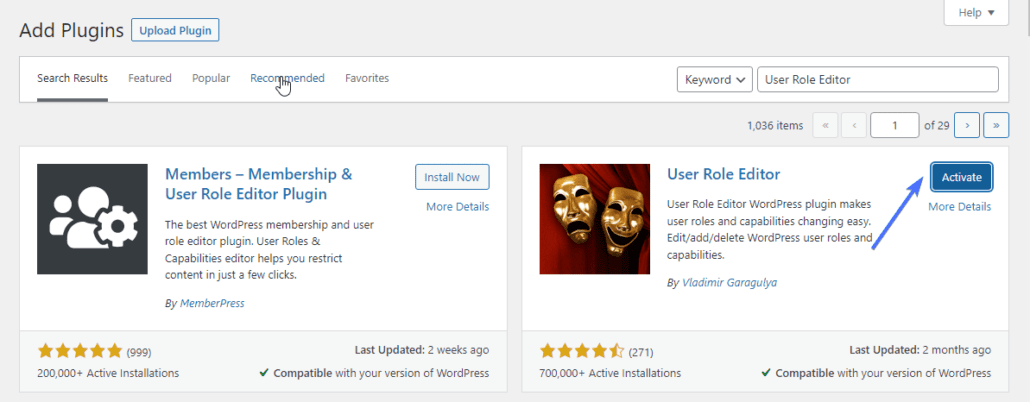
On the plugin page, type ‘User Role Editor’ into the search box located at the top right corner of the page.
The plugin will appear on the search result. Click on the Install Now button to install the plugin.
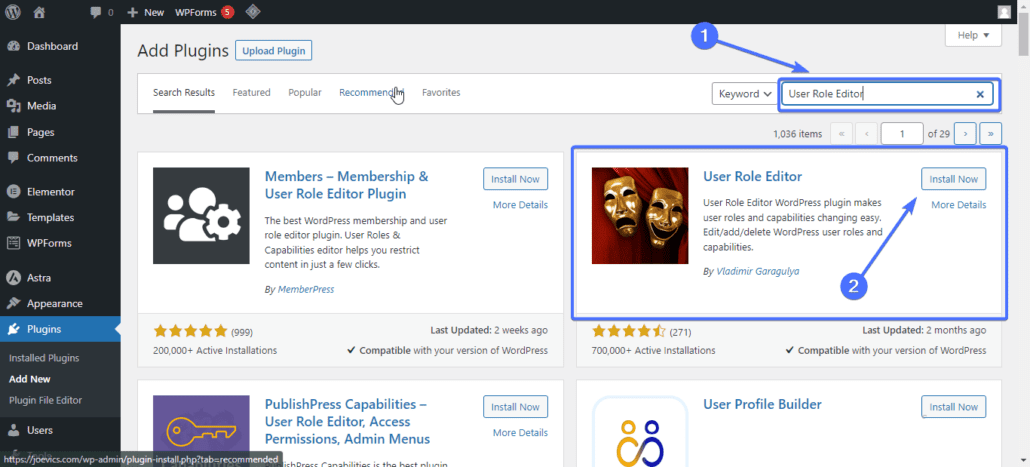
Next, click on Activate to enable the plugin on your website.
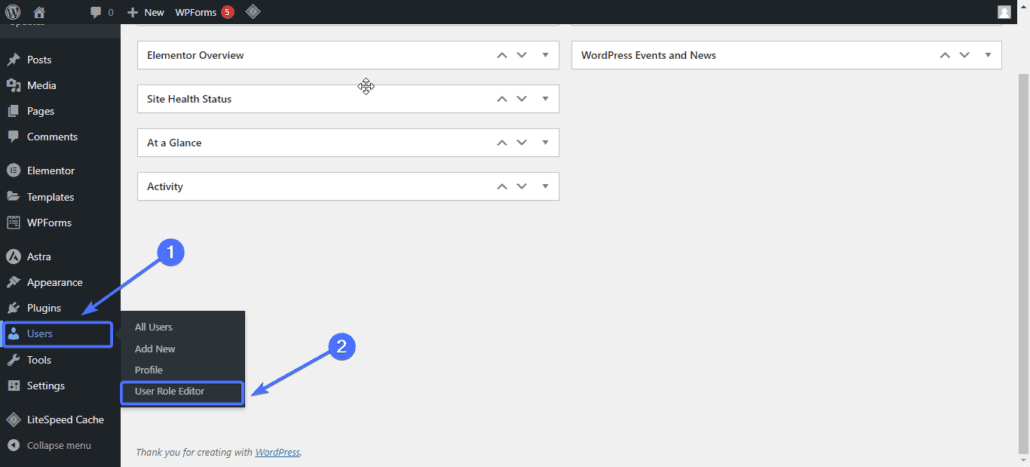
Once you activate the plugin, you will find it on your WordPress dashboard at Users >> User Role Editor.
How to Add a New/Custom Role Using User Role Editor Plugin
To add a custom user role, click on Add Role from the dashboard.

You will be required to enter a role name (ID) and display the role name.
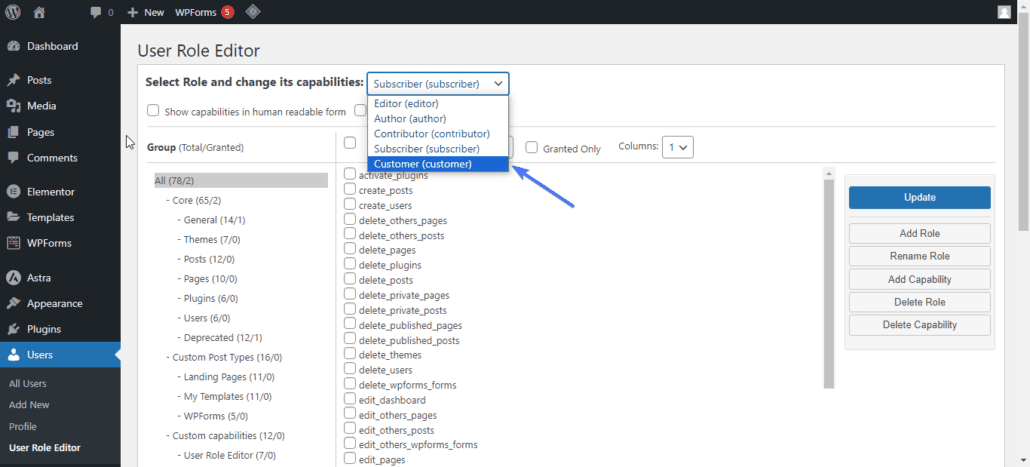
For instance, let’s say you want to add a new role called Customer. To do that, Enter ‘Customer’ as the ID and display name. After that, click on Add Role.

Now, the Customer role will be added as one of the user roles on the site.
Members – WordPress Access Control Plugin
Members is another great plugin to help you manage access to your site. The plugin is designed for membership sites. However, it provides all the functionalities you need to manage user roles and permissions on WordPress.
The plugin allows you to do the following:
- Create, edit or delete user roles.
- Modify user roles permission.
- Clone existing user roles to create a new role with modified capabilities.
- Private feature to make your site private and only accessible to people you want.
How to Use Members Plugin
To use the Members plugin on your WordPress, you need to first install it.
To do that, go to Plugin >> Add New from your WordPress dashboard.
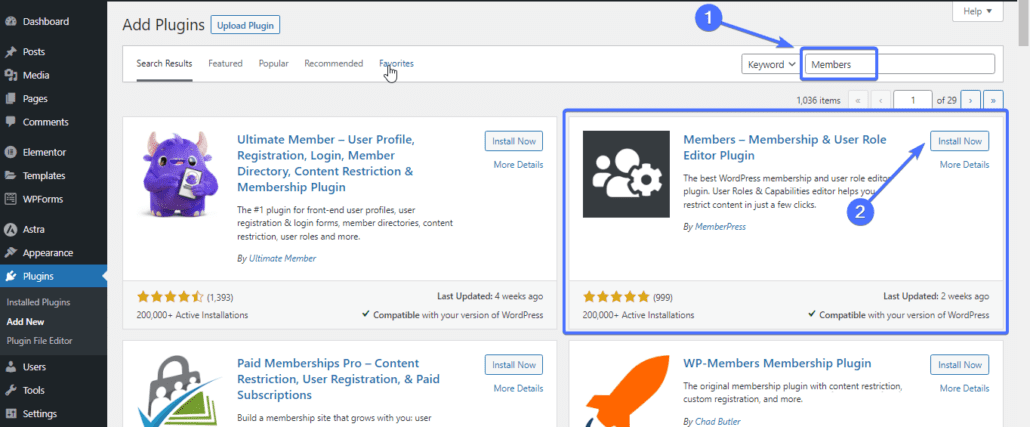
On the plugins page, locate the search bar at the top right corner of the page. After that, type ‘Members’ into the search box.
The plugin should now appear on the search result. Click on Install Now to install the plugin and then click on Activate to enable the plugin on your WordPress.
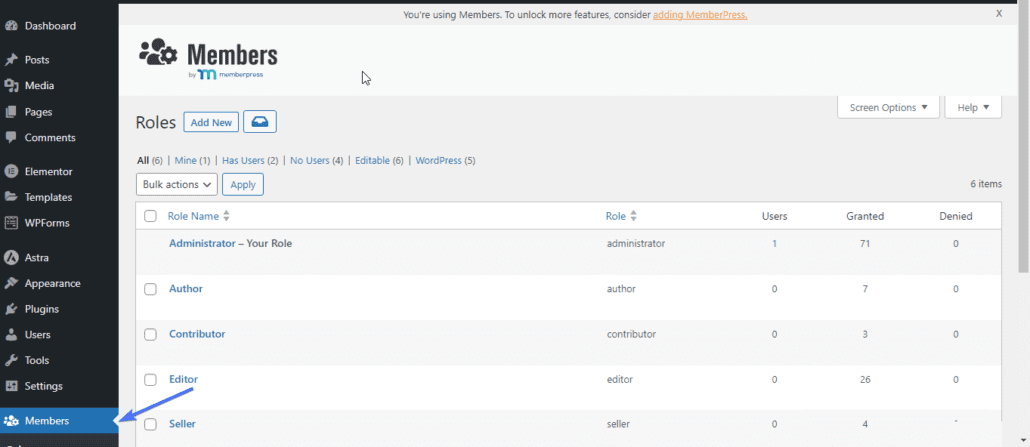
Once activated, the Member plugin will appear as ‘Members’ on your WordPress dashboard.
How to Add a Custom User Role Using Members Plugin
To add WordPress custom user roles, go to Members >> Add New Role.
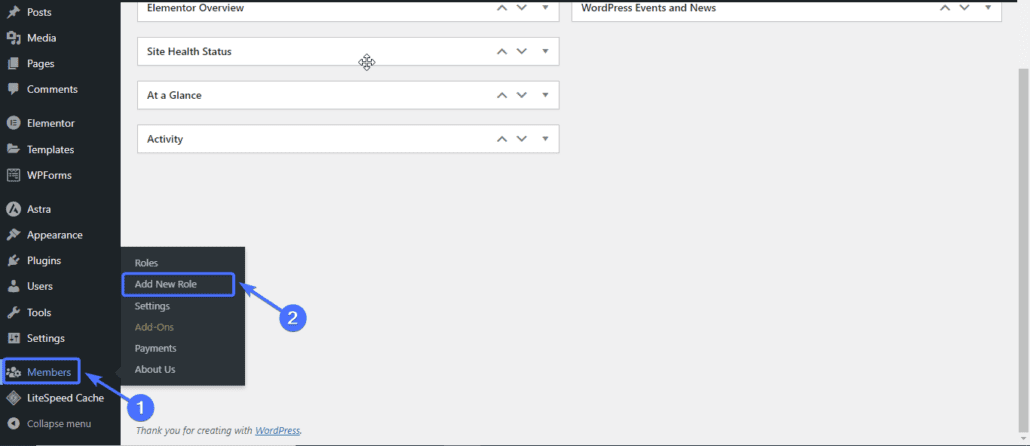
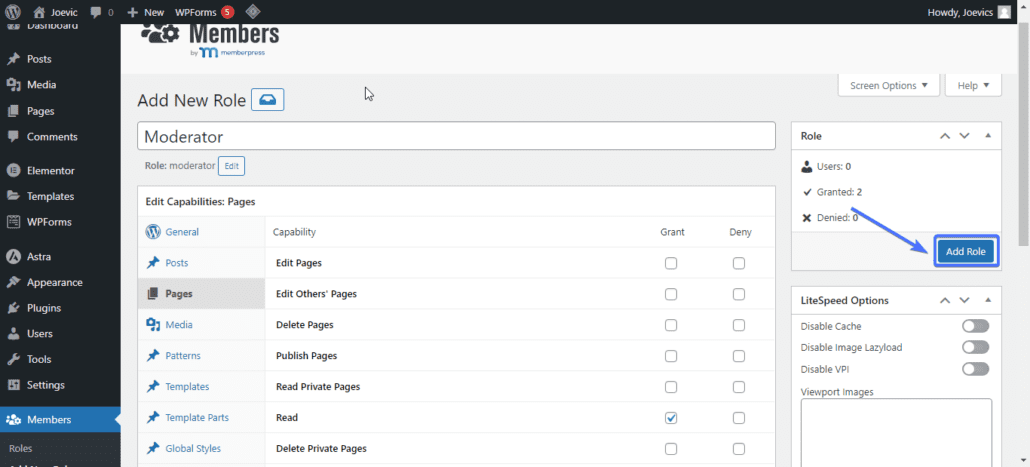
Let’s say you run a membership site and want to create a new role called Moderator. To do that, you’ll first have to enter the name for the user role: in this case; Moderator.

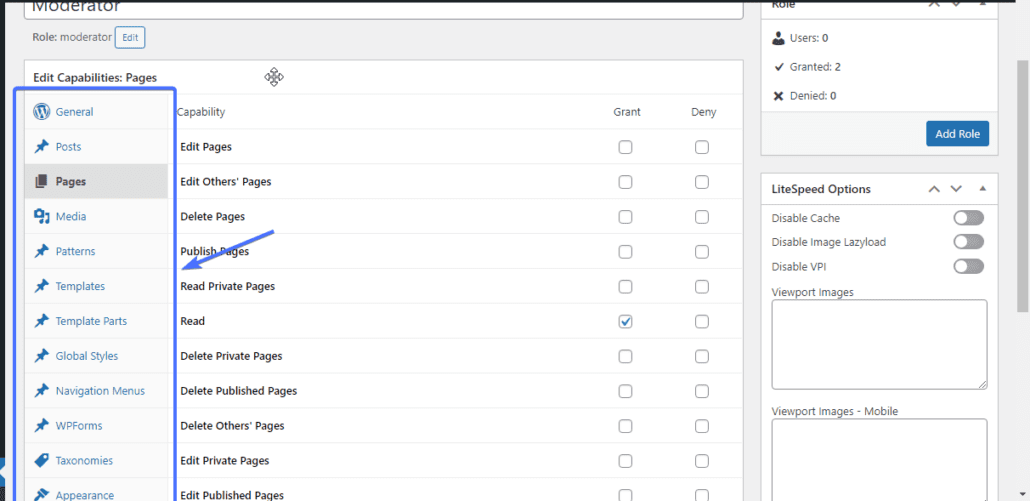
Next, you have to select the capabilities and permissions you want to allow for this user role.
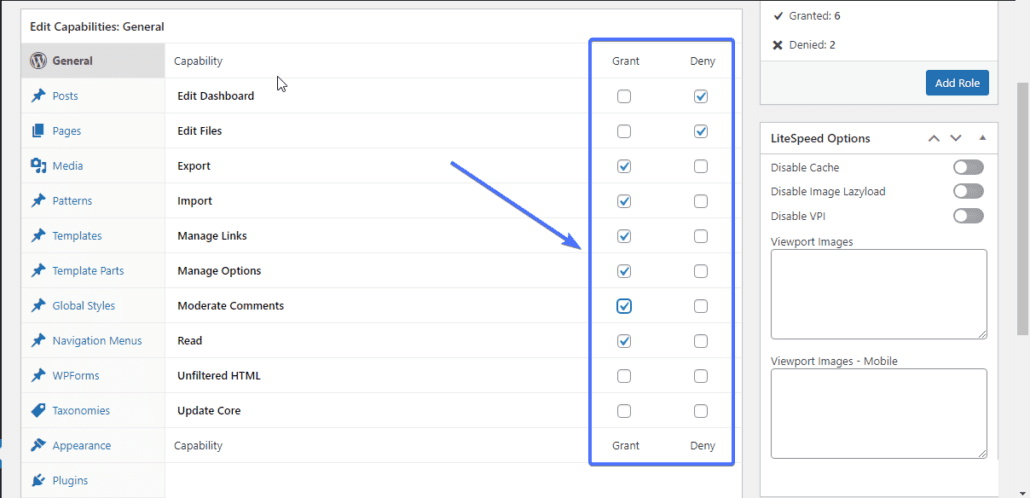
Click on the various sections to find more capability options.
Once you’ve selected all the capabilities you want for the role, scroll up and click on Add Role.
To confirm that the new role has been added, you go to Settings >> General then scroll down to the New User Default Section. You can now find the moderator role in the list.

How to Edit User Role Using Members Plugin
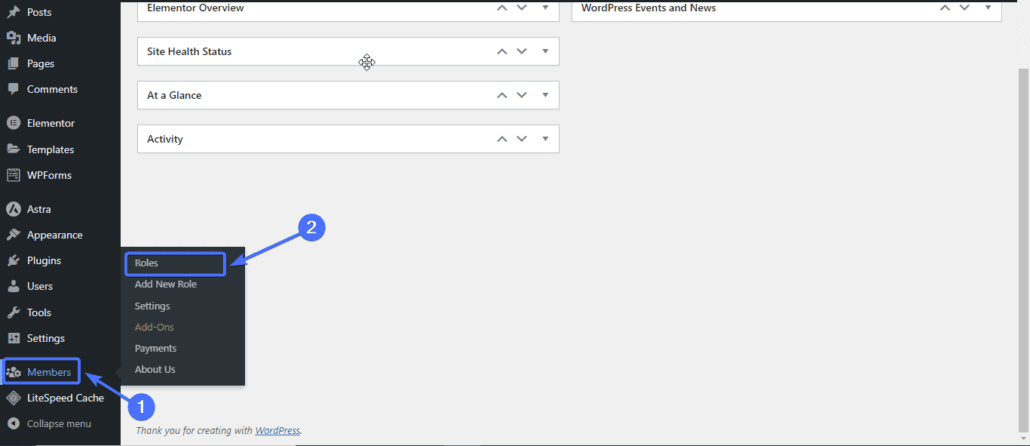
To edit a user role using Members, go to Members >> Roles.
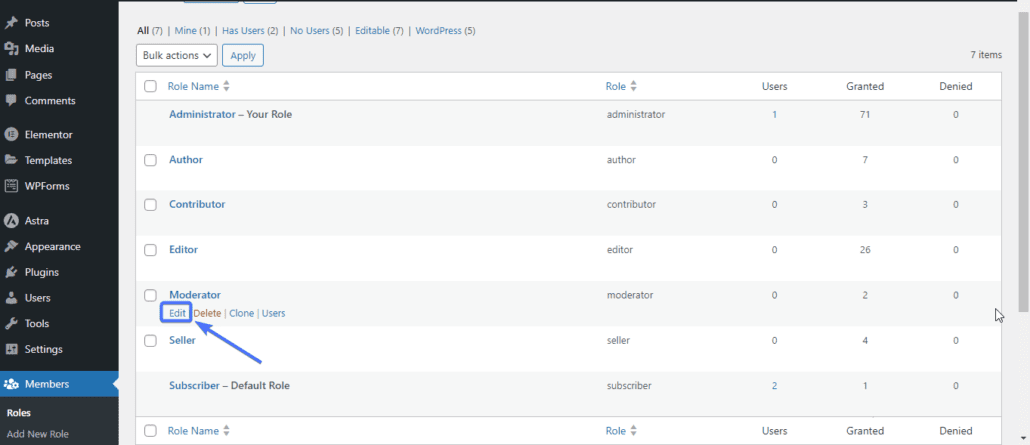
Now, hover around the role you want to edit. Let’s say you want to edit the moderator role and remove some of its capabilities.
Hover around it and click on Edit.
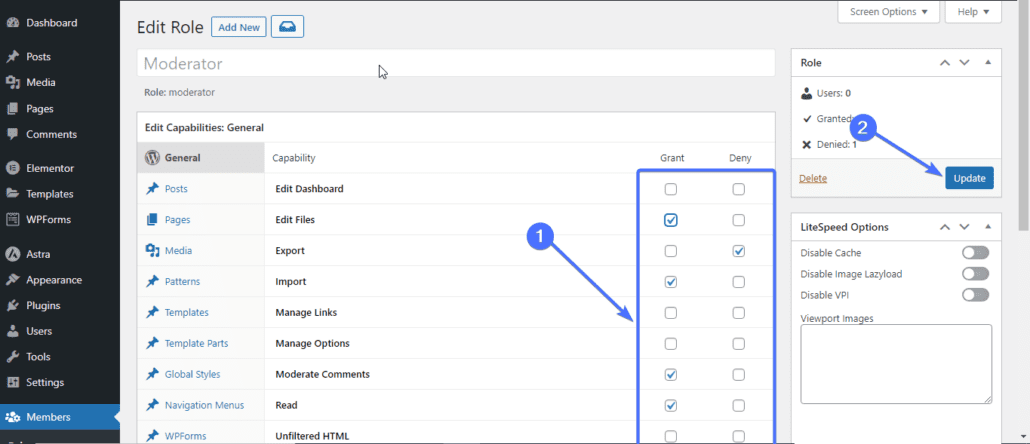
On the edit page, add or deny the capabilities you want and click Update to save the changes.
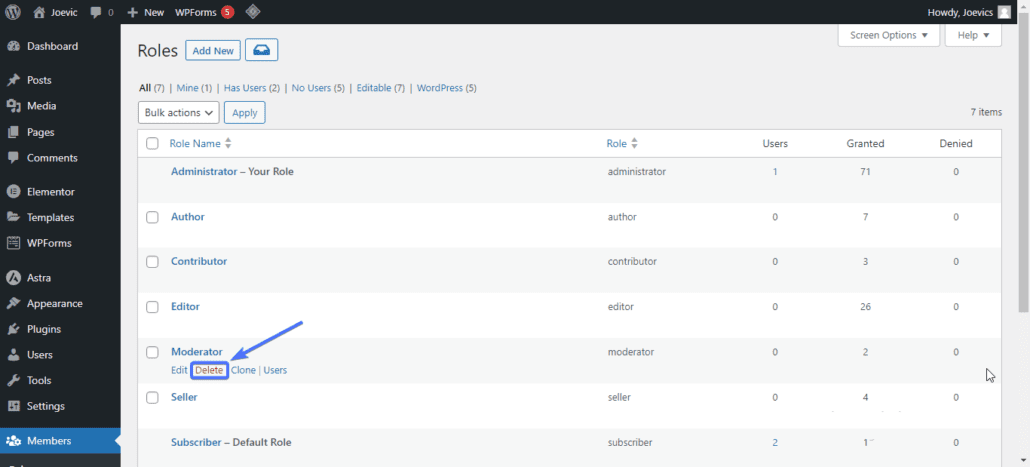
How to Delete User Role Using Members Plugin
To delete a user role using the Members plugin, go to Members >> Roles.

Locate the role you want to delete, hover around it and click Delete. For instance, if you want to delete the Moderator role, just hover around it and click Delete.
PublishPress Capabilities – User Role Editor, Access Permissions, Admin Menus
PublishPress Capabilities is a top WordPress access control plugin that allows you to manage the access and permissions on your site.
The free and easy-to-use plugin allows you to manage users and access controls. The plugin allows you to do the following:
- Create, edit, and clone user roles.
- The editor feature allows you to configure what users see when writing posts using the editor.
- You can hide items from the user profile screen.
- You can restrict user access to navigation menus based on their roles, registration status, and more.
How to Use PublishPress Capabilities Plugin
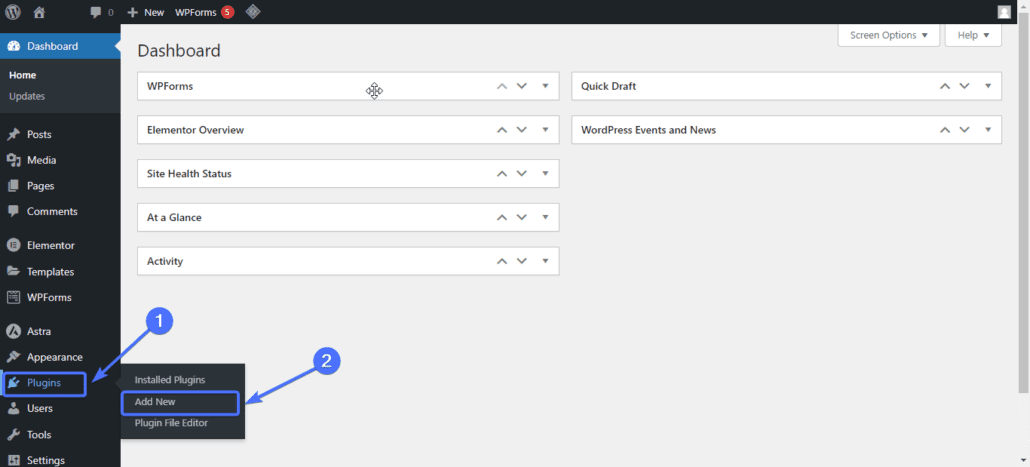
First, you have to install the plugin to use it. To do that, go to Plugin >> Add New from your WordPress admin dashboard.
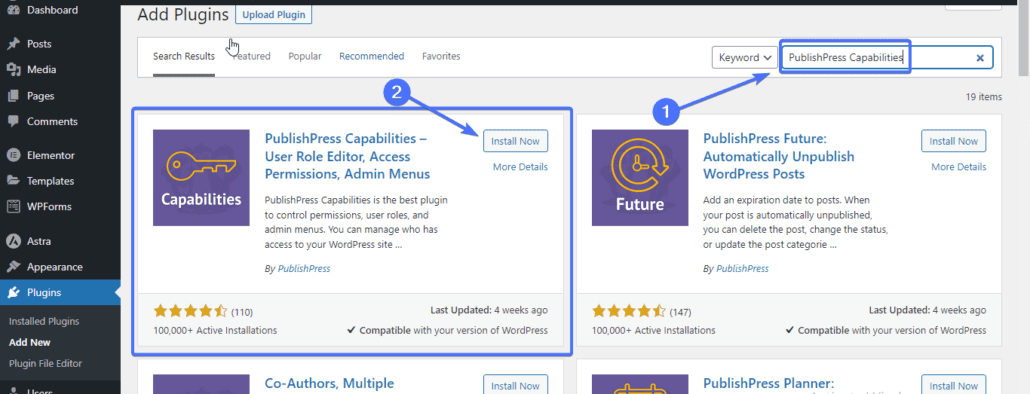
After that, type ‘PublishPress Capabilities’ into the search box. The plugin should now appear on the search result.
Click Install Now, then Activate to enable the plugin on your website.
Once activated, the plugin will appear as Capabilities on your WordPress dashboard.
How to Add New User Roles Using PublishPress Capabilities Plugin
To add a new role using PublishPress, go to Capabilities >> Roles.
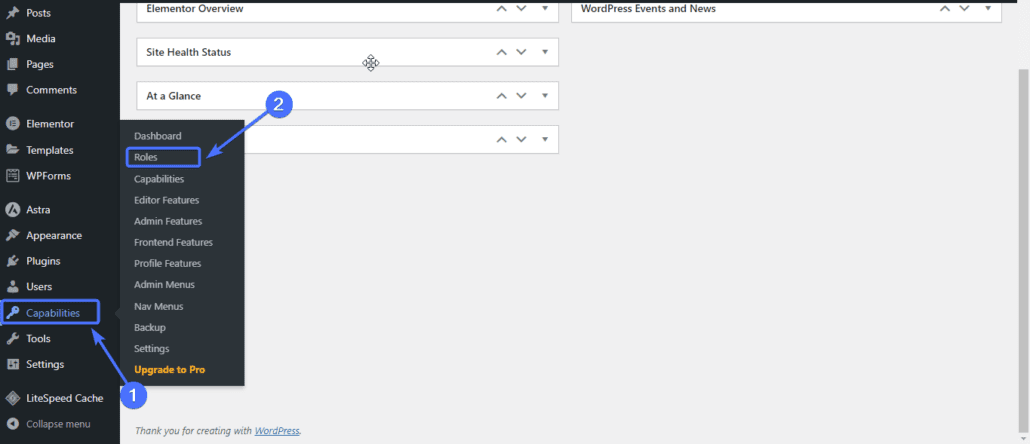
Next, click on the Add New button located at the top left corner of the page.
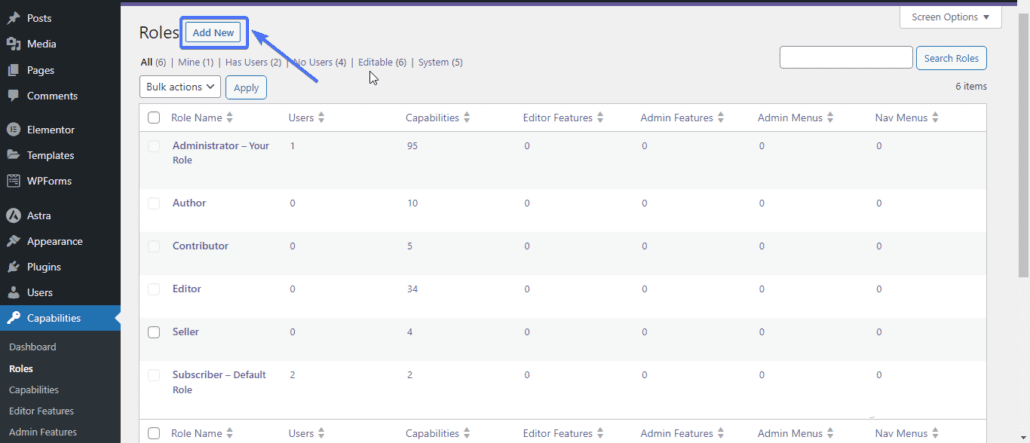
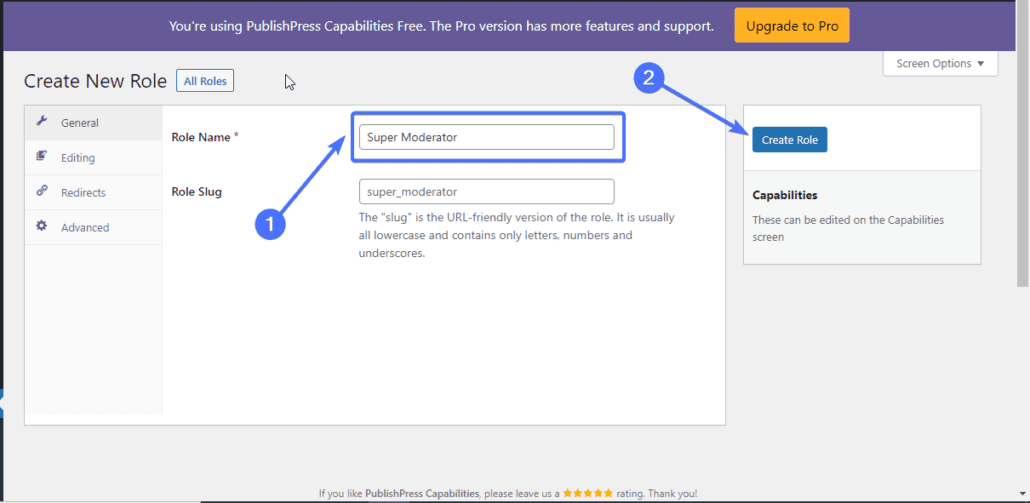
You’ll be required to enter a name for the new role.
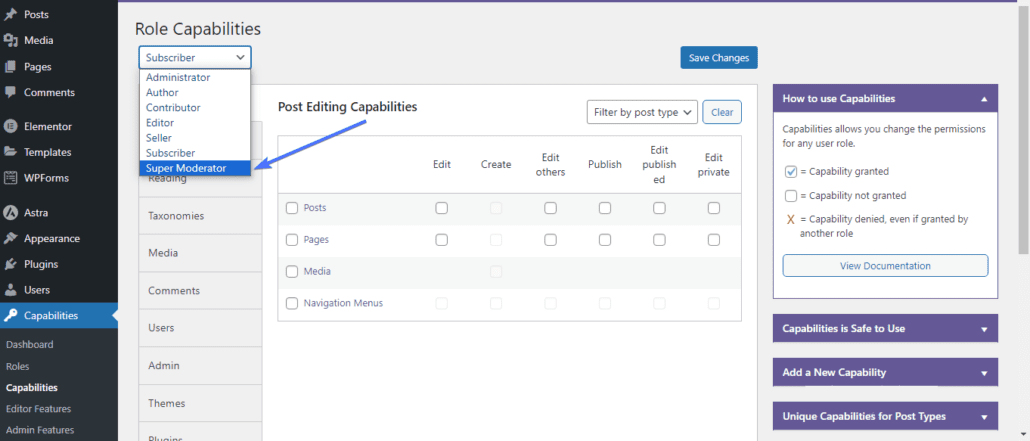
For instance, if you want to create a super moderator role, you’ll enter Super Moderator as the name.
Next, click on Create Role.
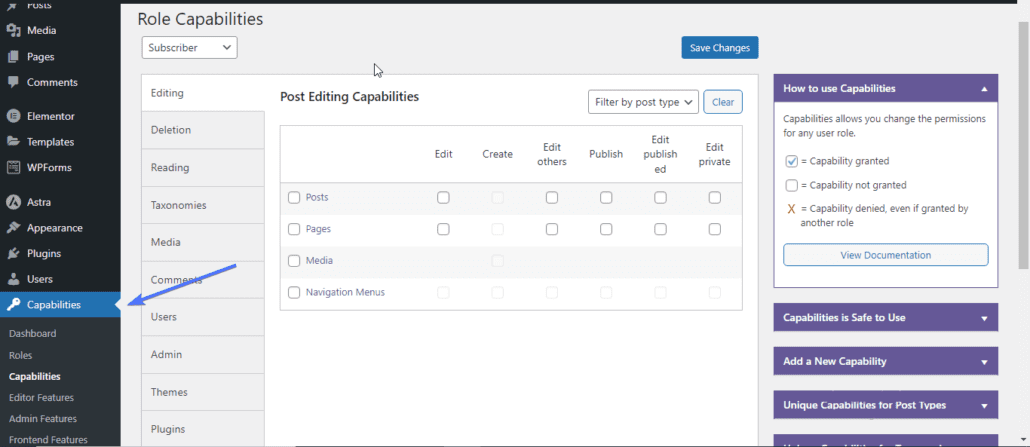
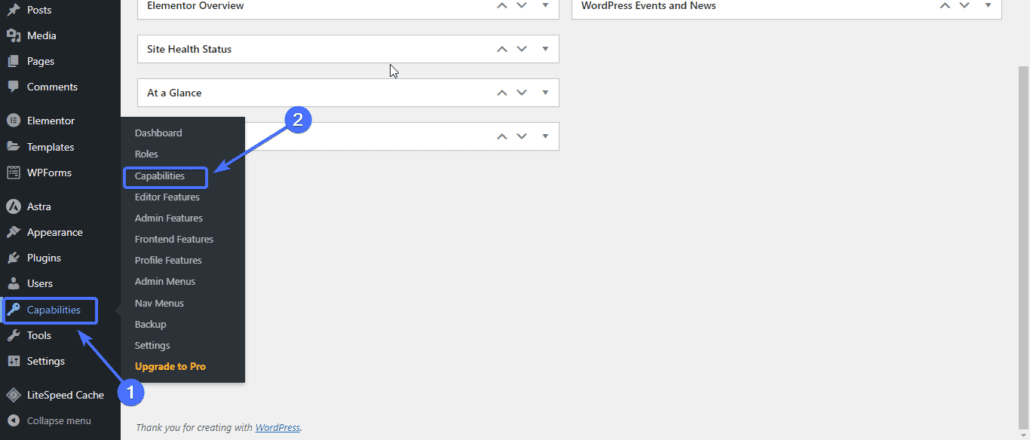
Now, you’ll have to go to the Capabilities section to configure the capabilities for this new role.
To do that, go to Capabilities >> Capabilities.
Next, select the new Super Moderator role from the drop-down list.
Now, grant all the capabilities you want for the role.
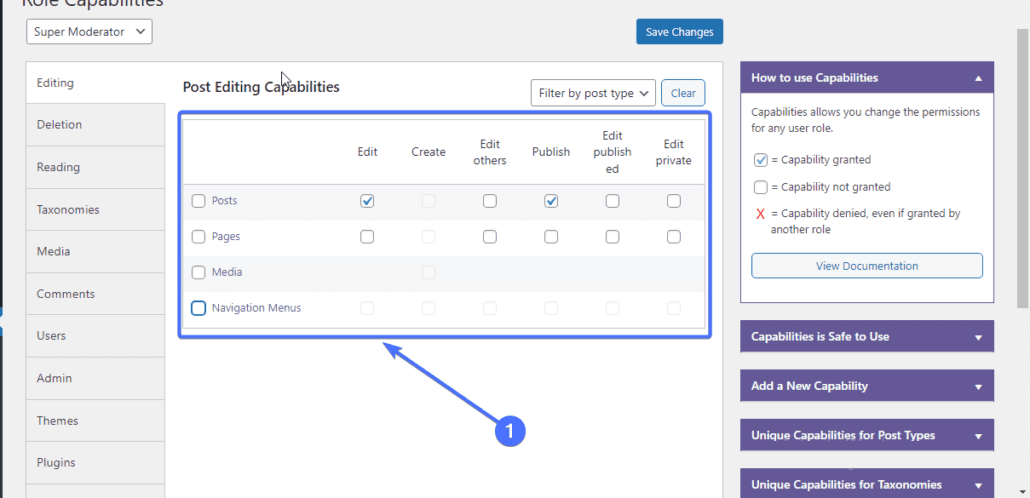
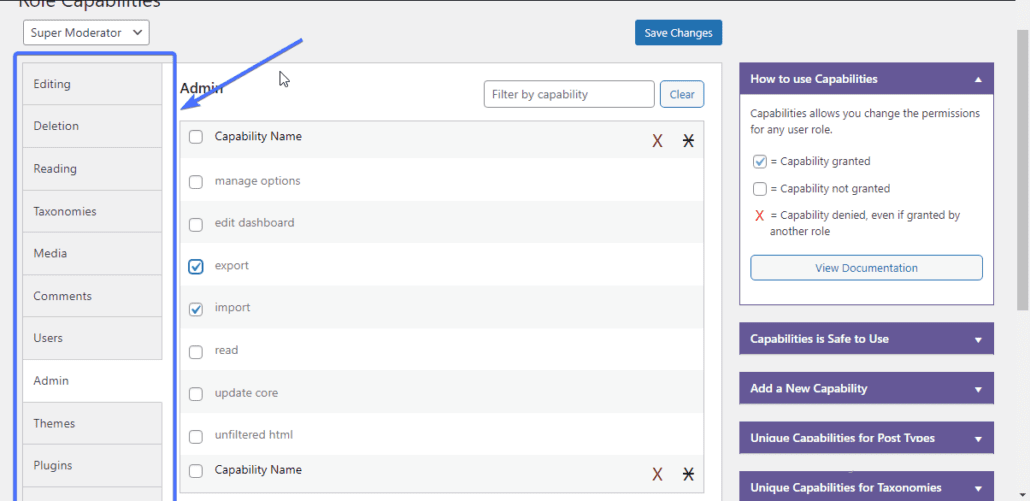
Click through the various sections and select all the permissions you want to allow.
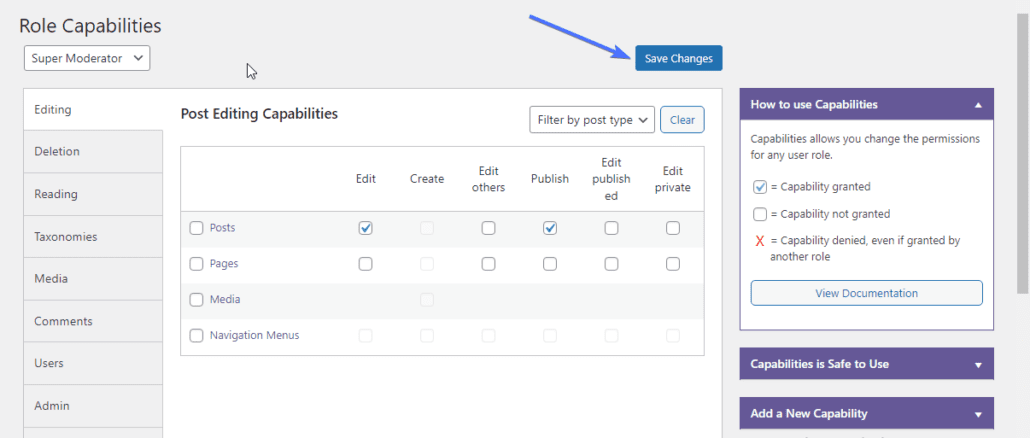
Once you’ve granted the capabilities you want for the role, click Save Changes.
And that’s it. You’ve created a new user role with unique capabilities.
How to Restrict User Navigation Using PublishPress Capabilities Plugin
There are several reasons why you may want to restrict user navigation to various aspects of your site. For instance, if you run a paid site, you may want only premium users to access specific pages and features on the site.
The PublishPress Capabilities Plugin allows you to do this easily.
To restrict user navigation using the plugin, go to Capabilities >> Nav Menus.
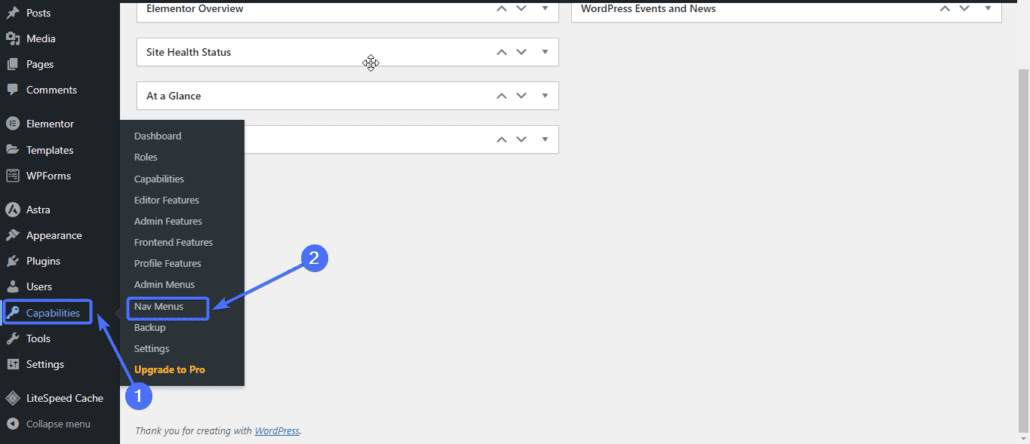
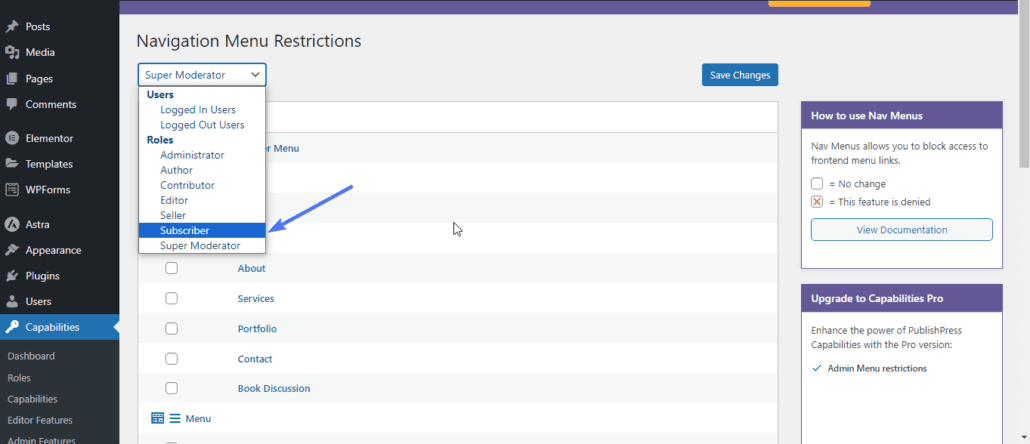
Once on the Navigation Menu Restriction screen, choose the user role you want to restrict.
For example, let’s say you want to restrict the Subscriber role in WordPress from accessing the Blog, Services and Book Discussion menus.
Choose Subscriber from the drop-down list.
Then tick on all the menus/pages you want to restrict subscribers from accessing.
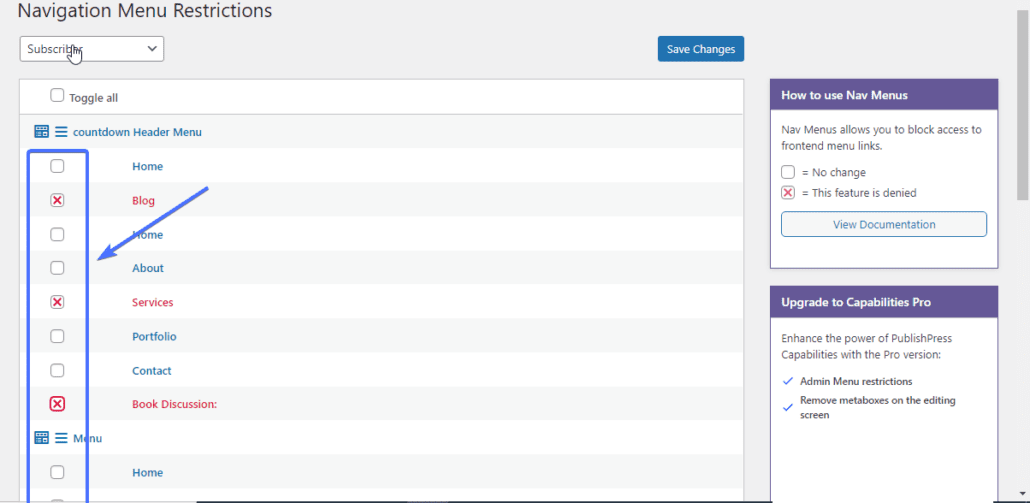
Then click on Save Changes to apply the restrictions.
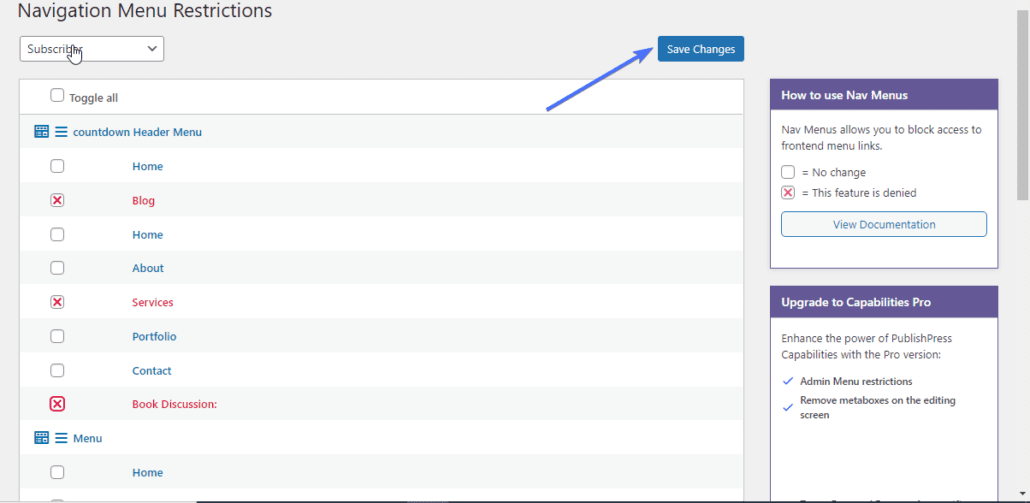
Once you do this, any user who is a subscriber will not be able to access these pages.
WPFront User Role Editor Plugin – WordPress Access Control
The WPFront User Role Editor Plugin is a top plugin that makes it easy to manage WordPress access control. This WordPress access manager is free and provides numerous functionalities, including the following:
- Create, edit, rename, or delete existing user roles.
- Add more capabilities to specific user roles
- Hide navigation menus and widgets
- Limiting access to the media library
- Restore roles to default, etc.
How to Use WPFront User Role Editor Plugin
Just like with the other plugins, the first step to using the WPFront User Role Editor Plugin is to install it on your site.
To do that, go to Plugins >> Add New from your WordPress dashboard. After that, type ‘WPFront User Role Editor’ into the search box. The plugin should appear on the search result.
Next, click Install Now to install the plugin. After that, click on Activate to enable the plugin.
Once you activate it, the plugin will appear as Roles on your WordPress dashboard.

How to Add a New Role Using the WPFront User Role Editor
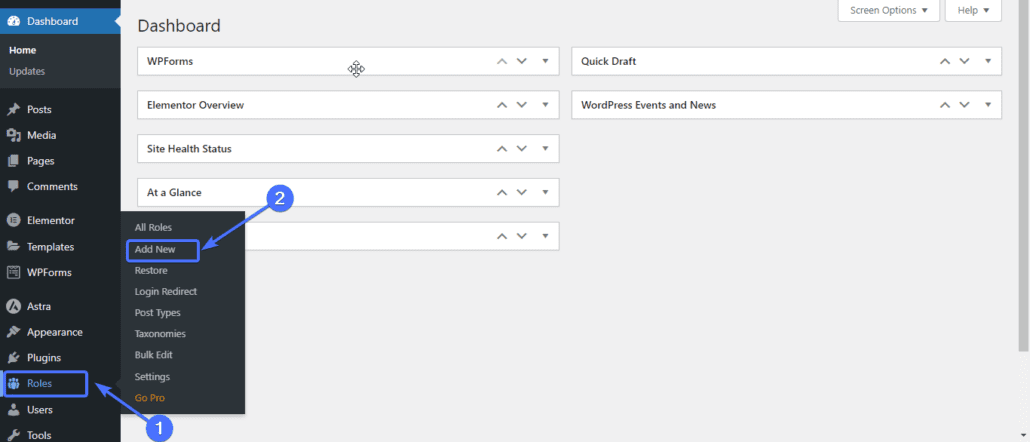
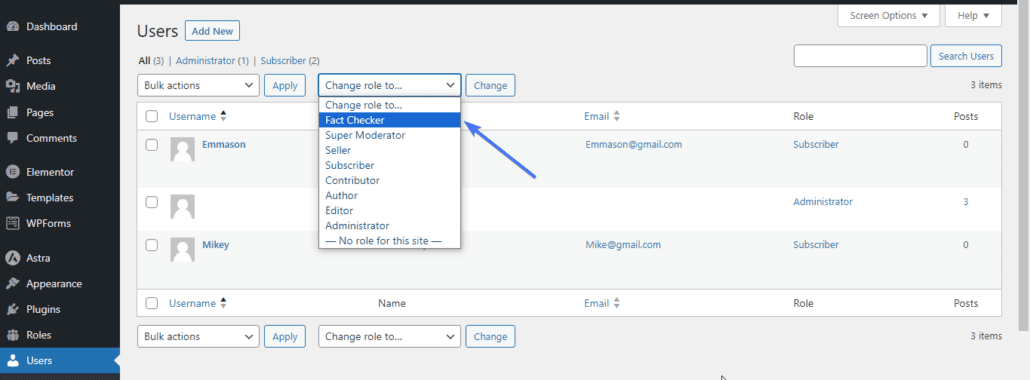
To add a new role using the WPFront plugin, go to Roles >> Add New.
You’ll be required to enter a display name.
For instance, if you want to create a new user role called Fact Checker *you can use that as the display name*.
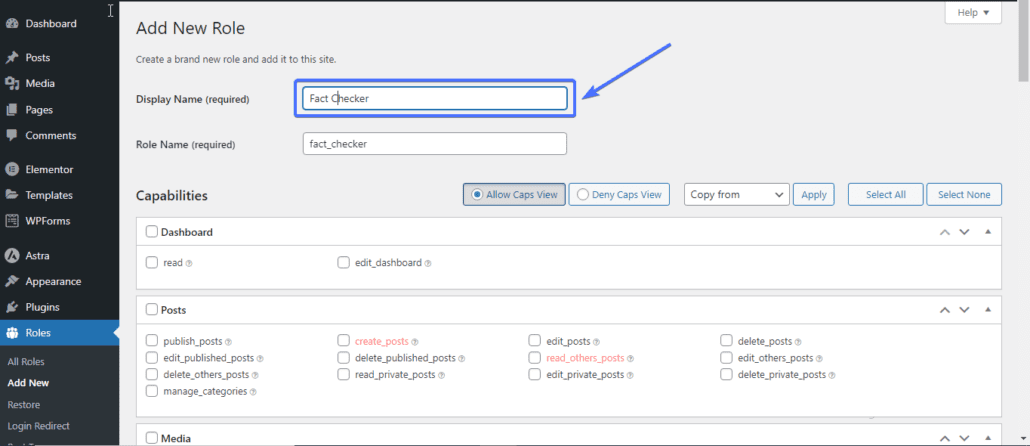
The next step is to select the capabilities you want to assign to the Fact Checker Role.
Select all the capabilities that you want to allow.

Once you’ve selected the capabilities, scroll down and click Add New Role.
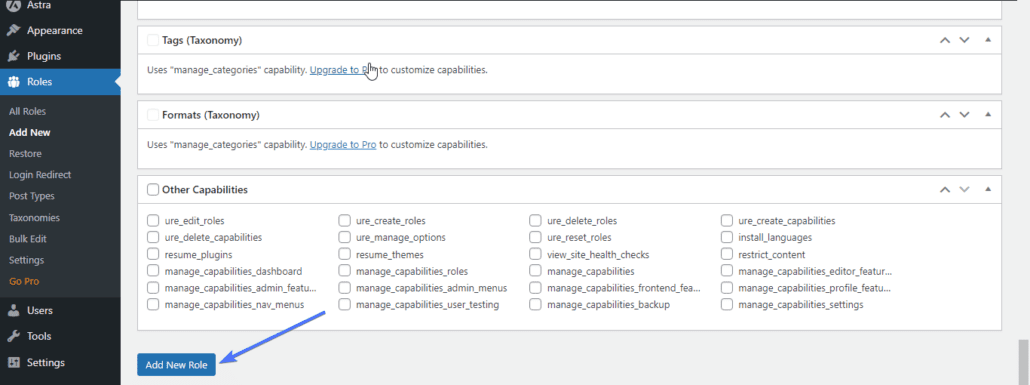
As you can see below, the Fact Checker role has been added.
How to Edit User Role Using the WPFront User Role Editor
WPFront also allows you to edit the capabilities of existing user roles, including the default WordPress user roles. This way, you can grant them more access or limit their capabilities.
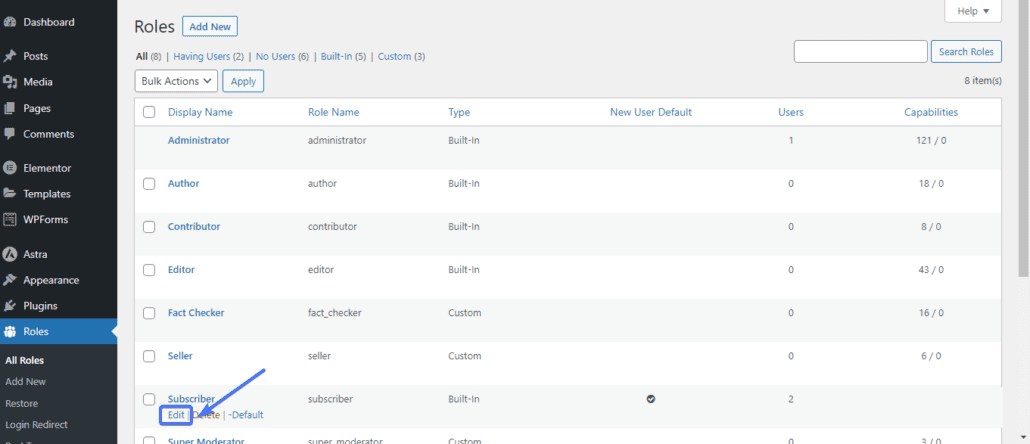
So to edit a user role using WPFront, go to Roles >> All Roles.

Now, locate the user role you want to edit.
For instance, if you want to give the subscriber role advanced access, hover around Subscriber and click Edit.
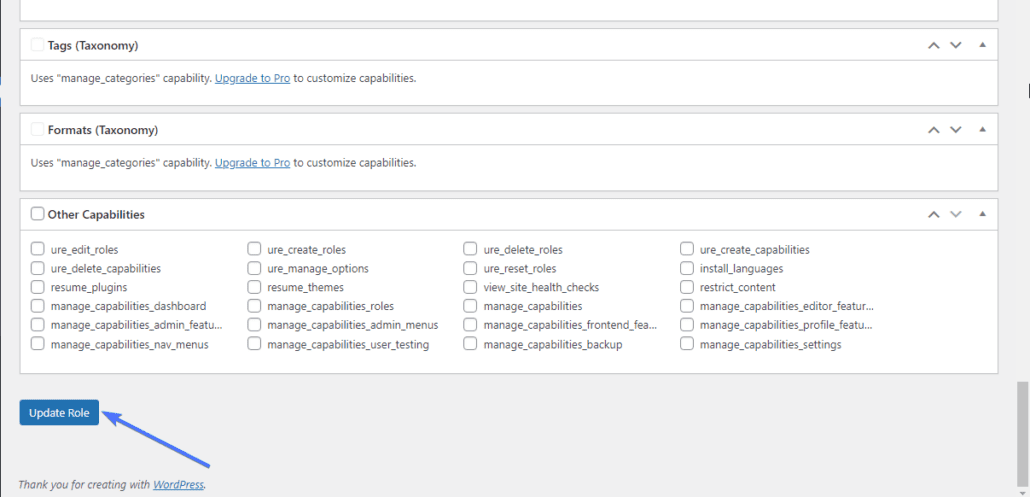
Once you are on the edit screen, you can assign any new capabilities or restrict specific capabilities for the role.
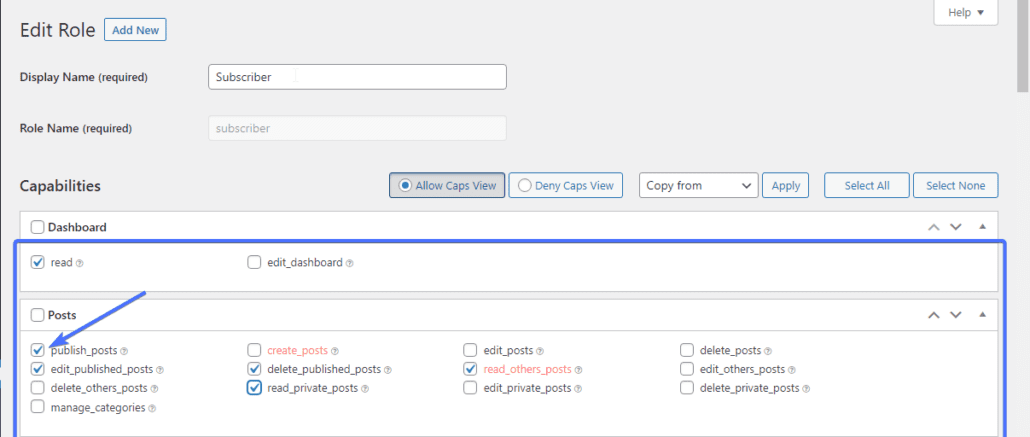
Select all the capabilities you want to add or remove, then scroll down and click Update Role to save your edit.
User Roles and Capabilities Plugin
The User Role and Capabilities plugin is a free WordPress access control plugin that allows you to control user access to your site and its content.
This WordPress advanced access manager can allow you to do the following:
- Create WordPress custom user roles
- Edit and manage existing roles
- Clone existing roles
- Change the default user role
- Manage user capabilities and more.
How to Use User Roles and Capabilities Plugin
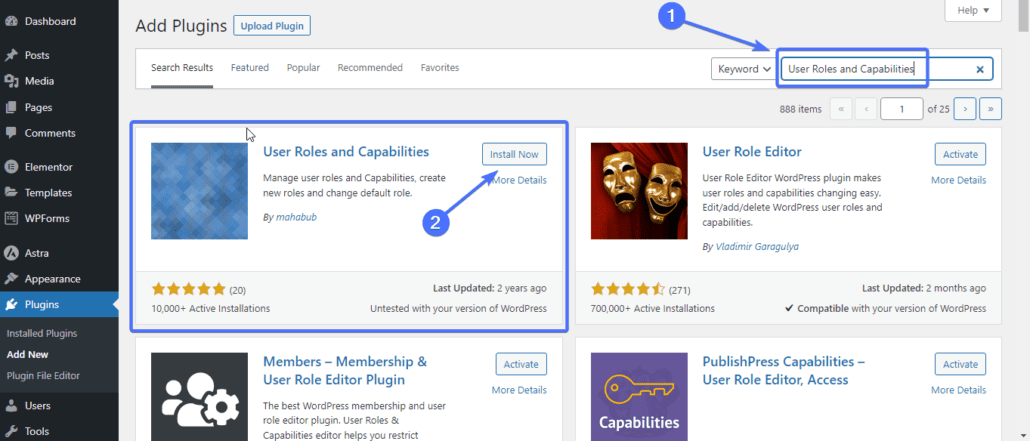
To install the User Roles and Capabilities Plugin, go to Plugins >> Add New.

Next, type ‘User Roles and Capabilities’ into the search box.
Click Install Now, then Activate.
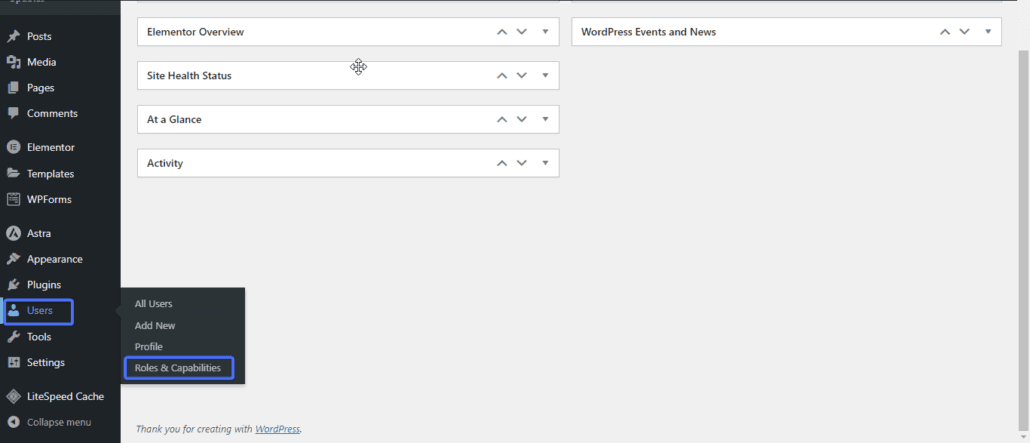
Once you activate the plugin, it will appear under the Users Menu as Roles & Capabilities.
How to Add a Custom User Role Using User Role and Capabilities Plugin
To add a new role using this plugin, go to Users >> Roles & Capabilities.

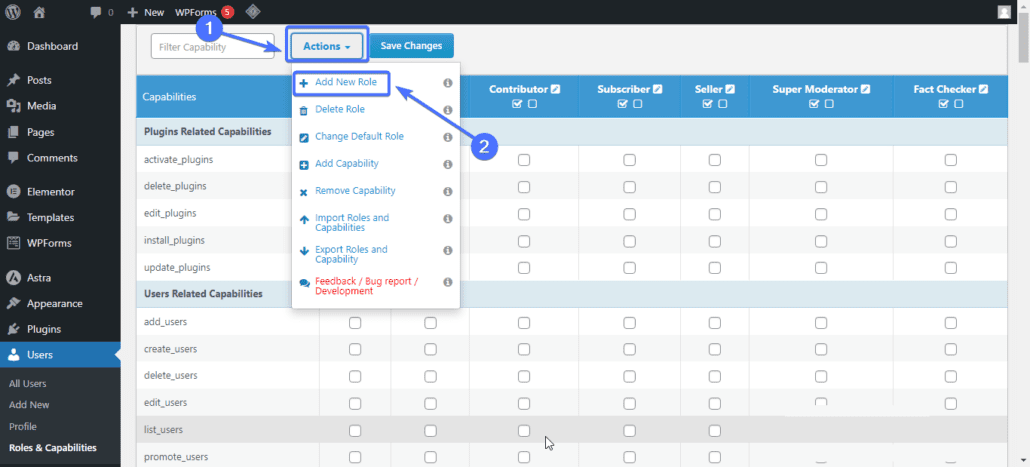
Click on Action and select +Add New Role.
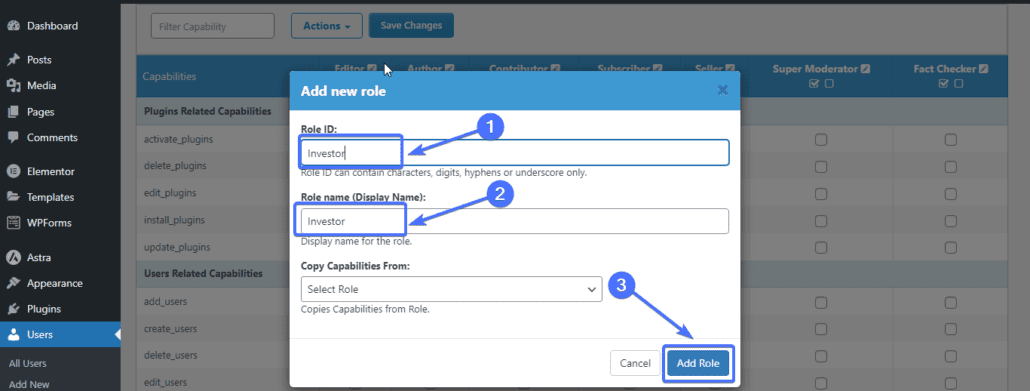
You’ll be required to enter a role ID and role display name. You can also copy the capabilities of any of the existing roles for this one.
For example, let’s say you want to create a new role for an investor. In that case, the role ID and role display name will be Investor.
Type in the name and click Add Role.
Once you add the new role, you’ll be redirected to the plugin’s Roles dashboard, where you can find all the roles on the site.
Search for the new role you created (it will typically be the last item on the right).
Now, you need to assign capabilities for this role.
So look through the various capabilities and select any one you want to assign to the investor.

Once you’ve selected all the capabilities you want for the new role, click on Save Changes.

And that’s it. You’ve successfully created a custom user role for your site.
Frequently Asked Questions
How do I control user access in WordPress?
As the administrator of a WordPress site, you can control who accesses your site using user roles. Each role has different levels of access.
You can assign a role with a higher or lower level of access to anyone you want. You can also create new roles with the exact level of access needed for specific users.
How do I restrict admin access in WordPress?
WordPress admin access control is only available to administrators, although the editor also has some form of administrative access to manage posts. To restrict admin access, only assign these roles to people you trust.
You can also create a custom administrator role with limited capabilities for any other admin on your site using WordPress user role plugins.
How do I restrict content in WordPress?
There are several ways to limit access to content on WordPress. They include using passwords on the content, using user roles to limit access, using content restriction plugins, and using code.
To use a password, go to Posts >> All Posts. Hover around the post you want to restrict and click Quick Edit. Next, enter a password for it and click Update.
Conclusion – WordPress Access Control
While there’s no one-size-fits-all access control configuration, the plugins listed in this post can help you control access to your website as you like.
We took the time to introduce some of the features so that you could get hands-on experience with how each WordPress Access Control plugin works. Consider trying out various plugins until you get what you want.