How to Remove Render-Blocking Javascript and CSS in WordPress
If you’ve ever tested the performance of your website on Google PageSpeed Insights, chances are you are fairly familiar with Remove or Eliminate Render-Blocking Javascript and CSS. But if you are not, that’s totally fine. In this post, we will explore how to eliminate render-blocking resources in depth.
Website load speed is a huge influencing factor in SEO; the faster your website loads, the higher it is likely to rank on search pages. While it’s very important to use a good web host, one of the ways to make your website load faster is to eliminate Remove Render-Blocking resources such as Javascript and CSS.
Simply put, render-blocking Javascript and CSS are scripts and style-sheets a browser must fully load before a webpage becomes visible to a visitor. And you know web users and search engines aren’t particularly patient. So it is important to fix this issue.
In this post, you will learn how to fix render-blocking Javascript on WordPress. Even if you are just starting out with WordPress, you will find this tutorial pretty easy to follow.
In this article:
- What is render-blocking Javascript and CSS all about?
- Google PageSpeed Insights test
- Methods for Removing Render Blocking Javascript Resources
- Conclusion
What Are Render-Blocking Javascript and CSS All About?
When a visitor lands on your website, their browser will first have to load the supporting Javascript and CSS files before loading the HTML. Ordinarily, this is how it’s supposed to be – a webpage without a style-sheet or a script will look ugly and unusable
The problem, however, is that unless these files are fully loaded, the webpage won’t be rendered on the browser. Hence the name render-blocking Javascript.
While it’s important for a browser to load the styling and script of a webpage before rendering it, this extra delay can be avoided without harming the look of a webpage. What’s more, doing so will also minimize loading time.
The trick is to delay the loading of scripts and style-sheet that don’t affect the section of a webpage a visitor sees immediately upon landing.
In other words, preventing the browser from loading any file that doesn’t affect the upper section of a webpage which a user will see before scrolling down, will solve this problem. This section of a webpage is referred to as Above the Fold (ATF) content.
Before we dive deep into this article, it’s important we get you familiarized with Google PageSpeed Insight tool.
Google PageSpeed Insights Test
Before taking steps to eliminate Render-Blocking Javascript and CSS, it’s best to first run a test on it.
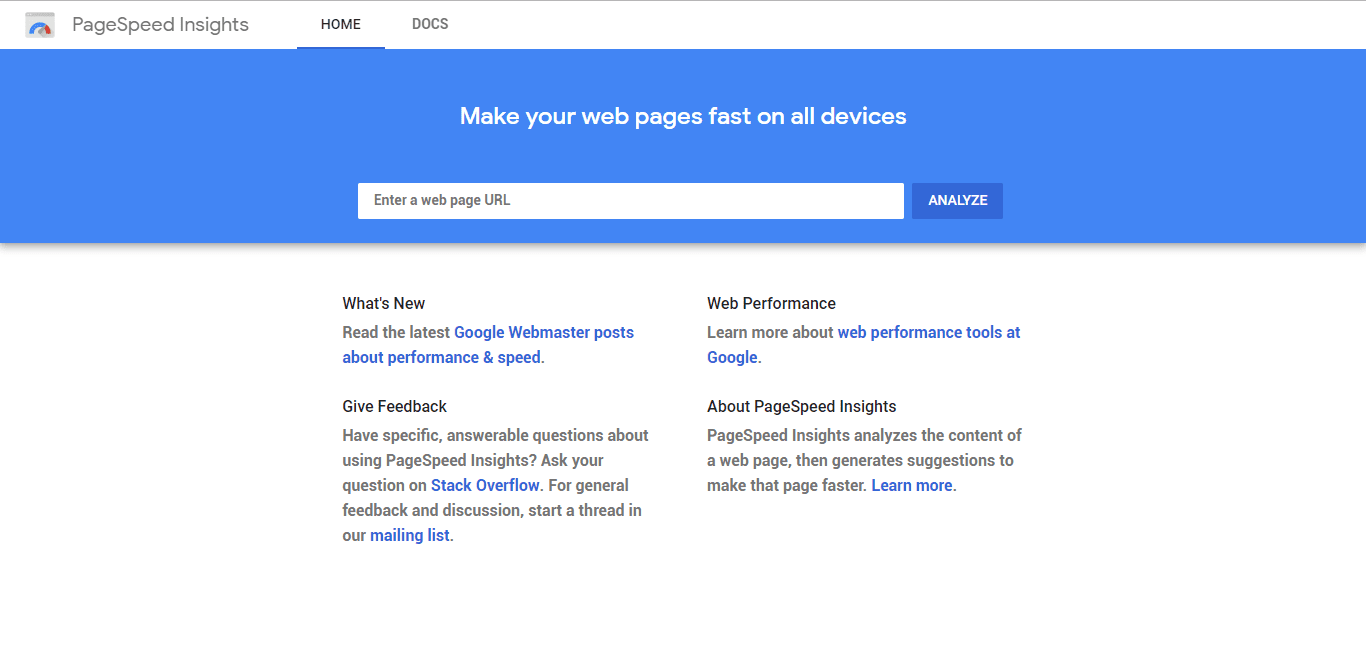
And there is no better tool for testing the performance of a website than Google PageSpeed Insights. So head over there and let’s run a couple of tests.
Type in the link to your website in the URL section. After that, click the ANALYZE button.
Once you are done running the test, your website performance score will be displayed on the screen.
Best performing sites are those with scores between the ranges of 90 -100. Tough call? Bet it is, but it’s achievable.
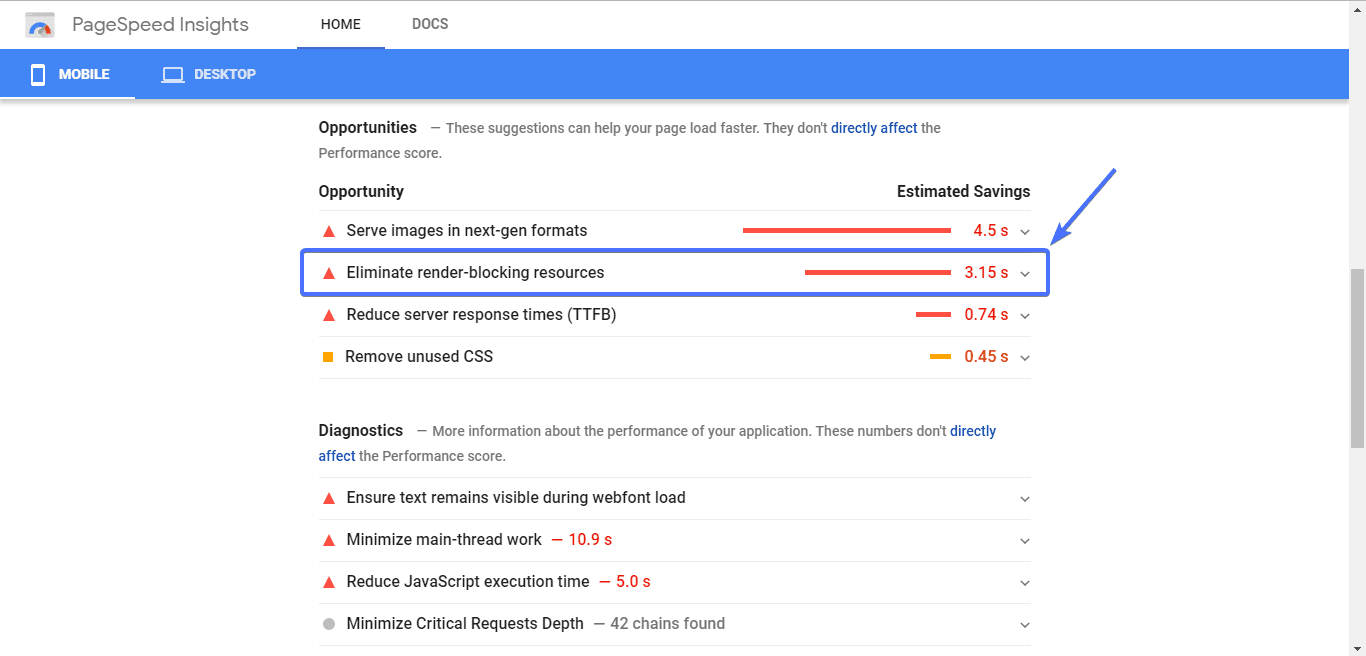
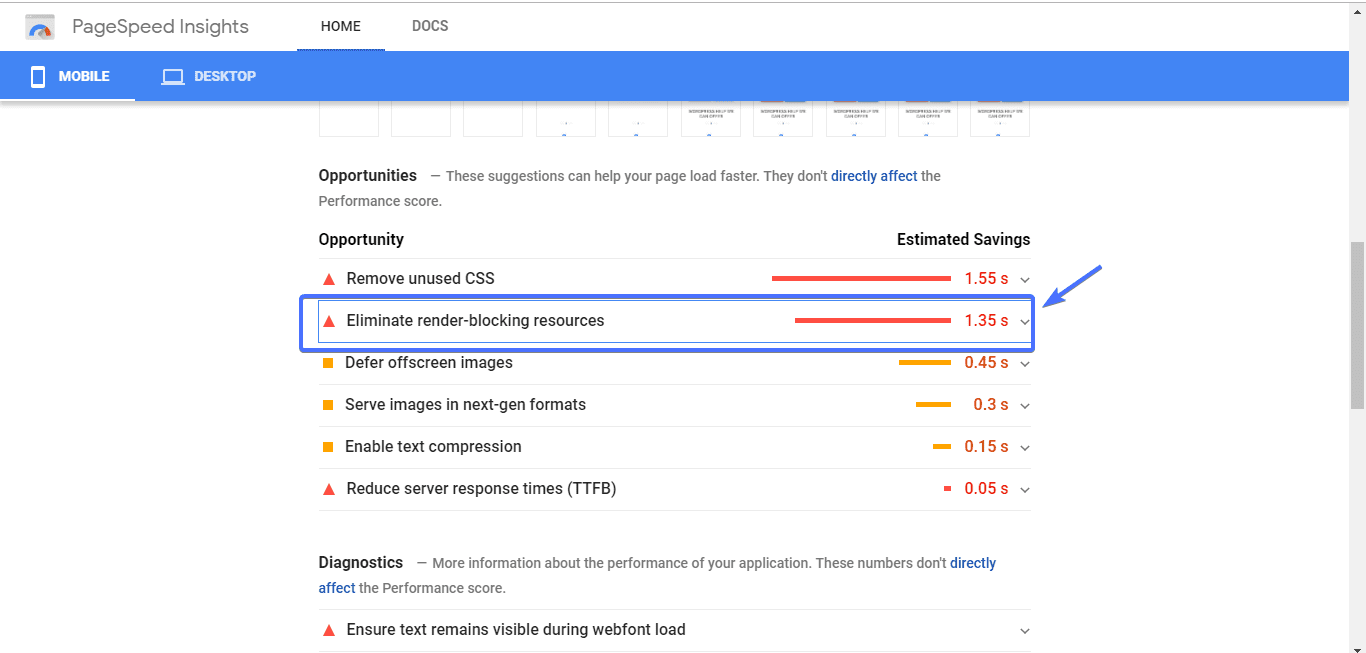
If your website performance comes up short, Google will throw in a couple of suggestions to make it perform better. Most likely, one of those suggestions will be to eliminate render-blocking resources.
Leave this tab open because we will be revisiting it later.
Methods for Remove Render-Blocking Javascript and CSS
Already guessing there are plugins that can fix this problem without you having to write a single line of code? Well, if you are, you are pretty correct.
A word of caution: As Google rightly warns in the test results, If you remove Render-Blocking Javascript and CSS could break your theme. It is wise to backup your WordPress site before you proceed.
You may also simply request our speed optimization service and we will take care of all identified issues in your site.
There are a couple of WordPress plugins that can handle render-blocking Javascript problems. However, we will be looking into two big names, namely: W3 Total Cache and Autoptimize.
W3 Total Cache
W3 Total Cache is a great performance improvement plugin for WordPress. Besides handling caching problems, it’s also a great tool for fixing loading problems caused by style sheets and scripts.
So the first thing you will want to do is to install and activate the plugin.
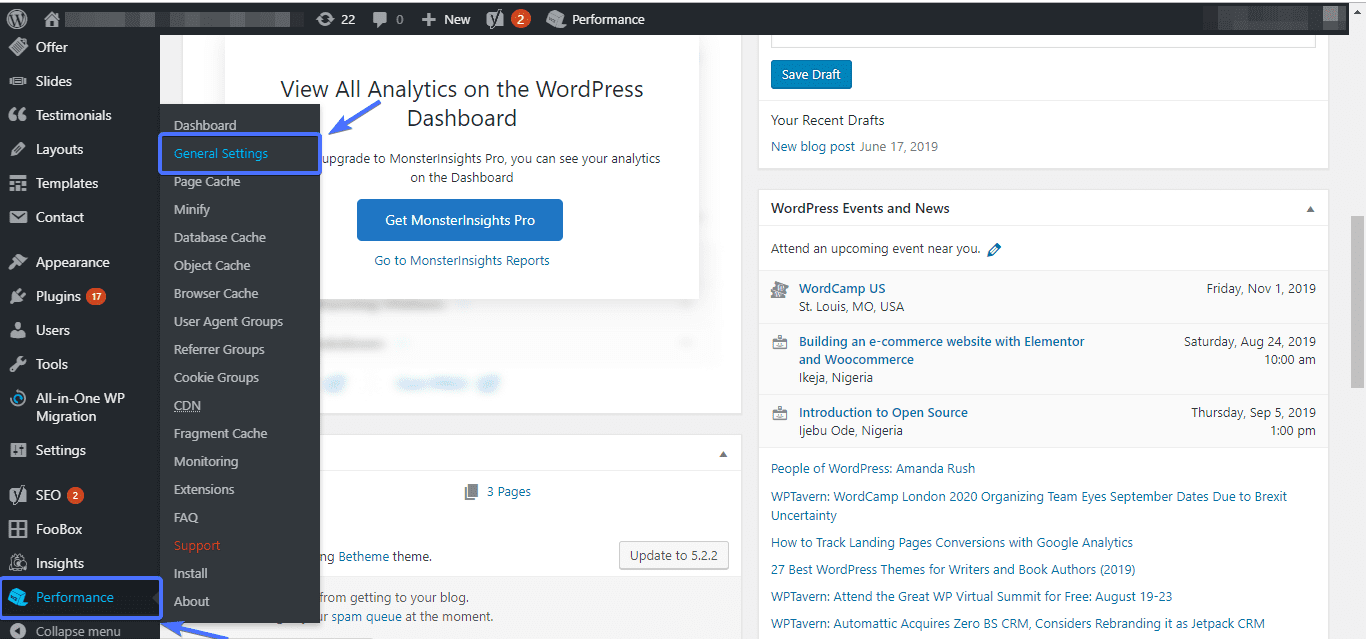
After installation and activation, navigate to Performance >> General Settings
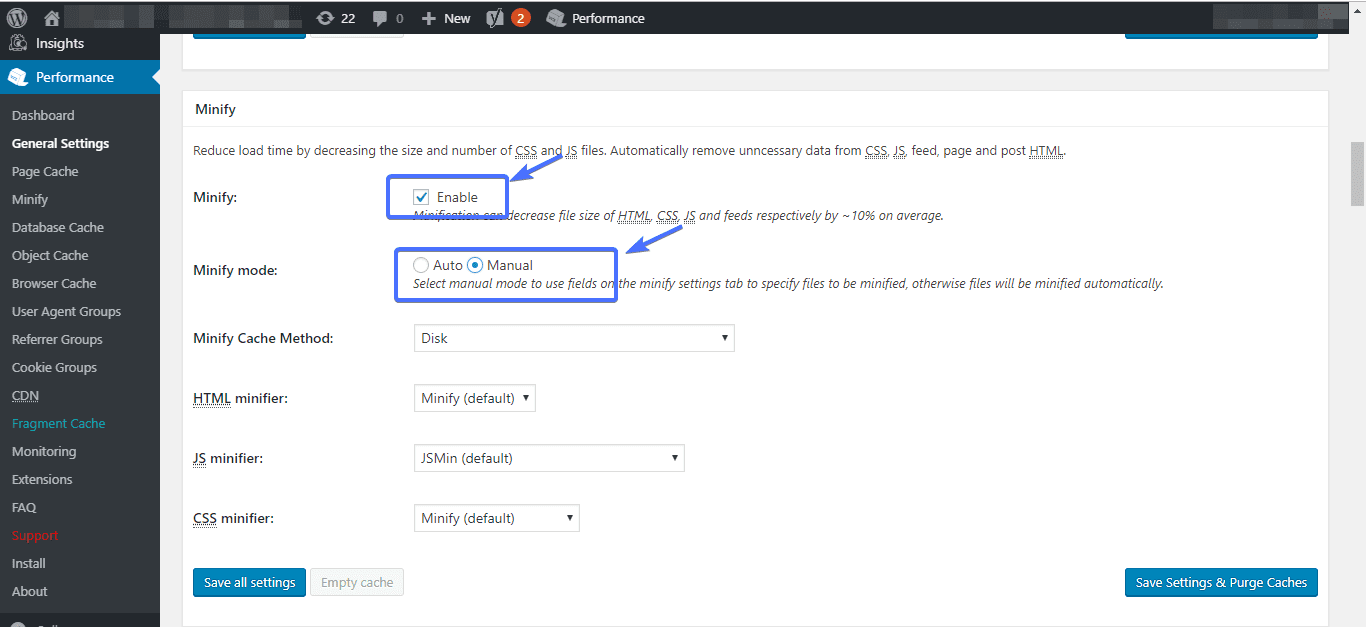
Next, scroll down to the Minify section. Here, enable Minify and then set the minify mode to manual.
Then click the Save all setting button.
With the minify option enabled, the next thing to do to remove Render-Blocking Javascript and CSS is to fetch links to the style-sheets and scripts delaying the full rendering of your webpages.
This is where Google PageSpeed Insights tool becomes handy once more. So head back to the tab you had earlier left open.
Once there, click the Eliminate render-blocking resources tab.
Links to scripts and CSS files that need to be minified will be displayed.
As you can see, the links to the files have been truncated. To get the full URL, hover over any link, right-click and copy link address.
We are going to be minifying JS files first, so copy any of the .js links.
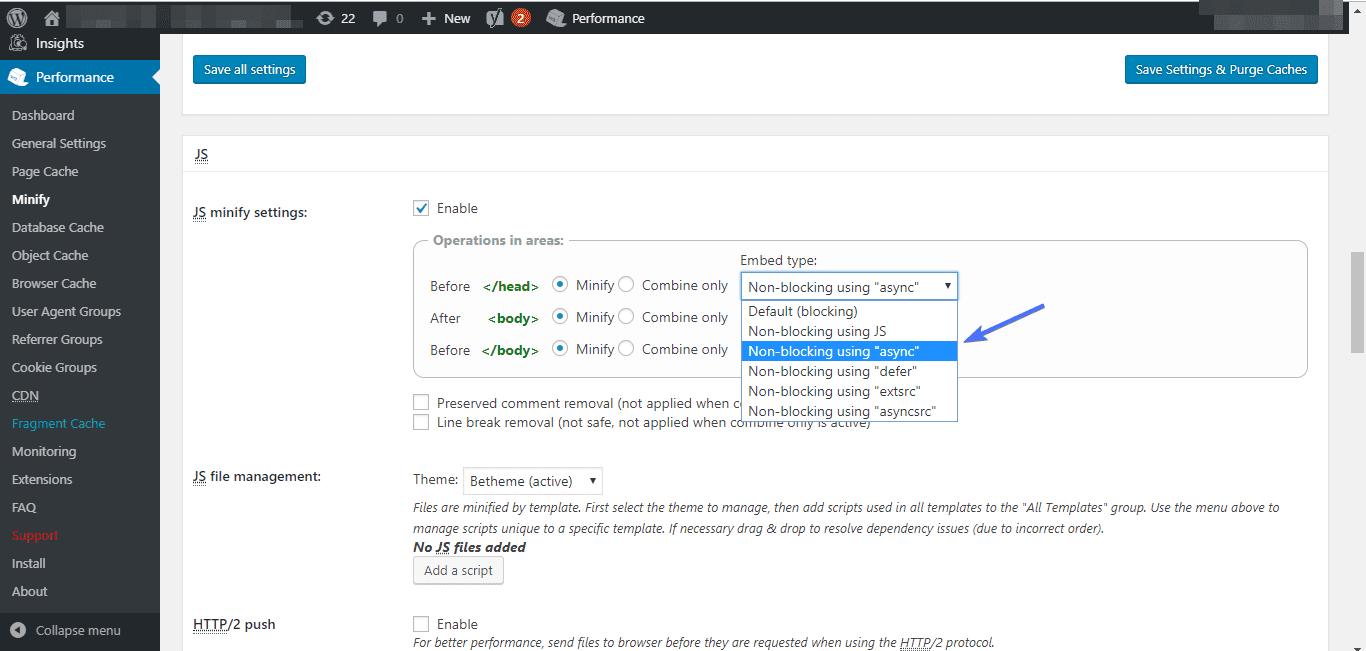
With the link copied, head over to your WordPress dashboard again. This time, navigate to Performance >> Minify
Scroll down until you locate JS section. In the JS minify settings section, you will see </head> tag area. Set Embed type to Non-blocking using “async”.
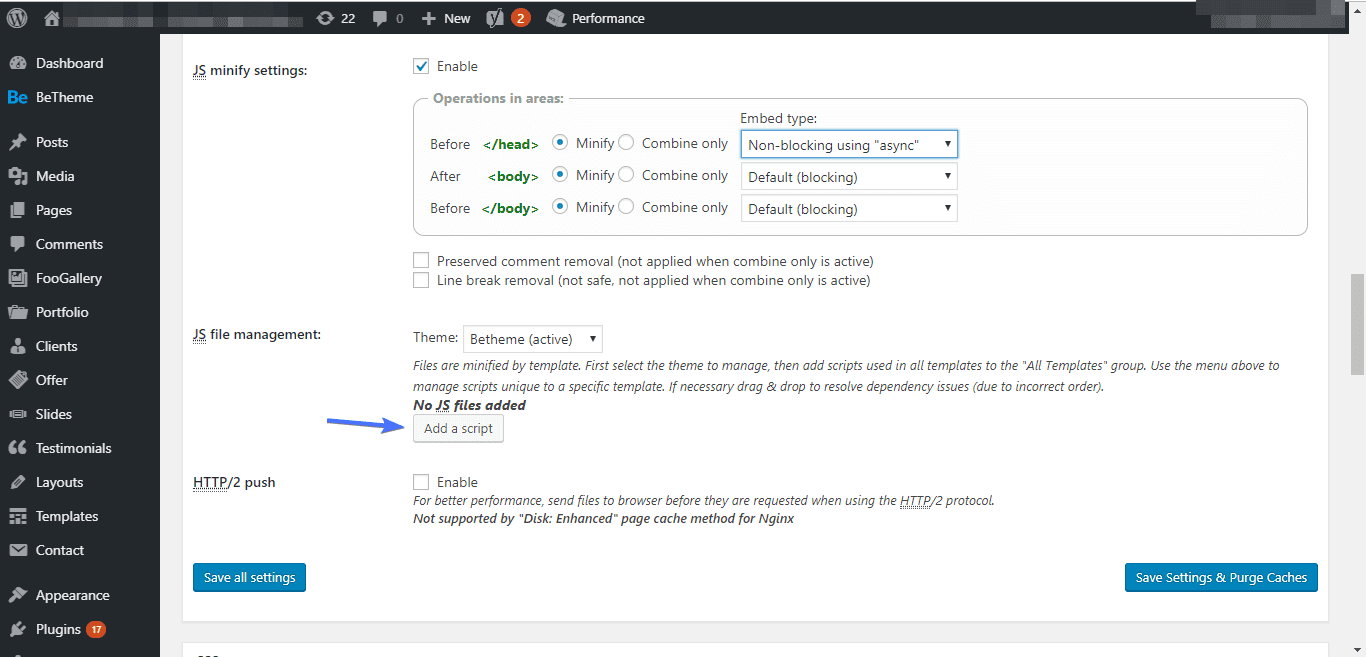
Next, turn your attention to JS file management subsection. Click the Add a script button.
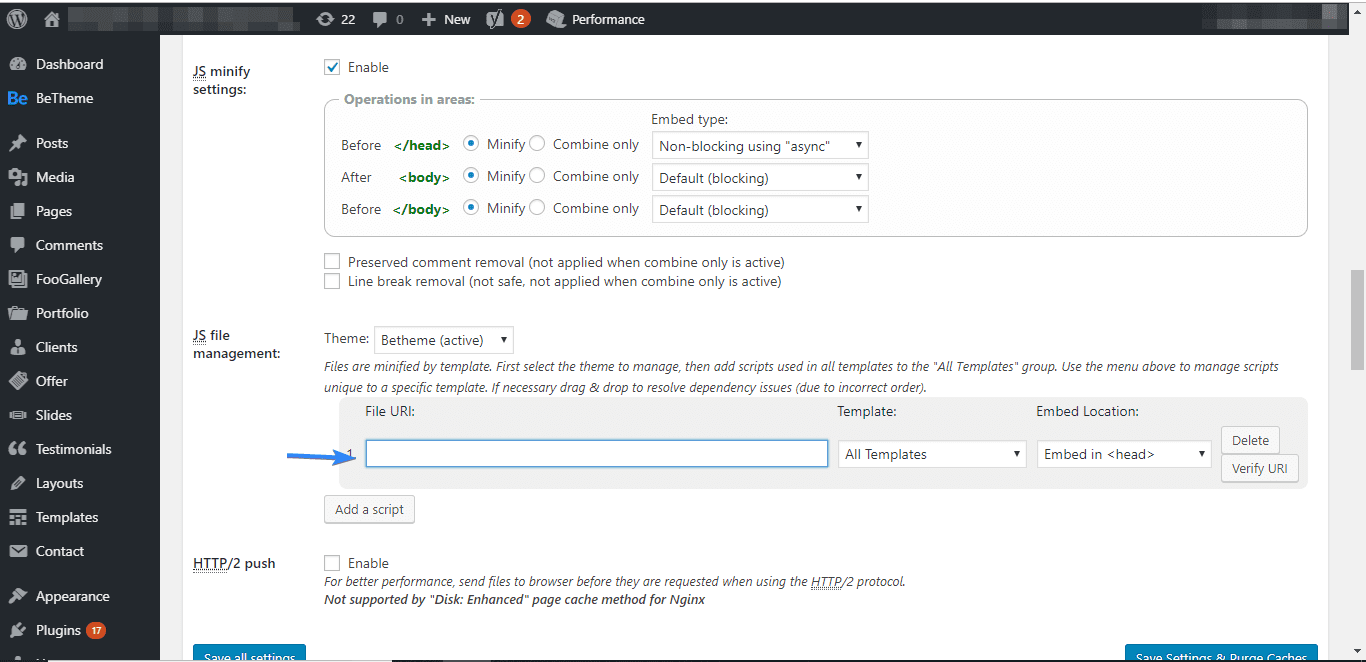
Paste the link to the JS resources you had earlier copied in the provided field.
Repeat the process all over until you’ve pasted all URL to your Javascript resources.
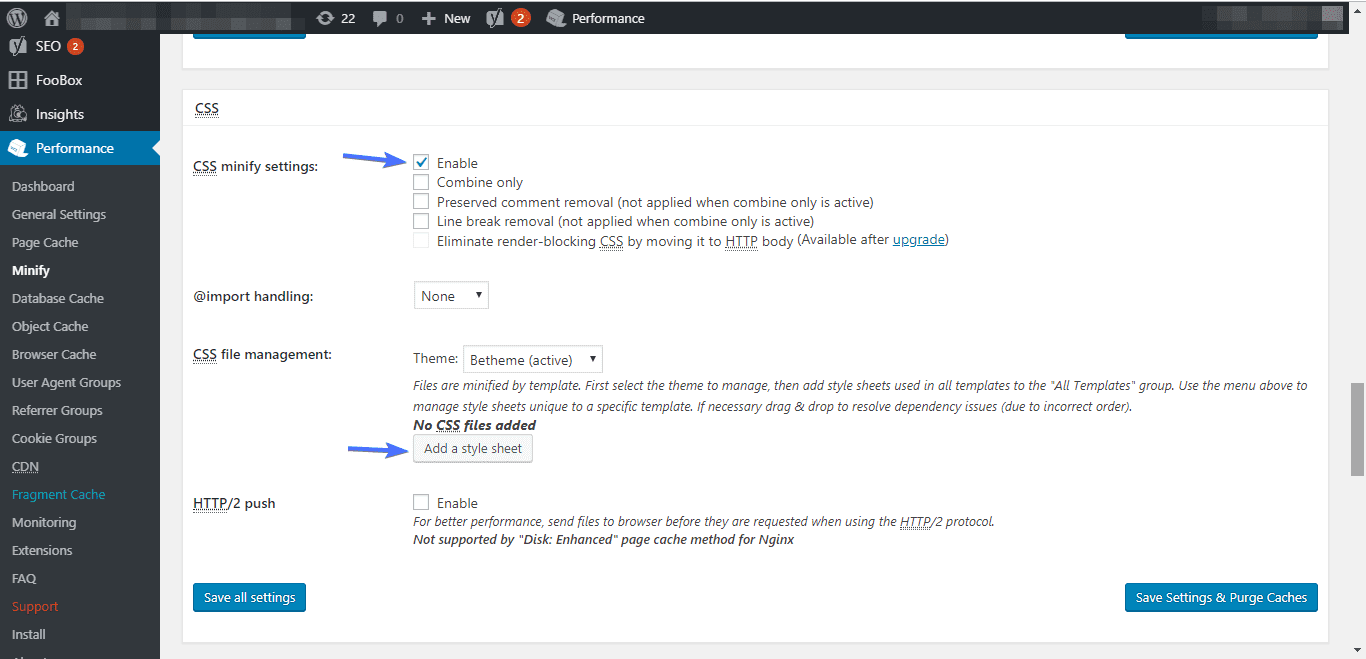
After adding JS scripts, while on the same page, scroll down to the CSS section. With CSS minify settings enabled, click the Add a stylesheet button.
Do exactly the same thing you did in the JS section. Only ensure you are copying links to CSS styling from Google PageSpeed Insights and not links to JS resources.
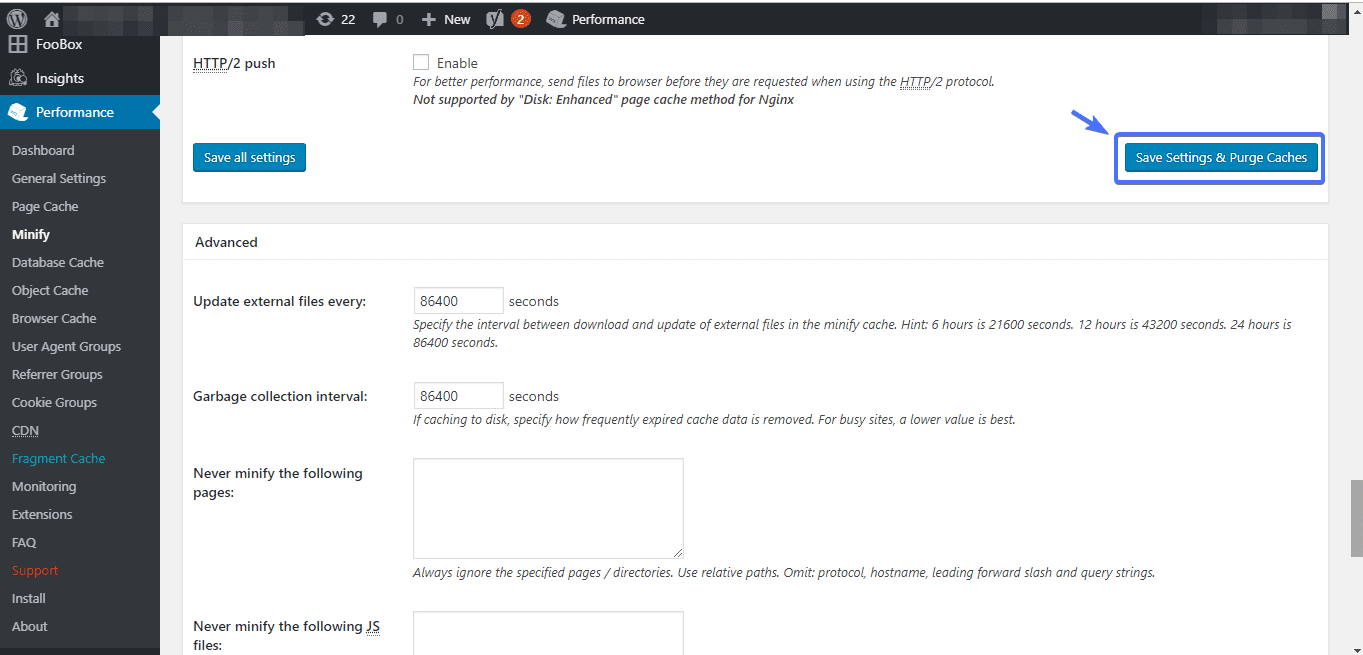
Once you are done copying and pasting, click the Save Settings & Purge Cache button.
Now head back to Google PageSpeed Insights and re-analyze your website. You should see considerable improvement.
Let’s now look at the second plugin that can help us Remove Render-Blocking Javascript and CSS.
Autoptimize
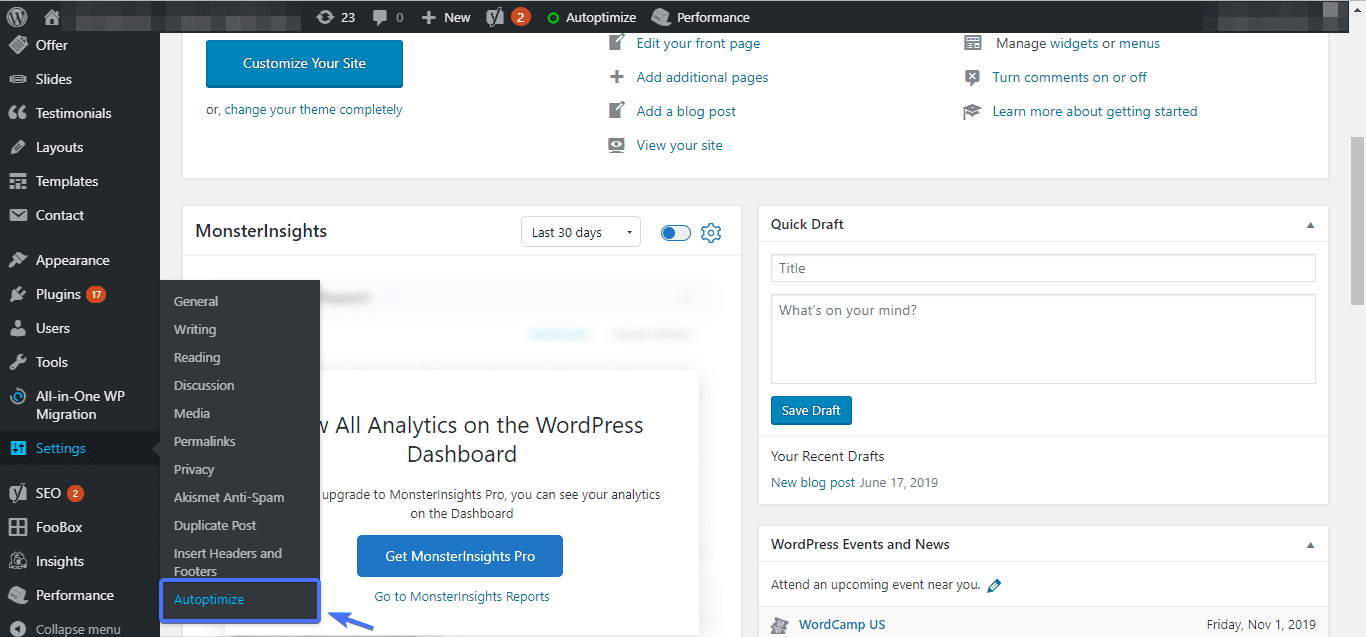
As you would expect, the first thing you will have to do is to install and activate the plugin. After installation and activation, right from your dashboard, navigate to Settings >> Autoptimize.
Next, check Optimize Javascript Code option. Then scroll down and do the same thing for CSS. Finally, scroll down and click the Save changes and empty cache button.
Run a test on Google’s speed test tool once more to see how your website performs. There will definitely be an improvement.
Conclusion
If you are really serious about improving the performance of your website, you just have to put in the efforts to make your website load faster.
In this post, we’ve shown you to eliminate render-blocking resources – Javascript and CSS. Also, we went further to show you the two plugins you can use to fix this problem: W3 Total Cache and Autoptimize.
Load speed is one of the numerous factors that influence the SEO of a website. As such, focusing solely on it, while neglecting other factors may not give you the results you desire. In this our SEO guide, we discussed steps – in addition to improving loading speed – you can take to make your website rank better. We encourage you to go over it.
More Resources:
- Remove Query Strings from Static Resources – 2 Methods
- Broken link building guide: Manually and with Ahref tool
- How To Create A Child Theme In WordPress


