The Link You Followed Has Expired Error

If you have been using WordPress for a while now, chances are you have encountered “The link you followed has expired” error.
This error message in WordPress looks something like this:
At first glance, it might appear difficult to fix the issue. While not outrightly easy, the truth is, fixing this error isn’t as complicated as it might appear.
As part of our WordPress tutorials, we will be showing you ways to fix this issue in this step by step guide.
Content:
- Link you followed has expired error in WordPress: what causes is?
- How to fix link expired error in WordPress
- Conclusion
Link You Followed Has Expired Error in WordPress: What Causes It?
When looking to upload files to WordPress websites, there are upload limits that you need to adhere to. These limits depend on your type of hosting.
For Shared Hosting, there is a limit to WordPress’s default upload limit. But on Managed WordPress Hosting, the allowable upload size is increased. Some hosting providers allow you to upload file size up to 150MB.
Here’s an illustration. If you tried uploading files, say a picture, to WordPress websites via the Media Library, you would see this.
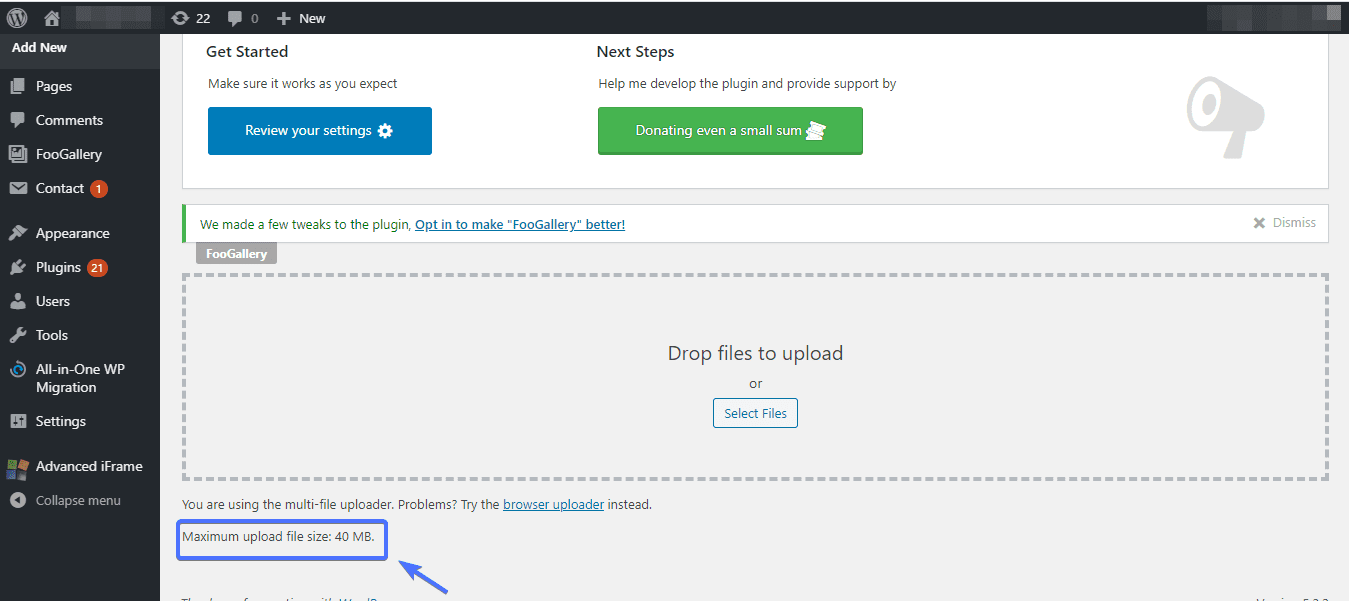
From the screenshot, you can see that the maximum upload limit is 40 MB. If you tried uploading a file that exceeds this limit, you would encounter errors. This could be maximum execution time exceeded or memory exhausted error.
‘The link you followed has expired’ WordPress error, on the other hand, occurs when you are trying to upload a theme or plugin. This can either be as a result of the theme being incompatible with your version of WordPress.
For instance, if you tried uploading a recent theme from Elegant Themes to an outdated WordPress install, you might run into errors.
This error can also be a result of the plugin or theme you are trying to upload which exceeds the maximum upload limit.
Sometimes, the problem might be that there is a limit to the maximum execution time of your WordPress site. As such, even if you tried uploading an extremely light theme or plugin, you will encounter an internal server error.
Lastly, if the PHP version of your WordPress site is outdated, you might get an expired message error, too.
With that said, let’s take a look at the different tried and trusted techniques that fix the error.
How to Fix the Link You Followed Expired Error in WordPress
So far, we have established that expired link error is caused by WordPress themes or plugins exceeding maximum allowable limit or execution time.
It then follows that the first approach to solve this problem is increasing these limits. There are quite a few ways to go about this, and we will be showing them to you shortly.
But before proceeding with the techniques we are about to show you, we recommend creating a backup for your website. This is because you will be making edits to core files in your WordPress directory.
Method 1: Making Edits to Functions.php File
If you are going to increase the upload limit or maximum execution time, you will have to specify your own limits in the functions.php file.
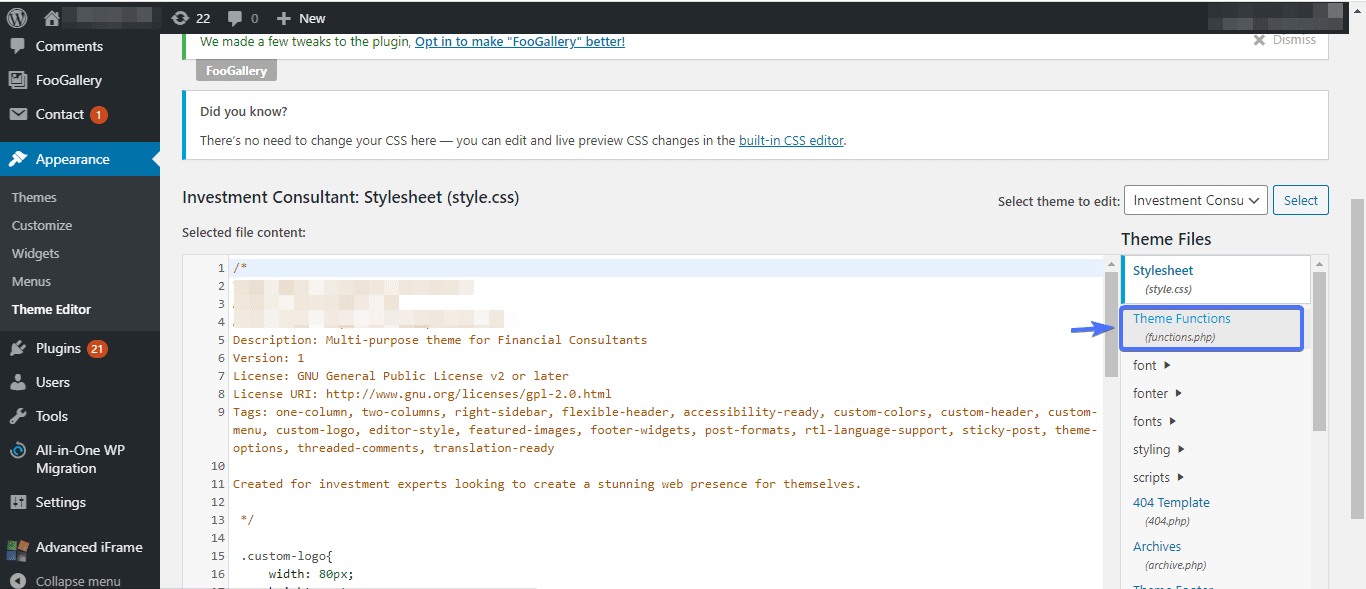
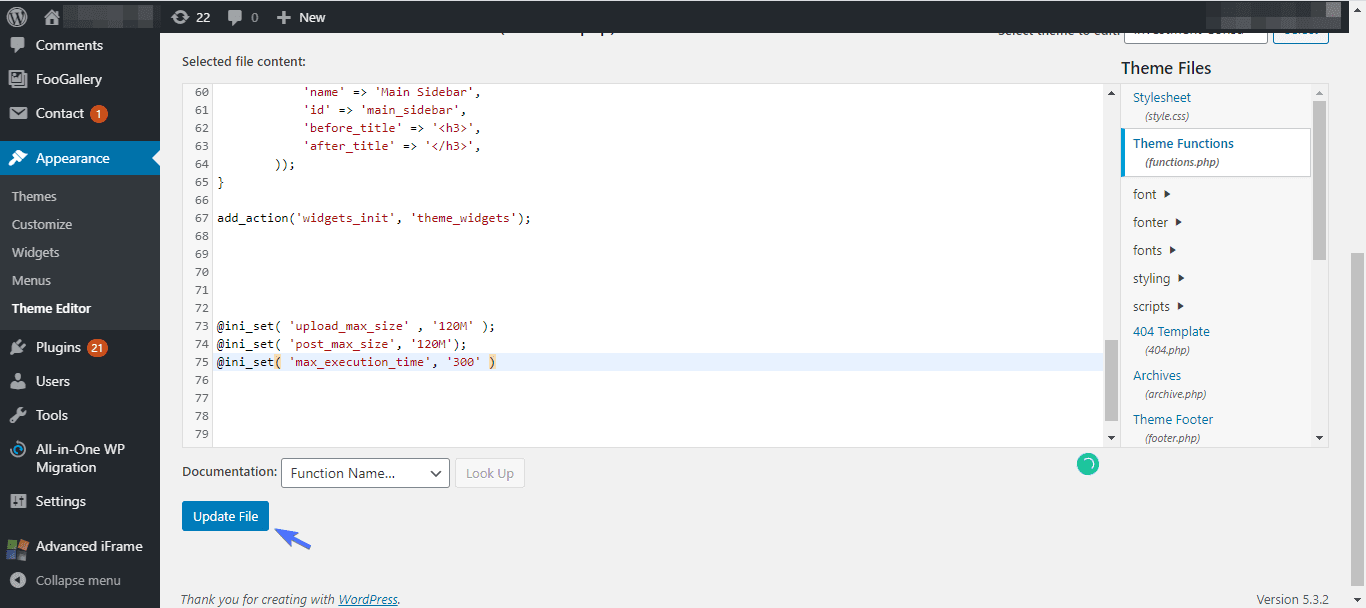
First, you will have to access your site’s functions.php file. To do that, login into your dashboard and navigate to Appearance >> Theme Editor

After that, click Theme Functions on the right panel.
With the functions.php file opened, copy and paste the following code.
@ini_set( 'upload_max_size' , '120M' );

@ini_set( 'post_max_size', '120M');

@ini_set( 'max_execution_time', '300' )
When you finish, click the Update File button.
With that, you are done.
But there’s a drawback with increasing WordPress limitations via the functions.php file. The thing is, functions.php file is exclusive to a theme. As such, if you changed to a new theme, the changes you made in the functions.php file will be lost.
For this reason, it’s better to make edits to the php.ini file, as we are about to show you.
Method 2 in Solving ‘The link you followed has expired’ Error: Making Edits to PHP.ini File
The php.ini file is the configuration file for PHP in your server. That means you can give instructions to WordPress PHP files and control how they execute from here.
To begin with, you will have to access the php.ini file of your website. To do that, connect to your website directory online via an FTP client like FileZilla. Ensure your FTP login credentials are correct, else the FTP client will experience error establishing a connection.
With the connection established, search for php.ini file in the root folder of your website.
Chances are you won’t find this file. This is because hosting providers hardly create php.ini files for WordPress sites on shared hosting – which happens to be the most popular hosting.
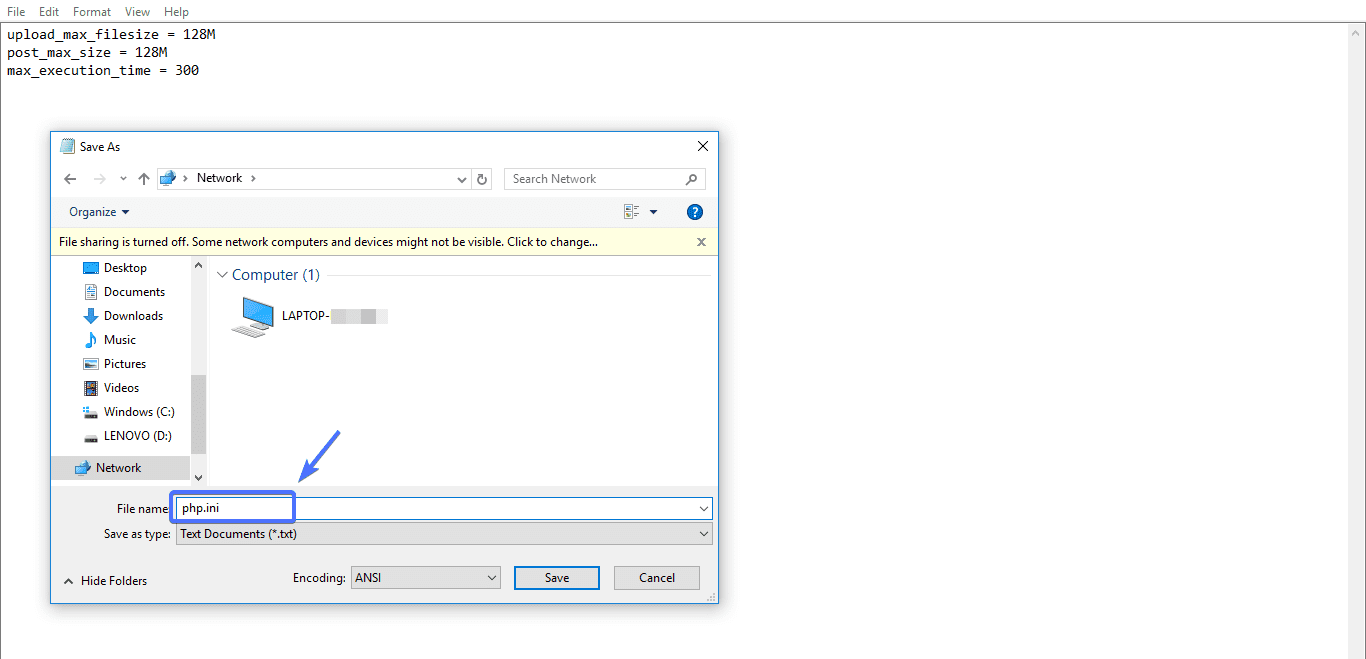
If that’s the case, you will have to create a fresh file and name it php.ini. To do that, open your favorite code editor – Notepad, Atom, Visual Studio Code, etc.
Copy and paste the following lines of code to it.
upload_max_filesize = 128M

post_max_size = 128M

max_execution_time = 300
Now save the file as php.ini
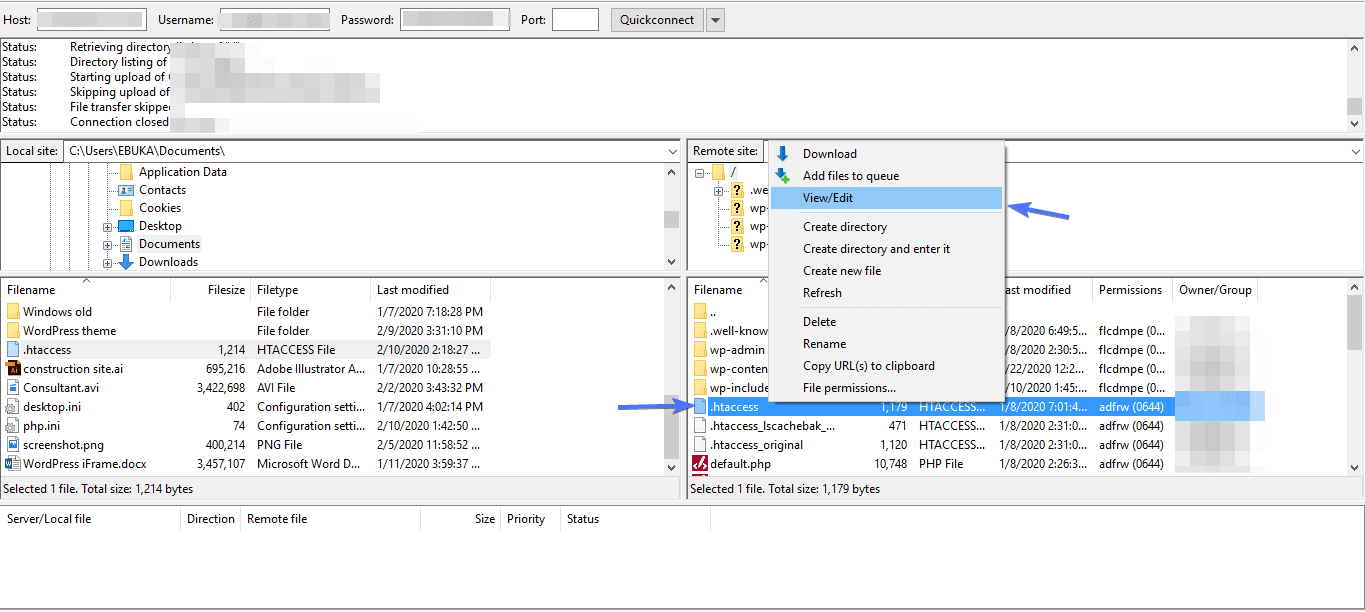
The next step is to upload the file to your main WordPress directory. To do that, within the Filezilla app, right-click on the file you had just created and select Upload

You should be able to upload themes or plugins without errors now.
However, if the problem still persists, there is another method you can try.
Method 3: Making Edits to the .htaccess File
Like the php.ini file, .htaccess file controls how WordPress sites function. So that means adding codes here can also help clear The link you followed has expired error.
You will still need an FTP client to create a database connection in WordPress. It’s still the same process we showed you previously. Once you establish a connection, locate the .htaccess file. Then right-click on it and select View/Edit.
With the file opened, copy and paste the following line of code in it.
php_value upload_max_filesize 128M

php_value post_max_size 128M

php_value max_execution_time 300

php_value max_input_time 300
After that, save the file, upload, and exit. Everything should work fine now.
Method 4: Updating Your Site’s PHP Version
If everything fails, try updating the PHP version of your website to the latest one. We explained how to go about this in this article.
Conclusion
There are quite a lot of upload errors that come with WordPress. One of them is the “The link you followed has expired” error.
In this article, we uncovered the many factors that cause this error. We also showed you four tested and trusted methods you can use to fix the error.
More resources: