 This is a comprehensive guide on how to use Facebook debugger to fix image issues in WordPress.
If you promote your site with Facebook for long enough, you would most likely encounter this common issue, where the image on your WordPress post is different from that displayed by Facebook. This usually happens when you try to share a post or page.
The knee-jerk solution to this issue is to remove the wrong image, and then directly upload the correct image to the post. But this is not a good solution.
First, uploading an image would mean less traffic to your site. This is because, when a reader clicks on the image, it will be expanded right there on Facebook. If you had shared the post normally with its image, clicking on it will take the user to your website.
Second, uploading the right image would only fix it for you. If anybody else gets your post URL and shares it on Facebook, they will still get the wrong image.
Of course, the better fix is to make Facebook share the correct image for your post. Gladly, this is quite easy to do with the help of Facebook debugger.
In this article, we will show you how to use the Facebook debugger to fix image issues, as well as other common sharing issues.
You will learn:
- How Facebook (FB) Uses Open Graph to Share Your Content
- What FB Debugger is and How It Works
- How To Fix Image Sharing Issues Using FB Debugger
- How to Clear Cached Files in WordPress
- Other Sharing Issues
- Conclusion
How Facebook Uses Open Graph to Share Your Content
Open Graph, also referred to as ‘og tags’, is a protocol that helps in displaying your content properly on social media platforms such as Facebook, Twitter, LinkedIn, etc.
The open graph meta tags was developed in 2010 by Facebook developers. Content creators can use the tool to control how their content will appear before sharing their link on social media.
Other social media platforms such as Twitter and LinkedIn also use the open graph to enable rich content sharing on their various platforms.
Twitter recently introduced Twitter cards which work similar to og tags. However, if Twitter cannot detect Twitter cards on your page, it reverts to using open graph tags.
When you share your content on Facebook, the open graph tags tell Facebook about the content of your page and tries to pull data from the link.
The most important meta tags that Facebook uses are:
- page title (referred to as og:title).
- meta description (og:description).
- featured image (og:image).
- page url (og:url).

These tags are automatically set by WordPress as long as you configure your site to use og tags. Some SEO plugins such as Yoast SEO add open graph tags to your WordPress site by default.
If Facebook is not displaying the right image after sharing your link, then there is likely an issue with your og image tag.
To analyze this, the Facebook debugger tool can help check for errors associated with image sharing. In the section below, we will walk you through how the Facebook debugger works and how to use it.
What Facebook Debugger is and How It Works
The Facebook debugger is a tool that is mainly used to preview how page content appears when someone shares the link on Facebook. In addition, you can use the tool to analyze your links and see how the og tags are being interpreted by Facebook.
The tool can show you errors that occur with the images on your page. Also, it will list the missing tags on the page you are analyzing.
How It Works
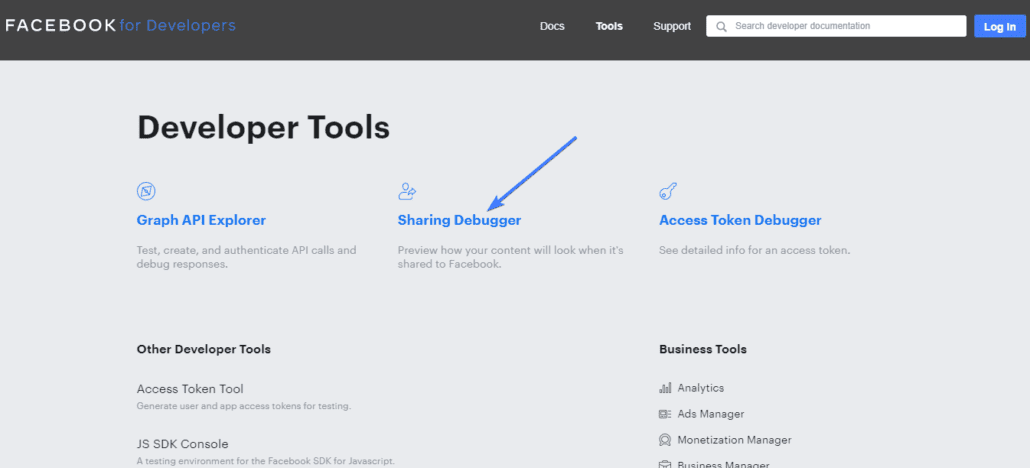
To start, simply visit the Facebook developer website and login with your regular Facebook account. After that click on More and from the dropdown menu, click on Tools.

On the tools page, click on Sharing Debugger.
Alternatively, you can simply access the tool with this direct link.
To analyze a page, copy and paste the link on the textbox and then click on Debug.

On the debug page, you will find all the details about that page along with its og tags.
If you are seeing the error that reads “The following required properties are missing: fb:app_id” as seen in the image below, you can ignore it for now because it does not affect how the debugger works on your site.

It occurs because you have not installed any Facebook app on your site, which by the way is generally not an issue.

For now, our focus is on the Link Preview section. If all the tags are present on your page, you should see a preview of your post along with the featured image.
Facebook stores the preview along with its tags on their server. This is quite similar to how caching works on your website.
When you or your readers share the link, Facebook will pull the information about the page from their server with the help of og tags.
If Facebook is not displaying the right image when you preview your link, a low-quality image or a caching plugin on your WordPress site might be causing the error. Below, we will show you how to resolve image sharing issues in WordPress.
How To Fix Image Sharing Issues Using Facebook Debugger
Sometimes, when you use a low-quality image as the featured image on your post, Facebook might ignore it when you share your post on the platform.
To help Facebook pick the right image, you can use a plugin to force WordPress to set the og:image tag before publishing a post.
There are a number of plugins you can use to achieve this such as ‘Open Graph and Twitter Card Tags’ and ‘Yoast SEO’ plugin.
In this guide, we will use the Yoast SEO plugin to set open graph images for blog posts. The reason we chose this plugin is that many wp users already utilize the SEO plugin on their websites.
Fixing Image Sharing Issues Using Yoast SEO
To start, download and install the Yoast SEO plugin on your WordPress dashboard. Please read this guide to learn how to install WordPress plugins.

After installing the plugin, go to Posts > All Posts and then select the post you wish to modify.

On the post editor, scroll down and then locate the Yoast SEO section.
Here, select the social tab and then click on the select image button. You can choose the featured image for that post if you prefer to use that as the og:image.

Side Note: After selecting an image for the Facebook meta tag, you still have to specify a featured image if it is a new post. Otherwise, when displaying the post on your website an image will not be present.
After setting the image click on Publish/Update to effect the recent change.
Force Facebook to Use the Image you Specified
The next step is to tell Facebook to use the new image you added from the Yoast settings.
To do that, go to the Facebook debugger tool and then paste the link to the post you just worked on.
After that, click on the Debug button. Then click on Scrape Again in the Facebook debugger dashboard so that the image can be updated.

If it is still not showing the right image, you may have to click on Scrape Again a couple of times before Facebook will update your tags.
The only problem with this method of debugging image sharing issues is that it can get cumbersome especially when you have to do it for many posts.
Rather than manually modifying each post on your website, you can try to identify the cause of the sharing error. In most cases, using a WordPress cache plugin might be the cause.
Caching helps in improving your website speed by storing information about the page on your managed WordPress hosting server, or pretty much any other kind of hosting you use. This supports fast loading of your website pages, even with a slow internet connection.
The problem with caching is that most third-party applications such as Facebook may pull the cached version of your page. That might happen even though you updated the images on the page.
While image issues are common when sharing posts on Facebook, they can be minimized with regular updates and optimizations. Fixrunner’s WordPress website maintenance services provide the technical expertise to keep your sharing settings optimized, reducing the likelihood of encountering these problems.
How to Clear Cached Files in WordPress
To resolve this, you need to clear your cached data from the caching plugin you installed on your site.
Let’s say you are using WP Fastest Cache as the caching plugin on your WordPress site. You can configure the plugin to clear all caches when you update a post or page on your site.

To do this, click on the WP Fastest Cache link on your WordPress dashboard.
Under the “Settings” tab, click on the ‘Update Post’ option and then select clear cache for Post/Page.

Next, click on OK and then scroll down and click Submit to effect the changes.

This option will automatically clear all the cache data when you update a post or page.
To manually clear all caches, go to the “Delete Cache” tab and then click on the Delete All Cache button.

You will get a confirmation alert that all caches have been deleted from your WordPress hosting server.

After clearing all the cached files from your server, you need to use the Facebook debugger to manually tell Facebook to scan your page and use up-to-date files.
Simply head over to the debugger tool and paste the link you wish to debug.
Now, click on the ‘Scrape Again’ button.
As mentioned previously, you may need to click on the Scrape Again button until Facebook starts pulling the right image from your post.
Other Sharing Issues
When using the Facebook debugger tool there are several warnings that may popup when you scan a page. For example:
The ‘og:image’ property should be explicitly provided, even if a value can be inferred from other tags
If you are seeing a warning similar to the one above, know that it mainly occurs when you are using a low quality featured image on your blog post.

Facebook recommends 1200 x 628 px as the proper image size for sharing on Facebook. But as long as your image is greater than 200 x 200, you should be fine.
In WordPress, the featured image is set by default as the og:image. If your featured image is low in size dimensions, Facebook will opt to use another image with higher quality from the page. This usually results in the warning seen above.
One way to resolve the warning is to change your featured image to one with better quality. Alternatively, you can use the Yoast SEO social settings to explicitly specify an image for Facebook as we did in the section above.
Conclusion – Facebook Debugger
Social media is a great tool to help promote your content and drive traffic to your website. However, if you are not sharing your content with the right image, it can reduce the CTR (Click Through Rate) for your blog post.
In this guide, we have shown you how the open graph protocol works. Also, we shared a beginner-friendly guide on how you can use the Facebook debugger to fix image issues before sharing your content on Facebook.
If you found this article helpful, kindly share it on your social platforms or WordPress groups.