WordPress Categories | How to Create, Edit, and Assign Categories
 The easiest way to organize posts in a WordPress blog is to create categories. Doing this will make searching for content much easier. How so?
Well, imagine you have a wardrobe where you keep all your belongings; clothes, bags, shoes, jewelry e.t.c, all in one place. Looking for a shirt amongst the pile of other things would be exhausting. But allotting space to each group of items in there would really help.
The same goes for WordPress categories. When you group posts that are related in some ways, it becomes easier for visitors to find. With this in mind, we will be showing you how to create categories and how to use them.
Contents:
- WordPress Categories vs Tags
- How to Create Categories
- Assigning Posts to Categories
- Edit Categories in WordPress
- Displaying Categories on Navigation Menu
- Displaying Categories on WordPress Sidebar
- Converting Categories to Tags
- Conclusion
WordPress Categories vs Tags
Several WordPress users do not know the difference between categories and tags. Let’s have a look at how they differ.
Tags in WordPress are more specific than categories. For instance, if you’re making a blog about movies, you can create a category for each genre of movie – Comedy, Thriller, Horror, Science fiction, etc. But for tags, you can create tags with more specific details like the name of the actors and directors.
Likewise, if you are creating a WordPress site for vehicles, you can have main categories such as Truck, SUV, Sedan, Sports, and the like. But then, you can create tags for smaller vehicle attributes like Double Exhaust, Reverse Camera, Heated Seats, and the like.
Take note that WordPress posts should ideally belong to a maximum of two categories so accessing them won’t be hard. But with tags, you can assign as many as needed to a post.
How To Create Categories
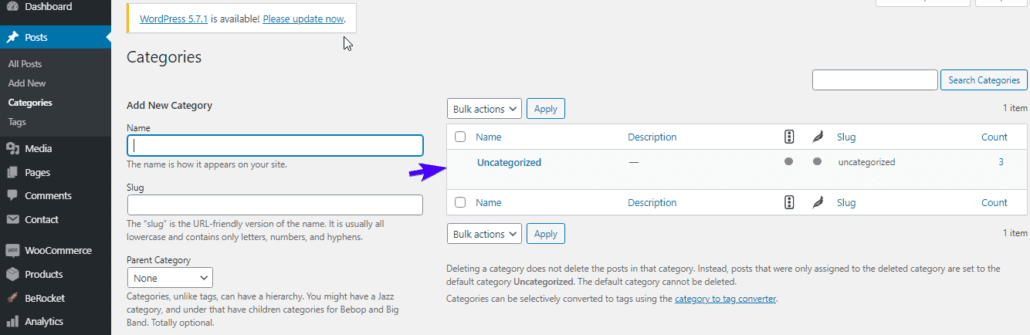
Creating a category is pretty easy. To start, go to your WordPress dashboard, hover your cursor on ‘Posts’ and click on the ‘Categories’ link.
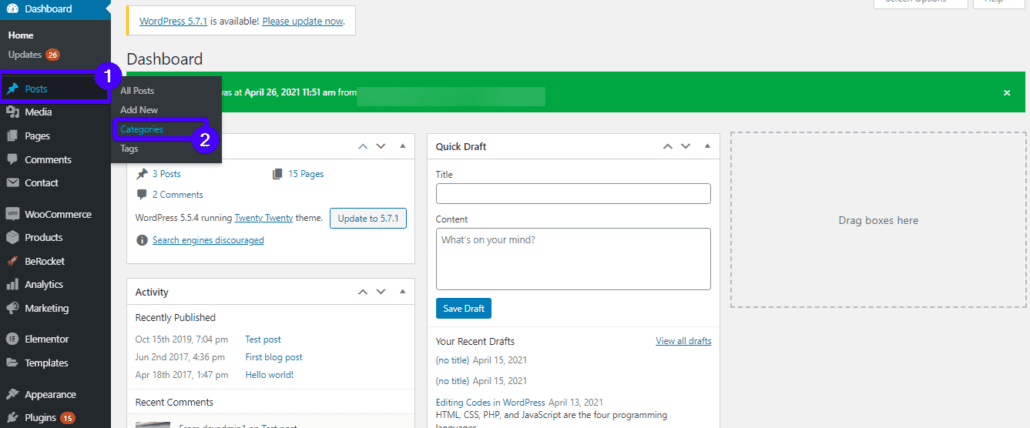
This will take you to the WordPress category page, where you’ll find a list of all available categories. If you haven’t created any, you’ll find ‘Uncategorized’ as the only item on the table. This is the default category blog posts are assigned to when you newly install WordPress.
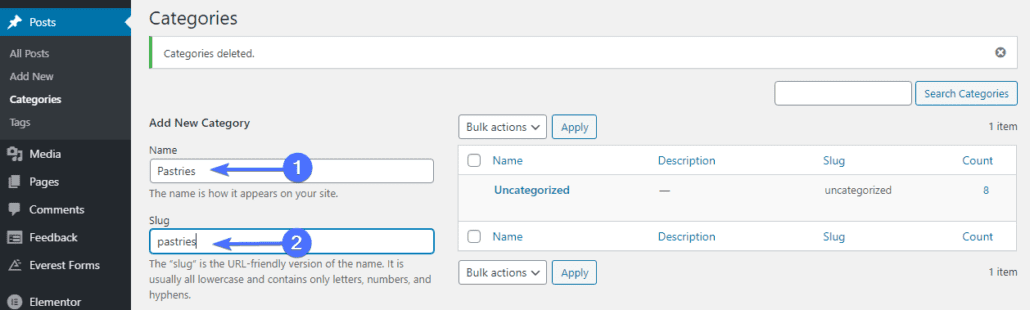
To change the default category, enter your preferred category name in the ‘Name’ text field under the ‘Add new Category’ section. Next, create a category slug (a URL-friendly version of your category name, similar to a permalink). You may also leave it empty so WordPress creates the slug from the category name.
The next field is ‘Parent Category’. This is useful only when the new category is a part of a larger category. If it isn’t, leave it set to ‘None’. You may also input a category description in the ‘Description’ box.
Finally hit the ‘Add New Category’ button.
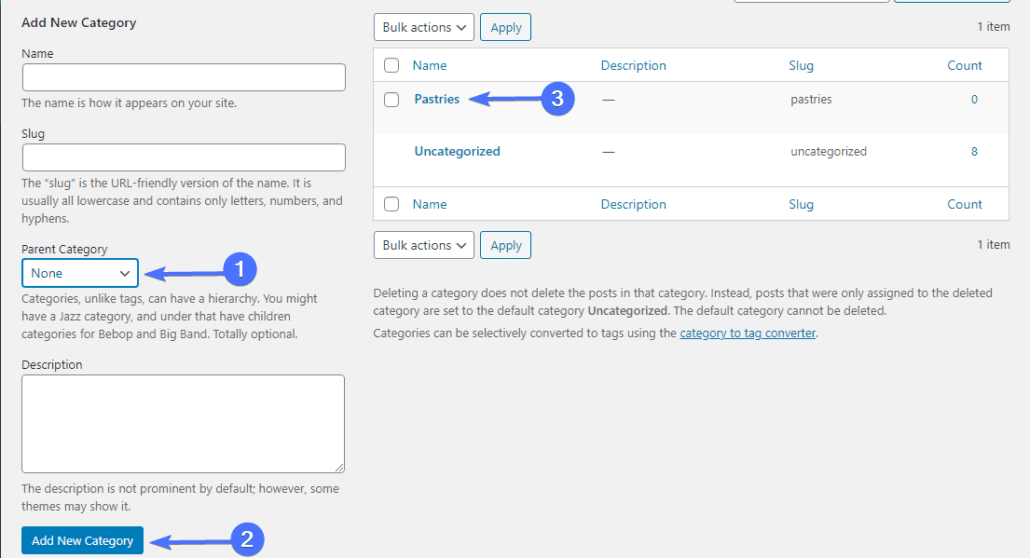
And that’s it. You have added a new WordPress category.
Child Category
This is any category that has a parent category. For instance, ‘Pastries’ as a parent category can have ‘Hot Dogs’ as a child category.
To create a child category, go back to the category page and create a new one. This time select a ‘Parent Category’ from the drop-down menu.
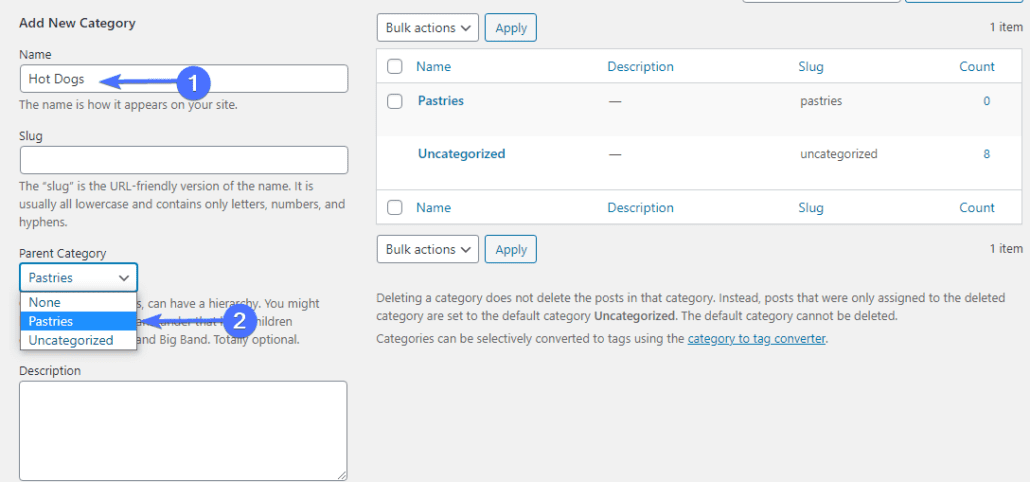
In this WordPress tutorial, we selected ‘Pastries’ as the parent category.
Now, scroll down and click the ‘Add New Category’ button to save changes.
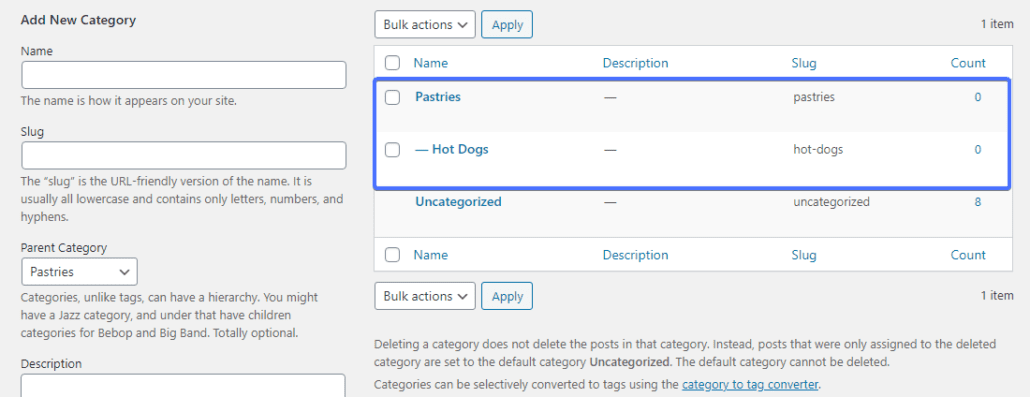
There you have it – a parent and a child category.
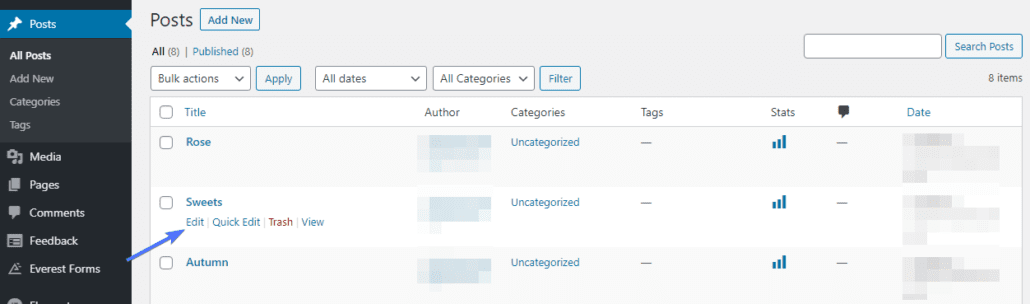
Assigning Posts to Categories
To assign posts to categories, click Posts >> All Posts to reveal a list of available blog posts. To place posts in categories, click ‘Edit’ (located under each blog post).
This will open the post editor. Locate the ‘categories’ section on the right side of the editor and select the category you want the post assigned to. Remember to uncheck the box next to ‘Uncategorized’.
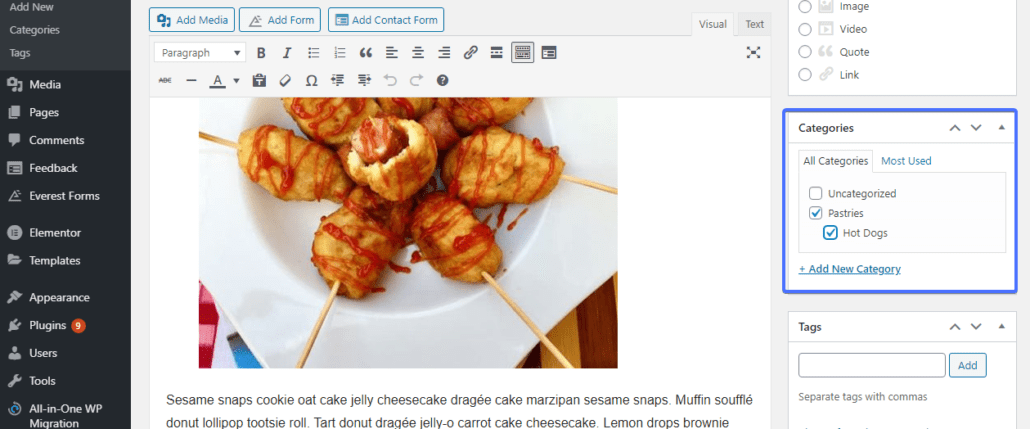
Finally, click ‘Update’ to save the changes.
How To Edit Categories In WordPress
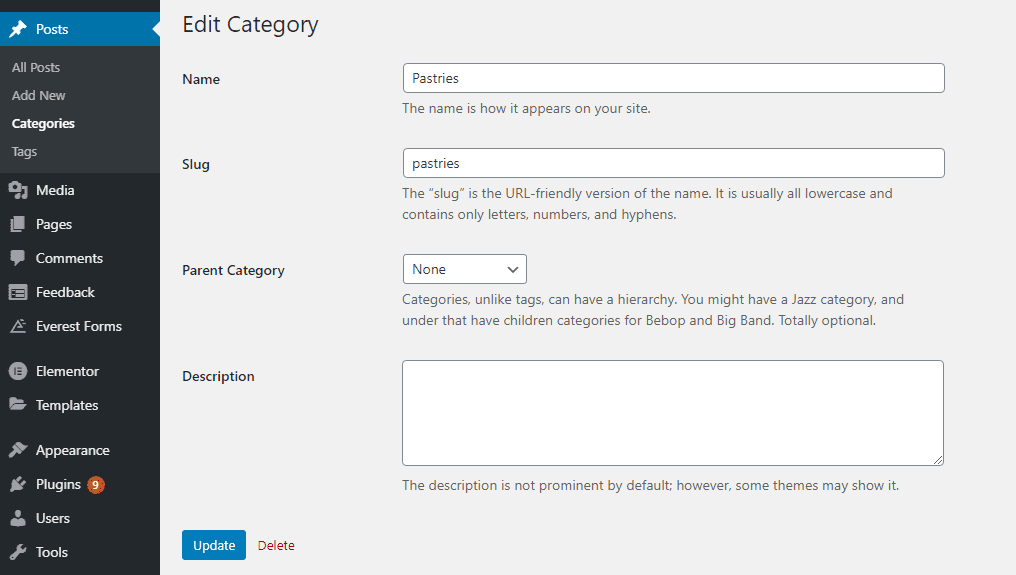
There are times when you need to make edits to your category, like changing the category name. This is also very easy. Simply navigate to Posts >> Categories. On the category list, hover your cursor on the category and click Edit.
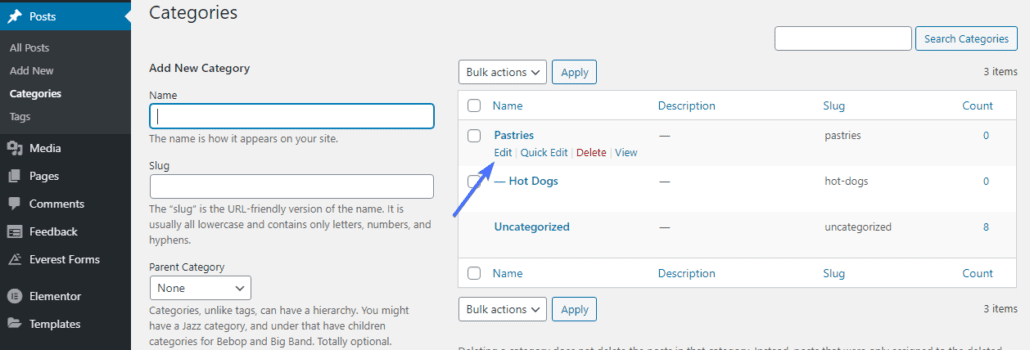
On the ‘Edit Category’ page, you can change the name, slug, parent category, and description. To save changes, click Update. You can also quickly edit the category name and slug only using the ‘Quick Edit’ link.
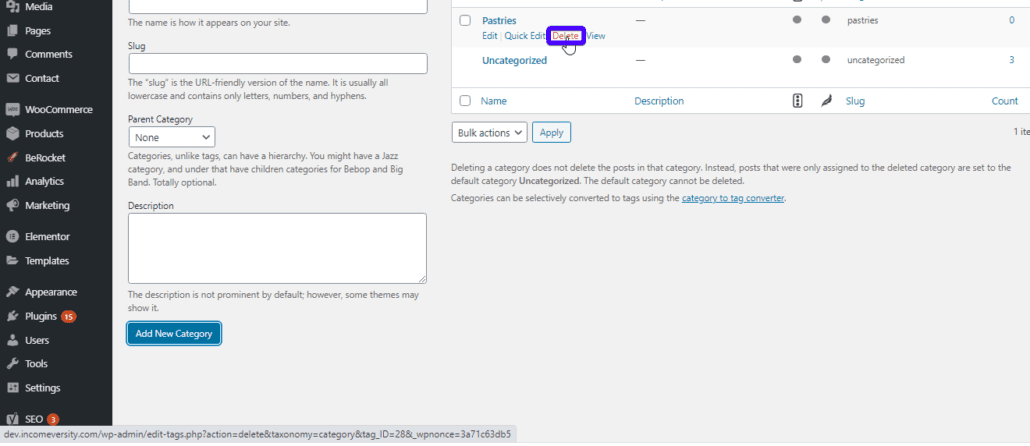
If you want to delete the category, hover your cursor over it. Then, click ‘Delete’.
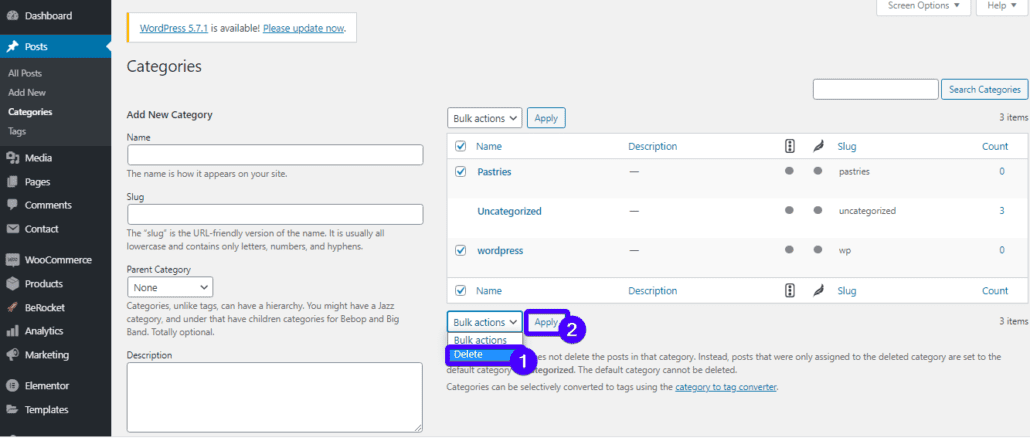
Alternatively, check all items you need to delete. Then, click the ‘Bulk Actions’ dropdown and select ‘Delete’ from the drop-down menu beneath the table. Then, click ‘Apply’. This method is useful when you need to delete several items at a time.
Displaying Categories On Navigation Menu
You can choose to display categories on your Menu bar. It’s pretty easy and straightforward. To do this, head on to Appearance >> Menus on your WP dashboard. On the ‘Categories’ tab, select the category you want to display and click the ‘Add to Menu’ button.

Displaying Categories On WordPress Sidebar
It is also possible to display categories on your sidebar using widgets. This way, visitors can easily find a topic assigned to that category. Here’s how to do it.
Go to Appearance >> Widgets on your dashboard. Drag ‘Categories’ from the ‘Available Widgets’ section and drop it in the ‘Sidebar’ section.
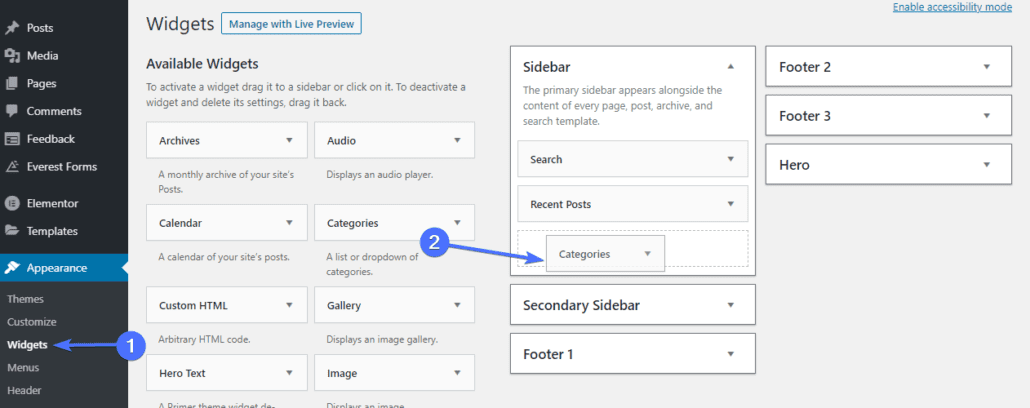
Next, check the boxes of any of the display options you’d like. You have the option of displaying your categories as a drop-down menu, showing the number of posts in a category, or showing hierarchy.
Tick any of the boxes as you wish and click ‘Save’.
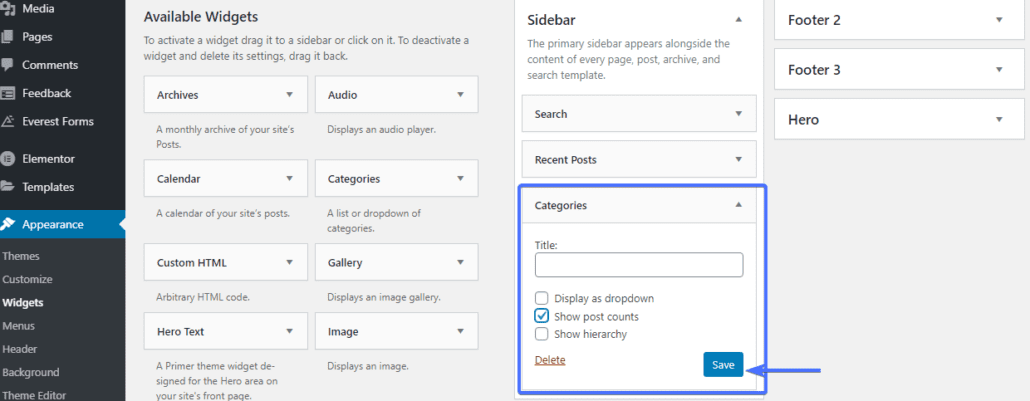
Side Note: Categories will only be displayed if they have at least one blog post assigned to them.
Converting Categories To Tags
If you wish to convert categories to tags and vice-versa, you can.
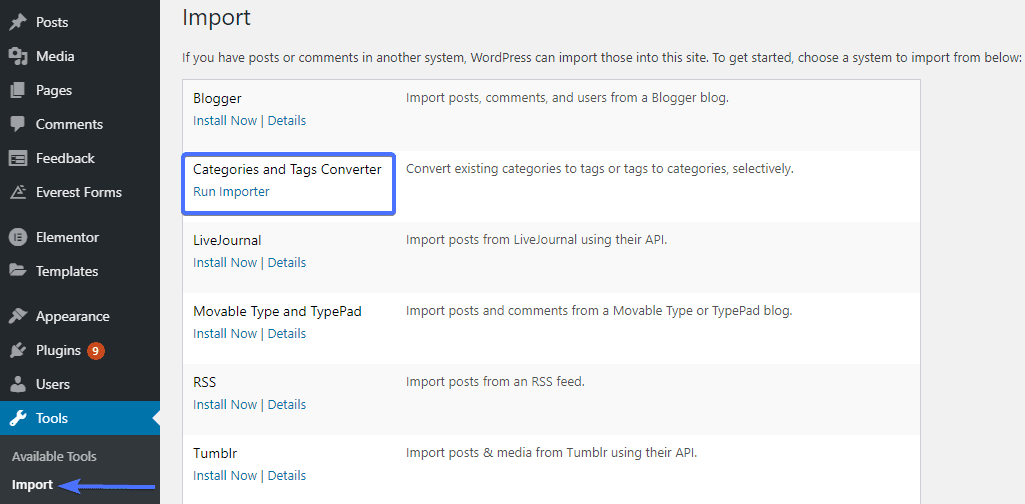
On your WordPress admin area, go to Tools >> Import. In the ‘Categories and Tags Converter’ section, click Install now, and when the installation completes, click Run Importer.
On the resulting page, select the option of converting categories to tags or vice-versa. Next, check the boxes of the categories you wish to convert. Finally, click the ‘Convert Categories to Tags’ button.
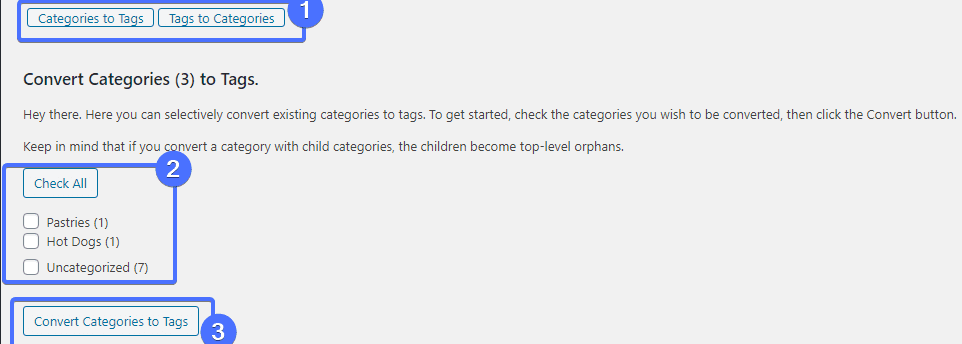
And you’re done. That’s how simple it is.
Conclusion – WordPress Categories
The aim of creating categories is to organize your site and make it easy to navigate. This is highly recommended for any WordPress user who aims to make site usage easy – both for themselves and for their readers.
So in this guide, we have shown you what a category is, how to create categories in WordPress, and the differences between tags and categories. You have also learned how to assign posts to categories, edit or delete a category and how to convert categories to tags.
If you need more help on any WP-related issue, please send us a message. We’d be glad to help.