cPanel for WordPress – What Is cPanel? How Can You Use It for WP?

cPanel is a user-friendly dashboard most web hosts provide to make it easy for their users to manage their web hosting accounts. Using cPanel for WordPress hosting, site owners can manage their WordPress websites, email accounts, domain names, database connection, etc. without any sort of technical knowledge.
To this end, having an in-depth understanding of cPanel will make life pretty easy for you as a website owner. By the time you are done with this guide to cPanel, you will have a deep understanding of the topic, even if you have never managed a website before.
Content:
- What is cPanel?
- What does a cPanel dashboard look like?
- Do all WordPress Hosts use cPanel?
- Do You Need CPanel for WordPress?
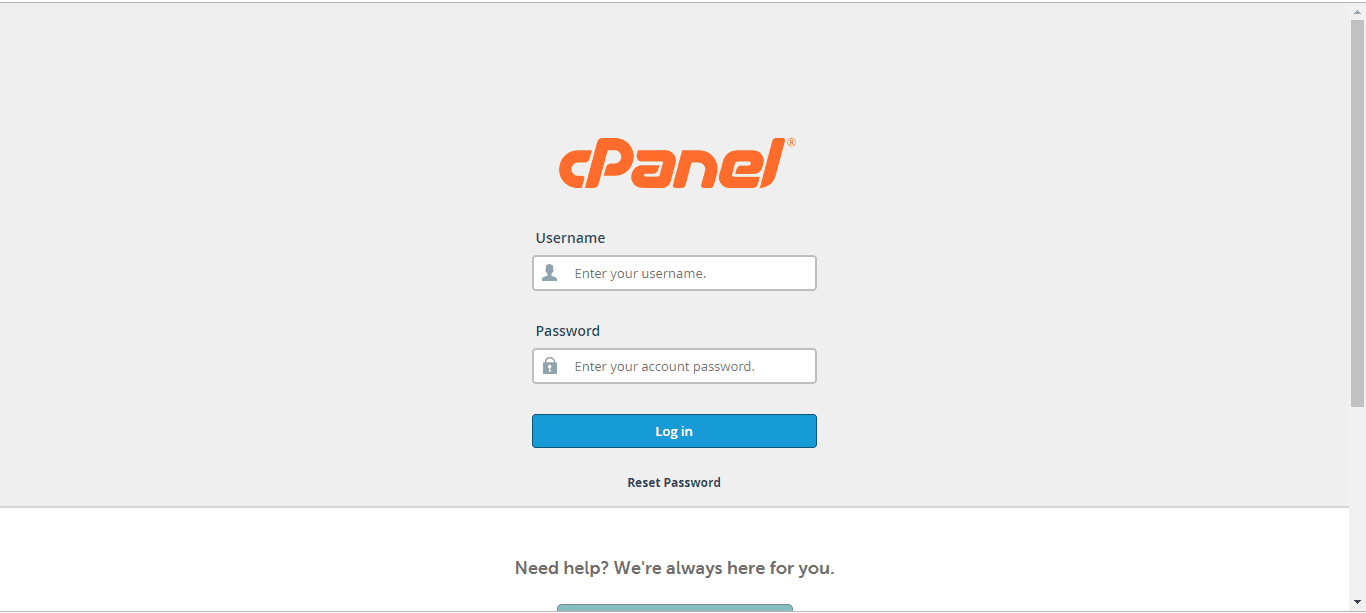
- How Do I Log into my cPanel?
- What Can I do via cPanel?
- Conclusion
What is cPanel in WordPress?
In the early days of the web, you needed to possess technical skills to manage a website’s hosting. But not everybody had such skills, and so the need for a user-friendly solution arose.
In response to this need, the control panel – cPanel for short – was developed.
Due to its rising popularity, it has become the go-to solution for the efficient management of web hosting.
So whether you run a custom-coded or WordPress website, with cPanel you can efficiently manage your webserver irrespective of your hosting plan.
What Does a cPanel Dashboard Look Like?
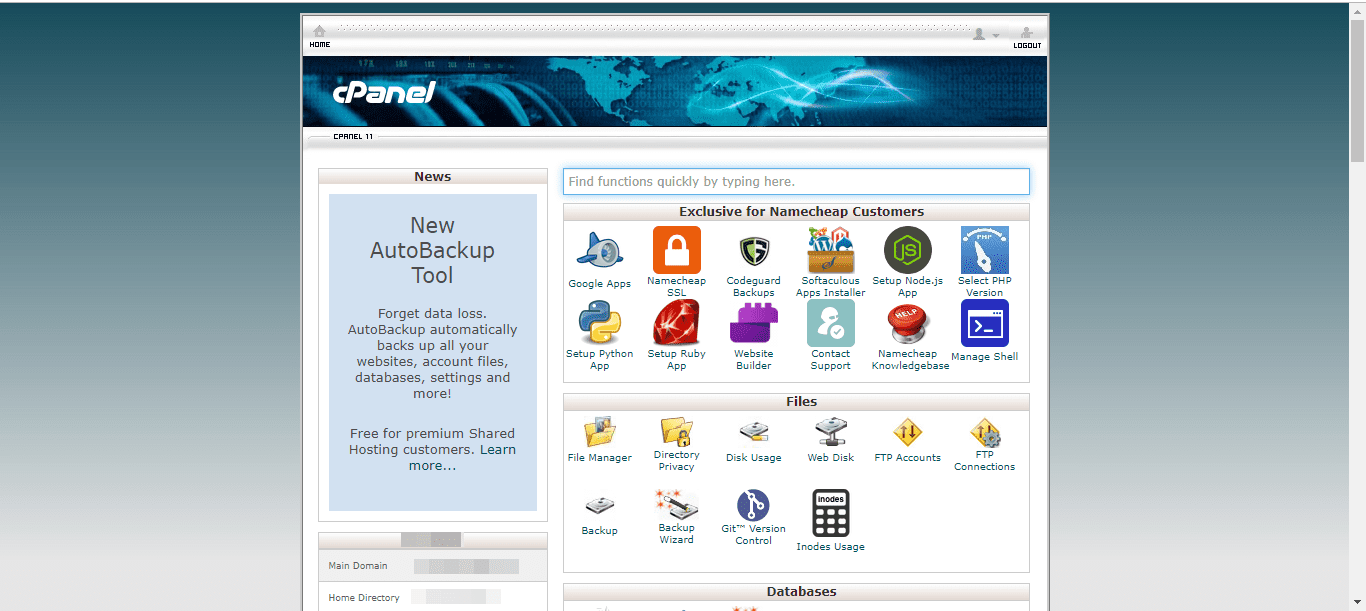
There’s no ideal ‘cPanel look’, it all depends on your hosting provider. However, all cPanels perform similar functions.
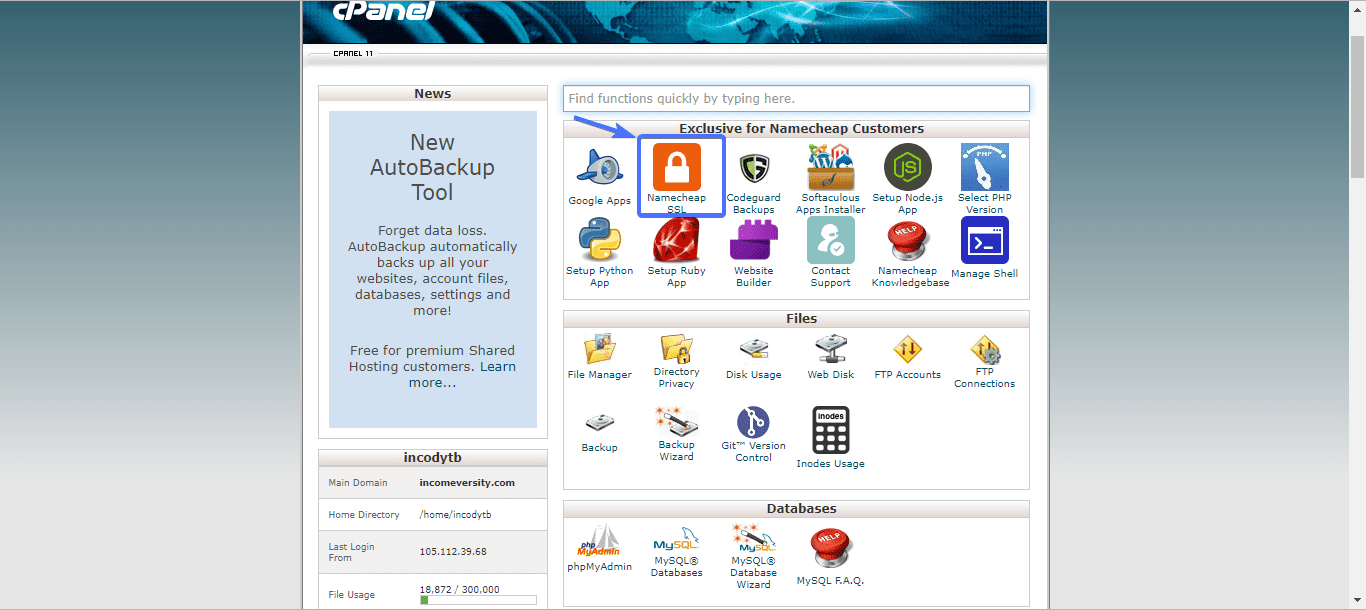
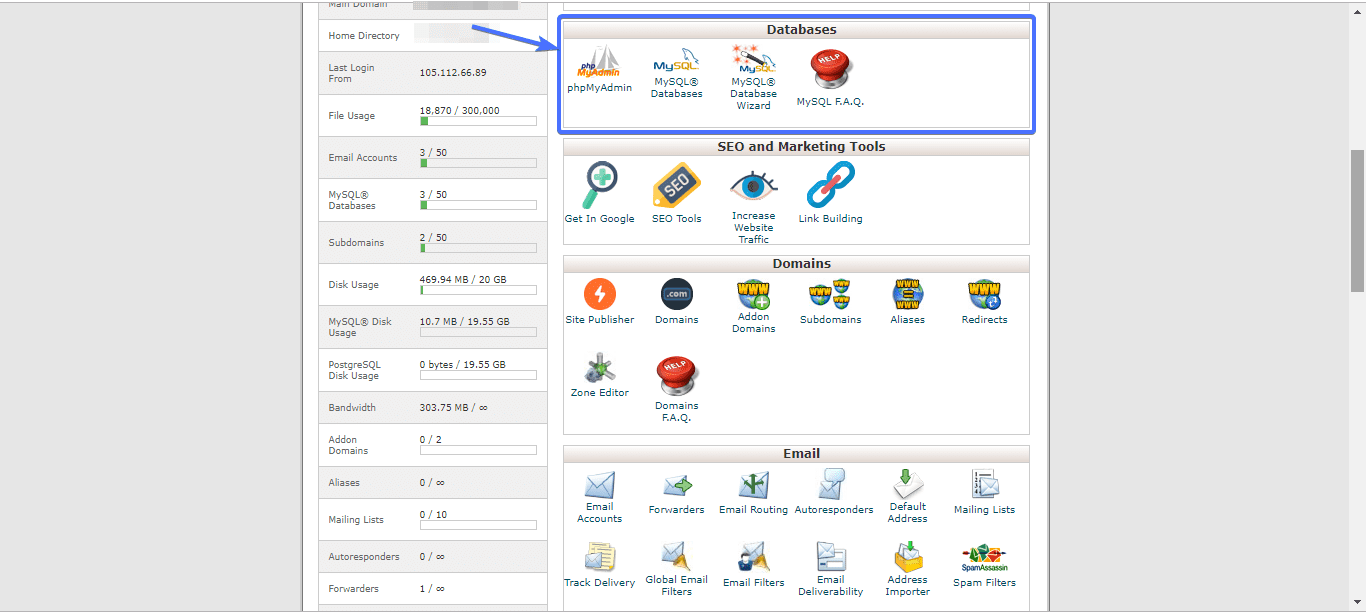
Here’s how the interface of our cPanel looks:
It consists of icons linking to various parts of your hosting account. It also has a side column that displays relevant information about your host.
Do all WordPress hosts use cPanel?
No! cPanel is the most popular but not the only means of managing your web server. Some hosts use a customized control panel, which works just like the cPanel. If unsure which one your host provider uses, reach out to them.
Do you need cPanel for WordPress?
Simply put, cPanel is a server management technology, whereas WordPress is one of the content management systems upon which you can build your website on.
This might sound a little confusing, so let’s break it down.
For a website to be live (accessible to anyone with an internet connection), it needs to be on a server. For instance, if you wish to start a WordPress blog, you will need a server that will host the blog, else it won’t be accessible to the public.
Because this server is constantly connected to the internet, anyone with an internet connection can connect with this server and request to view your site.
Organically, managing your website server and site software requires technical solutions such as command lines. This is where cPanel saves the day. It has a graphical user-friendly interface that makes it easy to manage your server, even if you have no technical skill.
WordPress, on the other hand, is a database-driven content management system that makes it easy to create and add/remove content from a website. Even with zero coding skills, you can seamlessly add new posts, pages, media, etc. to a WordPress website.
The WordPress and cPanel combination is to live for, especially for people know nothing about coding. While WordPress helps you build your blog/website, cPanel lets you manage it efficiently.
How Do I Log into my WordPress cPanel?
By default, upon creating a hosting account your web host provider will send you a welcome email that contains the link to your cPanel for WordPress hosting and your username and password.
Maybe they didn’t, or, perhaps, you can’t find the email anymore. Whatever be the case, there’s a workaround.
If you don’t have the link to your cPanel and would want to access it, simply append 2082 or 2083 to your domain
Which should you use? If you have SSL installed on your domain(i.e. your URL starts with https), use 2083, else use 2082.
Here’s an illustration:
https://mywebsite.com:2083
http://mywebsite.com:2082
To get the cPanel username and password, contact your hosting provider.
What Can I do via cPanel?
After logging into cPanel, here are a couple of cPanel features that you can do via the cPanel dashboard:
Install WordPress with cPanel
You might be glad to know that you do not need to install WordPress manually. You can just download WordPress and install it via cPanel. That’s the simplest and easiest way to get WordPress up and running on your domain.
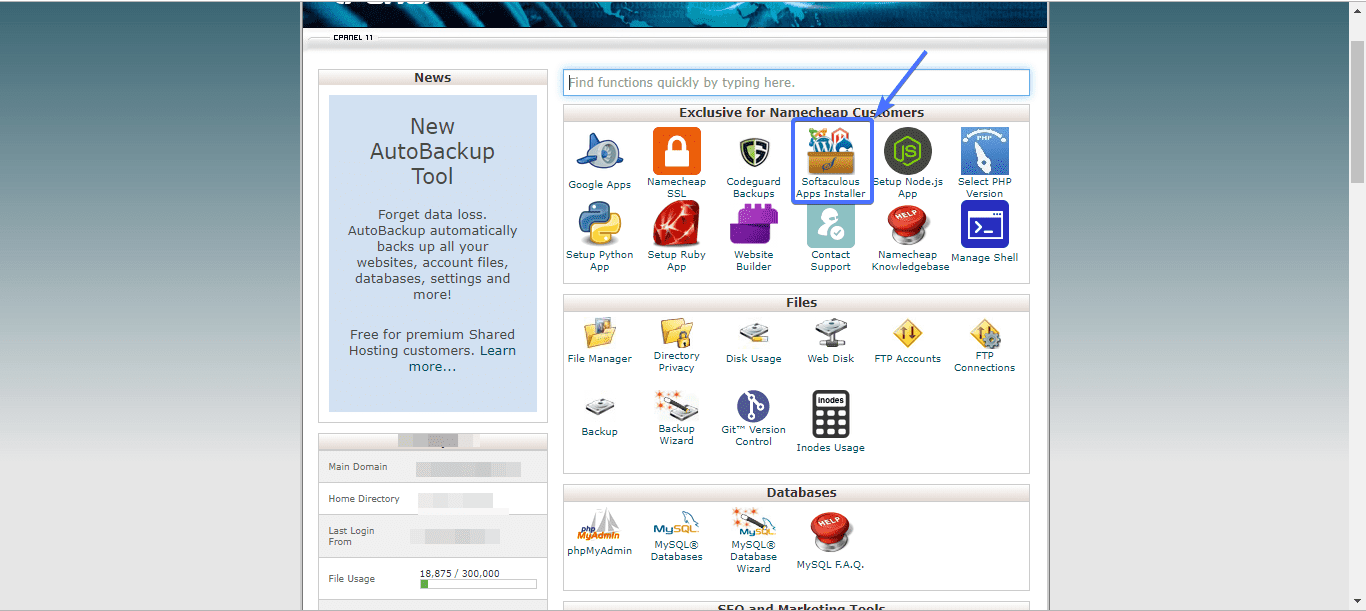
To do so, access your cPanel dashboard and navigate to the Apps section. Then click on Softaculous Apps Installer.
Depending on your hosting company, you might see Installatron, QuickInstall, and not Softaculous Apps Installer. If so, still click on it. They are all one-click WordPress installers accessible through your cPanel.
If it happens you didn’t see Softaculous or any installer, reach out to your host provider for assistance.
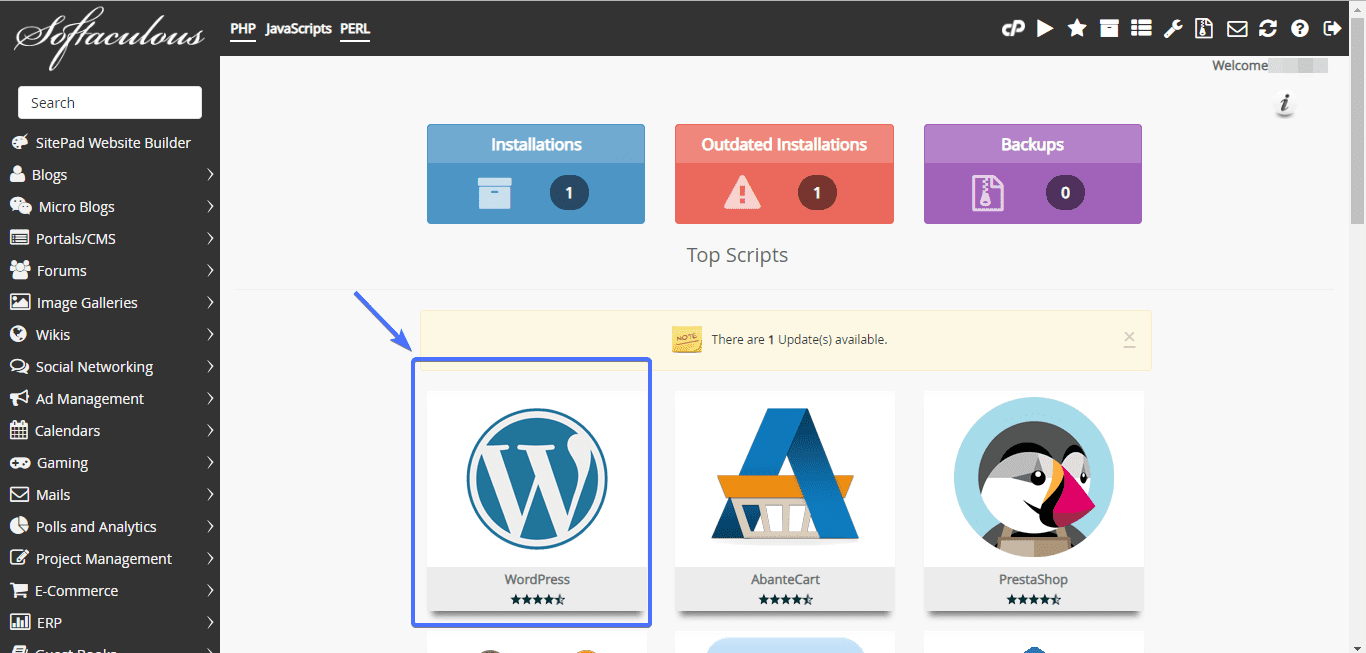
Upon clicking Softaculous Installer, you will see the software options you can install. WordPress, Joomla, Drupal, Prestashop, etc. are all available, and can be installed with a few clicks of the button.
To install WordPress on your domain, click the icon as shown below
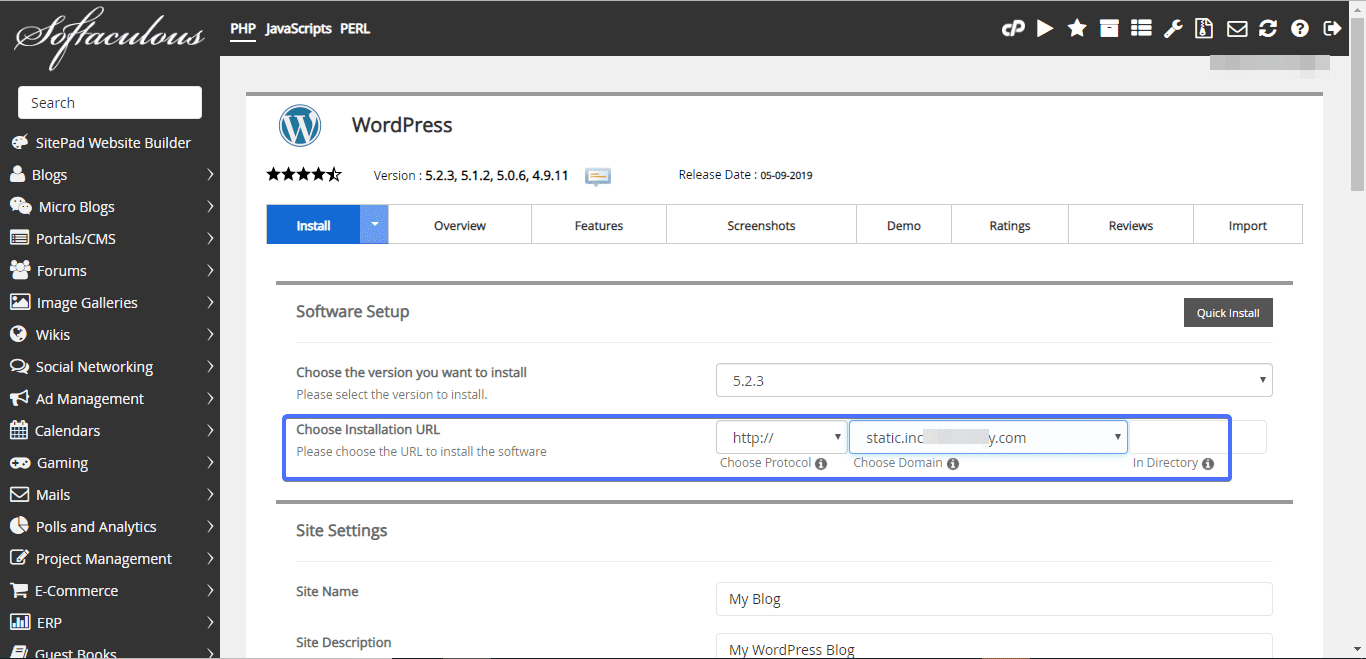
On the next page, select the domain you would like to install WordPress on. This could be your main domain or a subdomain.
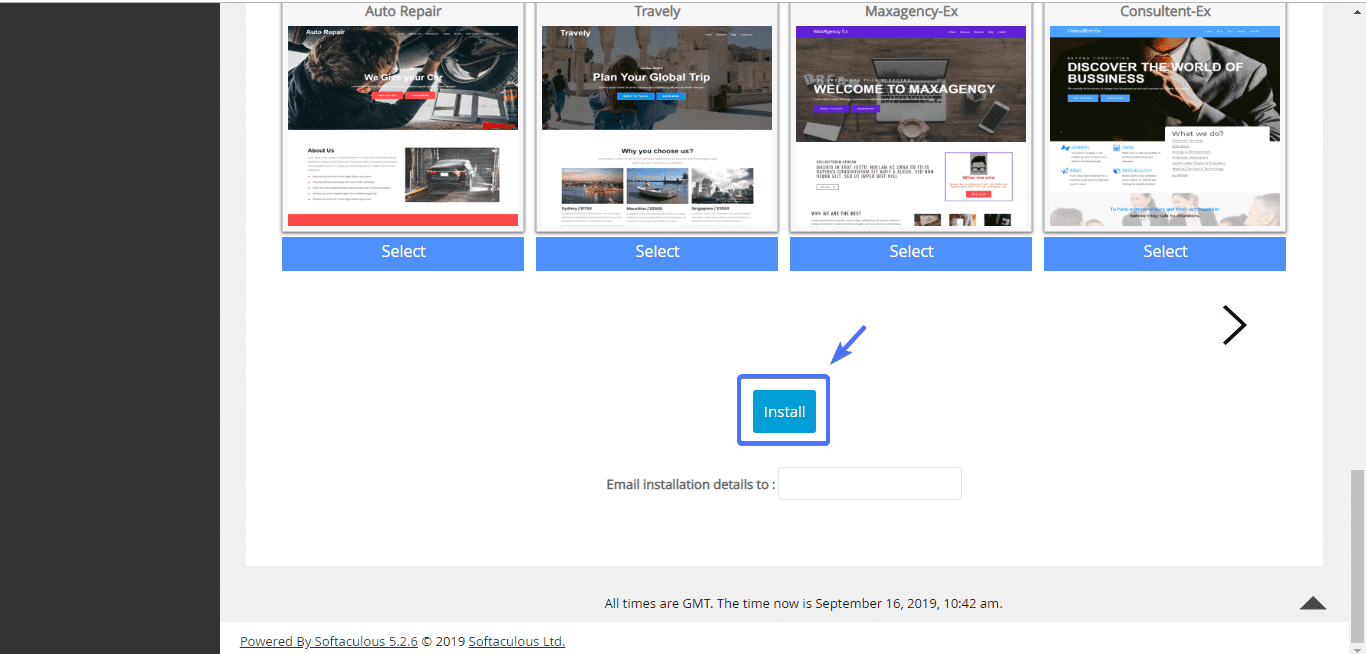
In this example, we chose to install WordPress on a subdomain. After selecting an installation URL, scroll down to the bottom of the page. You can type in your email in the “Email installation details to:” text box, and then click the install button.
After clicking the install button, you will get a WordPress installed success message. Also, you will be shown the URL to the login page of your newly installed WordPress site.
Install SSL certificate or website’s domain
Installing an SSL certificate not only makes your website more secure, but it also helps improve search ranking.
From your cPanel dashboard, you can install an SSL certificate on your domain. The installation process varies according to host providers. Some install it for you automatically upon creating a hosting account. Some others will charge you a fee before installation.
Upload and delete files via file manager feature of cPanel for WordPress
Every cPanel has a file manager module that lets you upload and remove files on the fly. This eliminates the need for FTP client. In addition to managing files, you can also create backups, manage disk space, and lots more, thanks to the cPanel backup wizard feature.
Create a custom email account
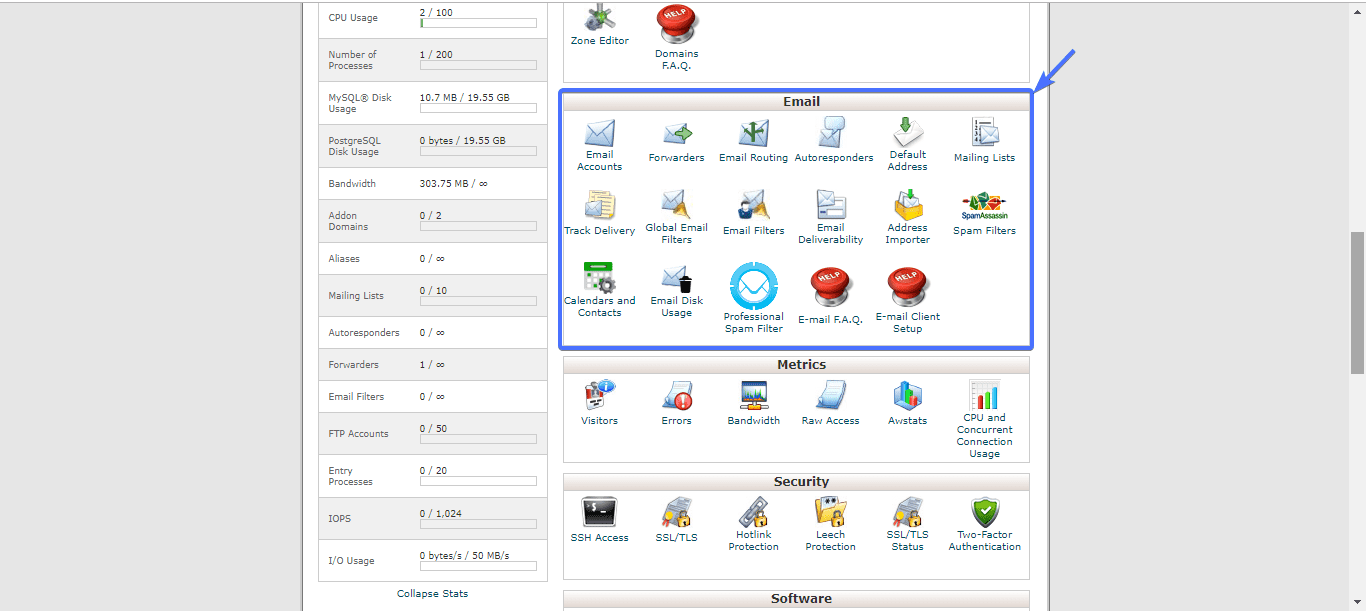
If you would like to have a custom email for your website, the easiest way to create one is via the cPanel.
A custom email can be something like this:
hello@mywebsite.com
What’s more, you can set up autoresponders, spam protection, and forwards via the email module.
If you would like to access your emails, you can do so via cPanel Webmail feature.
Access your website’s MySQL database
WordPress is a database-driven technology. For this reason, the need to modify/edit MySQL databases of your website will come up from time to time.
Thankfully, you can access and modify your WordPress website’s database via the cPanel.
Create FTP connection
To access your website’s files, you can either use the file manager feature of cPanel or create an FTP connection.
If FTP connection is your preference, you will first need to create an FTP user account. This you can do right from your cPanel accounts control panel dashboard.
After creating an FTP user account, login credentials will be generated for you. With the login credentials, you can access, modify, delete, and add files to your WordPress website.
Create subdomains
Subdomains make is possible to create multiple websites without having to purchase several domains.
A subdomain looks like this
https://subdomain.mywebsite.com
And, depending on your host company, there’s literally no limit to the number of subdomains you can create.
This is just a summary of some of the things you can do via cPanel.
Frequently Asked Questions
What is cPanel, and why is it important for WordPress?
cPanel is a web hosting control panel that allows website owners to manage their website’s files, databases, domains, and other features. It is essential for WordPress because it simplifies the process of managing your website’s technical aspects, such as creating databases, setting up email accounts, and installing SSL certificates.
How can I access cPanel for my WordPress website?
You can access cPanel by logging into your web hosting account and clicking on the cPanel icon or link. You may need to enter your login credentials to access cPanel.
What are the most important features of cPanel for WordPress users?
Some of the most important features of cPanel for WordPress users include the ability to manage email accounts, create and manage databases, install SSL certificates, access file manager, backup and restore files, and view website statistics.
How can I create an email account using cPanel?
To create an email account using cPanel, log in to cPanel and navigate to the Email Accounts section. From there, you can enter the desired email address, set a password, and configure other settings such as mailbox size and email forwarding.
Can I use cPanel to install WordPress?
While cPanel itself does not allow you to install WordPress, it often includes a feature called Softaculous that can automate the installation process for you. Simply navigate to the Softaculous section of cPanel, select WordPress from the available applications, and follow the prompts to complete the installation.
How can I back up my WordPress website using cPanel?
To back up your WordPress website using cPanel, navigate to the Backup section of cPanel and select the Backup Wizard. From there, you can choose to back up your entire website or select specific files and directories to back up.
Can I use cPanel to manage multiple WordPress websites?
Yes, you can use cPanel to manage multiple WordPress websites by creating separate databases and domains for each website. You can also use the same cPanel account to manage multiple web hosting accounts.
What should I do if I encounter issues with cPanel or my WordPress website?
If you encounter issues with cPanel or your WordPress website, it is recommended to contact your web hosting provider’s support team for assistance. They can help you troubleshoot and resolve any technical issues you may be experiencing.
Conclusion
cPanel is a great technology that makes it easy to manage a website’s hosting right from one place. However, not all host providers use it but prefer to use a custom control panel.
Whatever is the case, your hosting company is obliged to provide you with a means of managing your site’s hosting. If unsure about one they use, you can always reach out to them.
This article has shown you some of the most used functions of cPanel, including how to Install WordPress in cPanel.
If you would like to learn WordPress and everything that goes around it, visit our WP academy right away. You will find a ton of beginner-friendly guides and tutorials.
For questions or further assistance, don’t hesitate to contact us. We would love to help.
More Resources:
- Change Domain Name in WordPress
- How to Open a New Database and Database User in cPanel
- How to Fix “Are You Sure You Want to Do This?” Error in WordPress

