How to Move your WordPress site from HTTP to HTTPS
You may have noticed that most websites no longer run on HTTP; the majority have migrated to HTTPS. It may be a good idea for you also to redirect HTTP to HTTPS WordPress.
One major reason for this exodus is Google’s dislike for HTTP. In July 2018, Google came up with new development – all HTTP websites were marked “not secured”. Any site with such marking will surely discourage visitors. Even worse, they barely show up on search results.
Needless to say, if you are about to launch your website, it is best you integrate HTTPS into it. But if your WordPress website is already running on HTTP, you can migrate it to HTTPS quite easily. In this step by step guide, you will learn how.
In this article
What is HTTPS?
First, HTTP means Hyper Text Transfer Protocol. Think of it as the platform upon which the browser and the web server communicate. The current HTTP version is HTTP/2.
The ‘S’ in HTTPS stands for secured – that’s to say a secured connection. In simpler terms, HTTPS creates a more secure communication channel between the browser and the web server. That way, a web user doesn’t need to worry about his or her sensitive data being compromised by a hacker.
For a website to have a secured connection, it needs a matching, authentic Secured Socket Layer (SSL) certificate. The most up to date HTTPS version is Version 1.2.
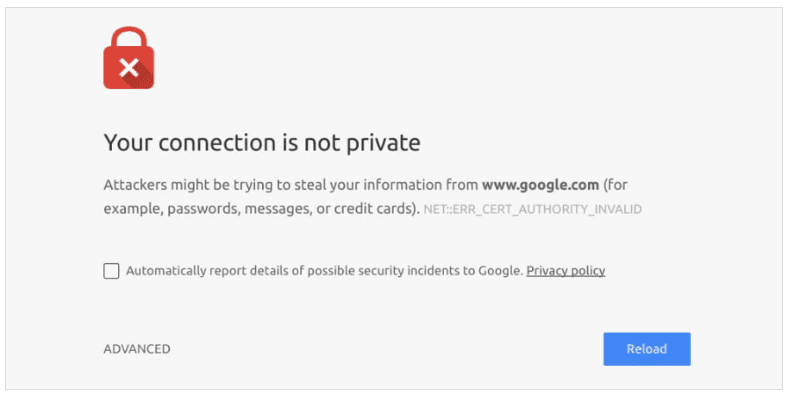
Often times, some web owners attempt to game the system. They do this by forcing HTTPS on a website that has no SSL certificate. Whenever you attempt to access such a site, what you would see is this:
 That said, let’s have a look at some of the reasons why you need to move to HTTPS.
Why Should You Switch WordPress from HTTP to HTTPS?
Installing HTTPS has lots of benefits, and below are some of them.
HTTPS Gives Web Users Confidence
In this age of heightened cyber-crime, nothing is as scary as feeding the internet with sensitive personal detail. However, a website that has a secured connection takes this fear away. If your website is such that it demands sensitive personal details from users, SSL (HTTPS) is a must.
HTTPS is a Must for All E-commerce Stores
If you have plans of setting up an e-commerce store – or you already have one – HTTPS is non-negotiable. That way, users will feel safe to provide you with their credit card details.
HTTPS Websites Perform Better, SEO wise
It’s known that Google will naturally push down websites without a secure connection on search pages. So, if you don’t want that to happen, it’s about time you upgraded your site to HTTPS.
HTTPS Sites Load Way Faster than HTTP
Talking about SEO, load time has become a major ranking factor. You cannot afford to be careless about the load time of your website. One sure way of speeding up your site is migrating from HTTP to HTTPS.
If you need further tips on this, please read our WordPress Speed Guide.
Now you’ve seen the benefits a secure connection has to offer, it’s time to get one.
Steps to Migrate WordPress from HTTP to HTTPS
1. Get an SSL Certificate
The very first thing you would want to do is to get yourself an SSL certificate. The way to go about this is largely dependent on your budget and the type of hosting account. You can either get it for free or paid. The paid version is between $20 and $75 per year. Also, some host providers offer SSL certificate as part of the hosting package, others don’t. It is much easier to get one from your host and have them enable it.
If otherwise, you want to get an SSL certificate for free. Here’s how:
Let’s Encrypt
Ever since SSL became mandatory for websites, Let’s Encrypt, a non-profit organization, stepped forward to offer it for free. The good thing about it is that you don’t need to be a techie to get it. You can get it directly from your c-Panel (scroll to the ‘Security’ section and click Let’s Encrypt), provided your host provider is on the list of supported providers. If Let’s Encrypt is not available in your cPanel, you can use SSL For Free as an alternative.
SSL For Free
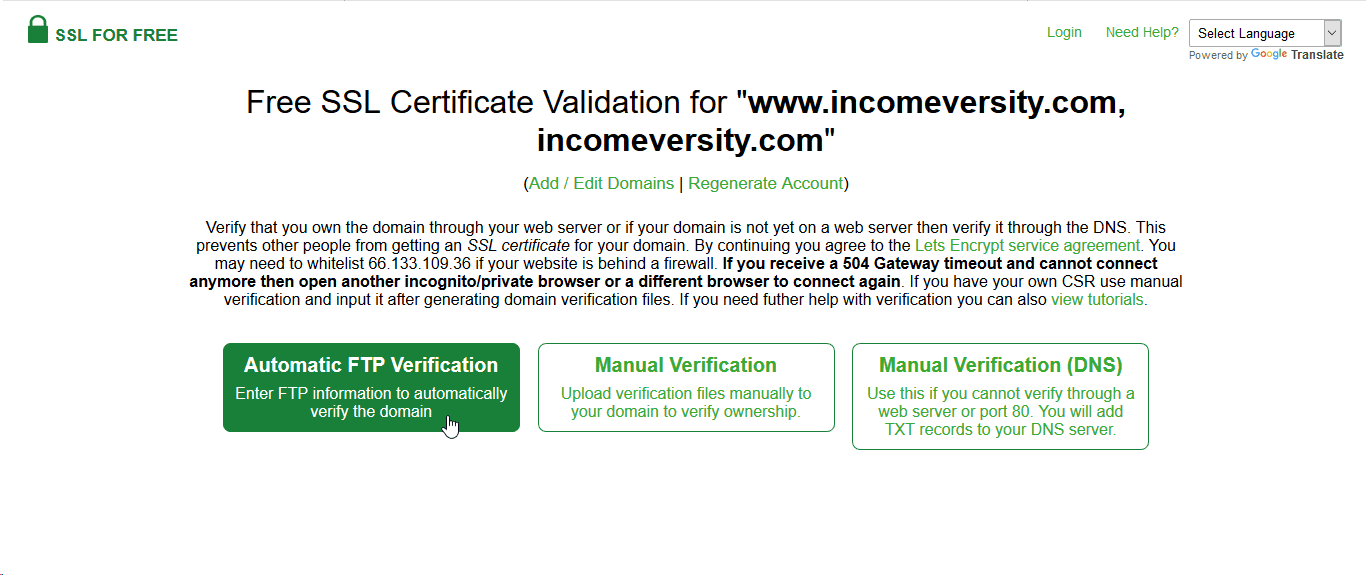
On the homepage of SSL For Free, put in your website’s URL and click “Create Free SSL Certificate”
 Next, select the verification method you are most comfortable with. Verifying proves you are the owner of the website. Automatic verification is the easiest, so select it.
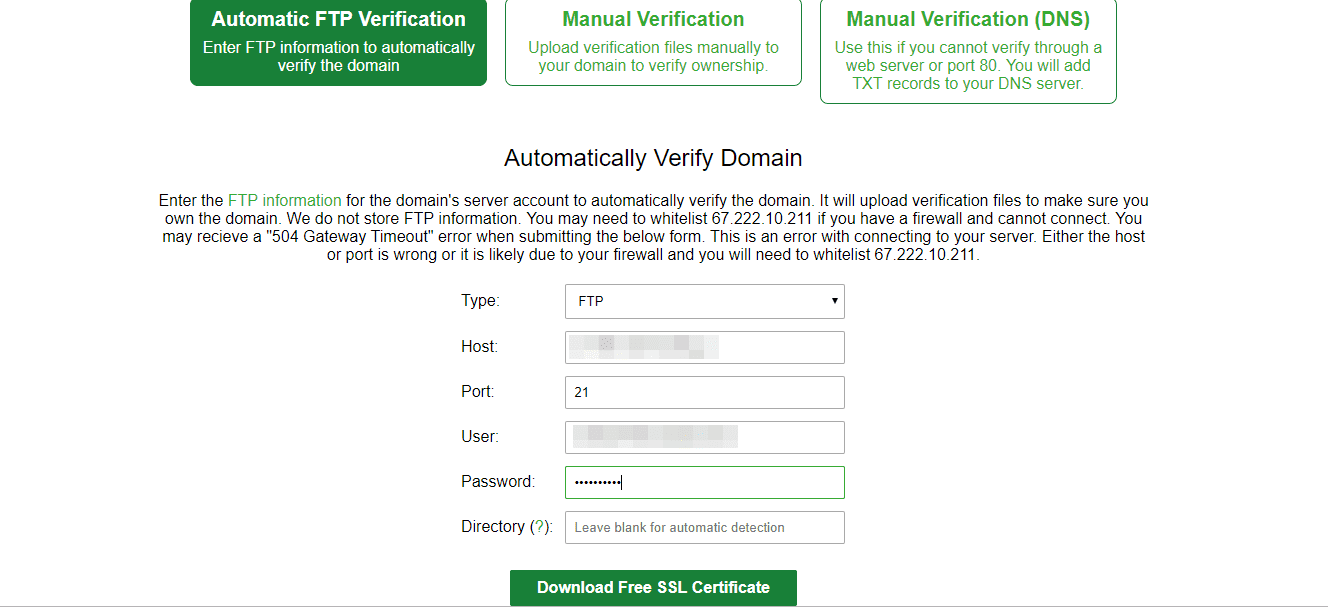
 On the next page, provide your FTP username, password, and directory (these are usually your cPanel details. You can ask your host for them). The directory will likely be “/public_html”.
Click download free SSL certificate. Finally, provide the email you want notifications to be sent to. This is important so you get alerted when the SSL needs to be updated.
 Note that this certificate will require manual updating every 90 days.
With your SSL certificate in hand, it’s about time it got installed.
2. Install SSL Certificate from Your Host
To avoid all the hassles and headaches that come with installing SSL on your host, reach out to your hosting provider. All you need to do is to provide them with the free SSL you’ve downloaded. They should be able to help you with it.
3. Migrate WordPress to HTTPS
After the SSL Certificate has been installed in your host, the last thing you need to do is modify WordPress so all your link starts with HTTPS. You can do this using a plugin, or manually.
Use a Plugin
As a beginner, it’s recommended you use a plugin for this task. But if you have some coding experience and understand the WordPress environment, you might decide to migrate manually.
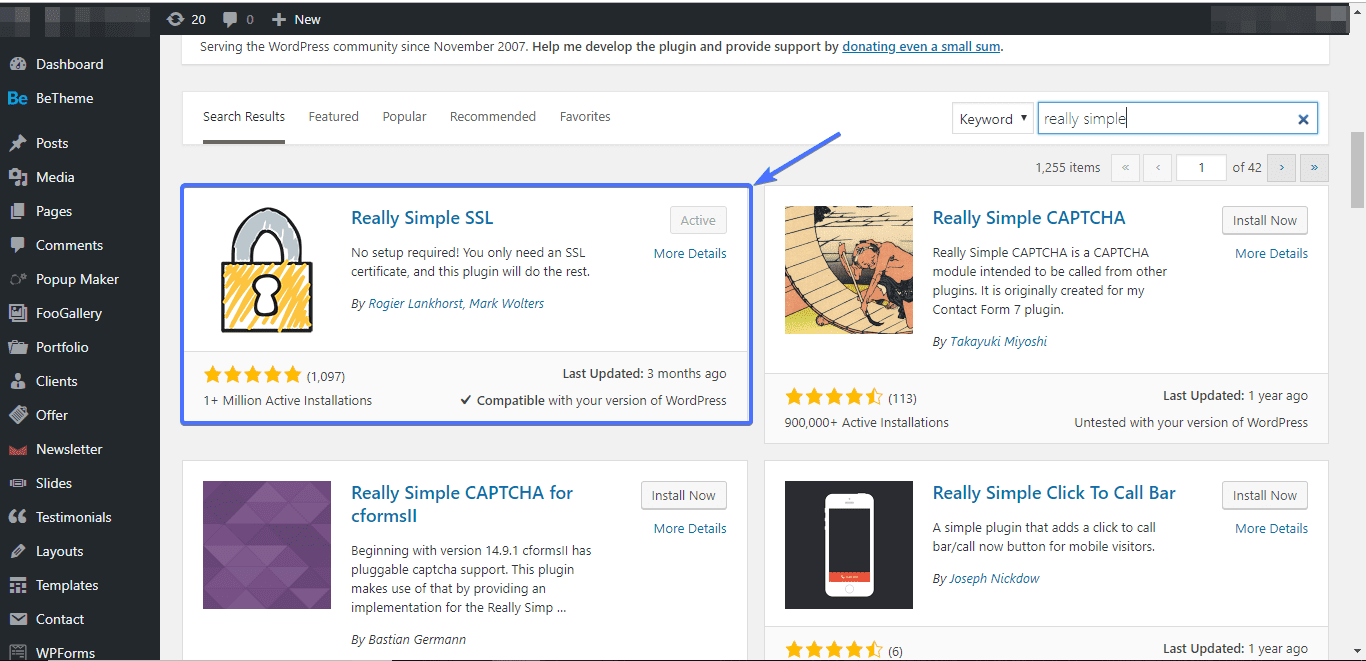
The plugin we will be using for this tutorial is Really Simple SSL. As the name suggests, it’s really simple and intuitive to use.
Install and activate the plugin in the “Add New Plugin” area of WordPress.
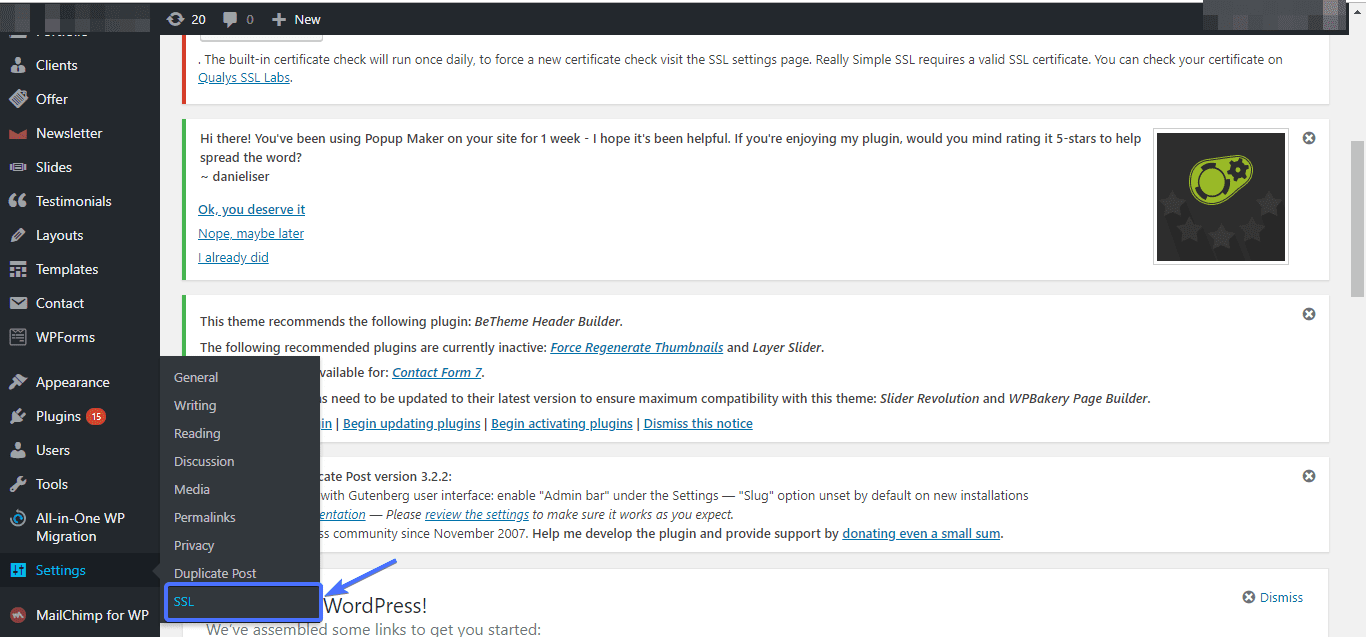
 Upon successful installation and activation, go to Settings >> SSL. Click the “Reload over HTTP” button.
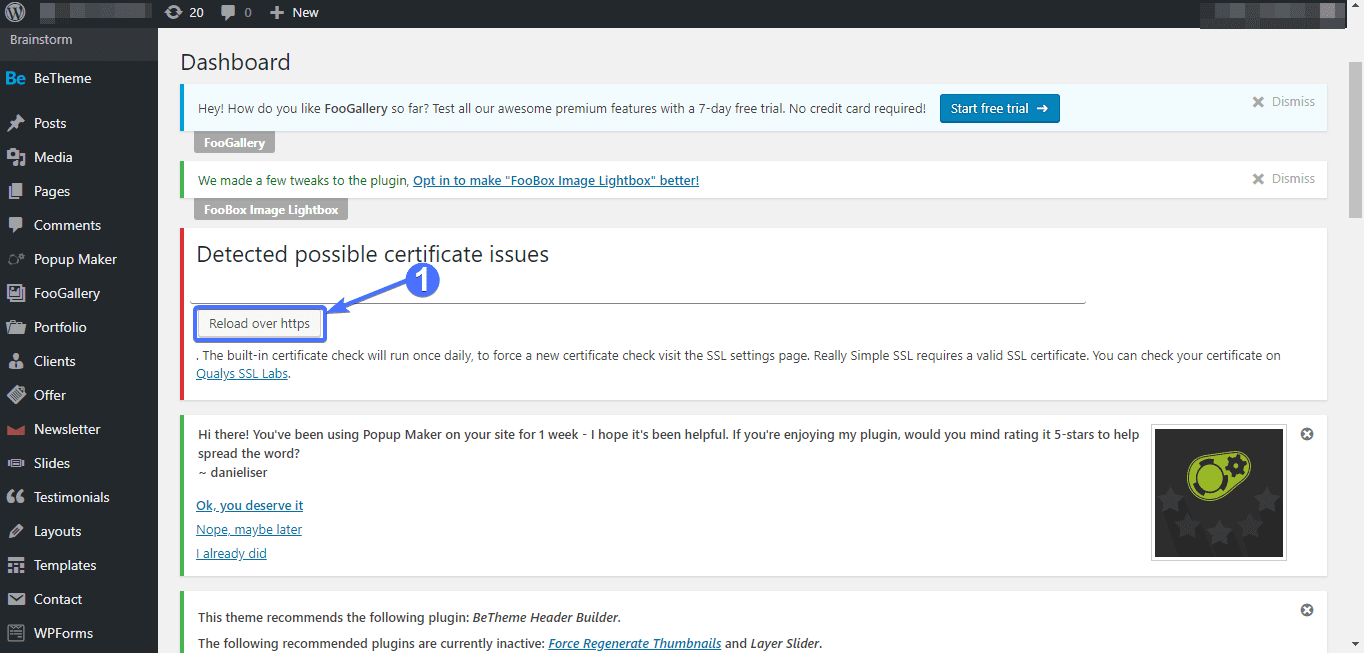 Once you click that, the plugin will force HTTPS on the entire pages on your website. It will also handle mixed content errors that may arise due to the migration.
Migrating Manually
If migrating your WordPress website with a plugin proves difficult, go the manual route. To start with, log into your WordPress Dashboard. Go to Settings >> General. In the “WordPress Address (URL)” and “Site Address (URL)” area, replace “HTTP” with “HTTPS”.
 Click Save Changes and you are all set!
4. Take Care of 301 Redirects
If you went the manual route, it’s important to have a 301 redirect setup properly. With a 301 redirect set up, any visitor that tries accessing your old site (http://yourwebsite.com) will be redirected to the new one (https://yourwebsite.com). That is to say, you have to redirect WordPress HTTP to HTTPS. This will help you fix the mixed content issue which can hurt your SEO and website rankings.
To do that, connect to your website via FTP. Once a connection has been established, locate the folder containing your WordPress files (usually public_html) and double-click to open it.
In this folder, scroll down and locate the .htaccess files. Right-click, then click “view/edit”
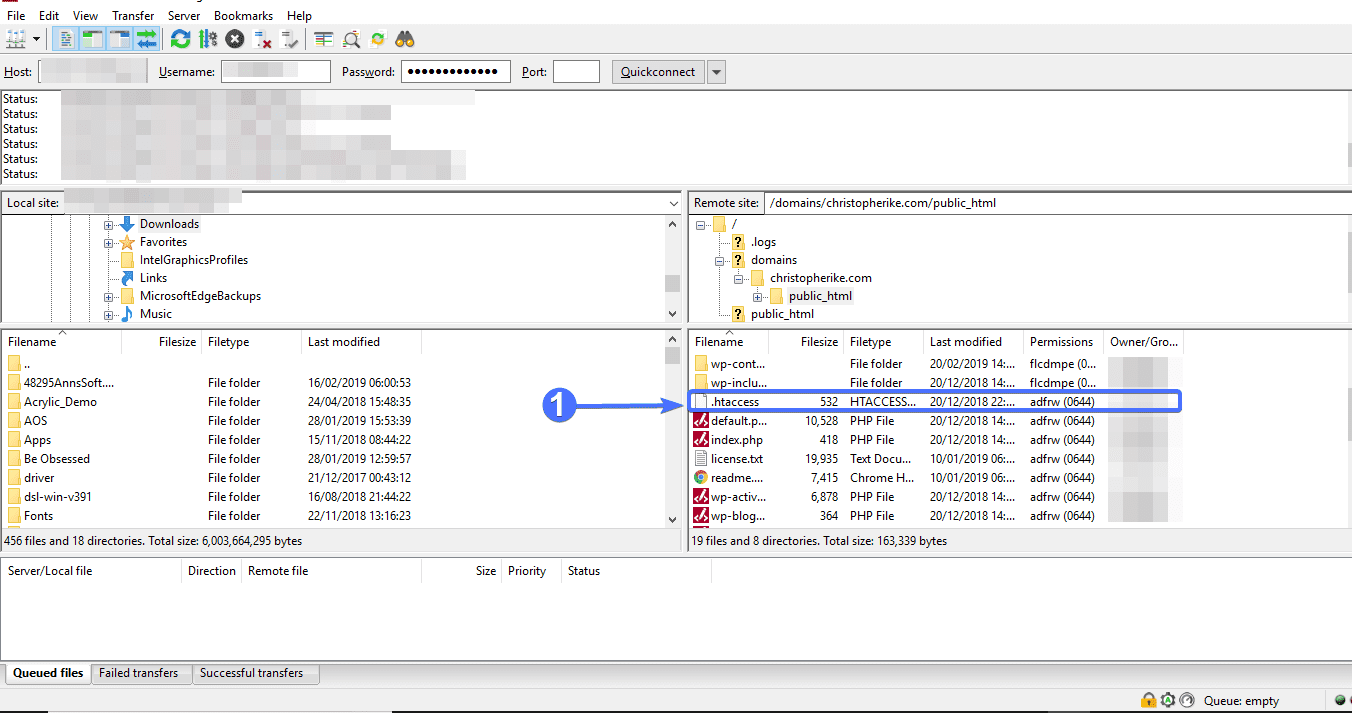 On opening the file, add the following code:
<IfModule mod_rewrite.c>RewriteEngine OnRewriteCond %{SERVER_PORT}80RewriteRule ^(.*)$ https://www.mywebsite.com/$1 [R,L]</IfModule>
Replace “mywebsite.com” with the URL of your website. With that done, save and close the file. When prompted to upload the updated file by FileZilla, agree.
Congratulations! You’ve now moved your website from HTTP to HTTPS.
SSL Check (how to check if SSL works)
Now you’ve set up your SSL, it time to check if it’s working. There are two ways to go about that.
Online SSL Checker
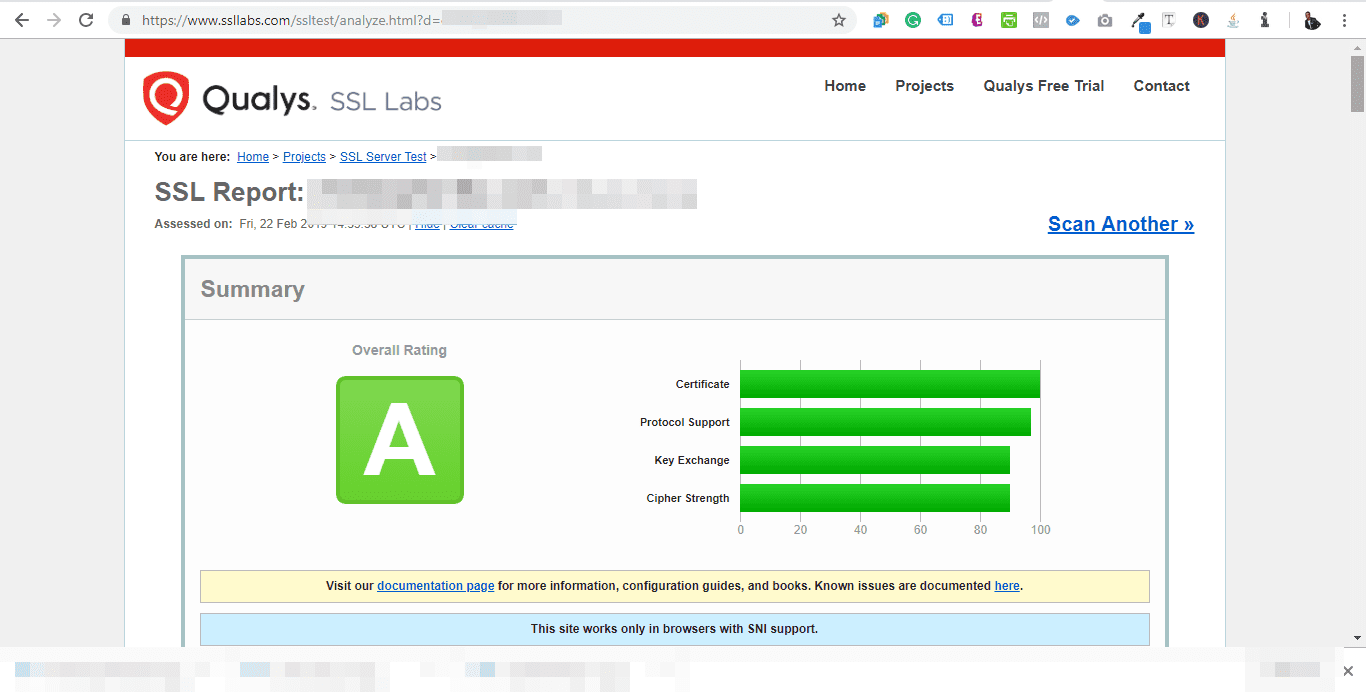
Head over to SSL Labs, put in your website’s URL, and submit.
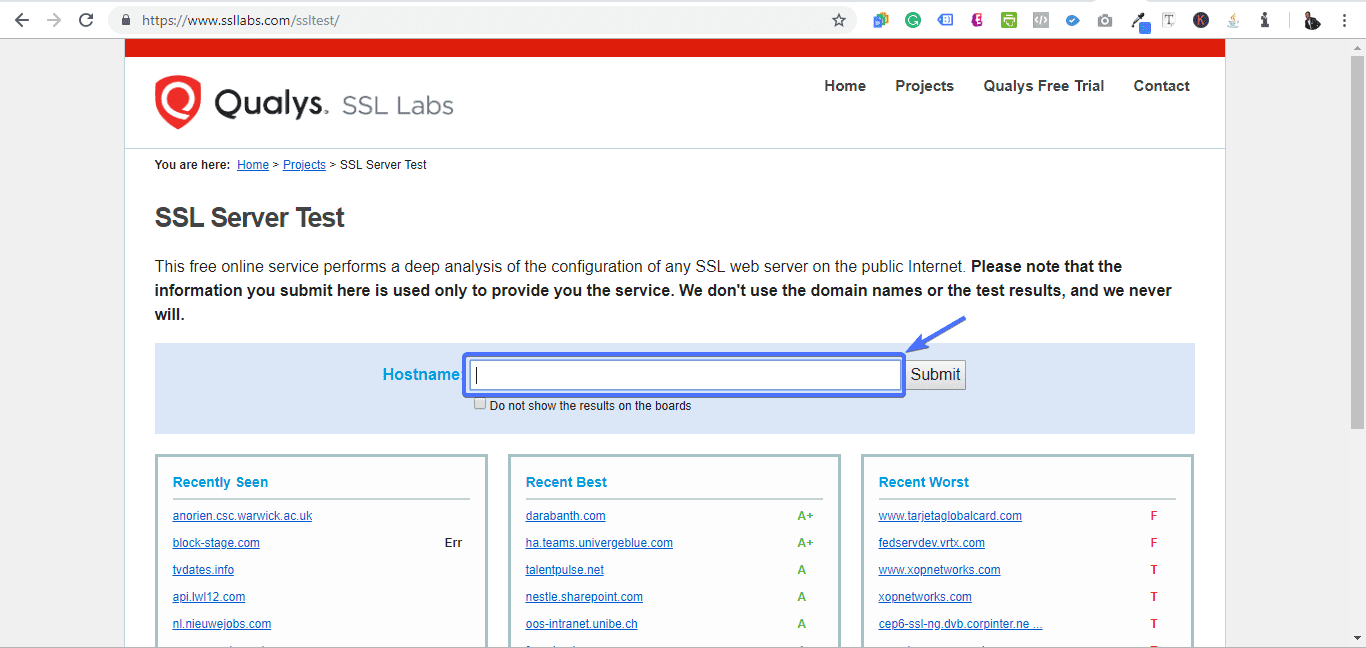 If it was properly installed, you should see the following screen
Physical examination
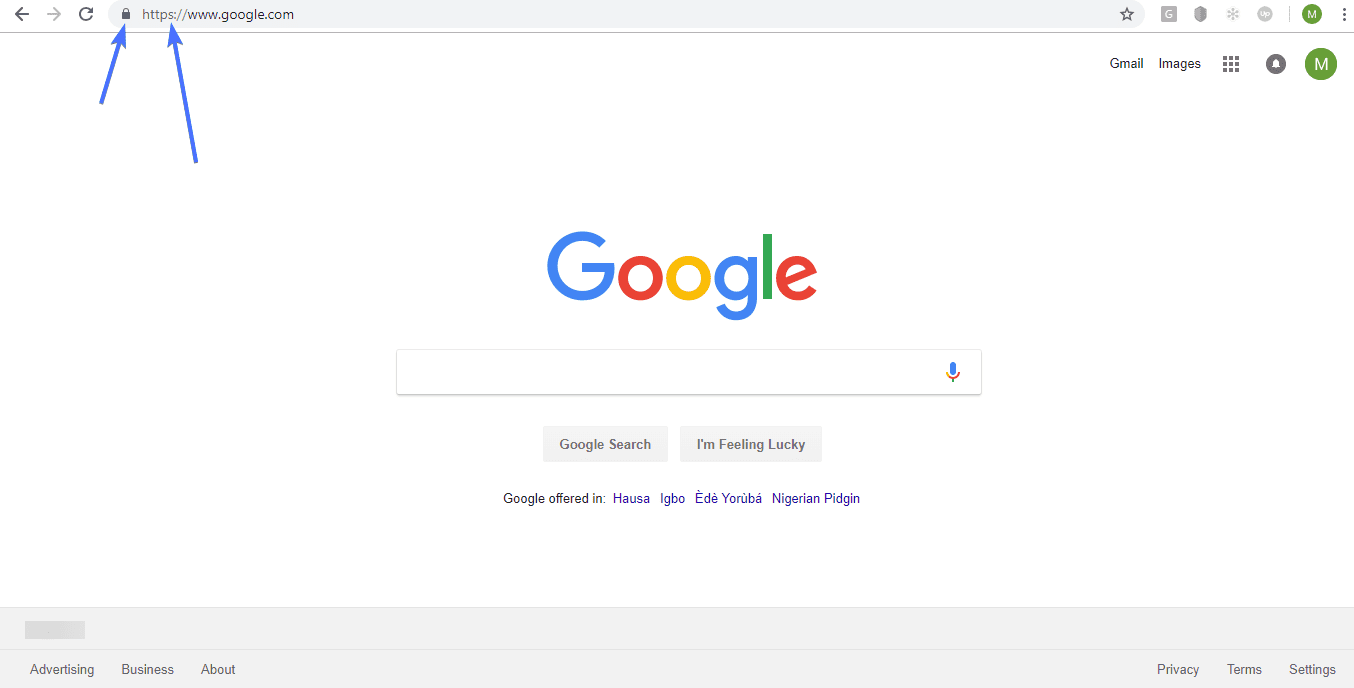
Check the top bar of your browser. If you installed SSL properly, you should see a padlock symbol by the top left-hand corner. Also, the URL should have “HTTPS”
 One last important step is to check your website on Google search to be sure your website has changed from HTTP to HTTPS. You can do this in Google Search Console. Finally, after a couple of days, check your website traffic in Google Analytics to be sure traffic to your site wasn’t affected by the migration.
Frequently Asked Questions
What is HTTPS, and why is it important for my WordPress website?
HTTPS (HyperText Transfer Protocol Secure) is a protocol for secure communication over the internet. It encrypts the data that is transmitted between your website and your visitors’ browsers, making it much harder for hackers to intercept and steal sensitive information. HTTPS is especially important for websites that handle personal or financial data, such as e-commerce sites, but it’s becoming increasingly important for all websites. In fact, Google has indicated that HTTPS is now a ranking factor for search results, so having a secure website can also improve your SEO.
How can I tell if my WordPress website is using HTTPS?
If your website is using HTTPS, you’ll see a green padlock icon in the address bar of your browser, and the URL will start with “https://” instead of “http://”. You can also use an online tool like Why No Padlock? or SSL Checker to check the status of your website’s SSL certificate.
What is an SSL certificate, and do I need one for my WordPress website?
An SSL (Secure Sockets Layer) certificate is a digital certificate that verifies the identity of a website and enables secure communication between the website and its visitors. All websites that use HTTPS require an SSL certificate. Some web hosting providers offer free SSL certificates through Let’s Encrypt, while others require you to purchase an SSL certificate separately.
How do I migrate my WordPress website from HTTP to HTTPS?
The process of migrating your WordPress website from HTTP to HTTPS involves obtaining an SSL certificate, configuring your website to use HTTPS, updating any internal links and hard-coded HTTP references, and redirecting HTTP traffic to HTTPS. The specific steps can vary depending on your web hosting provider and the plugins and themes you’re using. You can use a plugin like Really Simple SSL or SSL Insecure Content Fixer to simplify the process.
Will migrating to HTTPS affect my SEO or website rankings?
Migrating to HTTPS can actually improve your SEO and website rankings, as Google has indicated that HTTPS is now a ranking factor for search results. However, if the migration is not done properly, it can cause temporary fluctuations in rankings and traffic. To minimize the impact on your SEO, it’s important to follow best practices for HTTPS migration, such as updating your sitemap, submitting new URLs to Google Search Console, and using 301 redirects to redirect HTTP traffic to HTTPS.
Conclusion
If you haven’t done so already, there’s no need to wait to redirect HTTP to HTTPS WordPress. Doing this will do two things for you:
Prove to Google, and other search engines, you mean business. Remove fear from the heart of visitors – few things are as scary in the online world as visiting a site that is not secure and getting a security warning from your browser.
We hope we managed to help you with moving WordPress from HTTP. This guide has shown you the steps to get HTTPS enabled on your site. Hopefully, you have been able to complete this process and are now greeted with the pleasant green section on your navigation bar that indicates your site is secure. For more WordPress tutorials check our blog.
More Resources:
- How To Fix Err_Too_Many_Redirects Error In WordPress
- How to fix err_ssl_version_or_cipher_mismatch Error
- Err_SSL_Protocol_Error – How to Fix it

