How To Install WordPress On Localhost – Complete Guide
Installing WordPress locally on a Windows or Mac computer is often the first step in any WordPress website development process. This is regarded as WordPress localhost installation. Localhost here refers to your Windows or Mac machine.
To install WordPress locally, you need a localhost server app. There are lots of localhost server apps you can use, and they all work pretty well. WAMP, XAMPP, Local by Flywheel and Desktop Server are typical examples.
For this tutorial, we will be using XAMPP to install WordPress on localhost.
Content:
- Why install WordPress Locally?
- How to install XAMPP
- How to Install WordPress on XAMPP
- Conclusion
Why Install WordPress Locally
You might be wondering if setting up WordPress locally on your computer is worth the effort. The short answer is yes! Here are some of the benefits of installing first on your computer before moving it online.
1. Provides flexibility and saves time:
Building a modern WordPress Website from scratch takes time. If you were to go the direct route (setting up and designing WordPress on a live server), you would spend hours online to get your website up and running.
However, if you opt for local installation, an internet connection will only be needed when you want to push the website online.
2. Minimizes downtime:
You can’t afford to make drastic changes – like modifying a theme – on a live website. This could break your site, and your website’s uptime and reputation will be severely affected.
The better option is to test offline and then make the changes live after exhaustive testing.
3. Faster development:
Local installation of WordPress affords you the opportunity to quickly test plugins and themes. And you can do this without breaking anything on your live site.
That said, let’s get into it: how to install XAMPP.
How to Install XAMPP for Successful WordPress Localhost Installation
For WordPress to work, three things have to be in place:
- A server-side programing language like PHP
- A web server app. Apache is the commonest
- A database management technology like MySQL
While you can install all three of these platforms separately, things can get out of hand, especially if you aren’t experienced. To save time –and lots of headaches, simply install XAMPP.
XAMPP is an acronym for cross (X) platform, Apache MySQL, Pearl, and PHP. Basically, what it does is to provide the complete environment WordPress needs to function. XAMPP is free, super light, easy to use & install.
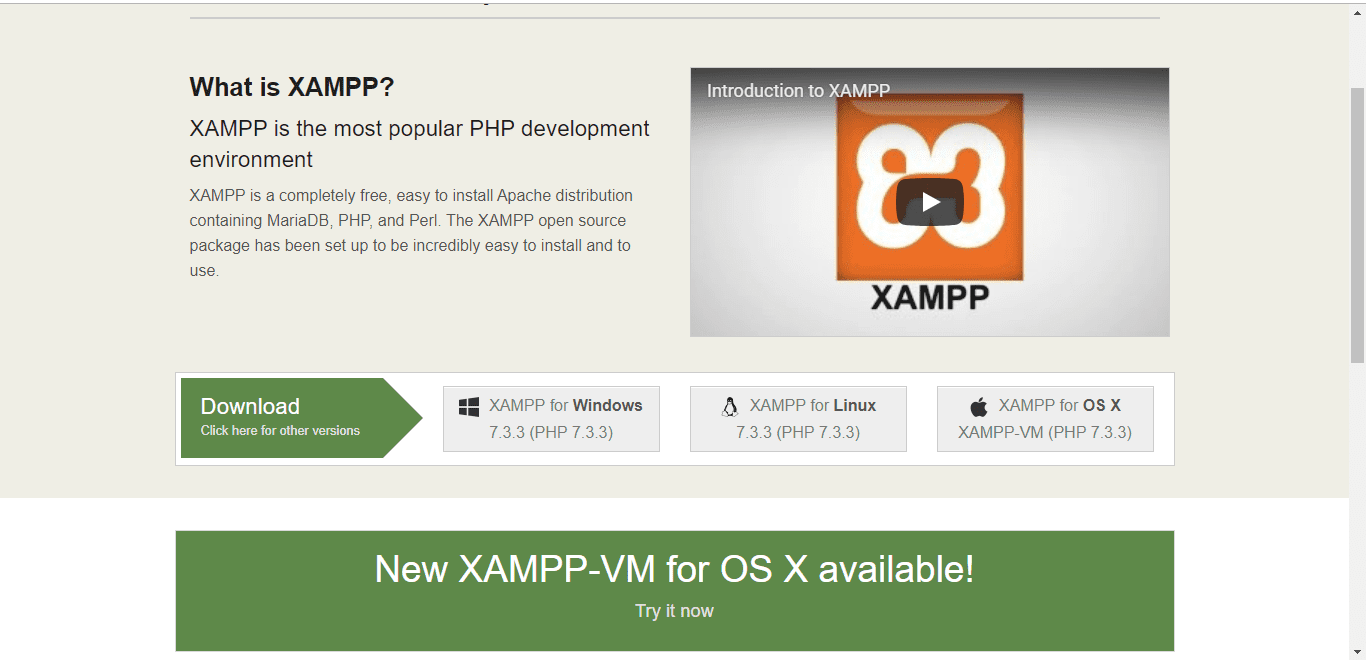
So, to get started with XAMPP, head over to the official website to download it.
You would have to select your operating system.
For this tutorial, getting XAMPP for WordPress localhost installation, we will illustrate how to do it on Windows, but the steps are very similar for Mac.
After the download completes, run the installer file. The installation process is pretty straightforward and simple.
Once the installation completes, fire up XAMPP. Start Apache and MySQL.
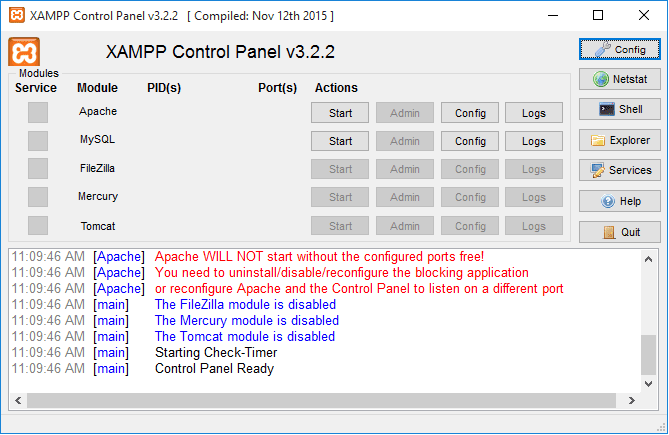
Here’s what you should see on starting up Apache and MySQL
Solving XAMPP Error on Windows
Often times, Windows users report running into port errors when trying to start XAMPP for the first time. Here’s a screenshot of an Apache error.
(Note: if you had no issue starting Apache and MySQL, skip to the next section).
Should you encounter such an error, don’t panic! This happened because another program on your computer is using the same port which Apache and MySQL uses: port 80 or 443.
Here’s how to solve the problem.
1: Close XAMPP
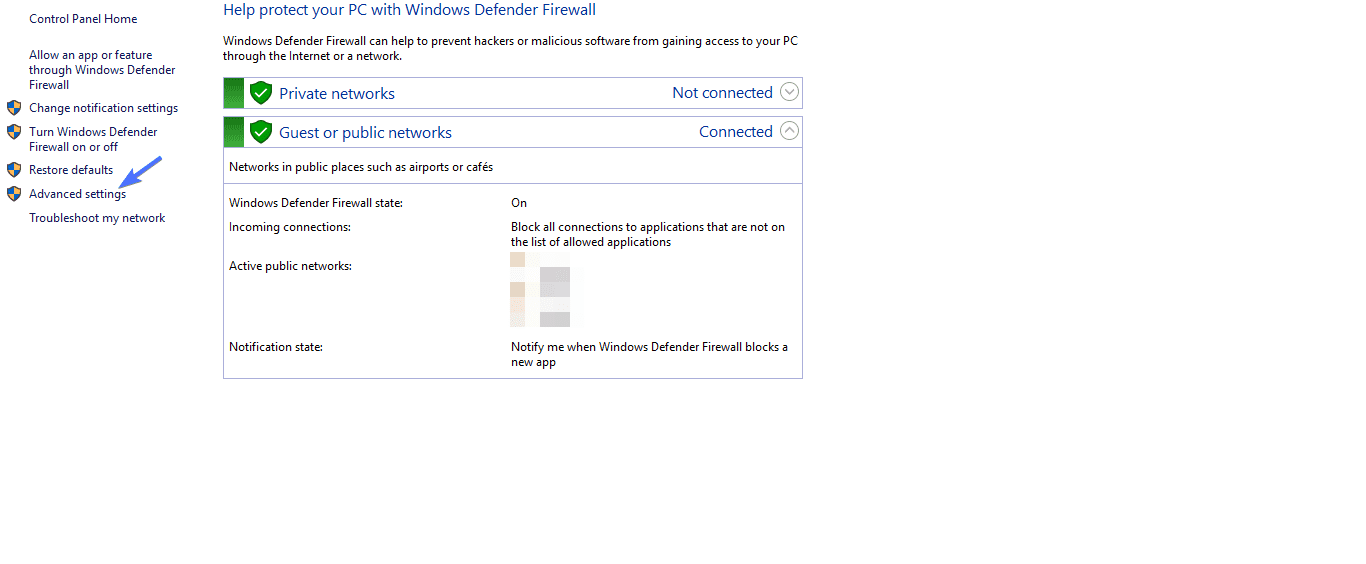
2: Launch Windows Defender firewall. You can do this by clicking the menu button and doing a search.
3: In Windows Defender, click Advanced Settings
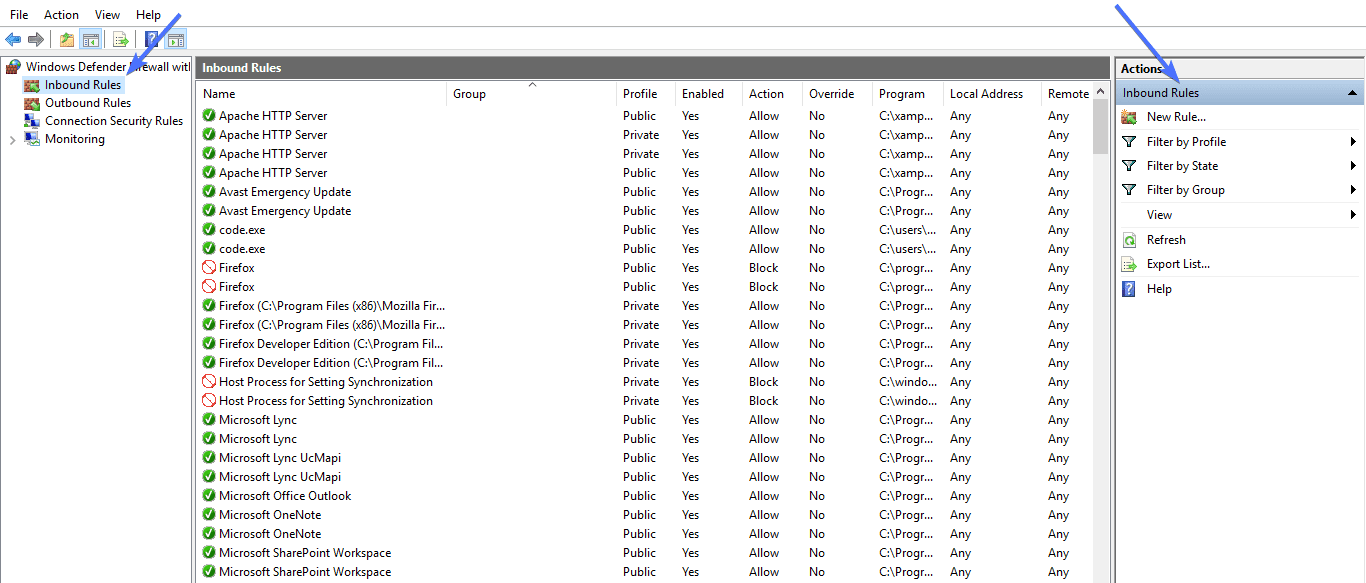
4: On the next page, click Inbound Rules on the left and click New Rules on the right menu.
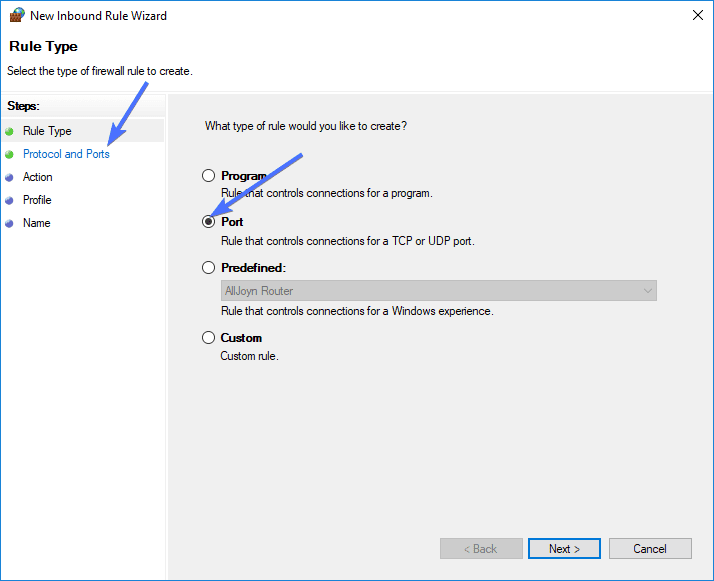
5: Select Port as the rule type and click Next
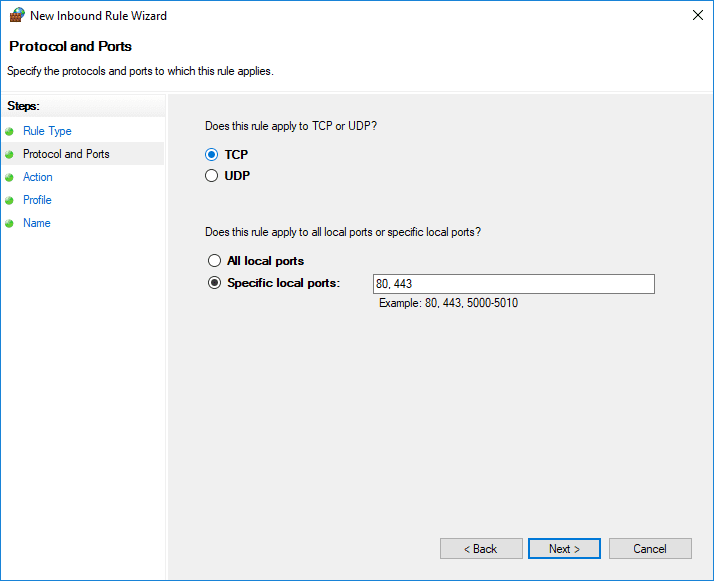
6: Select TCP. Type in 80 and 443 in Specific local ports.
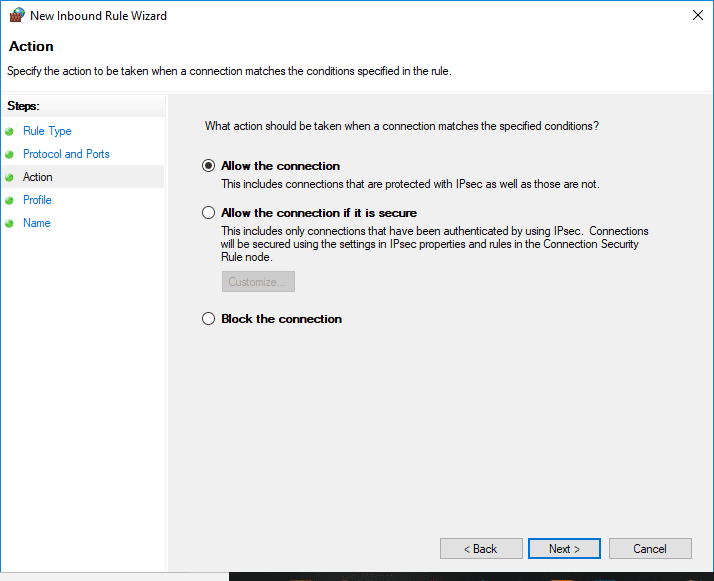
Click next. On the next screen, check Allow the connection, hit the next button
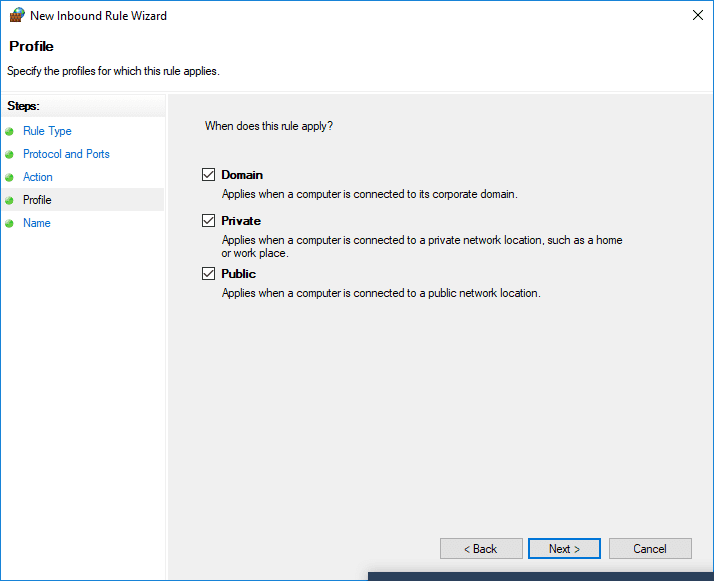
Ensure all three options are checked before proceeding.
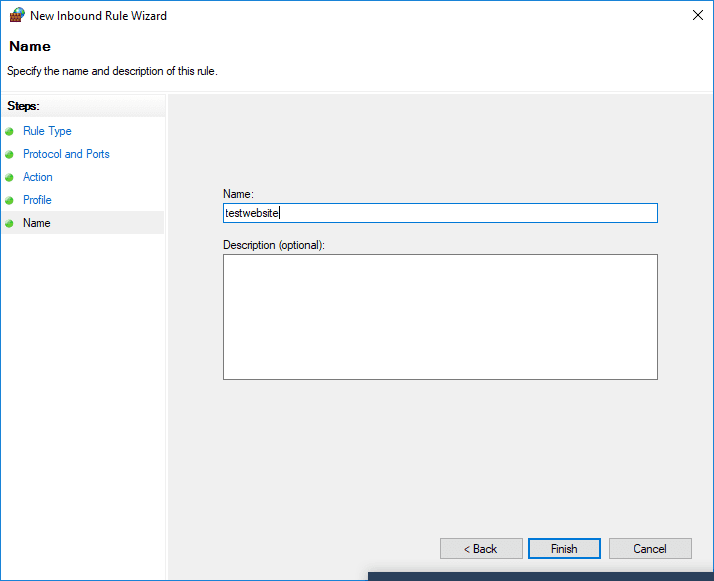
7: Type in a name in the name input area. You can put in whatever name you wish. For this example, we will still use “testwebsite”. Description is optional, so you can leave it out. Then click finish.
8: Repeat the process all over. This time, change the name to “testwebsite2”. When you are done, restart your PC. Everything should work fine now.
How to Do WordPress Localhost Installation on XAMPP
Now we have XAMPP up and running, let’s set up WordPress by following the steps below.
Step 1: Download WordPress
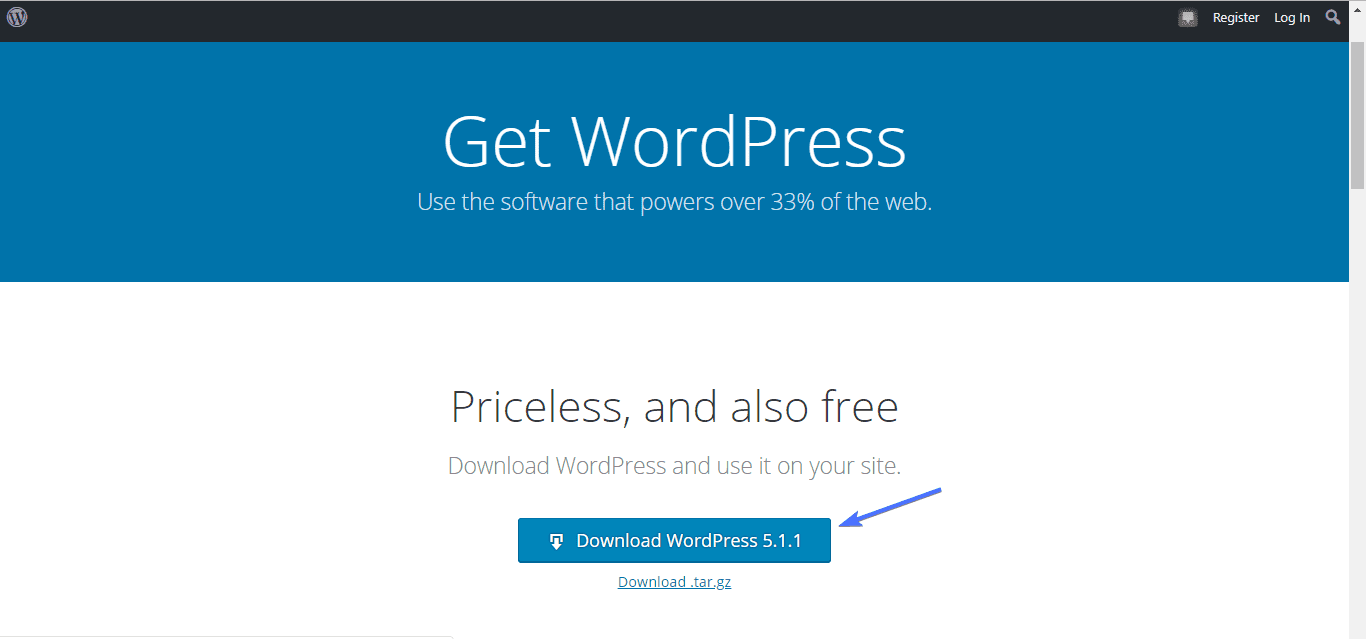
Head over to WordPress official download site to get the latest version of WordPress
Step 2: Extract the downloaded folder
WordPress comes in zipped format, so you first need to extract it. That should be fairly simple.
Step 3: Copy the extracted folder to XAMPP registry
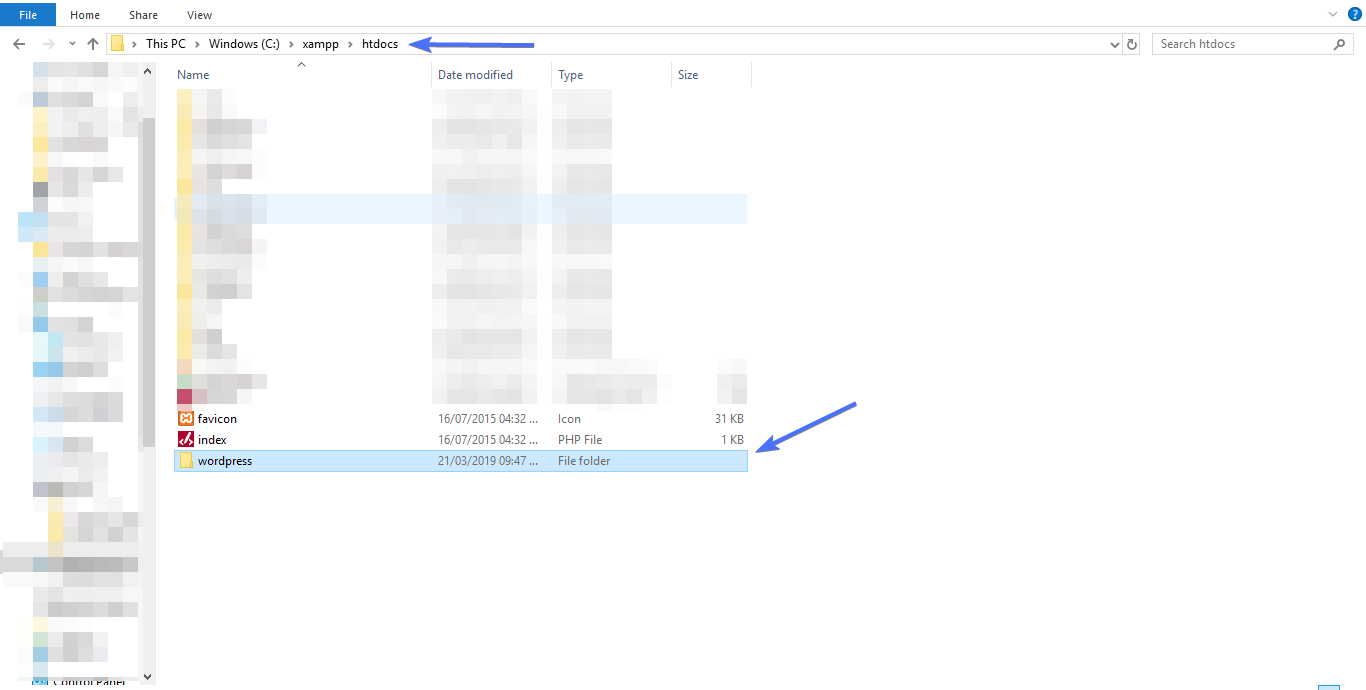
Since we are using Windows, copy the extracted folder to:
C:\xampp\htdocs
For Mac users, XAMPP registry takes this form:
Application/XAMPP/htdocs
Step 4: Rename the folder
Though optional, we recommend you rename the folder. For this tutorial on WordPress localhost installation, we shall be renaming the folder to “testwebsite”
Step 5: Launch website in browser
With XAMPP still running, open Google Chrome (or any browser of your choice). Type “localhost/testwebsite” in the tab
What you would see next is this:
Step 6: Create a database
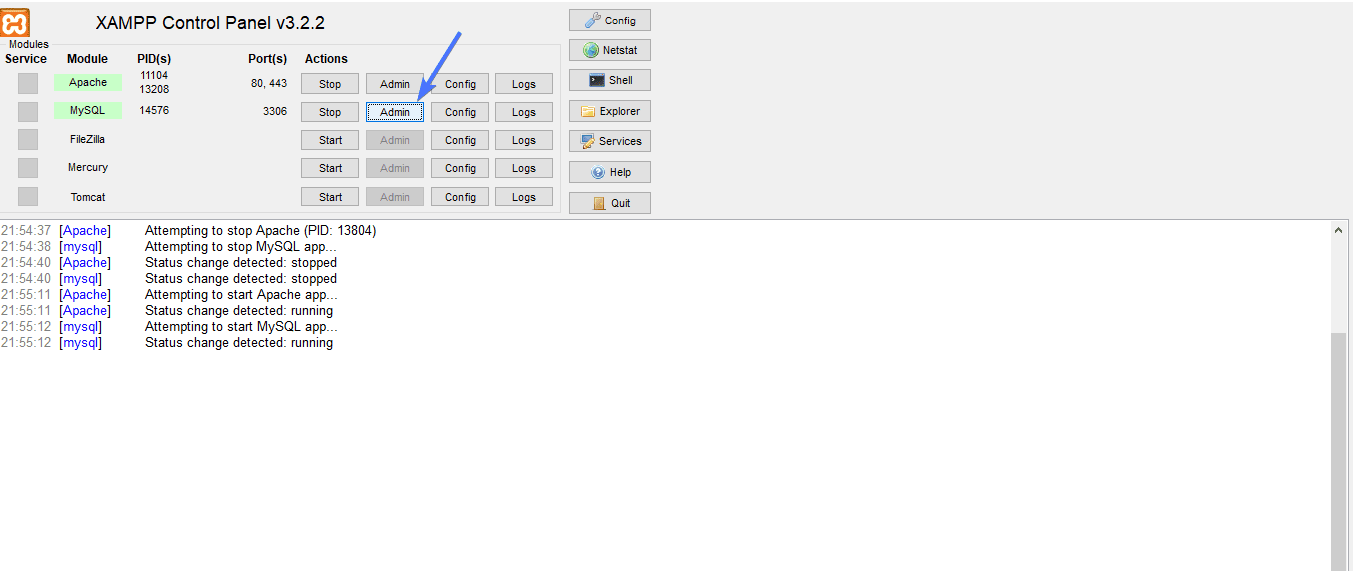
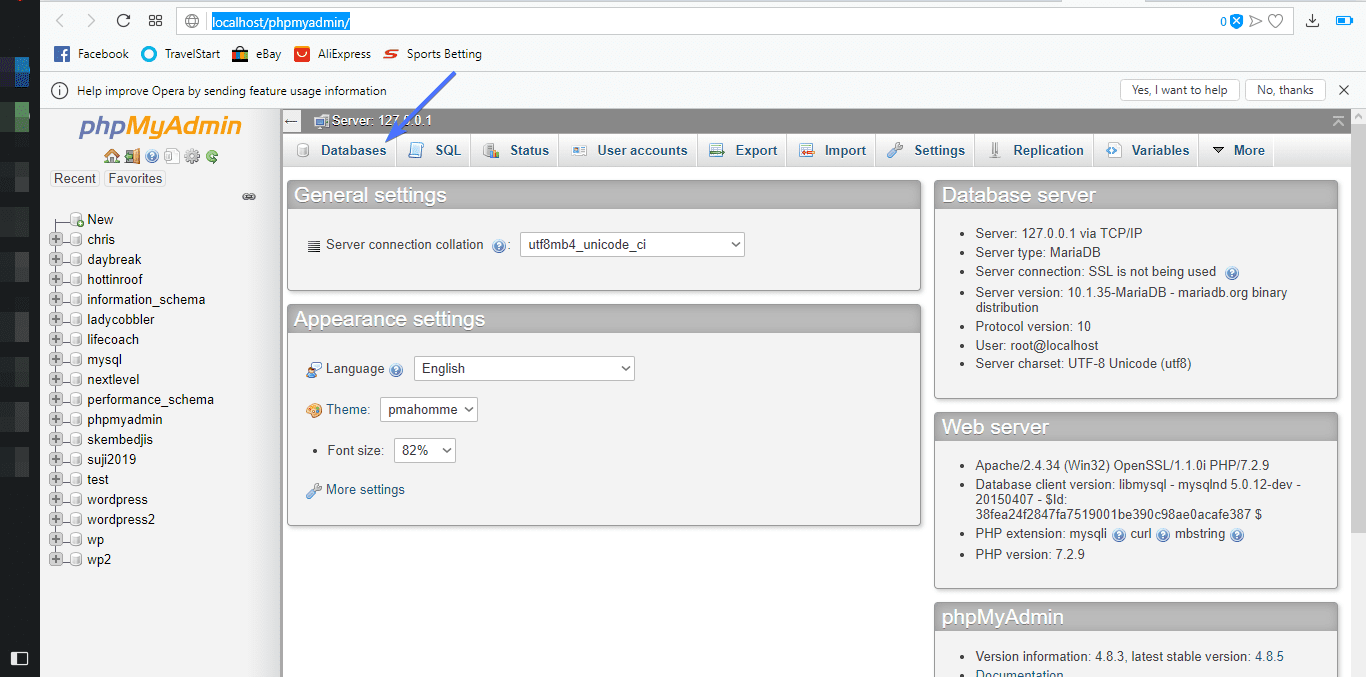
As you can see from the screenshot, a database is needed to run WordPress. So, let’s create one! To achieve this, head back to XAMPP, and in the MySQL section click Admin.
The localhost/phpmyadmin page on your browser would open. Click on Databases.
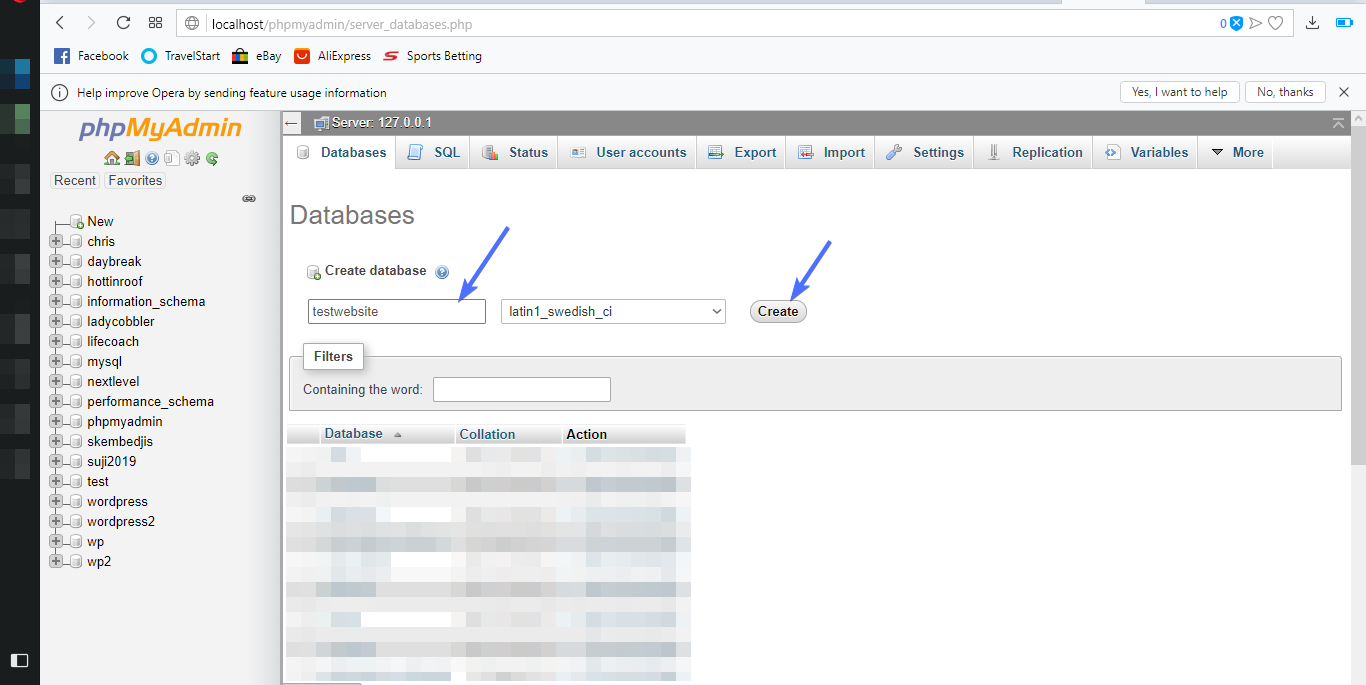
Type a name for your database. In this case we would be using the same name as the WordPress folder. Finally, click Create.
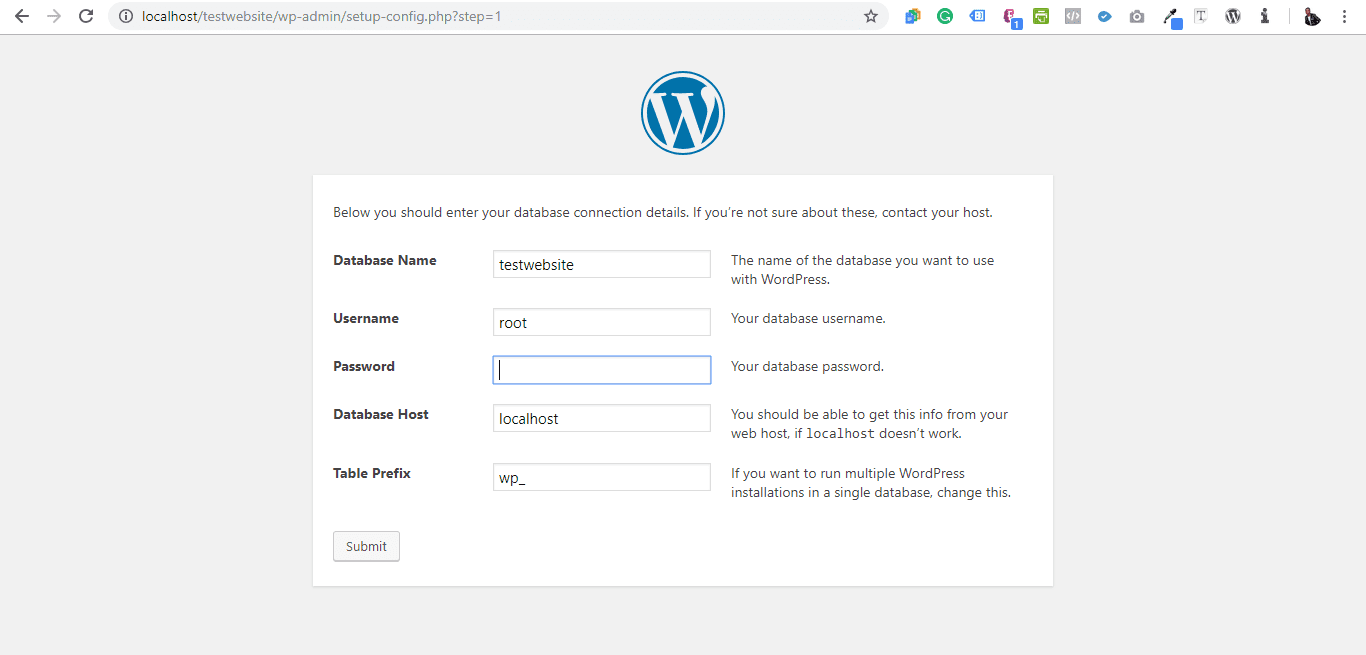
Now we have created our WordPress database, head back to the where we stopped in step 5. Click Let’s go. Fill out the input areas as follows:
Click Run the installation.
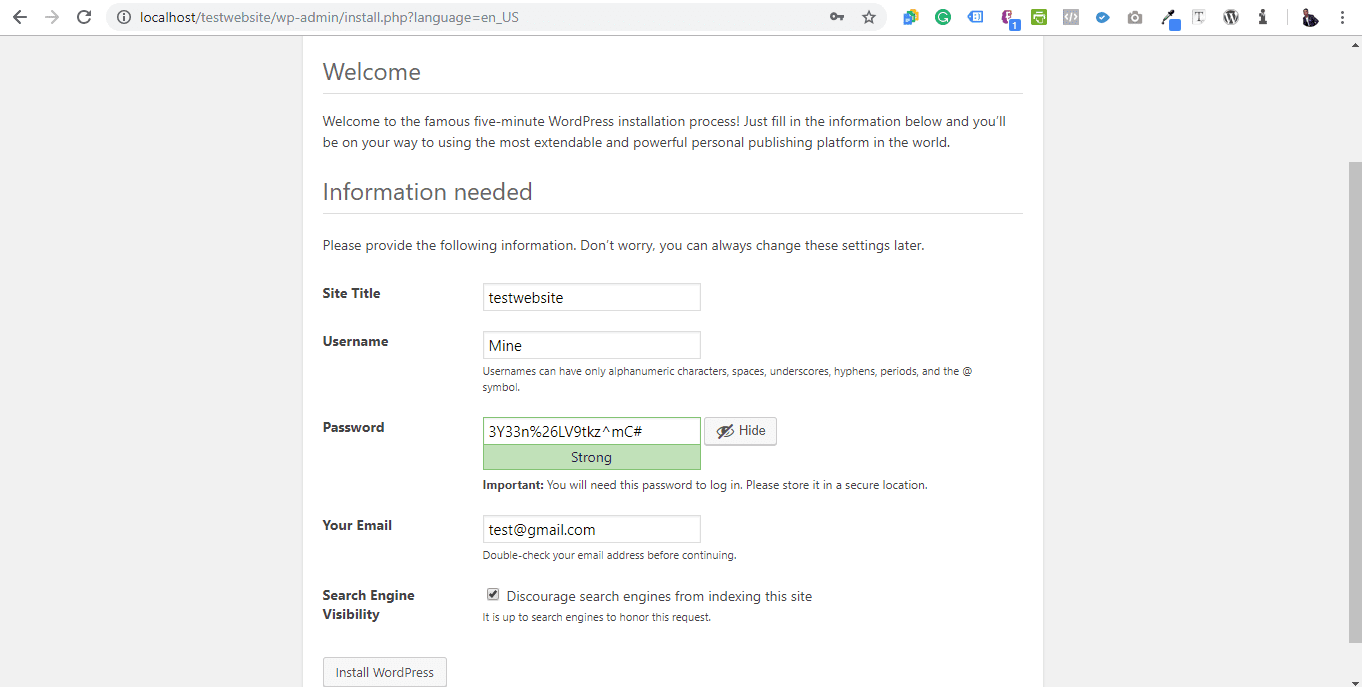
Finally, chose a site title, set your passport, put in your email address and proceed with WordPress localhost installation.
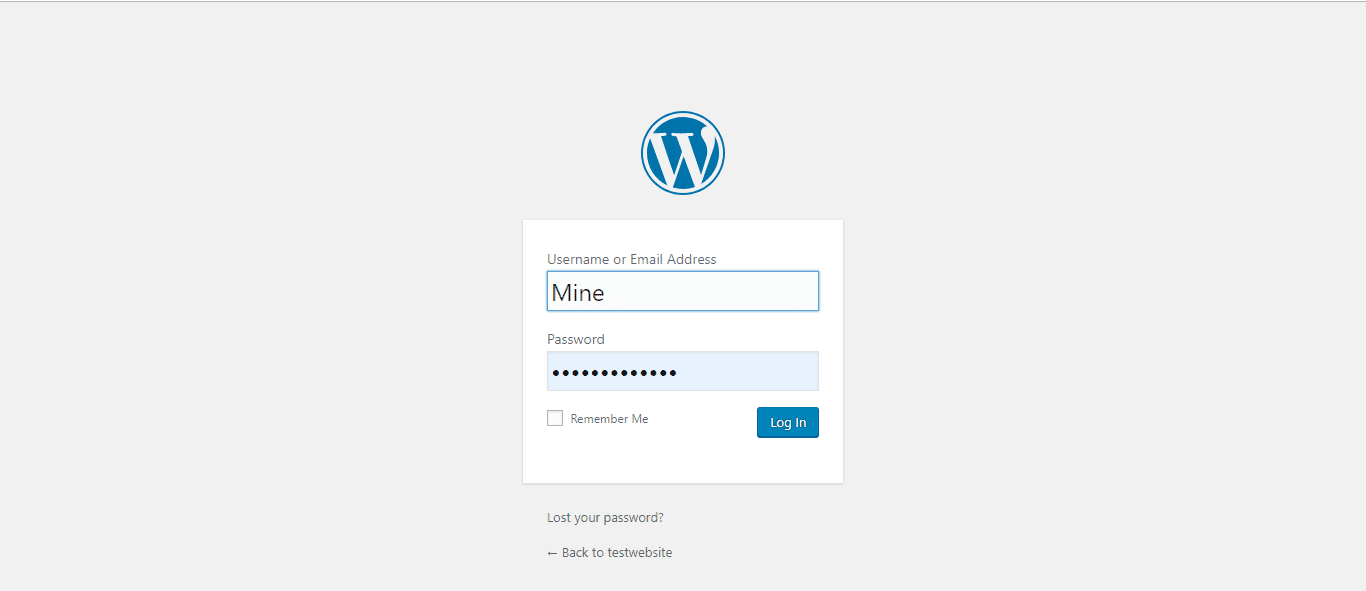
After installation, log in to your WordPress Dashboard and start developing, designing, or testing.
Congratulations, your local site is up and running.
Using our example folder name, you can access your local WordPress site by going to localhost/testwebsite, and WordPress admin by going to localhost/testwebsite/wp-admin.
Conclusion on WordPress Localhost Installation
Installing WordPress on your computer is a pretty straightforward process. Even the most experienced developers start out with setting up WordPress locally before moving it online.
As you have seen, XAMPP is enough for a successful WordPress localhost installation. But for the sake of variety, you can test other local server apps mentioned in this article.
If you have found this article useful, kindly share it with others. For more step by step WordPress tutorials follow our WordPress blog.
More Resources:
- How To Fix The “503 Service Temporarily Unavailable” Error In WordPress?
- Squarespace Vs WordPress
- The Fastest WordPress WooCommerce Themes Of 2020

