How to Set Up WordPress AMP Manually and with Plugin
Using WordPress AMP is one way to speed up your website and offer a better user experience.
Available data shows that over 50% of Google searches come from mobile devices. However, many sites are slow, leading to a poor user experience. AMP is a Google initiative to solve the issue of mobile speed. It is designed to make sites fast and easy to navigate on mobile devices.
So in this article, we will explore all you need to know about WordPress AMP. We will look at what AMP is and its benefits. We will also explain how to implement WP AMP manually and with a plugin.
Table of Contents:
- What is AMP?
- Benefits of WordPress AMP
- Implementing WordPress AMP on your Site
- How to Manually Create AMP Pages With Code
- Creating AMP Pages on WordPress
- Components of WordPress AMP
- Conclusion
- Frequently Asked Questions
What is AMP?
AMP (previously Accelerated Mobile Pages) is an open-source project launched by Google in 2015. The project was created as Google’s alternative to Apple News and Facebook Instant Articles.
AMP pages are regular web pages with lots of assets striped off to make them faster. They are built with limited HTML, CSS, and JavaScript, which reduces the time it takes to load.
AMP pages are also hosted on Google AMP Cache. Users can get the cached version once they click to access the page.
Google AMP has seen several changes since its launch. Today though, AMP is no longer only for mobile pages. It is now a fully responsive web component framework, available on mobile and desktop devices.
Several top companies, like LinkedIn and the Washington Post, have implemented AMP to make their web pages faster.
Benefits of WordPress AMP
Here are some reasons you should consider AMP for your WordPress site:
1. Fast Page Speed
One of the most obvious benefits of Google AMP is that it makes your web pages load faster. AMP pages are stored in the Google AMP Cache. This makes them load faster than traditional mobile pages.
The Washington Post experienced 88% faster load times after implementing AMP. They also experienced a 23% increase in the rate of mobile users in 7 days. Gizmodo saw a three-fold increase in loading speed after implementing AMP.
2. It Reduces Bounce Rate
AMP pages have a median load time of 1 second, which helps reduce bounce rates. Research shows that people abandon websites that take more than 3 seconds to load. This means that adding AMP will lead to a lower bounce rate and increased conversion.
A DoubleClick study compared AMP and nonAMP pages. It found that over 90% of publishers that implemented AMP had higher engagement and click-through rates. They also had higher viewability rates compared to non-AMP pages.
3. Improved Search Engine Ranking
Implementing AMP doesn’t directly increase your Google search engine ranking. However, it increases your site’s mobile friendliness and loading speed, which are major ranking factors. Slate saw a 44% increase in unique monthly visitors after implementing AMP.
4. Better User Experience
Having well-designed AMP pages will not only increase your site’s speed but also the user experience. AMP page designs are simple with a lot fewer components, which makes them faster and easier to navigate.
5. Compliance with Google’s Recommendations
AMP covers the three aspects of web pages: loading performance, visual stability, and interactivity. It forces several recommended web performance practices, like the limited use of CSS and JavaScript.
This gives your WordPress site a simple interface without too many moving parts.
Implementing WordPress AMP on Your Website
There are two ways you can implement AMP on your WordPress site. You can do it manually or with a plugin. Let’s start with how to create WordPress AMP pages using plugins.
How to Implement WordPress AMP Using The AMP Plugin
One of the easiest ways to enable AMP on your WordPress website is by installing the WordPress AMP plugin.
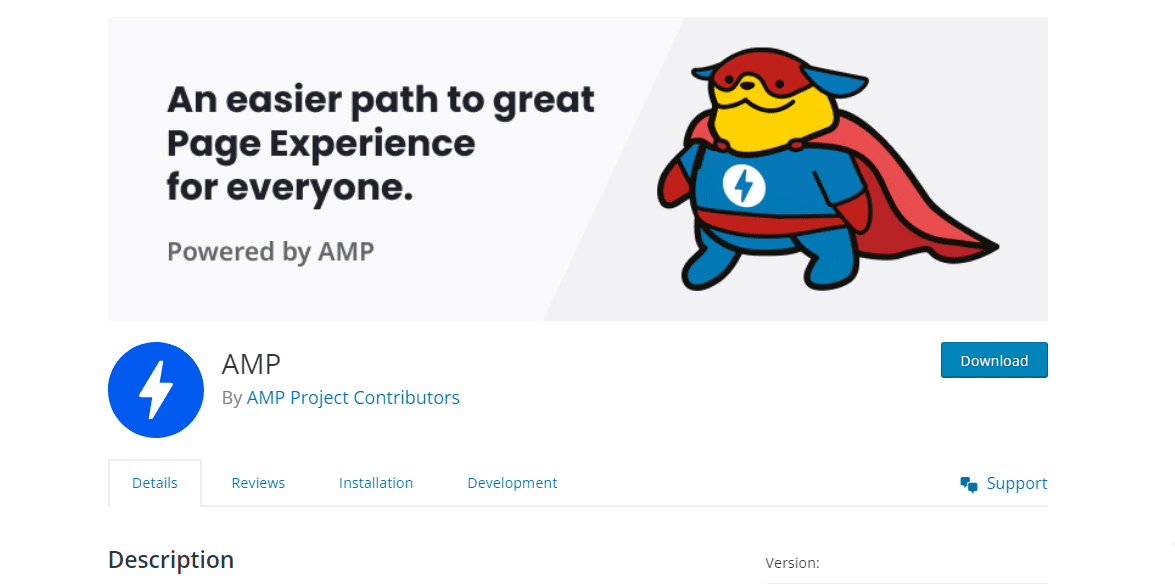
AMP is the official AMP plugin from the Google team and the best AMP plugin for WordPress. The plugin gives you the power to effortlessly integrate AMP into your website. It generates AMP-valid markup, allowing users to create beautiful and fast AMP pages optimized following the best AMP principles.
The plugin comes with several features to identify any issues with your AMP project. It also provides the tools to resolve these issues whenever they arise.
Cost: AMP is a free plugin.
How to Set up AMP Pages Using the AMP Plugin
If you want to implement AMP on your site, you need to first install the Google AMP plugin.
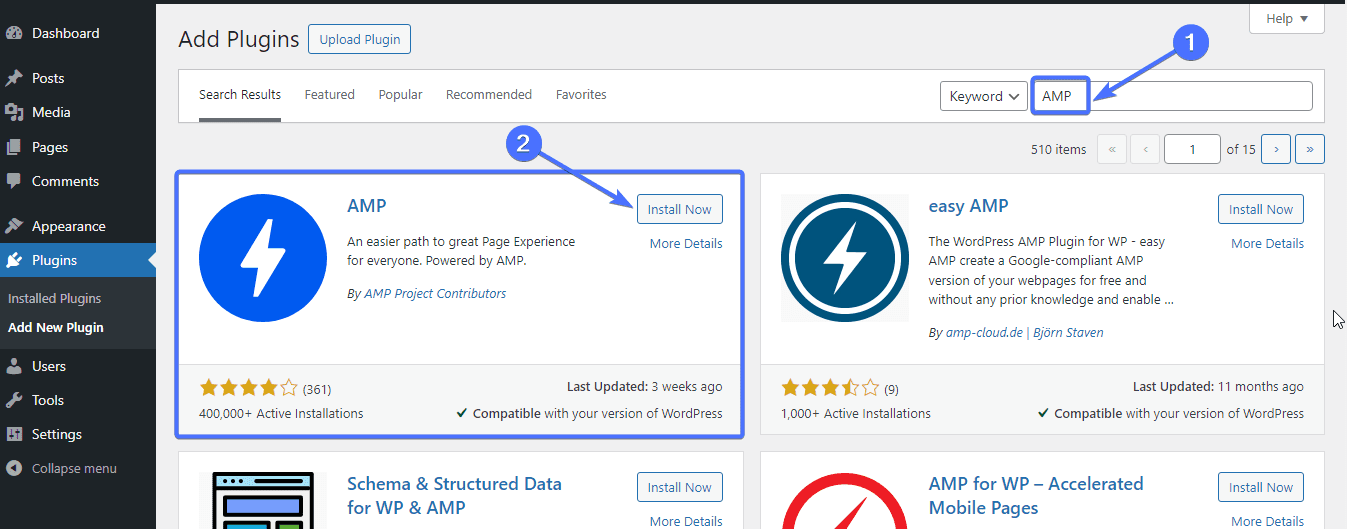
To do this, log into your WordPress dashboard. Then go to Plugins >> Add New.
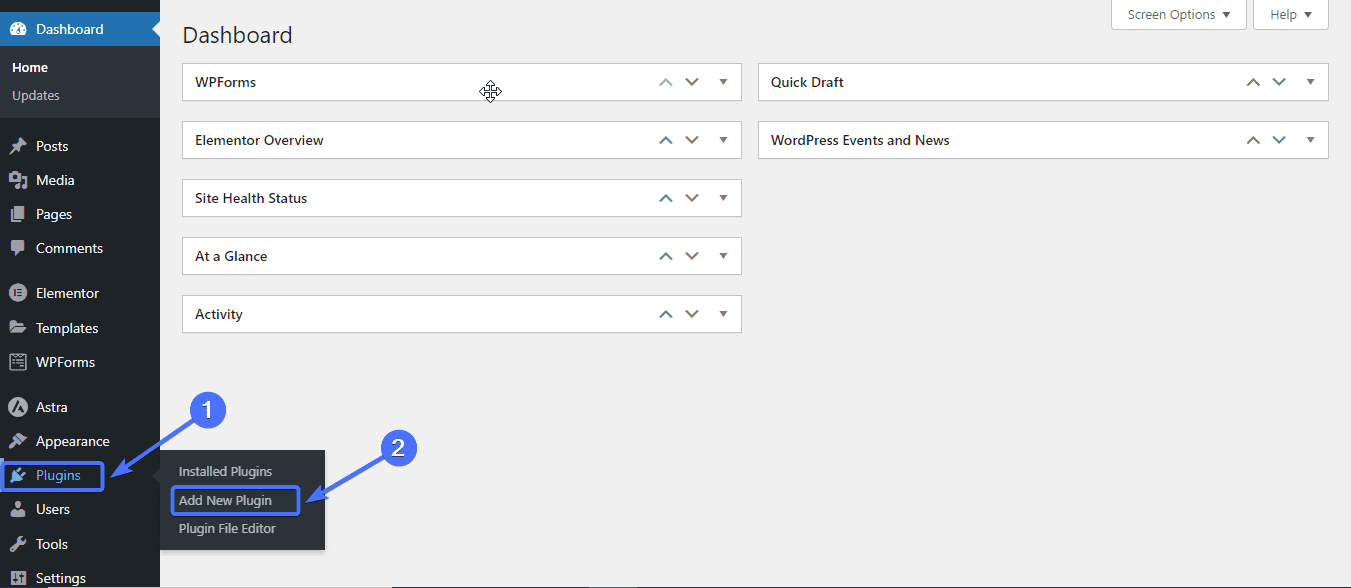
Type “AMP” in the search box. Then click Install Now to install the AMP plugin.
Once installed, click Activate.
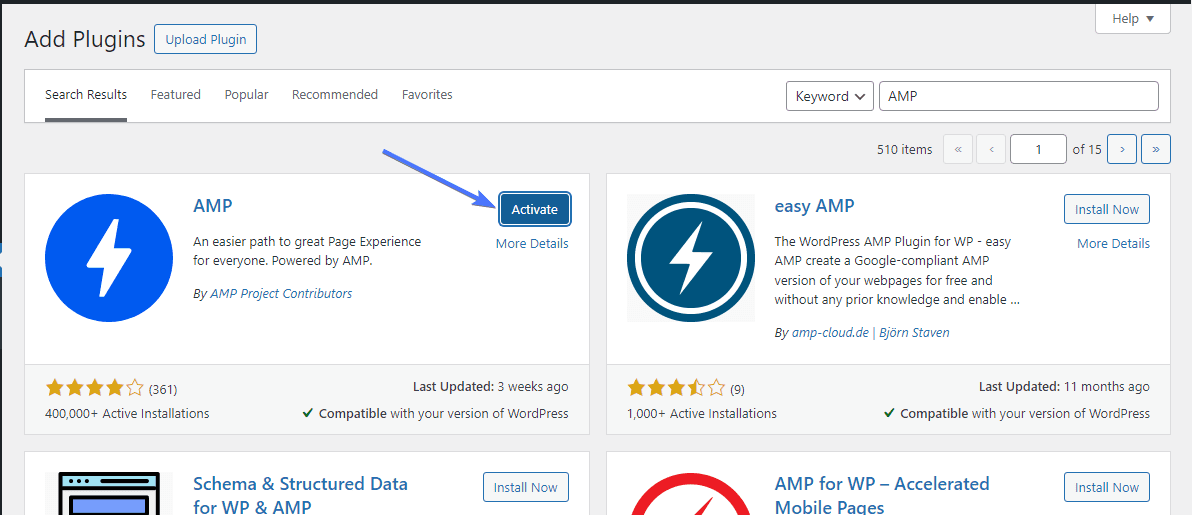
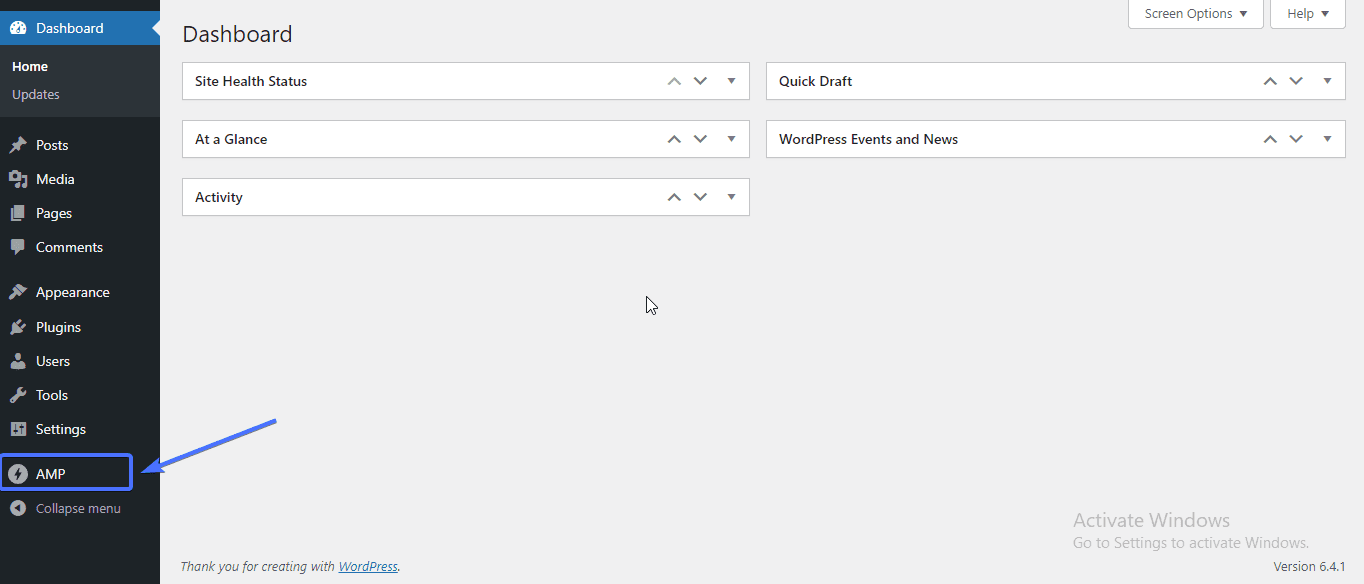
Once activated, the plugin will appear on your WordPress dashboard as “AMP.”
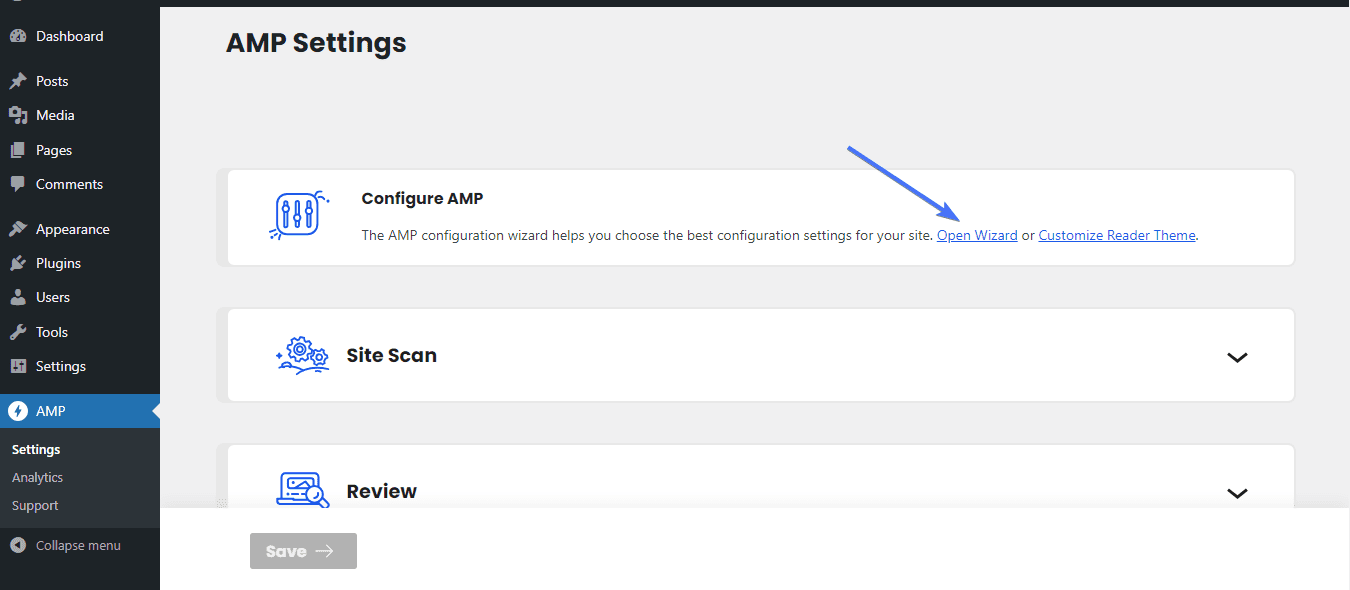
Now, to set up the plugin, go to AMP >> Settings.
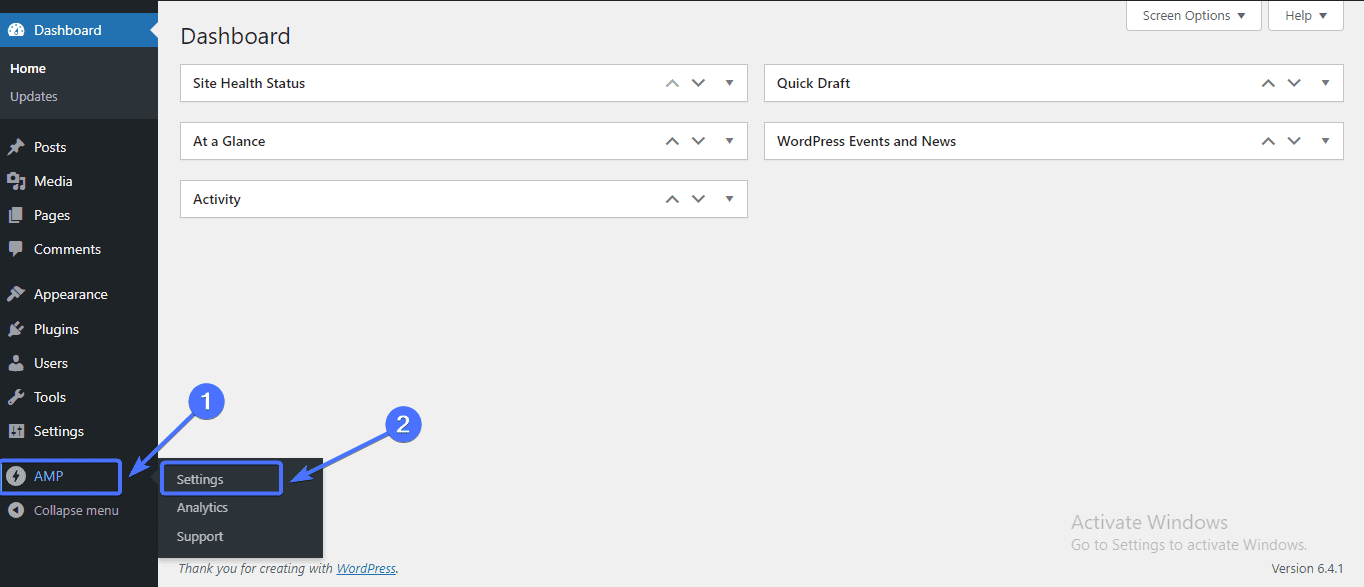
Once you are on the “AMP Settings” screen, click on the Open Wizard link. This will take you to the plugin setup page.
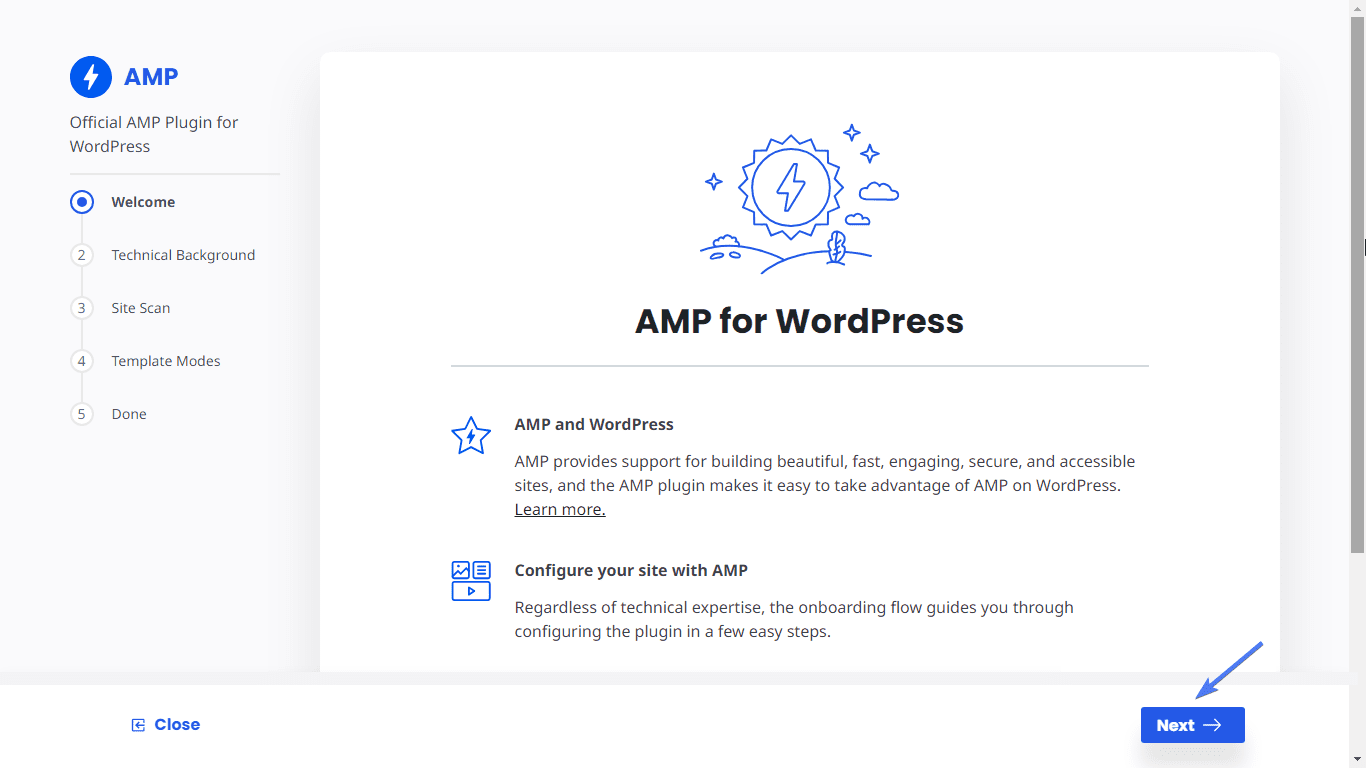
Click Next on the “Welcome” screen.
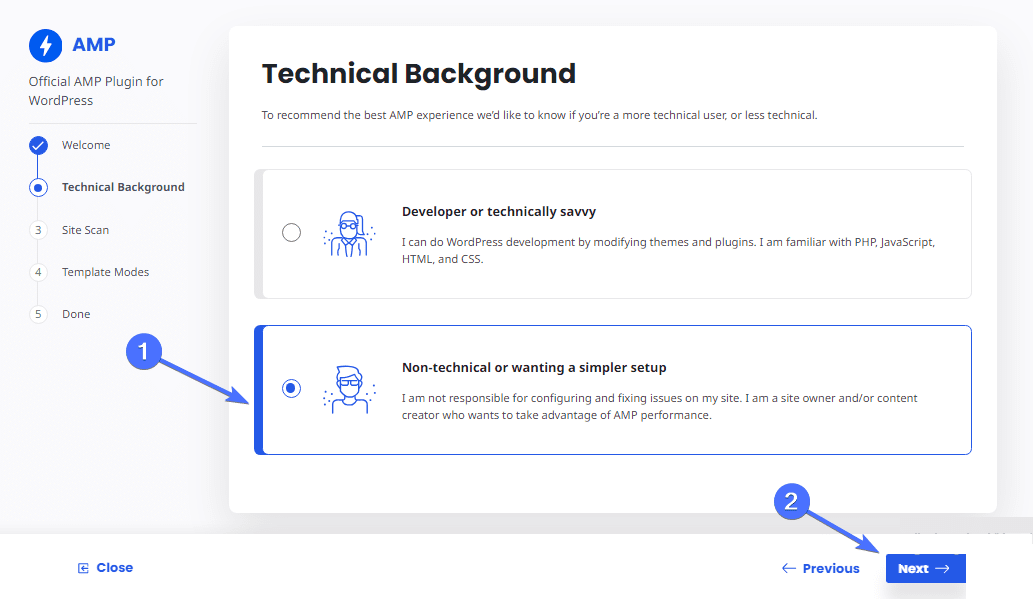
For “Technical Background,” choose ‘Non-technical or wanting a simpler setup’ if you are a beginner.
Then click Next.
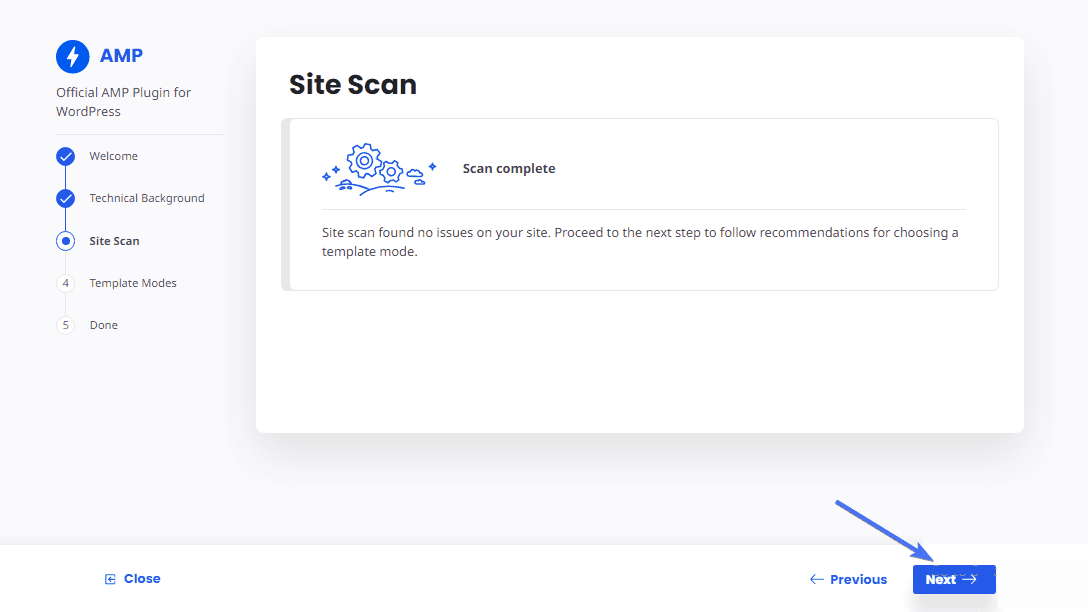
Now the plugin will begin a site scan. This may take about a minute to complete.
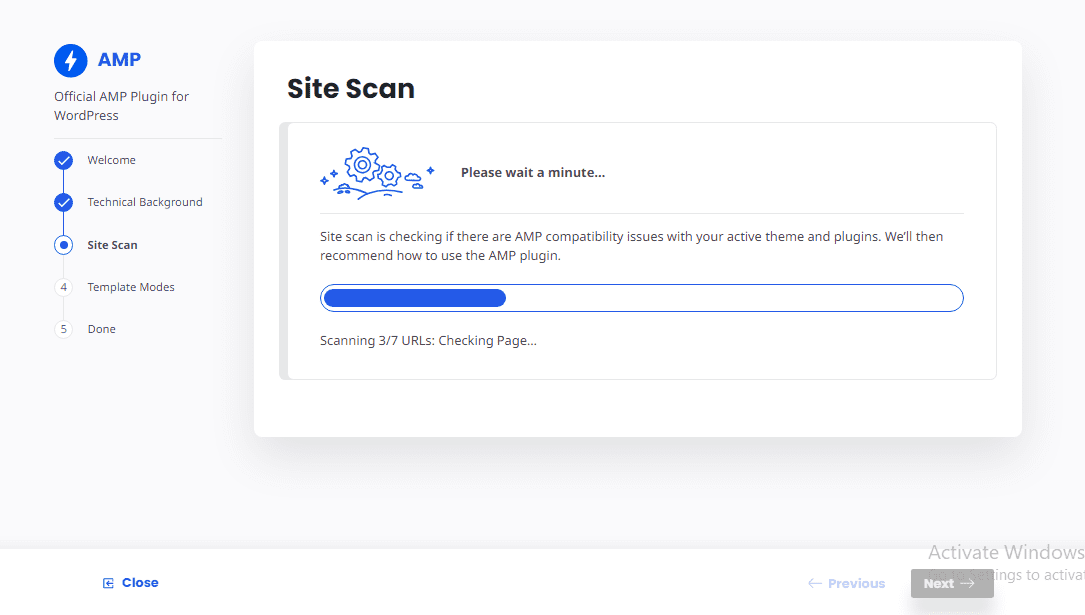
Once the scan is complete, click Next.
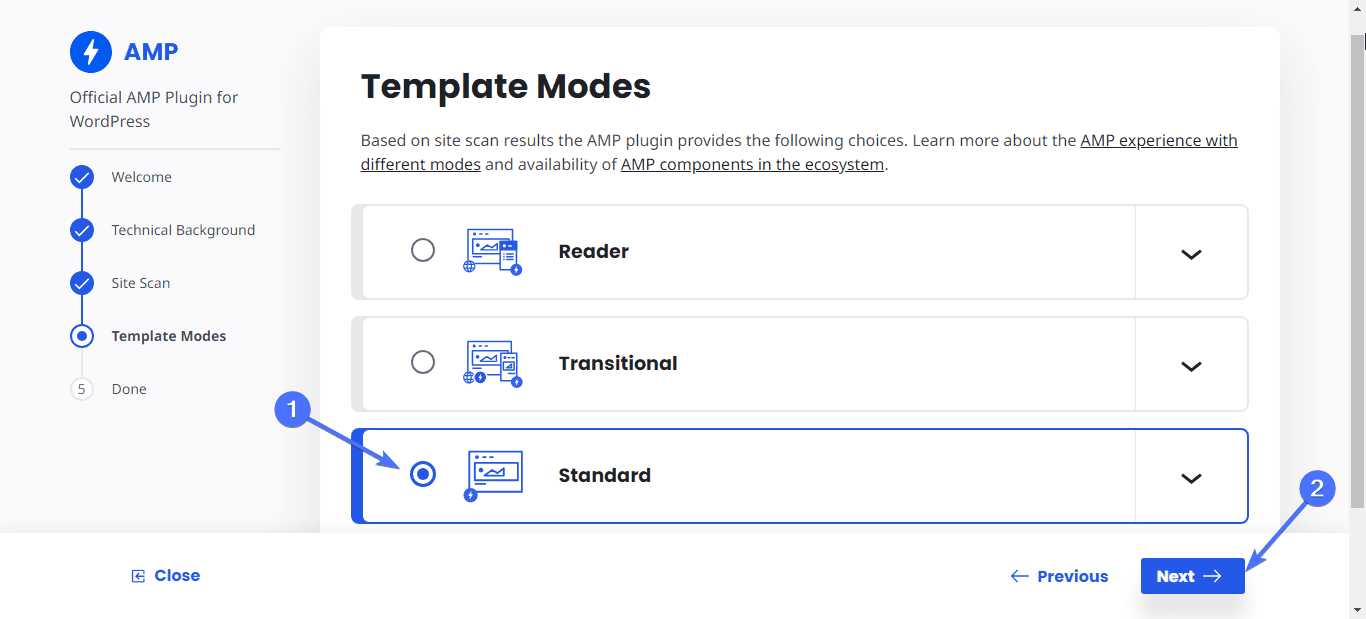
Now you have to choose the template mode you want for your AMP. There are three modes available.
- Reader: The Reader mode will create an AMP version of your site using a different AMP WordPress theme.
- Transitional: The transitional mode will also create an additional AMP version of your web pages using the same theme.
- Standard: The standard mode will make your whole site completely AMP, except for pages you specify otherwise.
Choose the “Standard” mode if you want to make your whole website faster.
Then click Next.
Click on each page to preview its AMP version. Then click Finish to complete the setup.
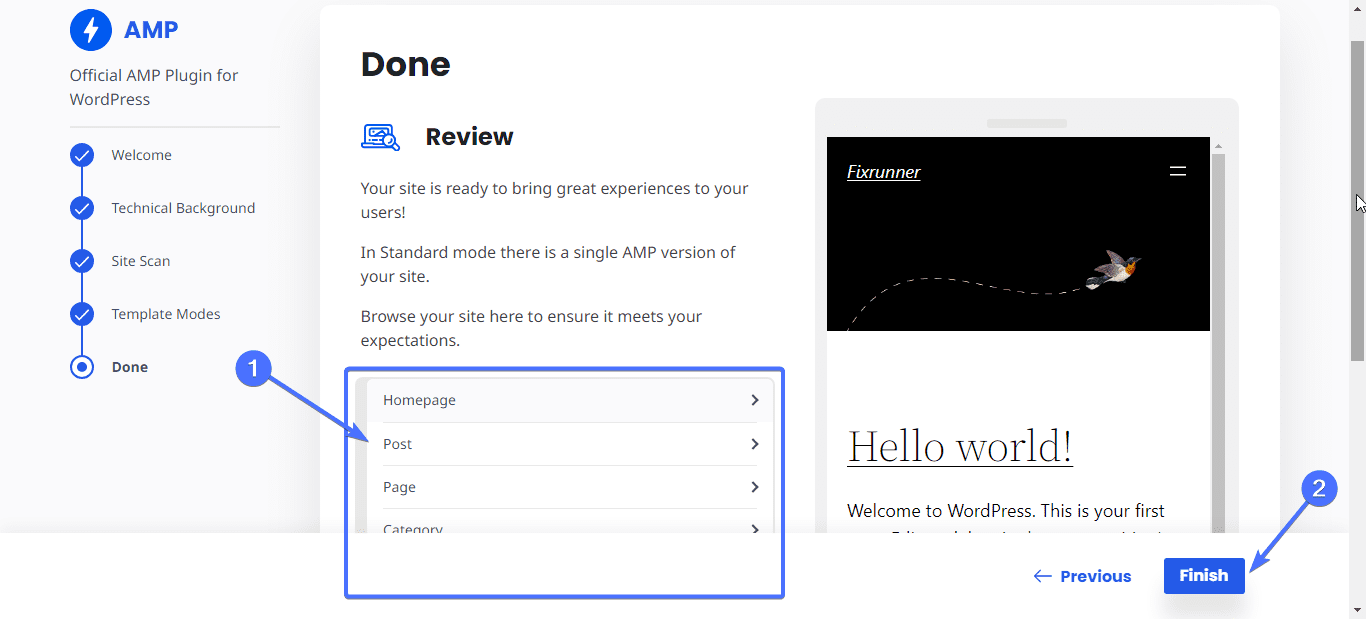
And that is it. You just made your website very fast for mobile and desktop devices. When users visit your site, they will be redirected to the fast-loading AMP web pages.
Other WP AMP Plugins
Here are other WordPress AMP plugins you can install to create AMP pages on your website.
AMP for WP – Accelerated Mobile Pages
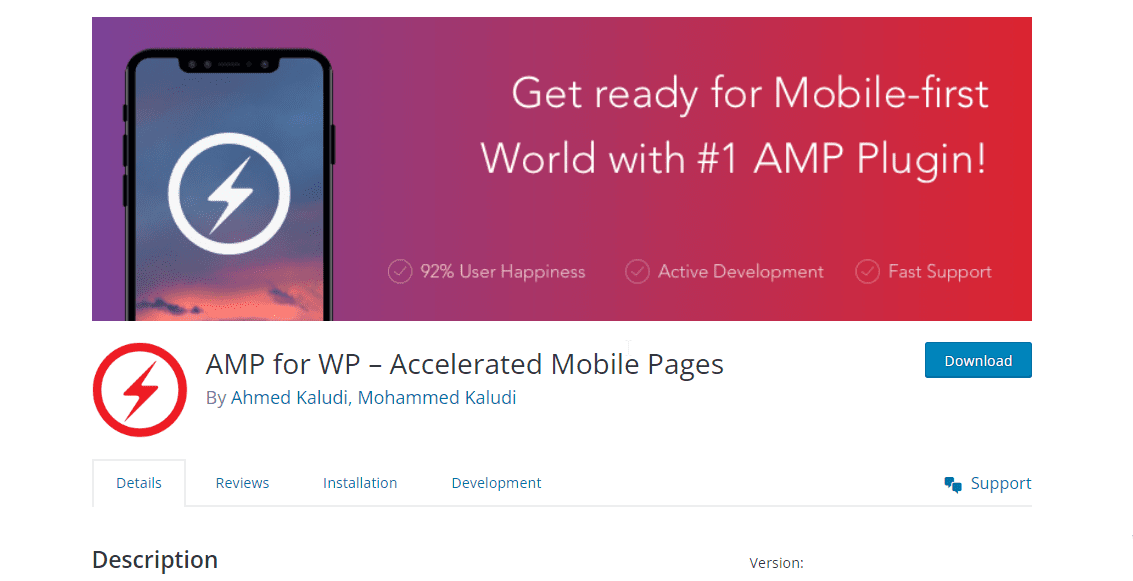
AMP for WP automatically adds AMP pages to your WordPress website. The plugin is the ideal solution to go from zero to publishing AMP pages, regardless of your technical knowledge.
Once you install the plugin, you will be required to choose your level of knowledge. Choose Basic (if you are a beginner) or Advanced (if you are knowledgeable about AMPs).
Choosing ‘beginner’ will provide you with a more in-depth guide on how to create an AMP site without writing a single line of code. The plugin works well with several WordPress SEO plugins, including Yoast SEO and Rank Math SEO.
Cost: The AMP for WP plugin has a free version. The PRO version costs about $10.
AMP WP – Google AMP For WordPress
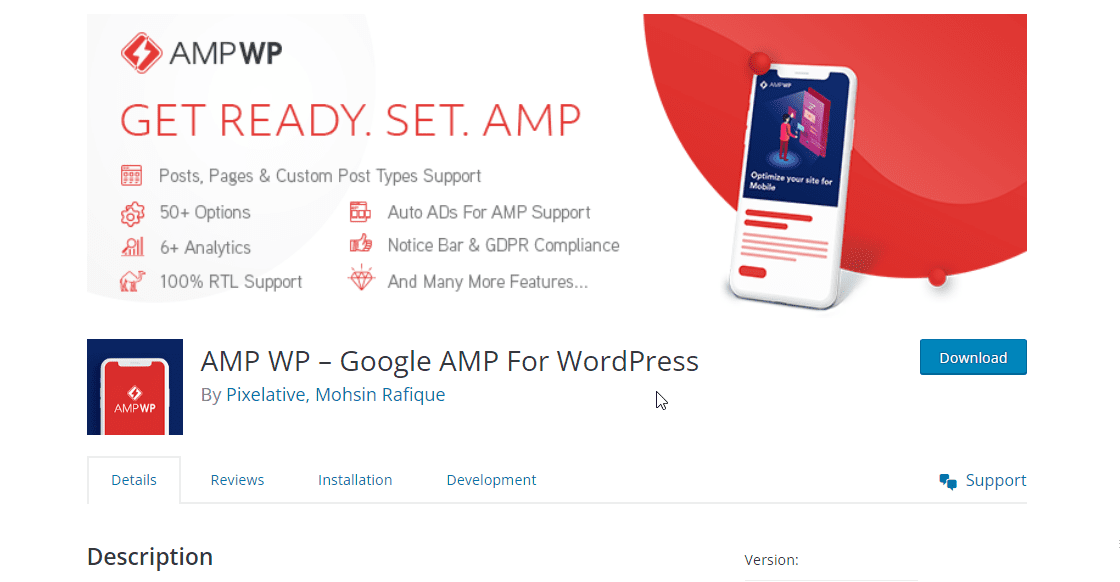
AMP WP is a free AMP plugin for WordPress that adds AMP functionality to your site. The plugin can automatically optimize your website, making it about five times faster.
It offers several functionalities and customization options, including four different AMP designs you can implement for your website. The plugin also has an option to hide or show the AMP Mobile Redirections for visitors.
It also has a drag-and-drop feature that you can use to quickly build AMP-compliant pages.
Cost: AMP WP is a free plugin.
How to Manually Create AMP Pages With Code
Implementing AMP manually allows you to set up the pages as you want. Follow the steps below.
Get an AMP Template
While the process is straightforward, it can be time-consuming and also requires coding. You can start by creating an AMP template that you can edit and use across all of your web pages.
Here’s a basic template for an AMP page.
<!doctype html> <html ⚡> <head> <meta charset="utf-8" /> <title>My AMP Page</title> <link rel="canonical" href="self.html" /> <meta name="viewport" content="width=device-width" /> <style amp-boilerplate>body{-webkit-animation:-amp-start 8s steps(1,end) 0s 1 normal both;-moz-animation:-amp-start 8s steps(1,end) 0s 1 normal both;-ms-animation:-amp-start 8s steps(1,end) 0s 1 normal both;animation:-amp-start 8s steps(1,end) 0s 1 normal both}@-webkit-keyframes -amp-start{from{visibility:hidden}to{visibility:visible}}@-moz-keyframes -amp-start{from{visibility:hidden}to{visibility:visible}}@-ms-keyframes -amp-start{from{visibility:hidden}to{visibility:visible}}@-o-keyframes -amp-start{from{visibility:hidden}to{visibility:visible}}@keyframes -amp-start{from{visibility:hidden}to{visibility:visible}}</style><noscript><style amp-boilerplate>body{-webkit-animation:none;-moz-animation:none;-ms-animation:none;animation:none}</style></noscript> <script async src="https://cdn.ampproject.org/v0.js"></script> <style amp-custom> h1 { margin: 1rem; } </style> </head> <body> <h1>Hello AMPHTML World!</h1> </body> </html> |
You can find other ready-made AMP designs here.
Creating AMP Pages on WordPress
Once you have your template, the next step is to move it to WordPress and create the AMP pages.
To do this, go to Pages >> Add New Page.
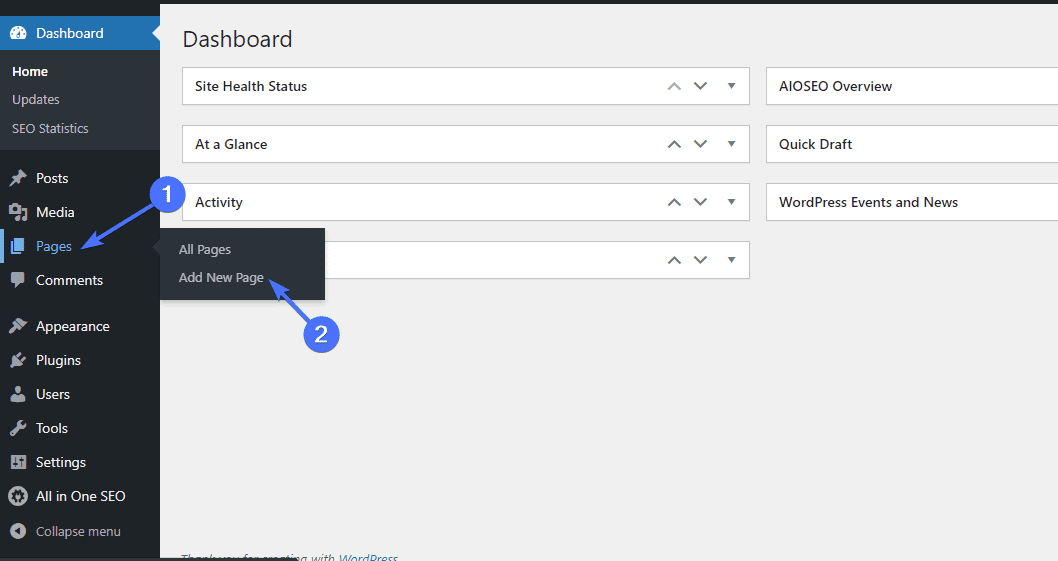
Once you are on the “New page” screen, click on the plus icon.
Then type “HTML” into the search box and click on Custom HTML.
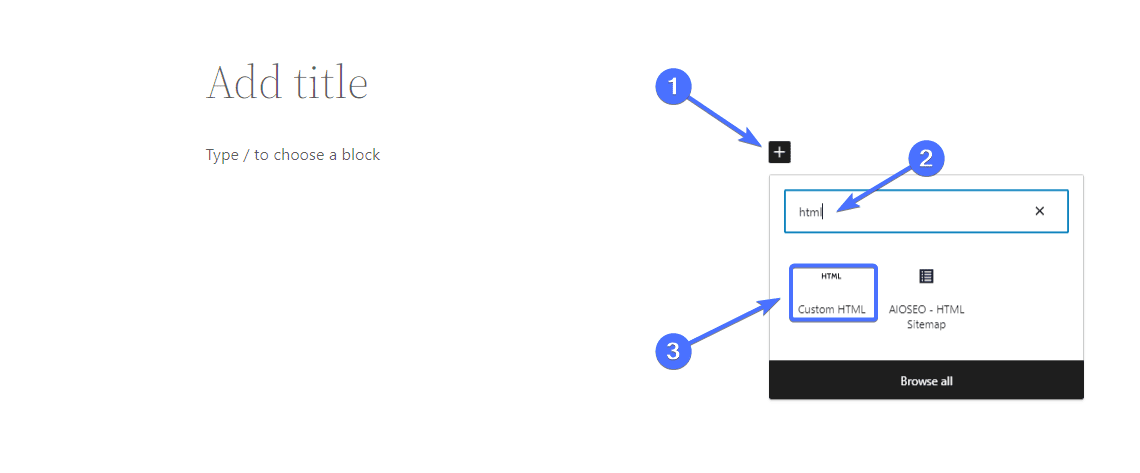
This will load the Custom HTML widget.

Now paste your AMP HTML template. We will use the template above.
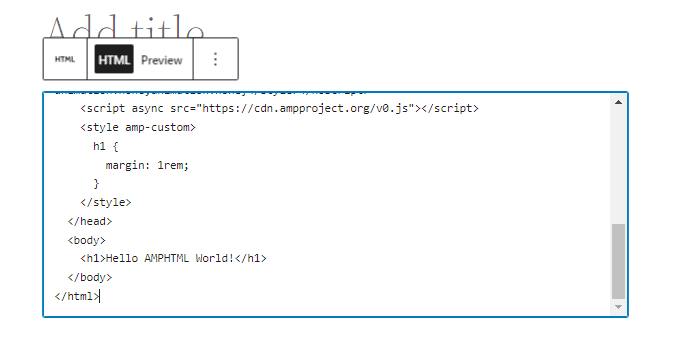
You can click Preview to see how the page will look when published.

You can further edit your code as you deem fit. Once you’re satisfied, click on Publish.
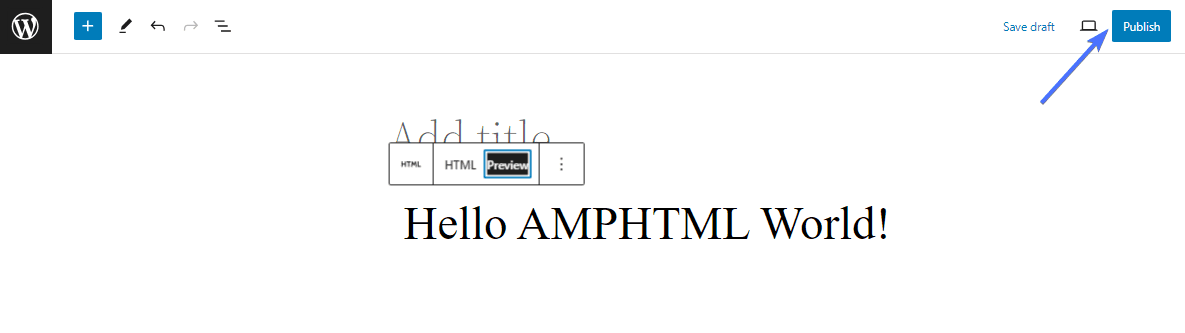
Here’s the page we created.

Components of WordPress AMP
The AMP consists of HTML, CSS, and Javascript.
AMP HTML/CSS
AMP HTML is only allowed to contain limited elements to ensure it is lightweight. There are several tags you must use on your AMP pages in place of the regular ones. They include the following:
- The HTML document must start with <!doctype html>. This informs the browser about the type of document to expect.
- The document must contain a top-level <html ⚡> or <html amp> tag.
- Images: If you want to add images, then you must use the <amp-img> tag instead of <img>. Example: <amp-img src=”https://www.fixrunner.com/wp-content/uploads/2023/10/image7-1-1030×502.png” width=”600″ height=”300″></amp-img>
- Videos: To add videos, you must use the <amp-video> tag instead of the <video> tag.
- CSS styling: AMP allows styling. But all CSS codes should be contained within a <style amp-custom> tag in the <head> of the document.
To learn more about AMP HTML documents, check out the official AMP documentation.
AMP JavaScript
AMP allows you to use JavaScript using the <amp-script> component instead of <script>. However, the JavaScript document must not exceed 150KB in size. You can write your own JavaScript, following the guidelines to ensure optimal performance.
AMP Cache
AMP caches are created to pre-fetch and serve valid AMP pages before users request them. Having your website cached helps prevent issues of slow speed caused by WordPress hosting and other factors.
There are two main AMP Caches: Google AMP Cache and Bing AMP Cache. You must use the <html ⚡> or <html amp> tag for AMP caches to discover and cache your page content.
Conclusion
In summary, implementing AMP on your site comes with several benefits, the top of which is the increase in speed, as we’ve seen above. Fortunately, you can implement AMP on your website manually or with a plugin following the steps listed in this article.
If you want to learn more about AMPs, then you should check out this article on the best WordPress AMP plugins.
Remember, our team at FixRunner is available to help, whether you want to create AMP pages for your site or just make it faster. So contact us to learn more.
Frequently Asked Questions
What is AMP in WordPress?
WordPress AMP is an HTML framework that allows WordPress website owners to create fast-loading web pages. When you implement AMP on a WordPress website, you will be able to create pages that load way faster on mobile and desktop devices.
Is AMP for WordPress free?
Yes. You don’t need to make any payments to implement AMP on your website. You can either implement AMP manually with code or by using a plugin. Most WordPress AMP plugins, including the official Google AMP plugin, are also free. You just need to install and set up the plugins, and it will automatically create pages for your site.
Is AMP for WordPress Worth it?
AMP can be very beneficial if your website pages are slow. Implementing AMP can make your website up to five times faster. But you don’t need to implement AMP if your web pages load fast on both mobile and desktop devices.
What does AMP stand for in WordPress?
AMP previously meant Accelerated Mobile Pages. However, AMP pages are no longer restricted to mobile pages. This means that if you implement AMP on your WordPress website, the pages will be optimized for both mobile and desktop devices.
Is AMP a Google Ranking factor?
Not directly. AMP is not one of the ranking factors listed for Google’s algorithm. However, implementing AMP can increase your website speed, and website speed is a ranking factor. So creating AMP pages will indirectly increase your search engine ranking position.