How to Start a Blog – Easy Step by Step Guide

Looking to learn how to start a blog? Creating a blog is an exciting adventure – it is a journey to share your story, knowledge, and experience with the world.
However, blogs have several moving parts, and it can get overwhelming to figure it all out. This is why we have created this simplified guide to show you how to start a blog successfully using WordPress. Just keep reading as we explain the various steps to creating a successful WordPress blog.
If you find the process overwhelming or need professional assistance, our team is here to help. Contact us for a free WordPress installation, and we’ll handle the setup for you.
Table of contents
- What a blog is and isn’t?
- Should You Start a Blog?
- What you Need to Start a Blog
- How to build a successful blog in 10 easy steps
- Step 1: Pick a niche
- Step 2: Choose a Name for your Blog and Register a Domain Name
- Step 3: Get a Web Host – How to Start a Successful Blog
- Step 4: Choose your Blogging Platform
- Step 5. Install WordPress – How to Start a Blog
- Step 6: Install a WordPress Theme and Customize it
- Step 7. How To Customize Your Theme
- Step 8: Install WordPress Plugins – How to Start a Successful Blog
- Step 9: Optimize your Blog for Search engines
- Step 10: Start creating content – How to Start a Successful Blog
- Step 11: Set up Google Analytics
- Step 12: Promote and Monetize your Blog
- How to start a Successful blog with no money
- Conclusion – How to Start a Successful Blog
What a Blog Is and Isn’t?
A blog is just like a website – except that blogs are regularly updated with fresh content, while websites are more static in nature.
The content of a blog (known as ‘blog posts’) is usually arranged in descending chronological order – which means new posts appear first. See the screenshot below:
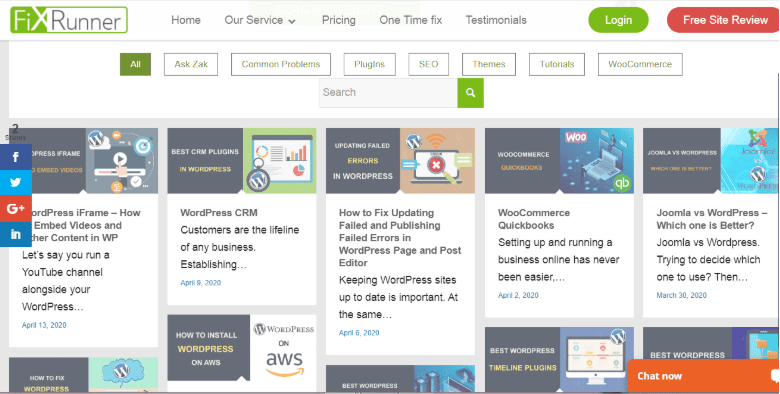
Blog readers can scan through the topics and click to read any topic they want.
Note that your blog content may not appear in ‘grid format’ like it is in the screenshot. The arrangement of your posts depends on your active WordPress theme (more on this later).
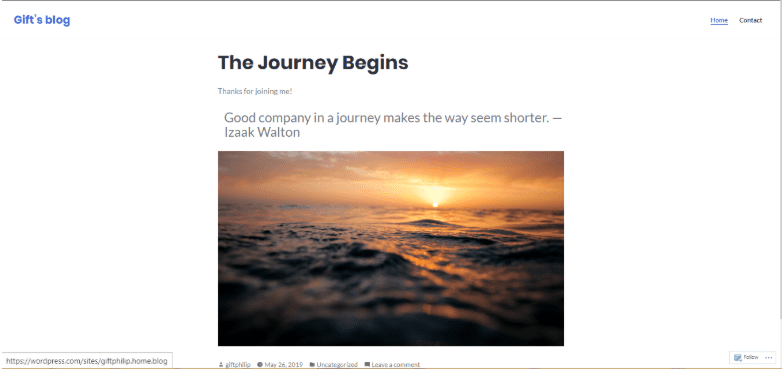
Now, a blog could be a part of a website, in the form of a separate page. Like this:
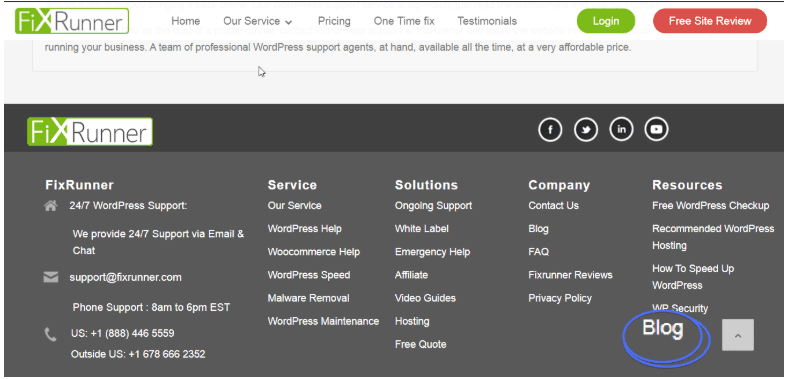
Or it could be an entire site of its own.
Most blogs have a comments section where readers can respond to the write-up. This creates a connection between the blogger and the reader.
Should You Start a Blog?
No doubt, building a successful blog is no child’s play. It takes a lot of time and effort. If you are passionate about blogging and you don’t mind giving it all it takes, go right ahead. Here are some benefits of being a blogger:
- You get to share your ideas with the world.
- Establishes you as an authority.
- Creates a connection between you and the reader.
- You have an opportunity to make money from your blog.
- Refines your writing skills.
What you Need to Start a Blog
It doesn’t take much to start a blog. Basically, all you need is:
- Access to the internet.
- A functional computer device.
- Some money is needed to buy a web hosting service and a domain.
How to Build a Successful Blog in 12 Steps
This is the part you’ve been waiting for! Here are the steps involved in building a blog.
Step 1: Pick a Niche
A niche is a specific subject or field on which a blog is focused. It could be anything from technology, education, business, food, adventure, robots, automobiles, entertainment, fashion, parenting, blogging, etc.
But you may be asking, – why can’t I discuss everything on my blog?
Well, you won’t get into trouble for writing on many random topics. In fact, several bloggers have recorded significant success using the ‘any subject’ approach. However, sticking to one subject will help you build a more dedicated audience.
According to research by GrowthBadger, most bloggers who earn more than $50,000 in a year focus on a specific niche. Lower-income bloggers tend to worry about having a small audience, so they write about anything and everything.
Now, if you focus on ‘Fashion’, you are more likely to become an authority in that field faster than someone who blogs about fashion, food, business, etc.
Also, internet users who love what you do can identify with your blog easily (if you constantly update your blog with great content).
How do you choose a blog niche?
Many brilliant ideas are probably running through your head right now. But answering the following questions will help you choose the one that is perfect for you.
- What topic do you enjoy discussing? Fashion? Then you should consider blogging about fashion.
- What topic do you know more about than many others? Business? You could teach people how to start and manage their businesses via your blog.
- What are your hobbies? Car racing? What if you discuss all you know about cars on your blog?
- What profession have you spent a better part of your life doing? Nursing? Then a health blog will make a lot of sense.
Use this chart to ease things up:

In summary, if you are passionate about it and a group of people need it – blog about it. Blogging about something you love will keep you motivated every time.
Don’t be in a hurry to leave this stage. Take your time. Do some brainstorming. The perfect idea will come.
Step 2: Choose a Name for your Blog and Register a Domain Name
When starting your blog, one thing is indispensable – A domain name. It’s a unique name for your blog.
Here are the factors to consider when naming your blog:
i. Use a descriptive name:
Use a name that emphasizes what your blog is all about. For instance, if your blog is all about food, names that include recipes, meals, kitchen, etc., are great choices.
Using a name that properly describes your blog will give your visitor an idea of what to expect.
On the other hand, you can make your blog a bit more personal, by using your name or a variation of it.
Ii. Keep it as short as possible (3 words at most):
A domain name can contain as many as 63 characters. But having a name that’s so long is pretty awkward. Keep your blog’s name short. The shorter, the better!
iii. Use a name that is easy to remember:
Not everyone uses the ‘Bookmark’ feature on their browsers. Choose a blog domain name that is memorable, easy to spell, and easy to pronounce.
For instance, the word ‘Pochemuchka’ is used to describe someone who asks too many questions. As beautiful as it sounds, it isn’t a good choice for a domain name. It is quite easy for an internet user to misspell such a word.
iv. Avoid numbers:
Using numbers can mislead your site visitors. Think of this – ‘Head2toe.com’ is a lovely domain name. But a user may try to access your site using ‘headtotoe.com’. This is quite confusing. If you can, avoid using numbers.
v. Avoid hyphens:
Hyphens are misleading. In most cases, a web user may type ‘domainname.com’ instead of ‘domain-name.com’. That could cost you a significant number of visitors.
vi. Use an appropriate domain extension:
There are lots of extensions available from .com, .co, .org, .net, .us, .blog, .io, .biz, and so much more.
A survey conducted by GrowthBage on the memorability of domain extensions revealed that .com URLs are 33% more memorable. This is followed by .co, .org, .biz, .us, .net, and .blog, in that order.

If you can’t get a .com extension, feel free to try the others. However, bear in mind that your visitors will find it easy to remember your blog if it has a .com extension.
That said, there are domain extensions to avoid.
Top Level Domains (TLDs) to avoid – How to Start a Blog
According to Spamhaus (a company that fights spam on the internet), there are Top Level Domains with bad reputations. They include:
- .buzz
- .wang
- .top
- .ryukyu
- .work
- .tk
- .rest
- .loan
- .gq
- .live
Using these extensions could affect your site’s traffic.
Check for domain availability
After choosing a domain name, check to see if it’s available. To do this, visit the whois lookup page and search for your chosen name.
If it isn’t available, that’s fine. Think of something different.
Finding a perfect and available name is hard, so take your time, search, and find a good one. Although you can change your domain name later, it is best to select the right name from the beginning.
Side note: To know more about changing your site’s domain, read our beginner’s guide on how to change a domain name in WordPress.
Register your domain name
Domain registrars are companies that let you purchase domain names. Although there are hundreds of domain registrars out there, they offer different services. Some domain registrars are only licensed to sell domain names with specific extensions. Others can sell any domain.
Look out for the following when choosing a domain name registrar:
- Pricing: Don’t be carried away by attractive offers from domain registrars. In many cases, they offer low introductory prices for the first year. But that’s just for the first year. Renewal prices are significantly higher. For instance, some registrars offer $9.99 as an entry fee.
From the second year on, you’ll have to pay $20.17 for renewal. Learn about all the hidden fees before you commit. On average, though, a domain name costs about $12/year.
- Domain Transfer Policies: Domain names can be moved from one registrar to the other. Review a registrar’s transfer policy to know if you will be charged for transferring your blog.
- Expiration Policy: When your domain registration expires, a domain registrar may give you some time to pay up. Some others may simply resell your domain. So, check out a company’s expiration policy first before pitching your tent.
Top domain registrars include:
- Namecheap
- Domain.com
- GoDaddy
- Bluehost
- IONOS
- Hostinger
- Hover
- Dynadot
- DreamHost
Step 3: Get a Web Host—How to Start a Blog
Web hosting gets your blog up and running on the internet. Hosting is like the building that houses your blog online. Without it, your blog remains offline.
There are plenty of web hosts available on the market right now. How do you know which to go for? Every good web host is expected to have the following:
- High Speed: Slow-loading blogs can be a nuisance. 53% of mobile web visitors tend to leave a website/blog if it doesn’t load in 3 seconds. Choose a hosting company that offers good speed. How do you know which hosting company has great speed? Simple! Check the reviews from their previous users.
- Uptime Guarantee: Uptime is the amount of time a website/blog is online. Your blog has to be online most of the time. Generally, 99.9% uptime is the hosting industry standard. 99.9% uptime means your blog may be offline for about 8.64 hours in a year. Downtime could be a result of ongoing maintenance. When shopping for a host, read the Terms of Service to know how much uptime guarantee they offer.
- Support: A good web host is expected to have a group of experts that offer all-day support to customers. It could be through any of these means: live chat, e-mail, or phone.
- Security: Poor security could cost you a lot. Choose a web host that offers good security. Want to know more about WordPress security? Check out this tutorial on WP security.
The next question is, where do you get reliable WordPress hosting?
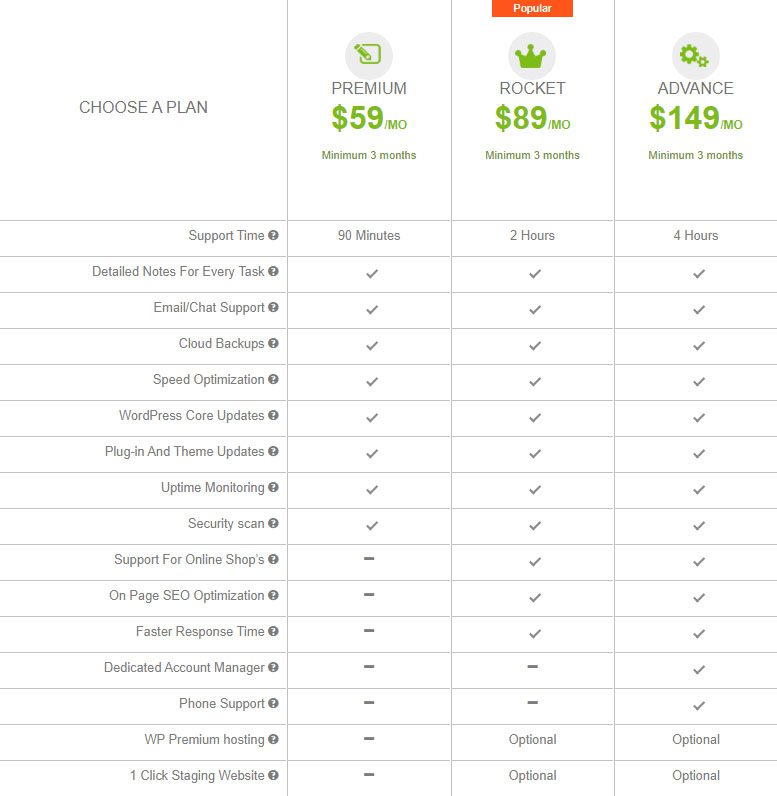
We have created a list of the best WordPress hosting providers. They include:
Some companies offer free hosting, but it is often limited. You can check out this guide to see a list of the best free WordPress hosting services. We also compiled a list of the Best cheap WordPress hosting.
AWS (Amazon Web Services) also offers free hosting services. You can check out our guide on how to install and use WordPress on AWS (Amazon Web Services).
Step 4: Choose your Blogging Platform – How to Start a Blog
To start a blog, you need content management software (CMS), and choosing the right one is crucial for your success. As the name suggests, content management software is a web application that makes it easy to create and manage pages and web resources.
There are several content management systems out there, including WordPress, Wix, Squarespace, Ghost, Joomla, and Drupal.
WordPress is undoubtedly the best option for both newbies and experienced bloggers. It provides numerous customization options for your blog, with thousands of themes and plugins at your disposal. Its user-friendly interface makes it easy to manage your blog and content with no technical knowledge.
Managing your blog and publishing content on WordPress requires no technical knowledge. WordPress also comes with strong SEO tools to ensure your blog is search engine optimized from the beginning. It also has a large developer community and a wealth of internet information to provide the answers you need.
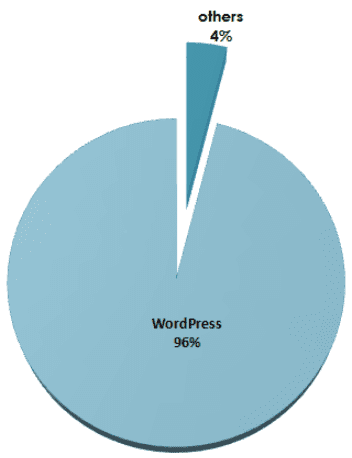
Most interestingly, 96% of the top 1 million blogs use WordPress. So you can’t go wrong with a self-hosted WordPress blog (WordPress.org).
Step 5: Install WordPress – How to Start a Blog
Once you’ve decided on WordPress as your ideal CMS, the next step would be to install it. Installing WordPress isn’t such a big deal, especially if your web host offers a one-click WordPress install. You just need to log into your hosting cPanel and install WordPress.
If things don’t go well with this easy method, don’t fret. You can still install WordPress manually. Click the text below to see how to install WordPress manually.
How to Install WordPress Manually
We have a detailed guide on how to install WordPress manually. Just follow the process listed there. Here’s a breakdown:
Step 1: Download WordPress
Start by downloading WordPress on your local PC from http://wordpress.org/download/ and then unzip the file.

Step 2: Create a Database
After downloading the file, its time to create a database. A database is essential for your WordPress site. It stores all your site’s data (usernames, passwords, posts, pages, comments, etc.).
To create a database, login to your hosting cPanel.
Search for “MySQL Databases” or a similar option (the exact name may vary by hosting provider) and click on it.

Enter a name for your database and click the Create Database button.

On the next page, confirm that your new database has been created and click Go Back.

Next, navigate to the “MySQL Users” section and create a new user. Enter a username and password, then click Create User.

Go to the “Add user to database” section, select the user and database you created, and click Add.

Keep these details safe, as you’ll need them during the WordPress installation process.
Step 3: Upload WordPress File – How to Start a Blog
Now you need to upload the WordPress file you downloaded earlier to your server. There are two ways you can upload WordPress files to your host manually. You can either use an FTP or upload it via your cPanel.
We already have a detailed guide on how to install WordPress using FTP. You should check it out.
Here are the steps to upload WordPress using FTP and cPanel:
i. Uploading WordPres File Using an FTP
An FTP (File Transfer Protocol) allows you to create a secure connection to your server. Here’s our list of the best FTP clients. For this illustration, we’ll use FileZilla FTP to upload WordPress.
To start, you need to connect your FTP to your web server. This guide on how to use an FTP explains how you can do this.
After connecting FileZilla to your webserver, you will be able to see the files on your server. Search and click on the public_html folder.
Note: If you have multiple blogs/websites on the same server, you need to click on the “public_html” folder under the specific domain you want to install WordPress for.

You will find the files on your computer on the left side of the screen. Navigate to the folder that contains the WordPress file you extracted earlier and select all the files in it.
Once selected, right-click on the selected files and click on the Upload button.

The system will take some time to upload the files. And that’s it. You have successfully uploaded your WordPress files using an FTP. Now let’s look at how it can be done using cPanel.
ii. Upload WordPres File Via cPanel
cPanel offers an intuitive interface to upload files, create databases, and install software like WordPress on your domain.
To upload your WordPress file, first log into your cPanel account. Once inside, locate and click on the File Manager icon.

Within File Manager, navigate to the folder where you want to install WordPress, typically public_html.

Next, click on the “Upload” icon.

In the new window that appears, click on the Select File button and choose the WordPress zip file you previously downloaded (Not the extracted file).
Once the upload is complete, click Go Back to return to the directory.
Next, Right-click on the uploaded WordPress zip file and click Extract

Click on Extract File(s) (leave the directory path as the default).

The files are extracted into a WordPress folder, which will result in a file path like public_html/wordpress/. This means that by default, your site will be accessible at yoursite.com/wordpress/, and you don’t want that.
To make your site accessible directly at yoursite.com, you’ll need to move all the files from the WordPress subfolder to the public_html directory. Here’s how to do it.
Navigate to the WordPress folder containing the extracted files.

Select all files inside the folder, and click on the Move icon.

Change the file path to /public_html and click on Move File(s).

And that’s it. You’ve successfully uploaded WordPress using cPanel. You can delete the WordPress zip file and the unnecessary folder to save server space.
Step 4: Run the Installation
With your WordPress file uploaded, you can now run the installation.
To get started, visit your blog’s URL. For example, if your URL is myblog.com, type it into your browser and press enter to access it.
On the first screen, you will be required to choose your preferred language. Select the language and click Continue.

The next screen provides an overview of the information you’ll need to provide to proceed. Click the Let’s go! button.

Fill in your database name, username, and password (these are the details you used when creating your database). Leave the “Database Host” and “Table Prefix” fields as they are. Click Submit.

On the next screen, click Run the installation to proceed.

Next, enter your site title, username, password, and email address. Then, click Install WordPress

After the installation is complete, you’ll see a success screen. Click on the Log in button to proceed.

Log in to your new website using your username and password.

Once you are logged in, you will have access to your WordPRess dashboard. From here, you can start writing posts, installing plugins, and customizing your site’s appearance.

And your WordPress blog is ready. The WordPress admin area may look a bit strange at first. But you will get used to it over time. Check out our ‘introduction to the WordPress admin area’. It will help you navigate your way around the dashboard.
Step 6: Install a WordPress Theme and Customize it
Although your WordPress blog is ready, it will look plain. You need to install a theme to give it the structure you want. The WordPress theme controls how your blog looks and feels.
There are thousands of themes out there, both free and paid, suitable for all niches, from travel to personal finance and technology.
Here’s how to install a theme: How to Start a Blog
Start by logging into your WordPress dashboard. Here’s how:
- Type in “www.yourdomain.com/wp-admin” on your web browser. e.g., “www.fixrunner.com/wp-admin”. This will take you to the WordPress login screen.
- Fill in your username and password and click on Login.
If, for some reason, you can’t access your WP admin area, read our instructional guide on how to fix WordPress login issues.
Once you’ve logged in, look at the tabs on the left-hand side of your screen. Hover your cursor around Appearance and click Themes.
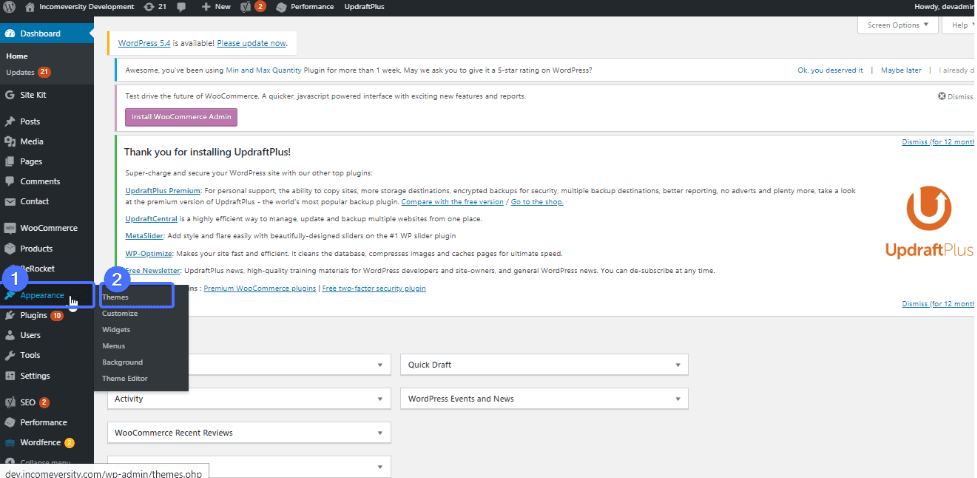
WordPress comes with some themes installed by default. You can simply click on any one of them to activate it. They are absolutely free.
However, if you want more design, click Add New and explore a new world of eye-catching themes.
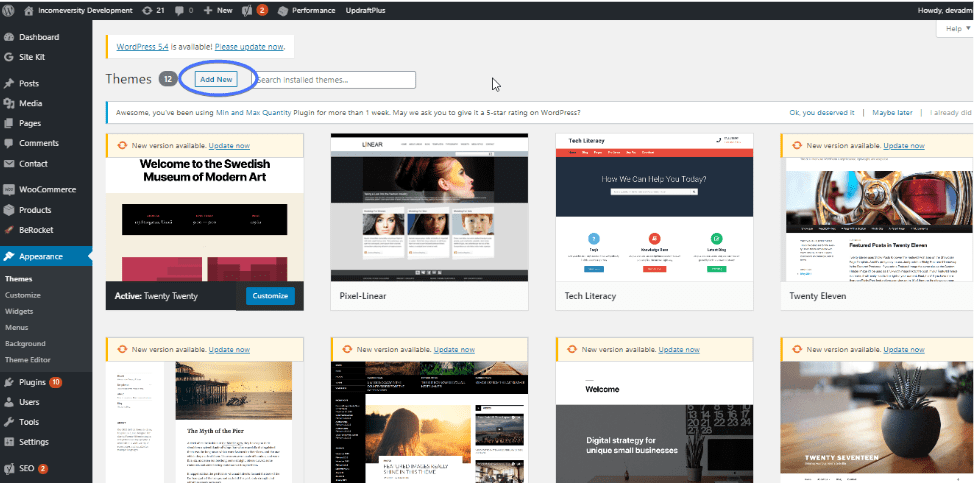
Choosing a theme can be a big deal. Most of the themes are lovely. Click on a theme’s thumbnail to preview it. You can always change your WordPress theme later on.
You can use the ‘feature filter’’ to make things easier. Click on it and select the features you’d love to have in your theme.
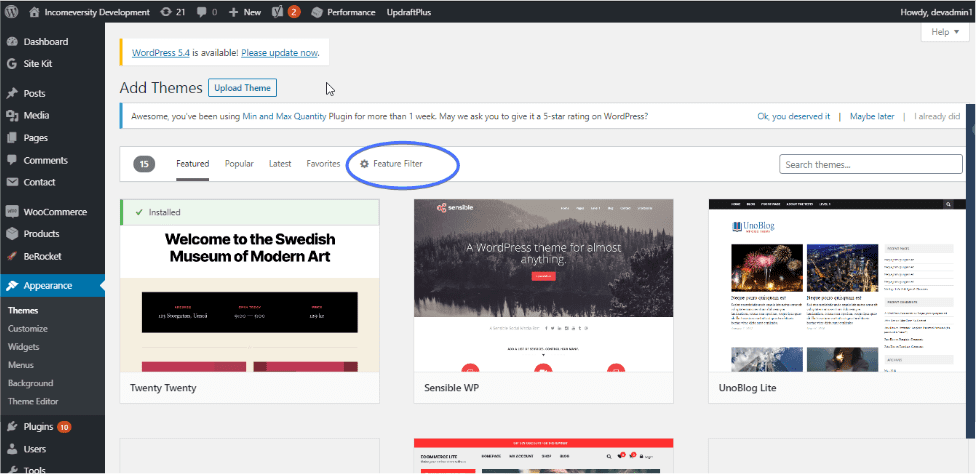
Once you have decided on the theme to use, click ‘install’ right next to it. Once the installation is done, click ‘activate’. And that’s all.
But that’s just one way to install a WordPress theme. Here’s our guide on how to install a WordPress theme In 3 different ways.
If you are looking for a free theme, then you should checkout our list of the best free WordPress themes.
Best Premium WordPress Blog Themes
Apart from these free themes, you can also buy premium themes. Here are some of the top WordPress blog themes:
- Astra
- Writee
- OceanWP
- Poseidon
- Newspaper
- Neve
- Mantra News
- Barletta
- Ashe
- Hemingway
Check out this article on the best 20 WordPress blog themes to see more themes and get detailed information about each of those theme. We’ve also curated the fastest WordPress themes.
Best WordPress Them Provider
Here are the best websites to get premium themes:
- ThemeForest
- CodeCanyon
- Elegant themes
- WooThemes
- MojoThemes
- WPExplorer
- Premiumwp
- TemplateMonster
- StudioPress
- ThemeRoulette
- ThemeGrill
- MyThemeShop
- Theme Fuse, etc.
If you purchase a premium theme or get a theme outside of WordPress, then you have to install the zip file. This guide explains how to install a new WordPress theme.
Most people also stumble upon nulled WordPress themes, but there’s a lot you should consider before you use them.
Step 7. Customize Your Theme: How to Start a Blog
What you have at this point is a freshly installed theme bearing a name that isn’t yours. It’s time to make the theme yours. The level of customization varies for every theme. Here are some steps you can take:
1. Import theme demo content (if applicable):
Some themes come with demo content to help you set up your site quickly. If your theme has a demo, then you should first import the demo.
Follow the theme’s documentation to import the demo content.
2. Set up menus:
Create new menus and assign them to the theme’s menu locations (e.g., primary menu, footer menu). To create menus, go to Appearance >> Menus. Here’s a guide on how to create a custom menu on WordPress.
3. Customize widgets:
Add, remove, or rearrange widgets in the available widget areas. Go to Appearance >> Widgets to manage widgets. Here’s our guide on how to create custom widgets.
4. Set up the homepage and blog page:
You can make your homepage static or a blog. If you choose blog, your homepage will be updated whenever you post a new blog. Go to Settings >> Reading to set up your homepage.
5. Customize your blog’s appearance
WordPress has a theme customizer that allows you to modify various aspects of your blog. To access the WordPress Customizer, go to Appearance >> Customize.

This will take you to a customizer like this. We used the Astra theme for this illustration. However, most themes have similar customization options.

Below are some of the top customization you can make with a customizer.
- Header Builder: This feature allows you to customize how your header looks. You can add different elements to the header, from buttons to menus and widgets. Here’s our guide on how to customize WordPress Header.
- Global: this section allows you to modify the topography (font size, weight, etc), colors, buttons, etc.
- Site Identity: Change your site title tagline and upload a logo.
- Colors: Modify the primary colors of your site.
- Header and Background Image: Set a custom header and background image.
- Menus: Create and manage navigation menus.
- Widgets: Add and arrange widgets in your sidebar or other widget areas.
- Homepage Settings: Choose what displays on your homepage (latest posts or a static page).
- Additional CSS: If you need further customization, you can add custom CSS. Go to Appearance >> Customize >> Additional CSS and enter your custom CSS code.
Once you’re satisfied with the customizations, click the Publish button in the WordPress Customizer. If your customizer isn’t coming up, then you should check out this guide on 7 easy ways to fix a WordPress customizer that isn’t working.
6. Use WordPress drag and drop:
Drag and drop is a simple way to customize your WordPress blog by clicking and holding an element, then moving it to a desired location. To customize your WordPress blog using drag and drop, you need to install a drag-and-drop page builder plugin like Elementor or WPBakery or use the WordPress Gutenberg editor.
These builders allow you to select your desired elements (text, images, buttons, etc.) from the builder’s sidebar and drag them into place on your page. You can then rearrange elements by dragging them to new positions.
Here’s our guide to the best drag-and-drop WordPress theme builder.
Step 8: Install WordPress Plugins – How to Start a successful Blog
WordPress plugins improve the functionality of a WordPress site. Plugins make it easy to add more functionalities to your website. What makes WordPress awesome is that there are plugins for most features you want to add to your blog.
Here are some plugins you may need for your blog:
WordPress Security Plugin:
Implementing robust security measures is essential to protecting your blog from brute force attacks and other WordPress vulnerabilities. This includes installing security plugins and using practices like regular backups and strong passwords. Additionally, optimizing performance enhances the user experience and protects against potential security vulnerabilities.
Here’s our recommended list of WordPress security plugins:
- iThemes security plugins
- Jetpack
- WordFence
- MalCare
- Sucuri
- All-in-One WP Security & Firewall
Other WP security tips:
Here are other tips to keep your WordPress website safe.
- Ensure all passwords are complex, combining uppercase, lowercase, numbers, and special characters to reduce the risk of brute-force attacks.
- Regularly update WordPress core, themes, and plugins to patch security vulnerabilities and improve overall security.
- Implement two-factor authentication (2FA) to add an extra layer of security, requiring a second form of verification beyond just a password.
- Install an SSL certificate to encrypt data between your site and its visitors, ensuring secure connections and improving trust.
- Restrict the number of login attempts to prevent brute-force attacks by using plugins like Limit Login Attempts Reloaded.
- Schedule regular backups of your site to ensure you can quickly restore it in case of a security breach or data loss.
- Avoid using “admin” as the default username to make it harder for hackers to guess login credentials.
- Keep track of user actions on your site using activity log plugins to detect any unauthorized or suspicious behavior promptly.
Here’s our guide on how to secure your website.
WordPress Backup:
Every WordPress blog needs a backup. You need to perform regular WordPress backups to ensure you can recover your data in case of any issues. If, by any chance, your blog crashes, you can restore your files quite easily when backed up. Here’s a list of the top 6 best WordPress backup plugins to protect your database and files.
WordPress Contact Form plugin:
Creating a relationship with your readers is vital to building a successful blog. Use a WordPress contact form plugin to add forms to your blog. To learn more, read this guide on the best contact form plugins.
Tips to consider before installing a plugin:
- Download plugins from the WordPress Plugin directory or from any trustworthy plugin developer. Stay away from plugins from questionable sources. To verify the quality of a plugin, check its reviews and ratings.
- Download plugins that won’t conflict with your WordPress version.
- Too many plugins can reduce your site’s speed. They occupy valuable space and bandwidth.
- Install updates regularly.
Top WordPress Plugins to Consider
Here’s a list of WordPress plugins you should consider for your blog:
- Yoast SEO – Optimizes your site for search engines.
- Akismet Anti-Spam – Filters out spam comments and protects your site from malicious content.
- Jetpack – Offers a suite of features, including site stats, security services, and performance improvements.
- WP Super Cache – Generates static HTML files to speed up your site.
- Elementor – A drag-and-drop page builder that makes it easy to create custom layouts.
- UpdraftPlus – Provides backup and restore functionality to keep your site safe.
- Contact Form 7 – Allows you to create contact forms easily with a drag-and-drop interface.
- MonsterInsights – Connects your site with Google Analytics to track visitor data.
- Smush – Compresses and optimizes images to improve site speed.
- Wordfence Security – Protects your site from security threats and malicious attacks.
- Redirection – Manages 301 redirects and keeps track of 404 errors.
- Broken Link Checker – Scans your site for broken links and helps you fix them.
- Social Warfare – Adds social sharing buttons to your posts and pages.
- W3 Total Cache – Improves site performance by caching files and optimizing delivery.
- MailChimp for WordPress – Integrates your site with MailChimp to grow your email list.
- Google XML Sitemaps – Creates a sitemap to help search engines index your site.
- WP Rocket – A premium caching plugin that enhances site speed and performance.
Step 9: Optimize Your Blog for Search Engines
If you hope to have lots of readers someday, don’t skip this step. There are about 152 million blogs on the internet. To stay afloat and visible, you need to optimize your blog for search engines.
Fortunately, WordPress makes this process amazingly easy. To get started, install and activate a WordPress plugin. We’ve done several analyses to find the best WordPress SEO plugin, including a comparison between All In One SEO vs. Yoast and Rank Math vs. Yoast SEO.
Here are the top WordPres SEO plugins out there:
Ultimately, we found Yoast to be one of the best and most popular SEO plugins. You can learn more about Yoast in the article on how to use Yoast SEO.
First, you need to install Yoast on your blog. To do this, go to Plugins >> Add New page and search for Yoast SEO.

It’s most likely to be the first plugin to appear in your search results. Click Install and activate it.
At this point, Yoast SEO is fully activated on your blog. There are two ways of accessing your settings – the ‘SEO’ menu in the sidebar and the ‘Yoast’ icon on top of your dashboard.

Also, when creating a page or post, a section with SEO tools appears below the editor to help you optimize your content for search. You should use this section for each piece of content you create.

Here are the steps to optimize your blog posts with Yoast:
- Set a Focus Keyword: Choose a primary keyword or phrase for your post. Ensure it accurately represents the content and is included in the key areas like the title, headings, and text.
- Improve SEO Title: Craft an engaging SEO title that includes the focus keyword. Ensure the title is within the recommended length, and encourage users to click on the post
- Optimize Meta Description: Write a compelling meta description with the focus keyword to attract clicks from search engine results and summarize the post’s content.
- Use Internal Linking: Add internal links to other relevant posts or pages on your site to improve navigation and boost SEO through better link equity distribution.
- Add Alt Text to Images: Add descriptive alt text with the focus keyword for all images to improve accessibility and help search engines understand the image content.
- Check Readability: Use Yoast’s readability analysis, which suggests improvements like shorter sentences and paragraphs to make your content easier to read.
- Use Outbound Links: Include outbound links to authoritative sources to provide additional value to readers and improve your post’s credibility.
- Optimize for Social Sharing: Configure social sharing options by setting custom titles, descriptions, and images for Facebook and Twitter to improve your post’s appearance when shared on social media.
- Check Keyword Density: Review the keyword density to ensure the focus keyword is used appropriately throughout the content without keyword stuffing.
- Set Canonical URLs: Define canonical URLs to prevent duplicate content issues by indicating the preferred version of a page to search engines.
Before you proceed, ensure to check out this guide on five SEO tips for WordPress that you should know.
Step 10: Start Creating Content – How to Start a Blog
Here is the part you’ve been waiting for—to start sharing your ideas with the world.
Content is everything when it comes to blogging. When you create the right content, your audience will love you, and so will search engines like Google.
The first step to creating blog content is to undertake keyword research. This allows you to know what to write about. You also need to research your competitors to see what they are writing about.
You can aggregate everything about your content writing and publishing into a content plan. The content plan will highlight how often you will update your blog. Whether daily, once a week, or twice weekly.
It should also contain the ideal blog post length. A blog post needs to contain a minimum of 300 words to do well in search engine rankings. However, longer posts (1000 words and more) perform better and are more likely to be shared on social media by readers.
You can write many articles as inspiration comes and schedule them to be posted in the future. To schedule a post, log into the WordPress dashboard. Paste your blog post into the editor, customize it, and click on Schedule Posts on the right side of the screen.
Creating a content plan
Here are some steps to create a content strategy:
- Identify your target audience: Careful planning and a strong content strategy are essential for the success of any blog. Start by determining who your target audience is and getting to know their needs, interests, and challenges. This information will help you create content that is both relevant to and helpful to them.
- Keyword research: Use tools like Ahrefs or Google Keyword Planner to find keywords that people in your audience are searching for. Naturally, include these keywords in your content to improve your blog’s organic traffic and search engine rankings.
- Competitive analysis: Analyze popular blogs in your industry to learn what makes them successful. Take note of their posting schedule, types of content, and engagement strategies. Use this insight to improve your plan.
- Create a content calendar. Plan your posts in advance, balancing various topics and formats to keep your audience engaged. Include evergreen content that remains relevant over time and timely posts that address current trends or news in your niche.
Step 11: Set up Google Analytics
Integrating Google Analytics into your blog allows you to track important metrics such as traffic, user behavior, and engagement. GA allows you to analyze the performance of your content and can provide you with insight into the performance of your blog, including the following:
- How many people have visited your site?
- Which pages are popular?
- What kind of content do your visitors prefer?
- Your current blog speed.
- Where do your visitors live?
- What time do they visit?
- How your visitors got to your site, etc.
- How long your visitors stayed on your site, and more.
How to set up Google Analytics
Setting up Google Analytics on your site is pretty simple. There are three major steps involved in the process:
- Set up a Google Analytics account.
- Copy your tracking code.
- Paste it into the code of any page you want to track.
To learn more about this, check out our guide on how to add Google Analytics to your WordPress site. And if you are still using Universal Analytics, this guide explains how to safely switch to Google Analytics 4 in WordPress.
Step 12: Promote and Monetize your Blog
To effectively start a blog and ensure its success, promoting your content is just as crucial as creating it. Here are some key strategies to enhance visibility and engagement:
- Write guest posts on popular blogs within your niche to drive high-quality traffic to your site and increase your blog’s visibility.
- Connect with other bloggers in your niche through comments, social media, and guest posting. Collaborate on projects, share each other’s content, and participate in blogging communities to increase your blog’s exposure.
- Share your blog posts across various social media platforms like Facebook, Twitter, Instagram, and LinkedIn.
- Build an email list and send regular newsletters featuring your latest blog posts. Offer incentives such as free resources or exclusive content to encourage sign-ups.
- Register on platforms like Medium, LinkedIn Pulse, and industry-specific websites to republish your blog content.
- Optimize your in-site search to make it easier for people to search for their desired topic on your blog.
Monetization
Now, to the monetization aspect:. There are a couple of ways to make money by blogging. They include:
- Affiliate Marketing: Join affiliate marketing programs like Amazon Associates or ShareASale and promote products or services to earn a commission for each sale made through your referral links. to get started.
- Advertisements: Display ads on your blog through networks like Google AdSense. Earn revenue based on the number of impressions or clicks the ads receive.
- Physical items. Selling physical products on your blog lets you leverage your audience to generate sales, whether through a dedicated online store or affiliate partnerships.
- Sponsored Content: Partner with brands to create content that promotes their products or services. This can include blog posts, reviews, or social media promotions, for which you get paid.
- Digital products: Create and sell your own digital products like eBooks, online courses, or merchandise. Use plugins like WooCommerce to set up an online store on your blog.
Before we conclude, it is important to highlight the legal considerations you should know when creating a blog.
Legal considerations:
When starting a blog, it’s crucial to address legal considerations to ensure compliance and protect yourself and your readers. Here are some factors to consider:
- Copyright: Copyright laws dictate that you should only use content that you have the right to use, whether it’s images, text, or other media.
- Privacy: Privacy policies are essential to inform visitors how their personal information is collected, used, and protected on your site. Additionally, having clear terms of service outlines the rules and guidelines for visitors interacting with your blog.
How to Start a Blog With No Money
The steps we described above are for the self-hosted WordPress version, which would cost you some money (hosting, custom domain name, theme, etc.). If you want to build your blog without spending money, there is a way out. WordPress.com allows you to create blogs at no cost (note that we do not recommend this for professional, or even serious blogging).
Follow these steps:
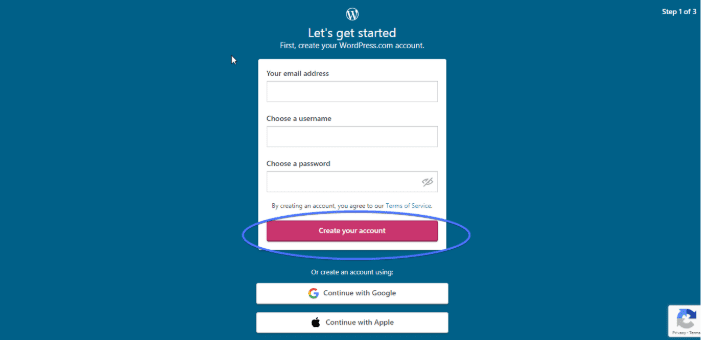
Head over to www.wordress.com and click Get Started.
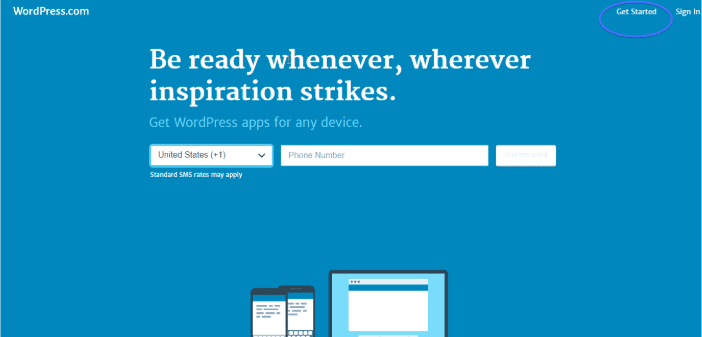
Create an account by filling in your email address, preferred username, and password in the provided spaces. Click Create Account.
Next, confirm your WordPress account. To do this, open the email you receive from WordPress.com. And click Confirm Now.

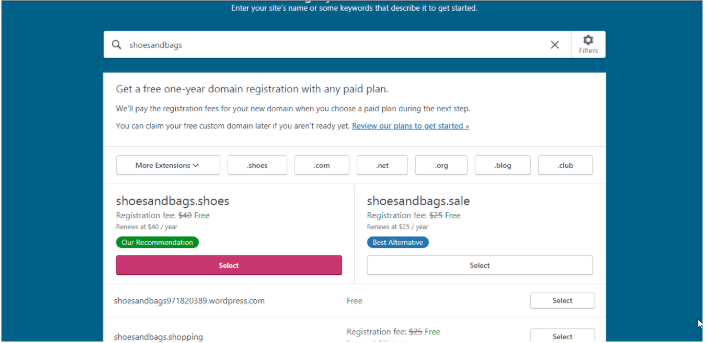
Choose a domain. WordPress offers you a list of available domain names related to your preferred name. Each with varying prices. Since we are interested in starting a blog that takes no money, you should go for ‘domain.wordpress.com’. They are absolutely free.
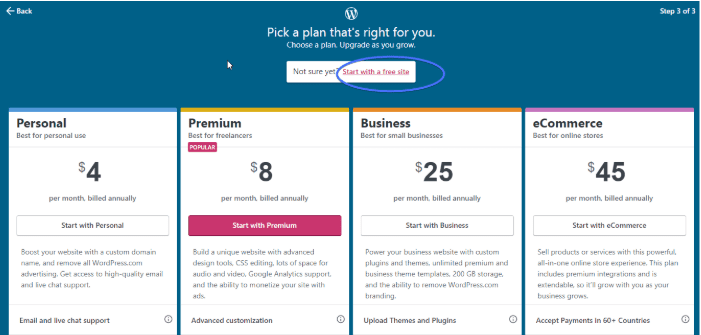
Next, select Start with a free site.
Choose a blog design. Select a theme that meets your needs and install it.

Write and publish your first blog post.
Truth be told, using a self-hosted blog is a better option. A blog that ends with ‘WordPress.com’ isn’t always a good option. However, if you just want to get a feel for what blogging is about before making any financial commitment, you may try it.
Conclusion – How to Start a Blog
You have just learned how to start a successful blog. What next?
The secret to having a profitable blog lies in one word: CONSISTENCY. Keep dishing out great content and your dream blog is only a while away.
You may experience some technical issues as time goes on, don’t worry. That’s why we are here – to support you on this journey. To start with, go through our WP college for more WordPress tutorials.
You can also get a free report on your site’s performance, security, and SEO delivered to your email in 60 seconds.