How to Create Custom Taxonomies in WordPress (Manually or via Plugin)
What is a taxonomy? Taxonomy is a process of grouping content based on certain properties and criteria. That way the content is structured better and, as a result, it is easier to navigate through it. For example, WordPress categories and tags are a type of WP taxonomy. In order to utilize taxonomies properly, we need to understand them. Therefore, we will go over a few definitions, and teach you how to create custom WordPress taxonomies.
Content:
What are the default taxonomies in WordPress?
How to display them in front-end?
How to create a custom taxonomy?
Which one is better – Plugin or Coding?
The default taxonomies in WordPress
WordPress comes equipped with four taxonomies by default: Categories, Tags, Link Category, and Post Format. Those used most often are categories and tags. These two are an example of two types of taxonomy – hierarchical and non-hierarchical. What does that mean?
Categories can have parent-child relationships between each other while Tags can’t. One category can be a parent category to several others. For example, let’s assume you are running an entertainment blog. You might create a category ‘Movies’ with sub-categories ‘Drama’,’Comedy’,’Action’ etc. In this case, the genres would be a sub-category of movies. On the other hand, you can also create tags like ‘New!’ or ‘HOT!’ that would help sort and show the newest articles.
Tags are non-hierarchical, therefore, they don’t have parent-child relationships. If you are writing about music, you might use a tag such as ‘Summer 2019’ and apply it to certain articles.
What is a ‘Term’?
The word ‘term’ is a member of a certain taxonomy. It adds to the confusion but it is actually just an item in the group. In the example above, the taxonomy is ‘Category’ and its terms can be ‘Movies’, ‘Music’, ‘Series’, etc.
Displaying taxonomies on the front-end
You define taxonomies, categorized, and tagged your content. Great! Your visitors will be delighted with the classification that you made for their browsing pleasure. But… err… how are they actually going to see it?
Good question! The answer is simple. You can use widgets in your predefined widget areas. The names of the widgets are ‘Categories’ and ‘Tags’.
First of all, navigate to your wp-admin dashboard. Go to ‘Appearance -> Widgets’ and drag the ‘Categories’ and ‘Tags’ widgets to the desired area.
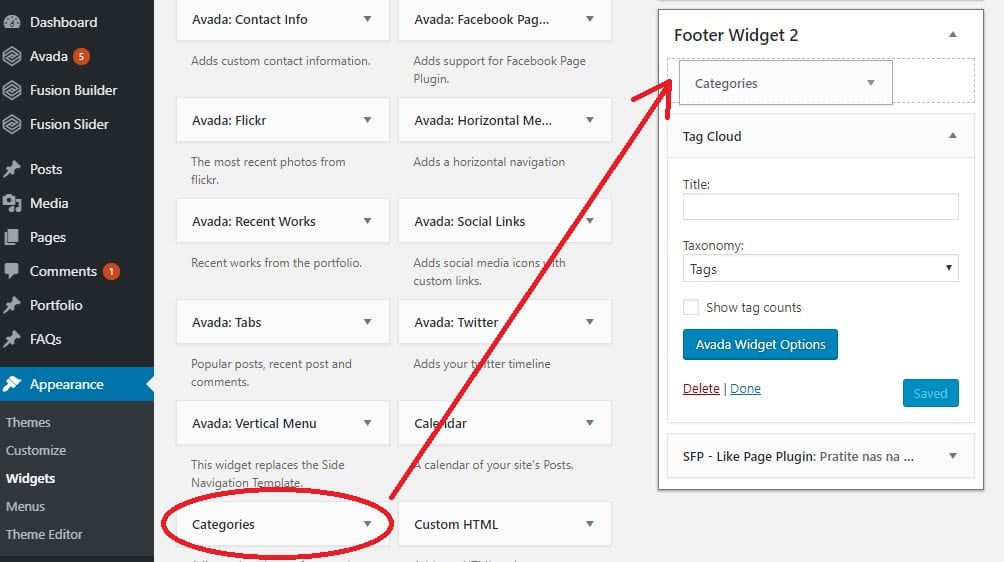
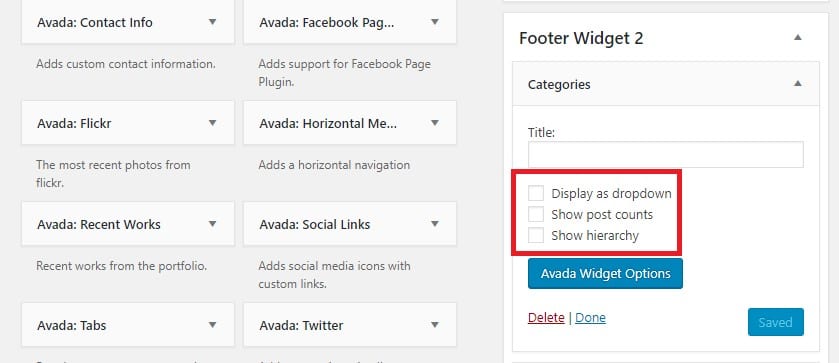
After you drag the widgets to the desired place, you can choose from a few options shown in the screenshot below.
WordPress Custom taxonomies
It is possible to set up your own taxonomies in WordPress. You can do this by using a plugin or manually, by creating a taxonomy functions PHP code and putting it inside the theme’s functions.php file.
Plugins for creating a custom WordPress taxonomy
One important thing to look for when choosing a plugin is that it is well-supported by the author. This is even more important when working with taxonomies. Some of the plugins that have proven themselves over time are:
- Toolset Types (paid/premium)
- Pods (open source/free)
- Custom Post Type UI (open source/free)
If you are not comfortable with PHP coding, then this is the solution I would recommend. All of these plugins are easy to use even if you are not a developer. Furthermore, it makes the job easier if you plan to add more taxonomies as you go.
These plugins operate on a similar basis, more or less. We will demonstrate how to create a custom taxonomy using the Pods plugin.
Firstly, you will have to install and activate the plugin. Go to your wp-admin dashboard, click on ‘Plugins’, search for ‘Pods – Custom Content Types and Fields’, install, and activate it.
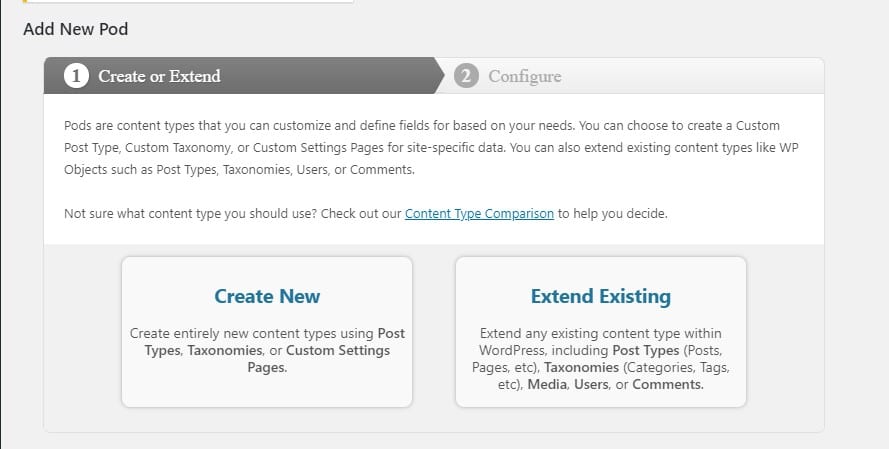
One of the cool features of the plugin is that it lets you extend existing taxonomies. That means that you will be able to edit taxonomies later on. Pretty cool, right?
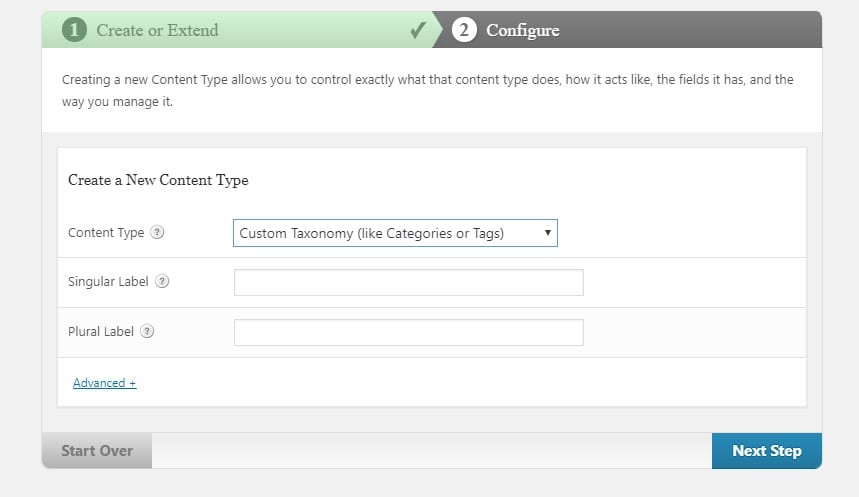
How to Create WordPress custom taxonomies
Click on ‘Create New’. You will need to choose the content type and set the singular and plural labels. We will be creating a taxonomy called Instruments. Therefore, under content type, choose ‘Custom Taxonomy’. Next, write ‘Instrument’ in the ‘Singular label’ field and write ‘Instruments’ in the ‘Plural label’ field.
It is a good idea to create WordPress Custom Post Types as well. The ‘Posts’ is a default WordPress post type and it requires a category because it is its default taxonomy. If no category is specified, then the ‘uncategorized’ will be set by default. Follow the same process as with creating a custom taxonomy.
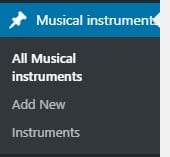
We created a custom post type called ‘Musical Instruments’. You cannot create ‘Instruments’ post type because that slug was already taken by the custom taxonomy. As a result, we are bypassing the default categories which are associated with WordPress posts.
Sounds confusing? Let’s explain!
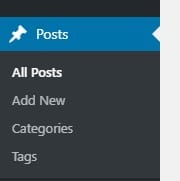
If you click on Posts in your wp-admin dashboard you will see the following:
- All Posts
- Add New
- Categories
- Tags
This is the default post type and default WordPress taxonomies (categories and tags).
So what did we do with the ‘Pods’ plugin? First of all, we created a custom post type ‘Musical Instruments’. Also, we created its own default taxonomy ‘Instruments’. Finally, we added ‘Guitar’ as the term.
Our taxonomy instruments can have as many child items (terms) as we want. Furthermore, we created the term ‘Guitar’ with sub-level terms ‘Electric guitar’ and ‘Acoustic guitar’. Therefore, if we decide to write an article about Fender Stratocaster, we would create a new ‘Musical Instrument’. Finally, we choose the term ‘Guitar’ and sub-level term ‘Electric guitar’.
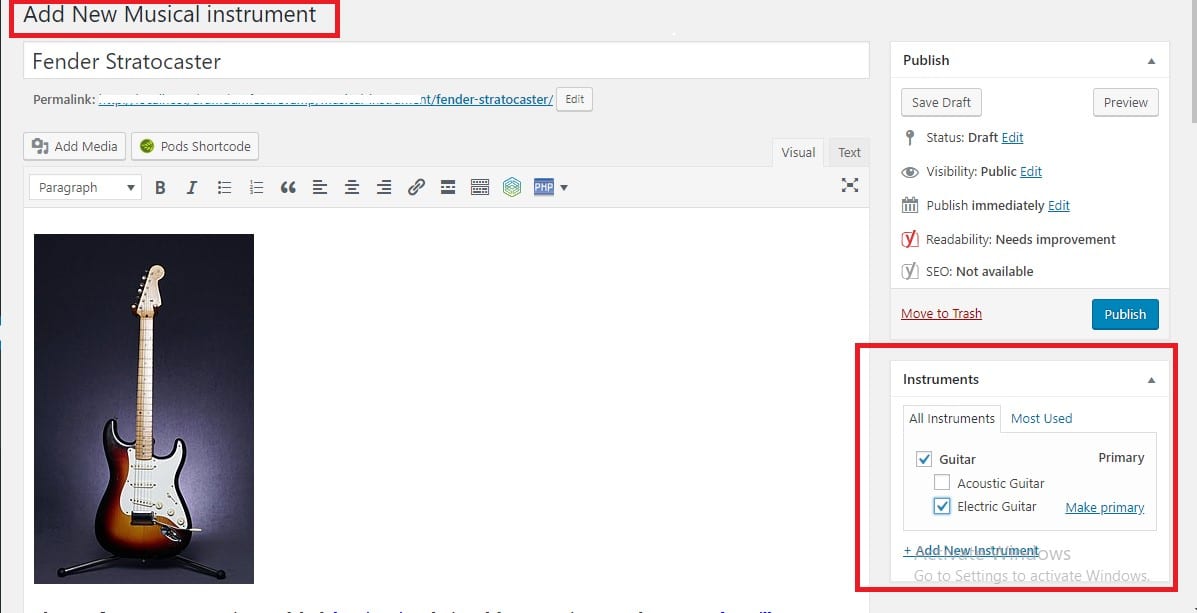
Since this is a custom post type, it will not require to be assigned to a category.
Manually coding a custom WordPress taxonomy
We already mentioned that this can be difficult for non-experienced users. But, if you decide to go down this road, here’s what needs to be done.
Where do you put the code?
The code needs to be in a file that is loaded on initialization. The most logical place would be the functions.php file of your theme (or child theme, if you are using one). You can paste the code at the very bottom of the file, beneath everything else.
A word of caution – if you make any syntax errors, it will result in bringing your site down. Therefore, make a backup of your site before proceeding. If something bad happens, the first thing you should do is remove what you added. If that doesn’t work, restore from backup. Still undeterred? Let’s proceed.
The register_taxonomy() function
There is a built-in WordPress function called register_taxonomy(). It requires 3 arguments:
- The taxonomy name
- Post type it relates to
- List of predefined arguments ($args) that are specified before the function is called
Creating a hook
This is the first part of the code that needs to be added. It will call the function we created, create_instrument_taxonomies(), immediately after the WordPress is loaded.
// hook into the init action and call create_instrument_taxonomies when it fires
add_action( 'init', 'create_instrument_taxonomies', 0 );
Defining $labels and $args
The $labels shouldn’t frighten you. Sure there are a lot of them, but they only represent what will be displayed on the backend. If you are creating a WordPress taxonomy with a different name, just replace ‘Instrument’ and ‘Instruments’ with a corresponding name.
function create_instrument_taxonomies() {
// Add new taxonomy
$labels = array(
'name' => _x( 'Instruments', 'taxonomy general name', 'textdomain' ),
'singular_name' => _x( 'Instrument', 'taxonomy singular name', 'textdomain' ),
'search_items' => __( 'Search Instruments', 'textdomain' ),
'all_items' => __( 'All Instruments', 'textdomain' ),
'parent_item' => __( 'Parent Instrument', 'textdomain' ),
'parent_item_colon' => __( 'Parent Instrument:', 'textdomain' ),
'edit_item' => __( 'Edit Instrument', 'textdomain' ),
'update_item' => __( 'Update Instrument', 'textdomain' ),
'add_new_item' => __( 'Add New Instrument', 'textdomain' ),
'new_item_name' => __( 'New Instrument Name', 'textdomain' ),
'menu_name' => __( 'Instrument', 'textdomain' ),
);
The other part of the code should look like this:
$args = array(
'hierarchical' => true,
'labels' => $labels,
'show_ui' => true,
'show_admin_column' => true,
'query_var' => true,
'rewrite' => array( 'slug' => 'instrument' ),
);
The first line in $args has the item ‘hierarchical’. Of course, this should be set to true if you wish to have a structured WordPress taxonomy.
The last bit of code is:
register_taxonomy( 'instrument', array( 'musical-instruments' ), $args );
}
It is really important to not leave out the ‘}’ at the bottom because it actually closes out the function create_instrument_taxonomies(). If you leave it out, your site will probably crash.
WordPress Taxonomy – Plugin vs. Coding – which is better?
To me, this is very straightforward. If you are not experienced and don’t want to bother with coding everything, just go with a plugin. First of all, the plugin is highly unlikely to crash your site. It has a user interface, which makes things a lot easier. Also, you don’t have to pay for anything. unless you are using Toolset Types.
There is one scenario where I might prefer coding over a plugin. That would be the case where you are absolutely certain that you won’t need a new WordPress taxonomy regardless of any content you plan on adding later on. You might just need to set a few of them at the start. In that case, I would recommend custom coding because adding any plugin slows down the site on your WordPress hosting.
More Resources:
- How To Easily Clean Up Your WordPress Database
- The Fastest WordPress Themes Of 2019
- WordPress Meta Description


