How to Install and Configure All in One SEO Pack Plugin

Search Engine Optimization is the most effective way of increasing traffic to your site. In WordPress, SEO plugins such as All in One SEO and Yoast SEO help anyone with basic knowledge to properly optimize their content for search engines.
When people talk about SEO in WordPress, the Yoast plugin comes to mind, however, there are other popular and reliable options available such as the All in One SEO Pack plugin.
In this guide, we will show you how to install and properly set up this SEO plugin on a WordPress site. Before that, let’s see the benefits of using an SEO plugin in WordPress.
Content:
- Why you need an SEO Plugin in WordPress
- How to Install and Configure All in One SEO Pack Plugin
- Conclusion
Why You Need an SEO Plugin
SEO increases your chances of ranking on search engines. When done properly, this leads to an increase in your websites’ organic traffic. In the past, you would need to hire a professional to perform an SEO audit and optimize your WordPress site.
But things have changed – thanks to CMS platforms such as WordPress which provides plugins that are easy to use. Anyone with basic knowledge about WordPress and SEO can perform on-page optimization on their website with these SEO plugins.
These SEO plugins provide optimization guidelines when creating or updating a post or page on your WordPress blog. If these steps are followed properly, it increases your chances of getting noticed on search pages.
How to Install and Configure All in One SEO Pack Plugin
All in One SEO is one of the best WordPress SEO plugins. The plugin is free to use, but you can upgrade to the pro version that comes with additional features.
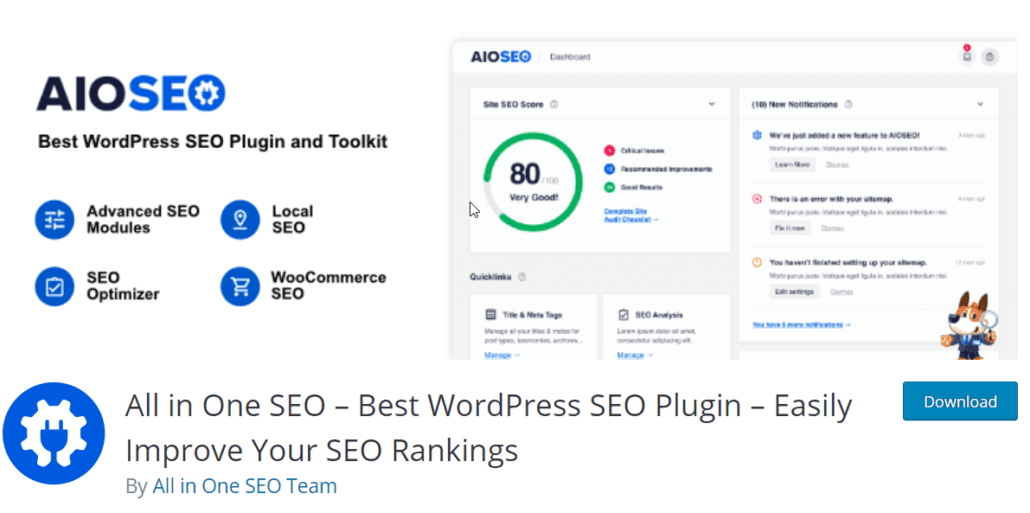
With this plugin, you can optimize your website content, pages and posts so they rank on search engines. It also generates XML sitemaps upon installation which can help search engines understand the content of your website. Below are some of the features of the plugin.
- Easily integrates with Google Analytics.
- Step by Step WordPress SEO Setup Wizard.
- On-page SEO Optimization for posts and pages.
- TruSEO score provides detailed content & readability analysis to help you optimize your pages for higher SEO rankings.
- Supports unlimited SEO Keywords.
- Built-in support for WooCommerce SEO.
To start, you need to install and activate the plugin from your WordPress dashboard. Please check this guide to learn how to install WordPress plugins.
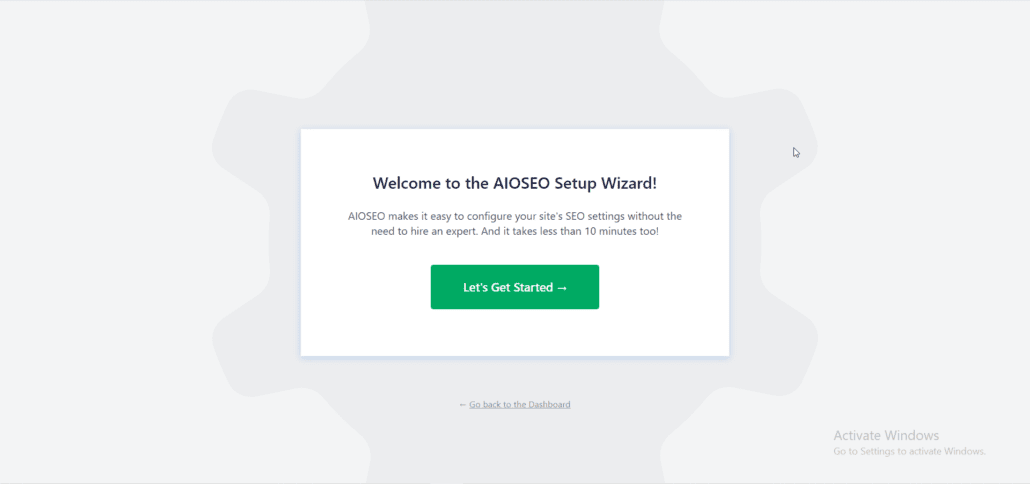
Basic Setup – All in One SEO Plugin
After activating the plugin, you will be redirected to the plugins’ setup wizard. To begin configuring the plugin, click on Let’s Get Started.
Side Note: The settings you enter in the setup can be updated later if you change your mind about any of them. So you can proceed without overthinking each setup step.
Step One – Site Category
On the first step, select the category that best describes your website. If you are more focused on creating content, then you should select the blog option.
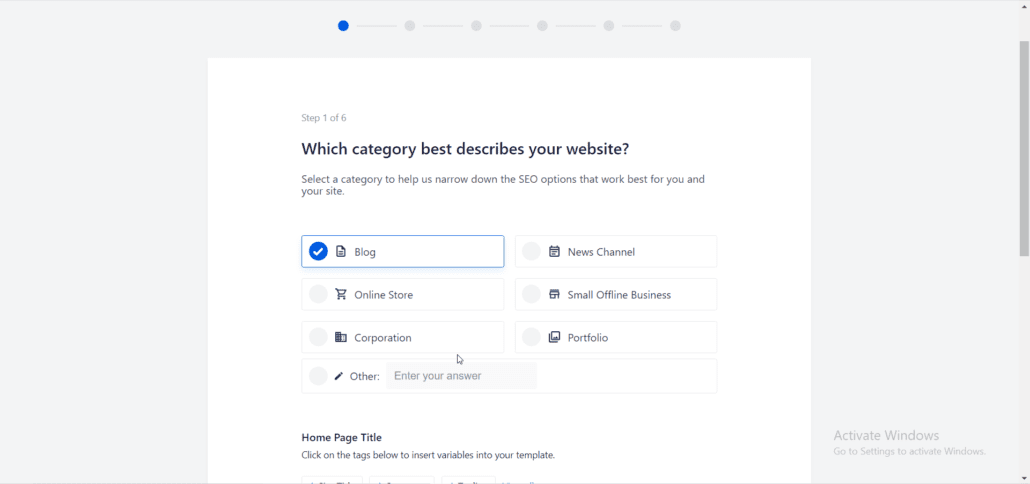
Other options are available as well such as News Portal, online store, portfolio, or small business website. Simply choose the one that best describes your website.
Below the website category, you will find the home page title section. This setting tells search engines what your website is about. It uses dynamic parameters to display the meta title and description you set when you first installed your WordPress website.
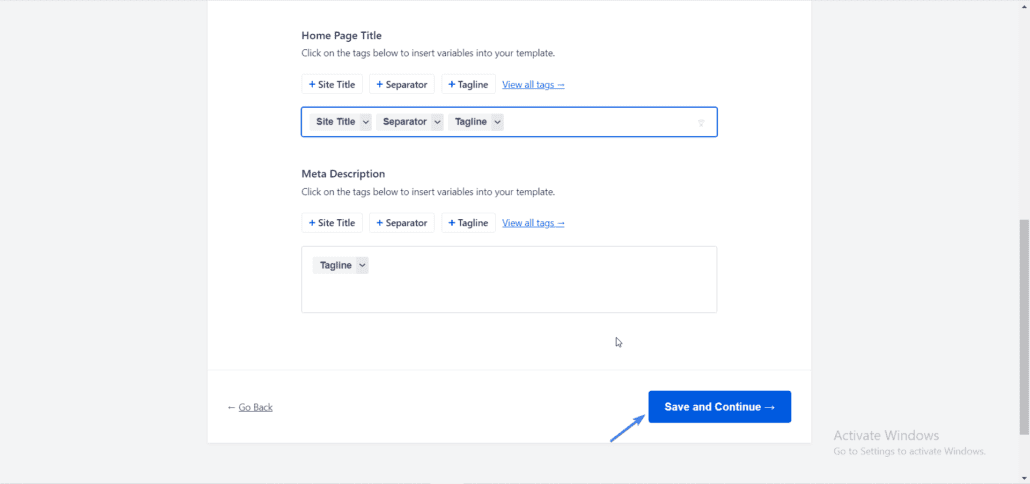
Once done, click on the Save and Continue Button
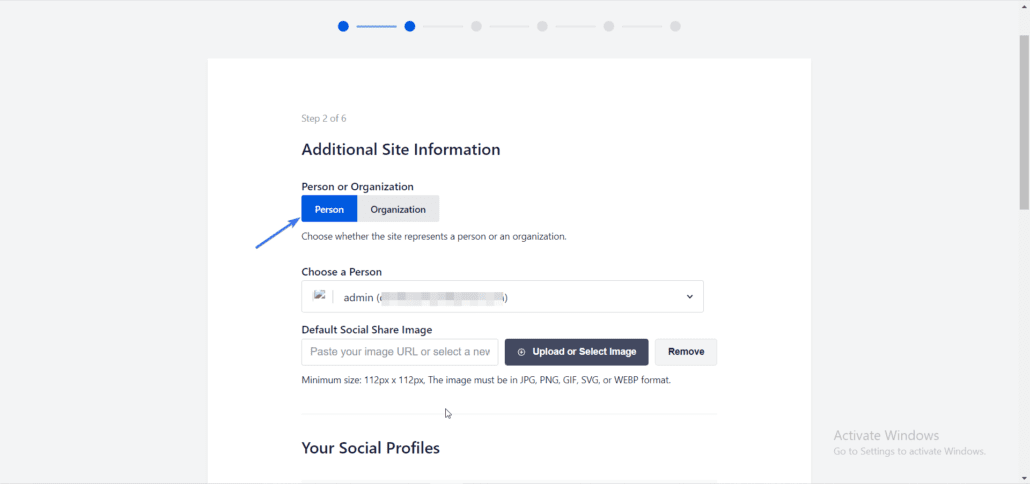
Step Two – Additional Site Information
On this page, enter additional parameters about your website. This will help search engines to gather as much relevant information about your brand.
First, specify whether your website is a personal site (for example, a personal blog), or an organization’s website (eg, an agency site). Next, choose a user to associate with the All in One SEO Pack plugin.
Below that, you will see “Your Social Profiles” options. Here, enter all the social networks of your website in their respective boxes.
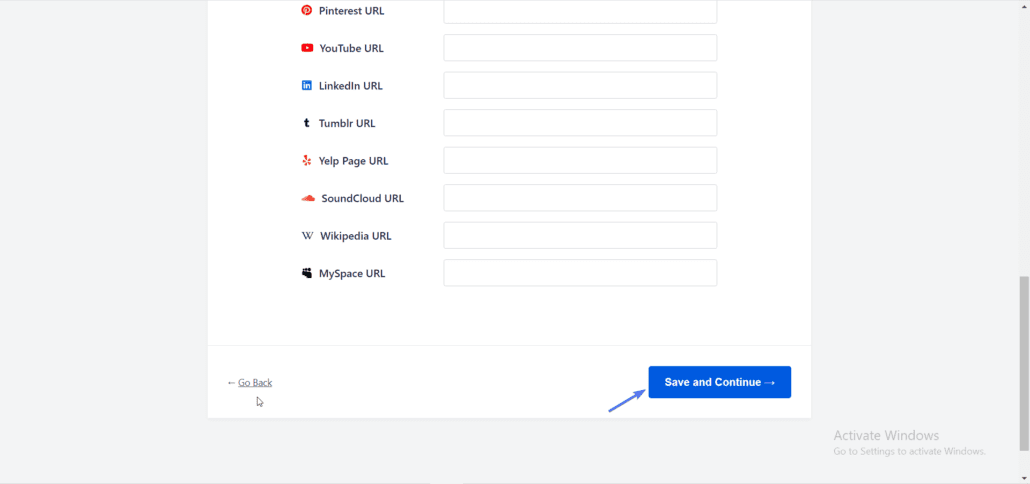
Once done, click Save and Continue.
Step Three – SEO Features
This section is where you set some useful tools such as SEO sitemaps and analytics. By default, sitemaps and search optimization are enabled. The Search Optimization tool provides you with tips and edits to make to your site and content to ensure you rank on search engines.
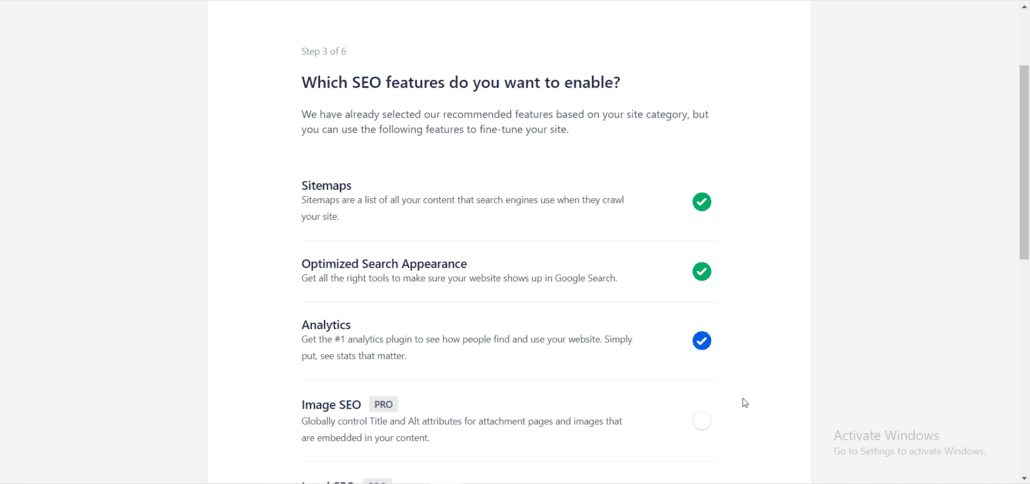
Other options such as Analytics, Image SEO and Local business SEO (for small business owners) are available. However, some of them are paid options available on the pro version of the plugin.
After selecting the SEO features you wish to enable, click Save and Continue.
Step Four – Search Appearance
On this page, you can set how your website is displayed on search result pages. This is more like a follow-up of the SEO settings in step one above.
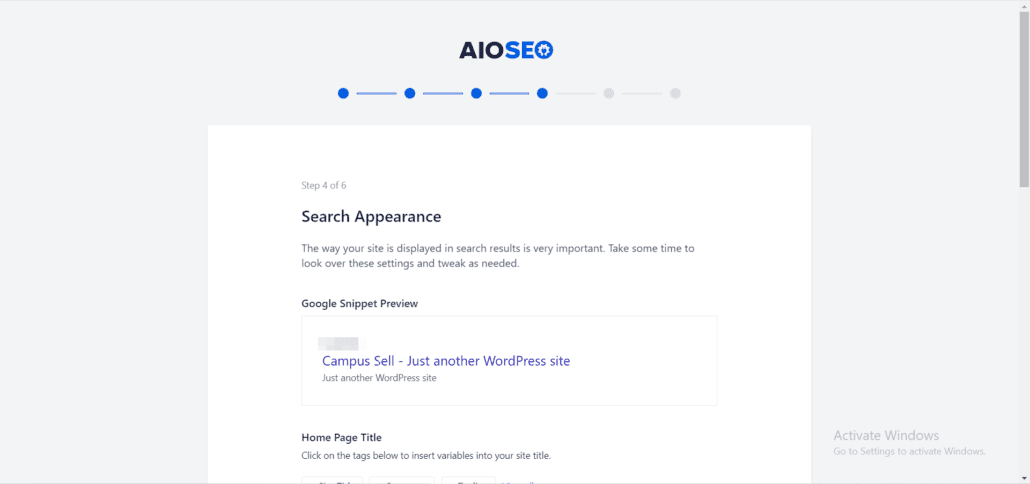
The plugin also has a cool feature to enable Maintenance Mode on your website. When turned on, search engine directories will not index your web pages. This is a cool feature to enable if you are still building your site.
You can leave the Live Site option selected if your site is not under construction.
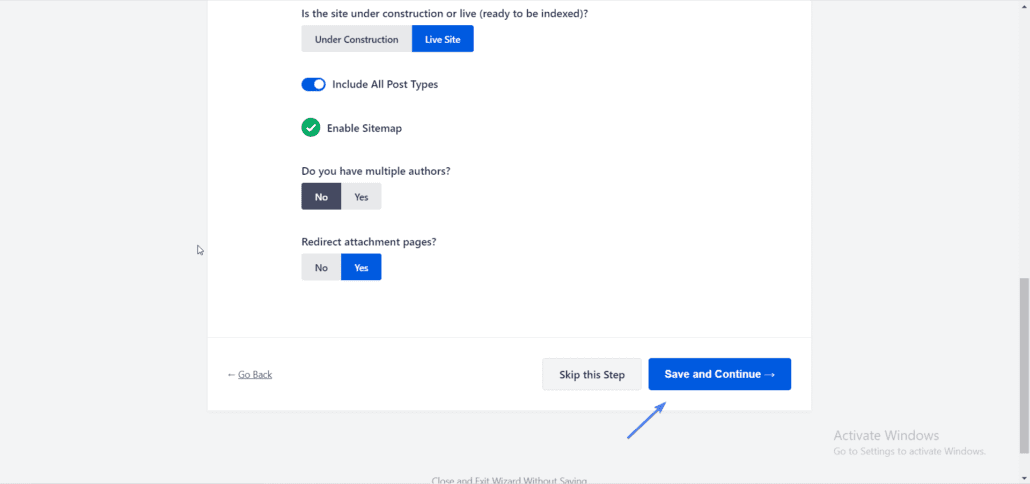
Below that, turn on the option to ‘Include All Post Types’. Leave the ‘Enable Sitemap’ option checked.
If your site has multiple authors, select ‘Yes’ to enable the All in One SEO option for all authors.
Next, keep the option to redirect attachment pages. Lastly, hit the Save and Continue button.
Step Five – Site Analyzer
Here you have the option to enter your email address to receive notifications about recommended optimizations, as well as about updates and new features.

You can click the button to Skip this Step if you don’t want to.
Step Six – AIOSEO Premium
If you have a license key for the premium version of this plugin, simply enter the key and connect with your site.
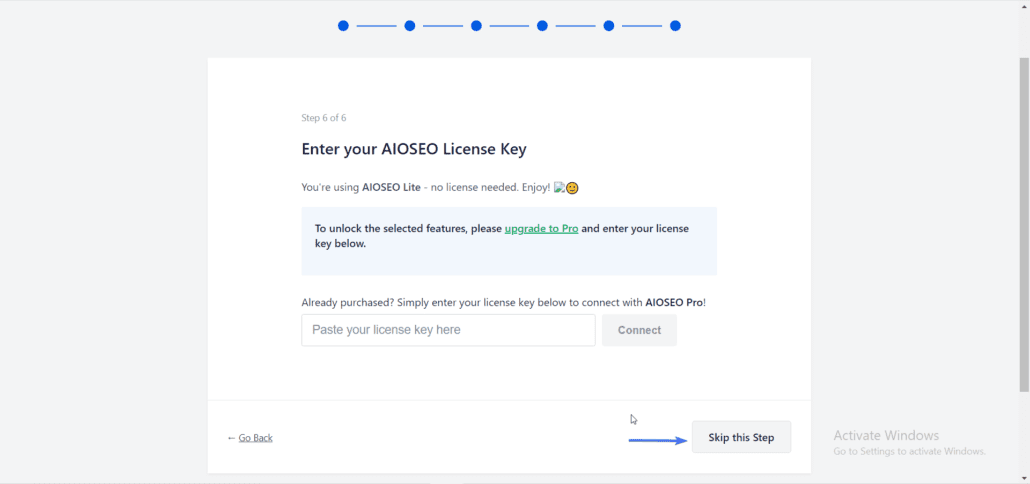
To continue using the free version of the plugin, click on Skip this Step.
With this basic configuration, you can start using the plugin on your website. However, there are still some technical SEO settings such as submitting your site and sitemaps to search engine consoles.
Connecting your Site to Search Console
Google search console is a tool that provides reports about your websites’ performance on the search engine. Adding your site does not directly improve your SEO ranking, however, the reports and error log provide guidelines on steps required to improve search ranking.
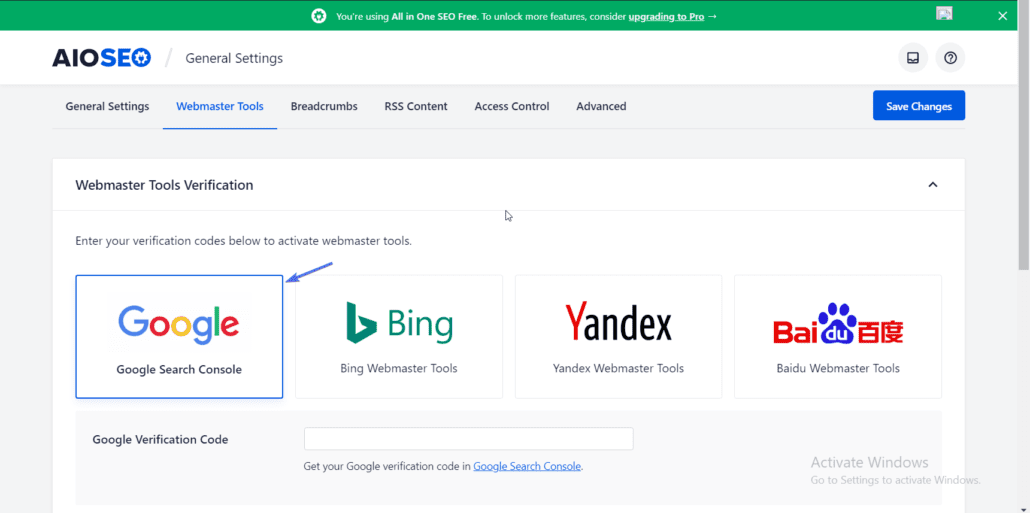
To submit your site to a search engine, go to All in One SEO >> General Settings.
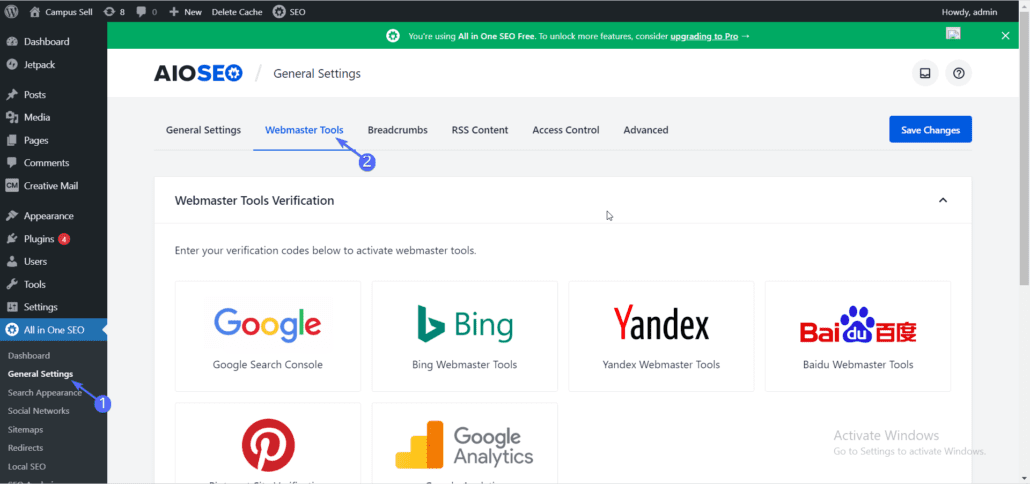
Next, click on Webmaster Tools. Here, you will find popular search tools where you can submit your site.
To add your site to google console, click on the Google Search button, a text box will appear where you will paste your google verification code.
The verification code can be gotten from google search console. Once here, login with your Gmail account.
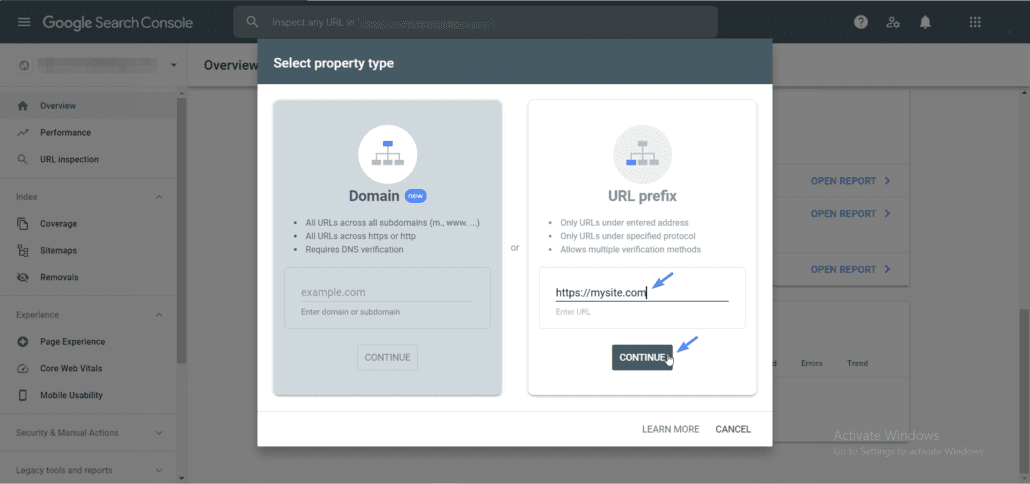
Now, click on the Add Property button.

On the URL Prefix section, enter your site’s address and then click on Continue.
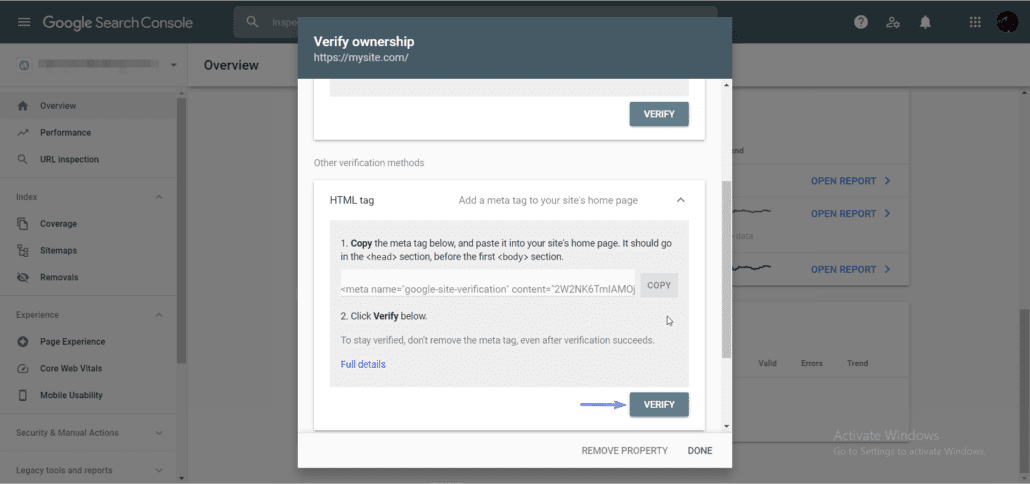
Next, you will be required to verify ownership of the domain name. For this, select the HTML tag option.
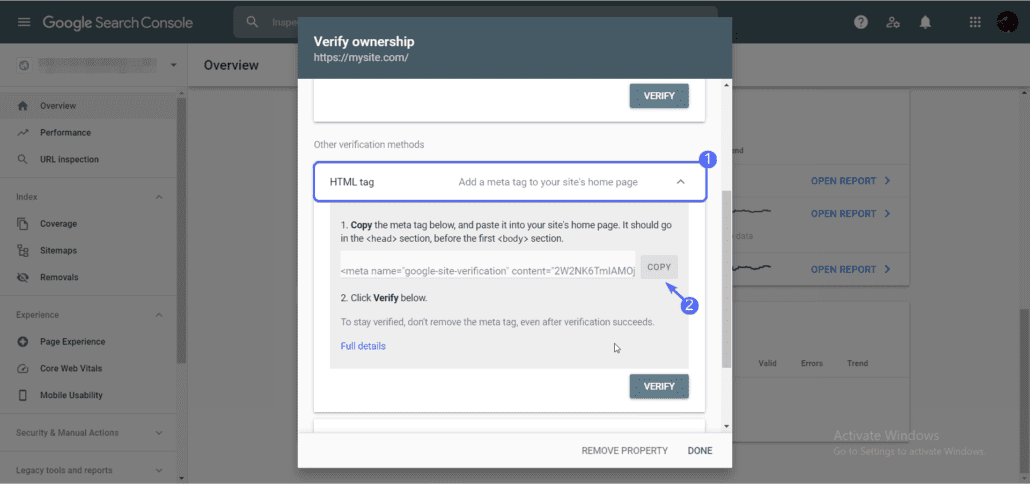
Copy the code and then head back to your WordPress dashboard and paste it into the google verification box.
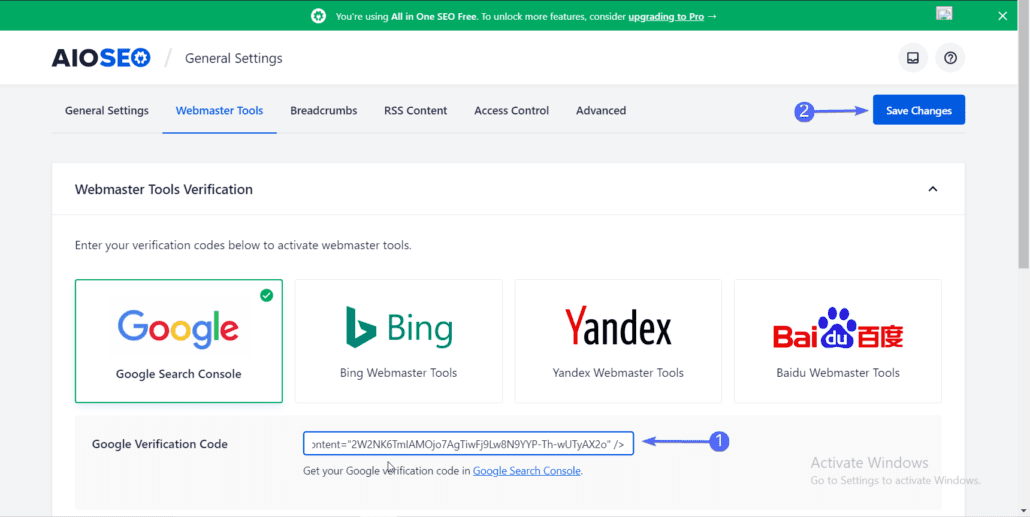
Next, click on the Save Changes button.
Lastly, head back to your search console and click on the Verify button.
The plugin has detailed documentation on how to add your site to each of the tools it supports.
Sitemaps
XML sitemaps help search engines to understand your content better. All in One SEO plugin supports XML sitemaps, video sitemaps, news sitemap and RSS sitemap. However, only the default XML sitemap is available with the free version of the plugin.
After following the Setup process above, the plugin will generate an XML sitemap for your website. To access this sitemap, go to All in One SEO >> Sitemaps.
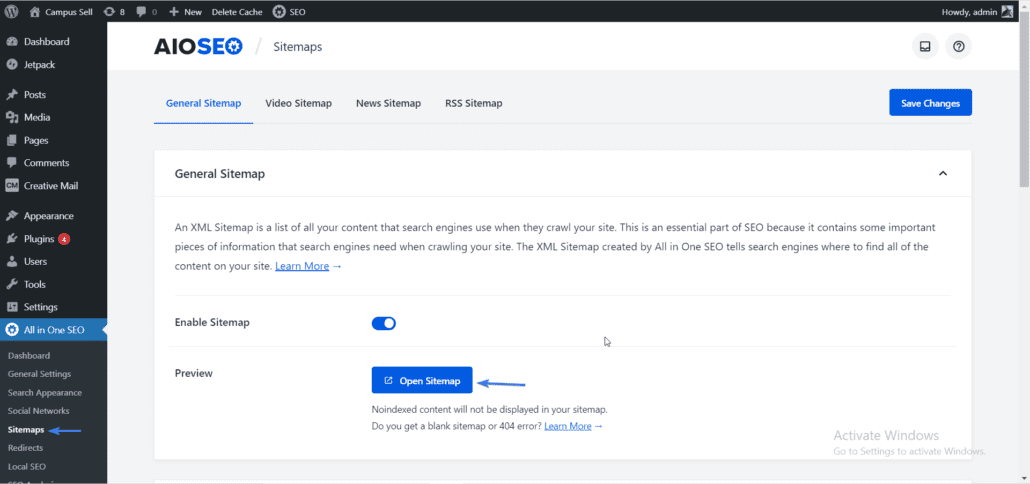
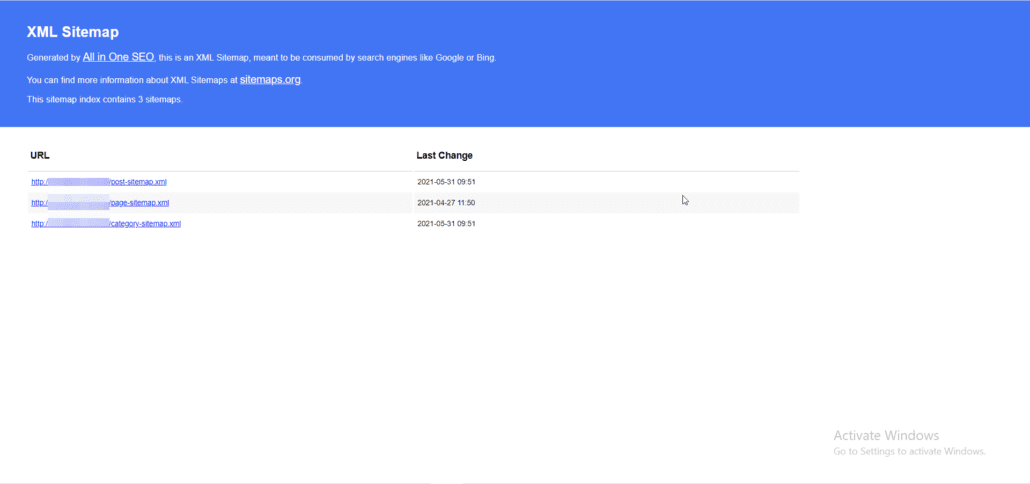
Under the General Sitemap tab, click on Open Sitemap to view your XML sitemap.
The plugin provides additional settings to configure how your sitemap works.
For this, scroll down to the ‘Sitemap Settings’ section. Here, you can increase the number of links your sitemap supports.
The default is 1000 links. If your site has more than 1000 posts, simply increase ‘Link Per Sitemap’ to a much higher value. The maximum number of links you can add is 50000.
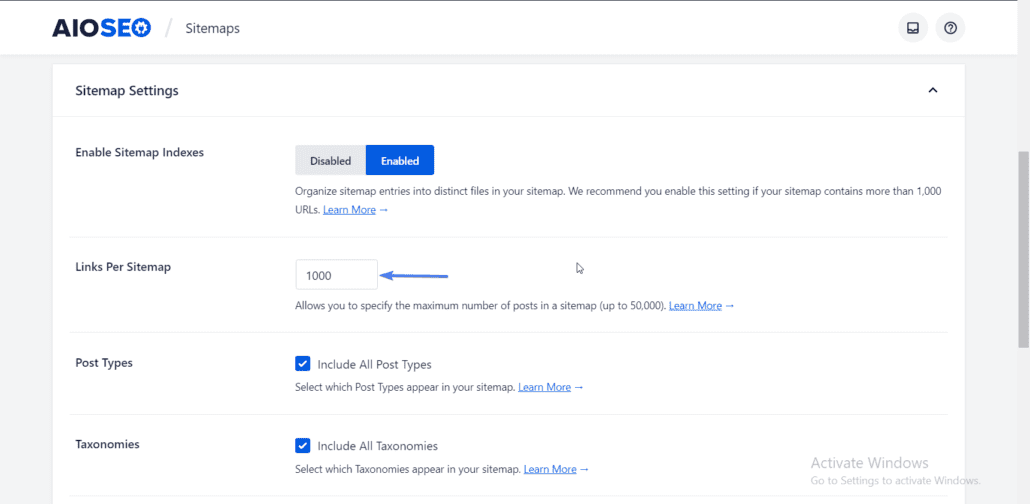
You may leave other settings as is because they work just fine.

Once done, scroll down and click on Save Changes.
Submitting your sitemap to search engines makes it easier for your content to be crawled. If you wish to submit your sitemap, please check this guide to learn how to submit a sitemap to Google and Bing webmaster tools.
If you have a YouTube channel where you share video tutorials, you may consider upgrading to the premium version so you can also rank your videos. This is another additional tip to easily improve your SEO ranking.
How to Optimize Blog Posts
The on-page optimization feature along with the TruSEO score provide an easy way to optimize your posts and pages for better search engine performance.
The plugin provides an editor with SEO guidelines that you can implement to increase your chances of ranking on search engine directories.
This tool is available on the content editor page. To access it, simply edit an existing post, or create a new post from your WordPress dashboard under Posts >> Add New.
On the content editor, scroll down and locate ‘AIOSEO Settings’. Here you will find all the tools and settings available for that particular post.
General
First, you will see a snippet preview of how the page you are editing will appear on Google search page.
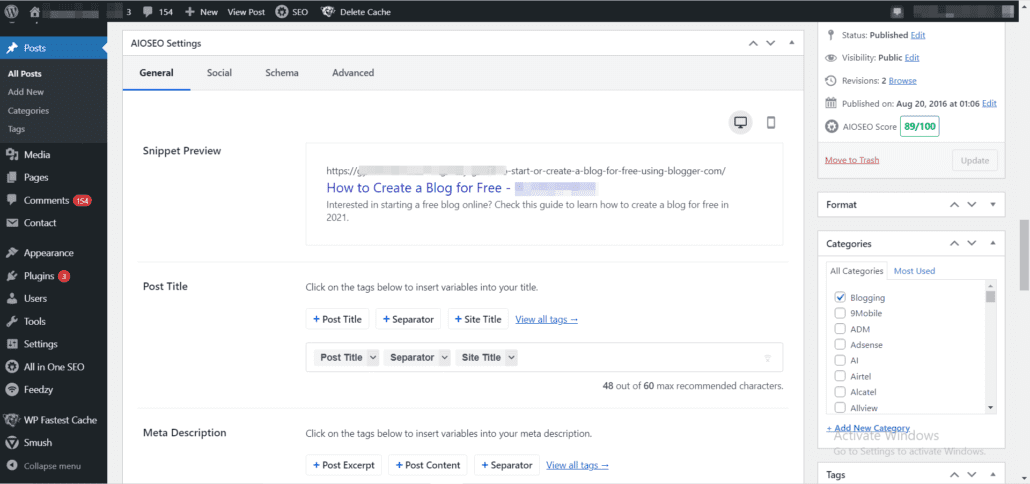
Below that, you will find the ‘Post Title’ and ‘Meta Description’ options. The SEO title and meta description are what is shown on SERP (Search Engine Result Pages).
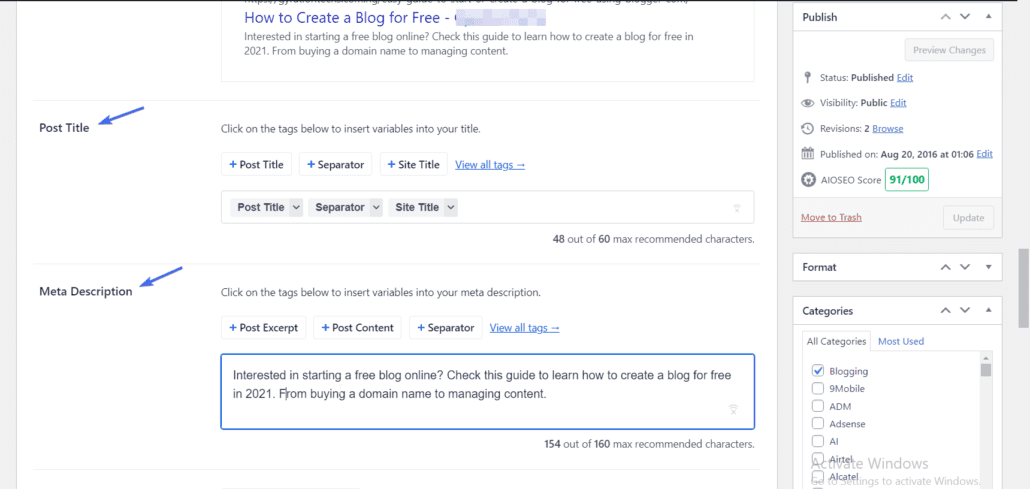
The plugin automatically generates the title and meta description from the post title and post excerpt respectively. But you can manually add both values if you rather not use the defaults.
Focus Keyphrase
A focus keyphrase is an exact keyword you intend to target with a blog post. This is the term users type on search engines.
Note that adding a focus keyphrase does not directly increase your search traffic. Rather, the plugin uses it to provide an on-page SEO audit checklist that you can implement to optimize your page for search engines.
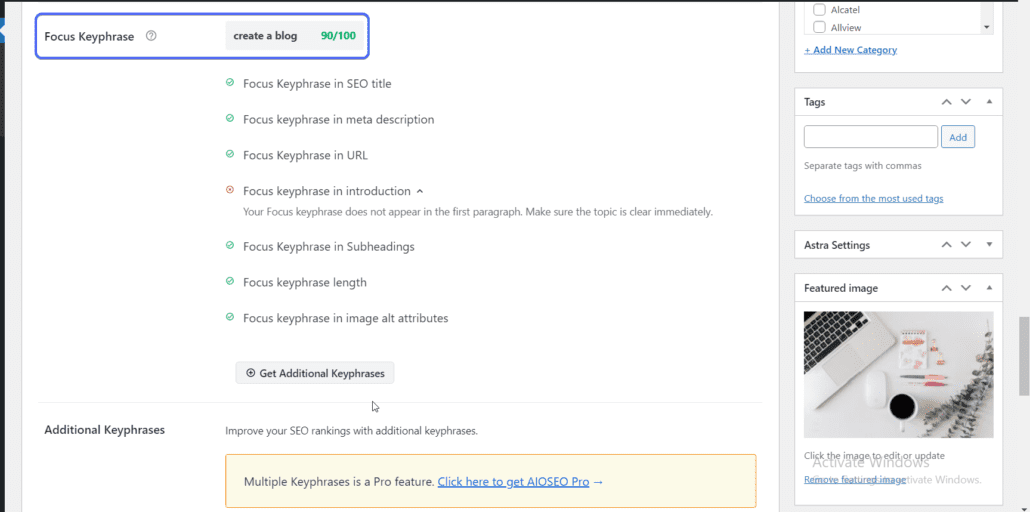
When there are red alerts, it means your content needs to be optimized properly. Luckily, the plugin will show you practical steps to improve the content.
The goal is to get as many green ticks as possible. The more green ticks you get, the greater your chances of ranking for your chosen keyword.
The plugin has an option to use additional focus keyphrases but requires a premium account to use this feature.
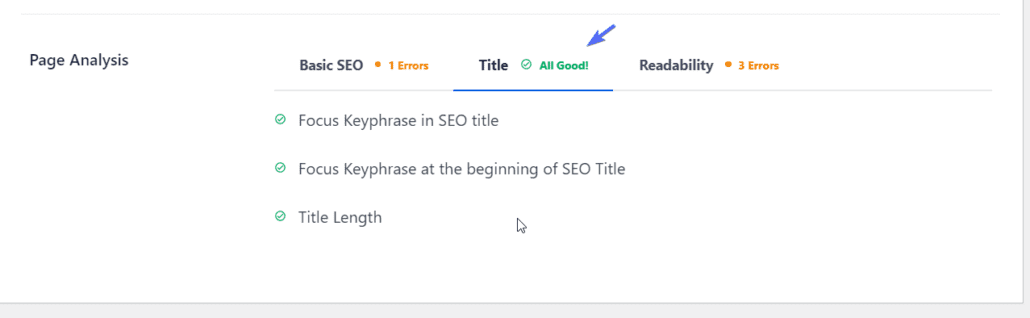
Page Analysis
Below the focus keyphrase section, you will find the ‘Page Analysis’ option. This section shows your content analysis in terms of SEO and readability.
The SEO score mainly shows the results from the focus keyphrase optimization. While the readability score determines how easy and understandable your content appears to your users.
On the Basic SEO tab, you will see the list of things you should strive to improve on your page content. Similarly, the goal is to get all guidelines to green as this improves your chances of ranking.
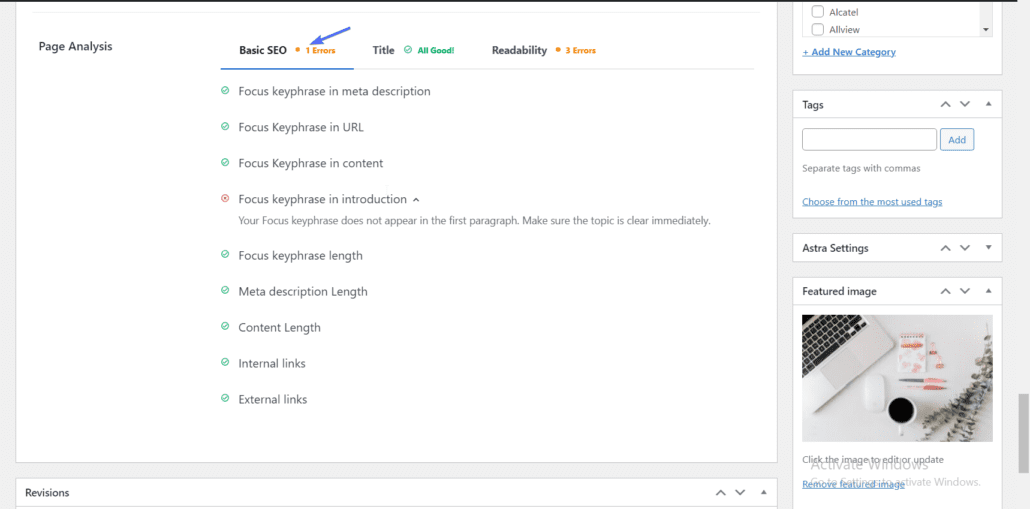
Next, click on the Title tab and check if your page title is properly optimized. If all checks are met, you should see “All Good” next to the Title.
Readability Analysis
After optimizing your title, go to the Readability tab. Here, you will see any readability error on your content. These are usually highlighted in red along with details on steps to improve your content.
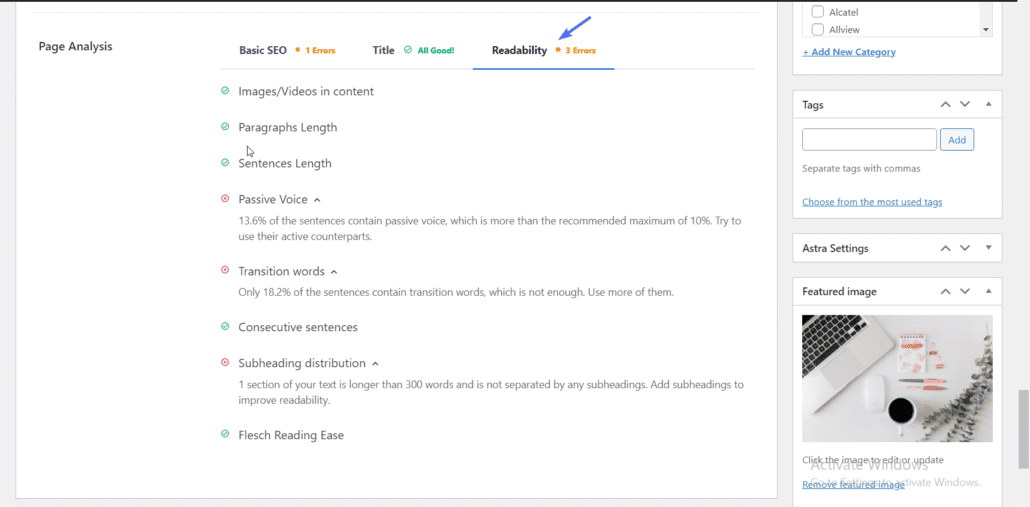
For instance, the passive voice shows the percentage of words that use a passive tone (e.g. used, stored, improved, etc) as opposed to their active version (use, store, improve, etc).
The maximum percentage should be less than 10%. If the passive tone on your content is greater than the maximum, it will be highlighted in red as seen in the example above.
To fix this, you can use a tool such as Datayze’s Passive voice detector to find and replace passive words with active ones.
Another error from the example blog post above is the subheading distribution. The plugin requires that headings and subheadings should contain less than 300 words.
So to resolve such warnings, you should consider breaking your content into subheadings as they make your content user-friendly.
When optimizing for readability, you should be careful not to overdo it. While it is great to get all checks green, you shouldn’t change your content or remove important points just to get green checks.
AIOSEO Score
After optimizing your content for SEO and readability, the plugin assigns an SEO score to the content of your page based on the optimization practices you followed.
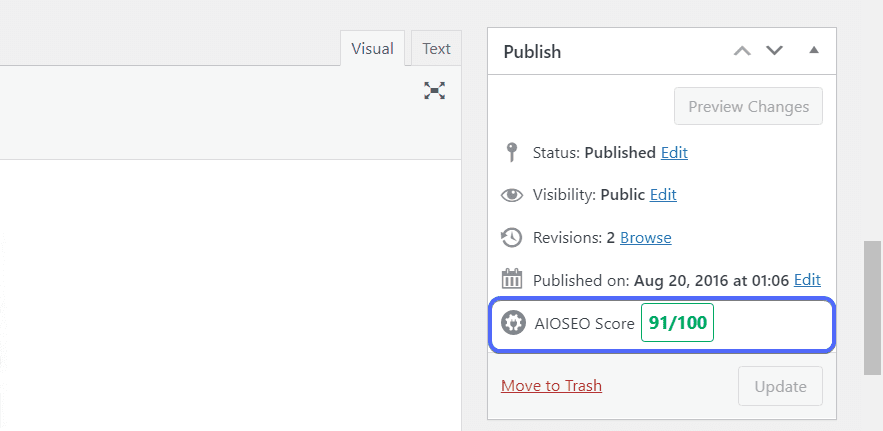
This SEO analysis score can be found on the right side of the content editor in the Publish section. When optimizing your content, you should aim for a score between 85-100.
Social
This tab contains all the social meta options for your content. Here, you can control how your content appears on social media sites such as Facebook and Twitter.
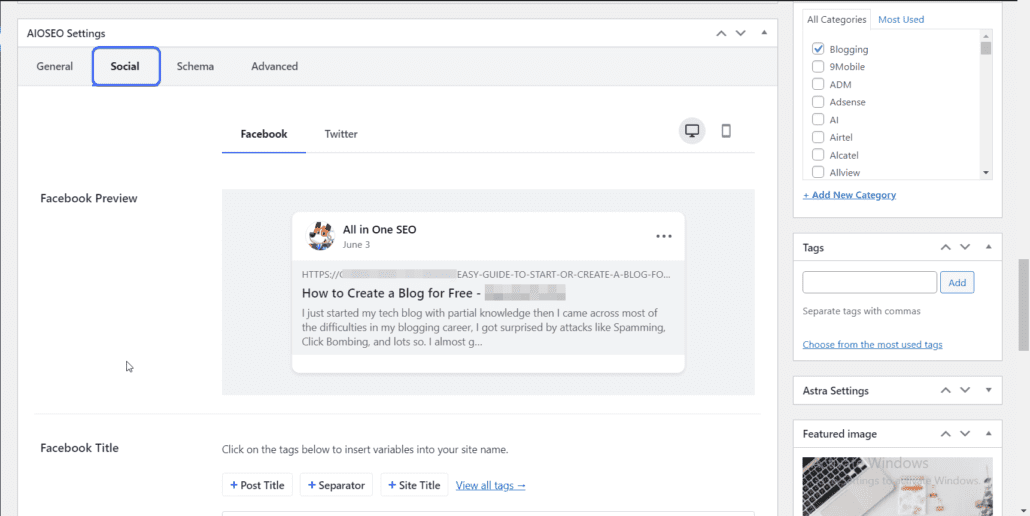
You can switch between the Facebook and Twitter tabs to see if your content appears well on social media.
If there are issues with the sharing option, such as images not showing, you can resolve them with this plugin.
To fix image issues, scroll down to the image source option, then click on the dropdown and select the image of your choice.
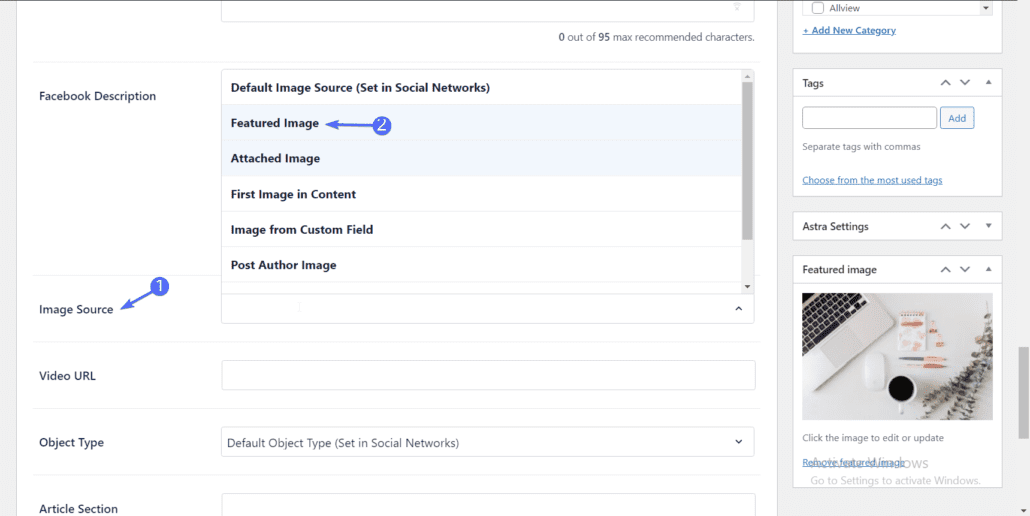
The default Image Source uses open graph tags and Twitter tags to automatically detect and configure how your link will appear. You can simply use the featured image as the Image Source whenever your image is not displaying on social media platforms.
There are other advanced settings and tools such as Schema markup that will help search engines better understand the content on your page. However, these features are only available to pro users.
AIOSEO Tools and Miscellaneous Settings
A few other tools are included in this plugin, such as Robots.txt Editor and .htaccess Editor that provide an easy way to modify your server files.
If you previously used another SEO plugin such as Yoast SEO, the plugin has an option to import your configurations and settings from the previous plugin.
To access these settings, go to All in One SEO >> Tools.
Robots.txt Editor
The robots.txt file is a configuration file that you can use to tell search engine crawlers which page(s) to index and which to avoid.
By default, this file is auto-generated when you install WordPress on your server. However, this SEO plugin provides an easy to use interface to edit the content of the file.
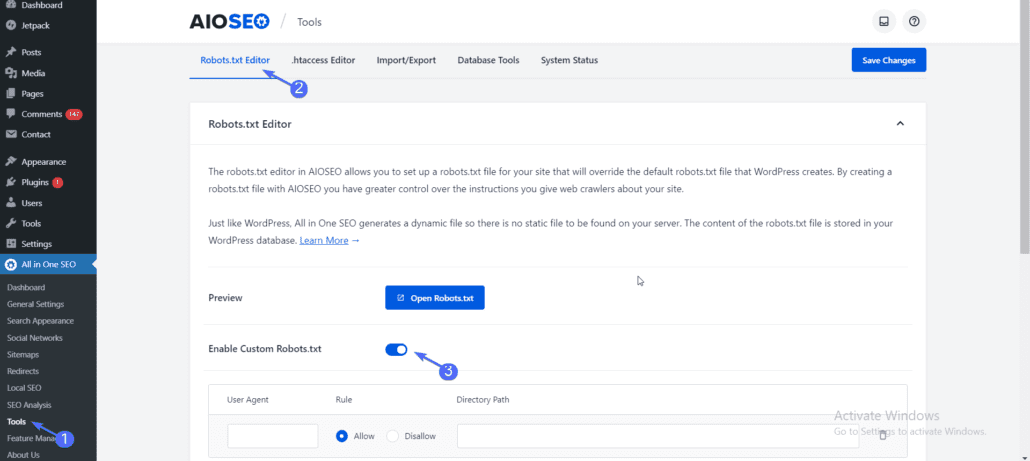
To use this file, simply tick the “Enable Custom Robots.txt” option. This will override the default WordPress robots.txt file.
This file works well out of the box so we recommend not making any changes to the file – except you are an advanced user and know what you are doing.
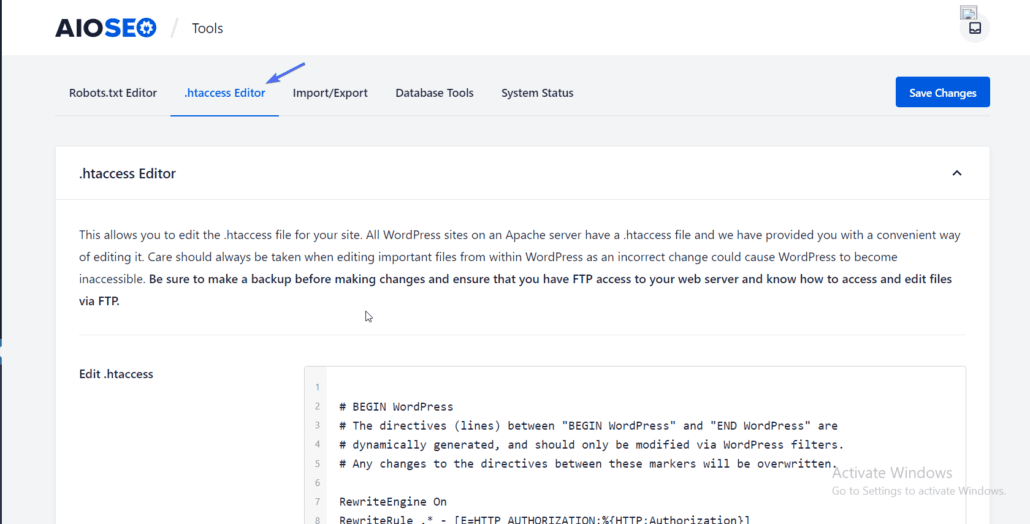
.htaccess Editor
This file holds all the server configuration of your WordPress site. The file is available on your WordPress hosting, which means you need to have cPanel or FTP access to edit the file.
However, with the AIOSEO plugin, you can edit the file right from your WordPress admin dashboard.
To access this option, simply click on the .htaccess Editor tab. Click on Save Changes when you are done editing the file.
Side Note: Before making any change to this file, you need to download a backup of the file so you can revert your changes if anything goes wrong. The file can be downloaded through FTP on your web host. Please check this guide to learn how to use FTP.
Import/Export
In this tab, you can export your current configuration or import configurations from another SEO plugin on your site. This is convenient for those who just changed from one SEO plugin to another.
To access this page, click on Import/Export. On the right, you will find the option to export the settings on your plugin.
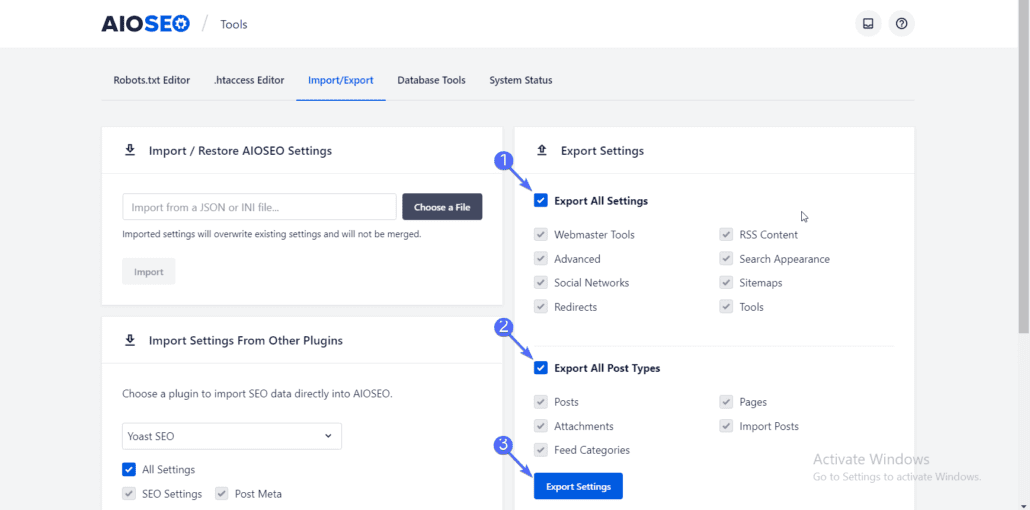
Tick the boxes to Export All Settings and Post Types. Then click on the Export Settings button. It will download the settings as a JSON file.
To import/restore your settings, click on the Choose a File button under “Import / Restore AIOSEO Settings”.
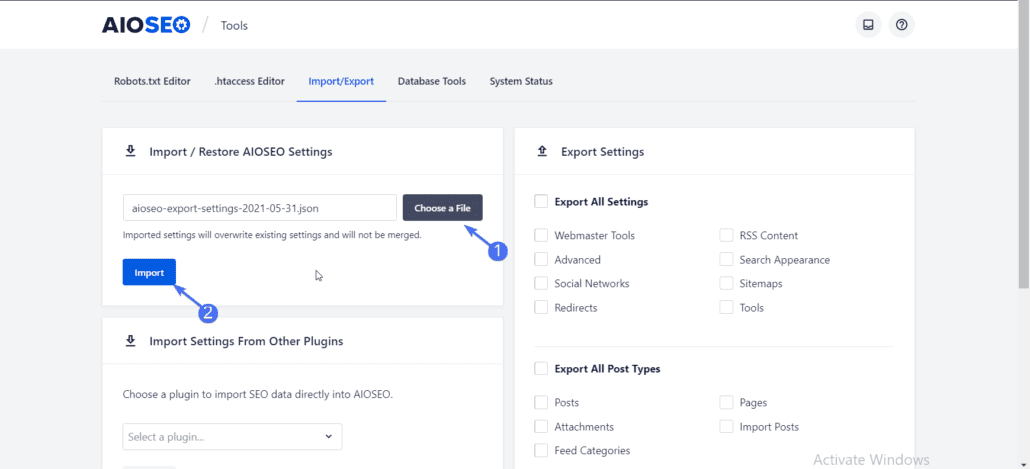
Next, select the exported file from your computer. Lastly, click on the Import button.
If you want to import settings from another SEO plugin, simply select the previous plugin from the dropdown.

In this example, we selected Yoast SEO plugin. Next, select which settings to import. Tick the ‘All Settings’ option to import all configurations.
Lastly, click on Import.
Conclusion – All in One SEO Plugin
The goal of every website owner is to drive traffic to their website either organically or using a paid service. Growing organically entails optimizing your content so it can easily rank on search engines.
WordPress SEO plugins provide an easy way to optimize your site and pages so they can rank on search engines.
In this beginners guide, we showed you how to install and properly set up the All in One SEO pack plugin on a WordPress site. Additionally, you saw how to optimize blog posts for the best search engine ranking.
Using an SEO plugin is one of the first steps towards optimizing your site for search engines. For a more detailed tutorial, please check our guide on WordPress SEO best practices. You can also check our WP-College for more WordPress tutorials.