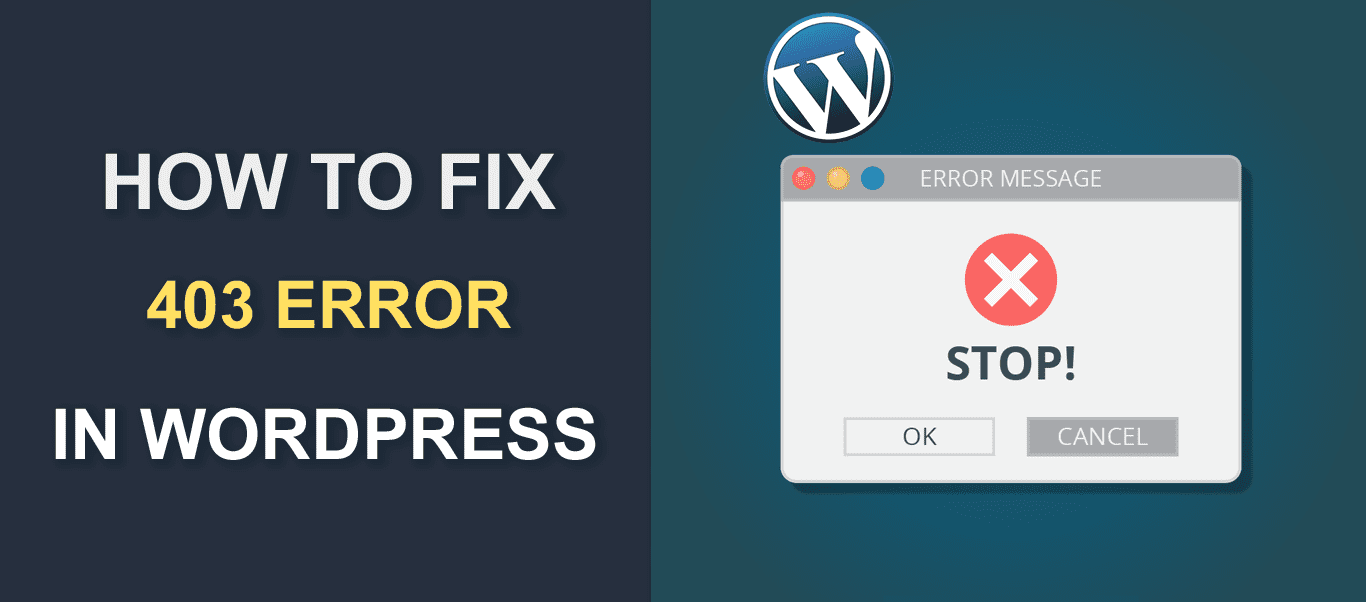
How to Fix 403 Error in WordPress
One of the most common errors you will likely come across while surfing the internet is the 403 forbidden error.
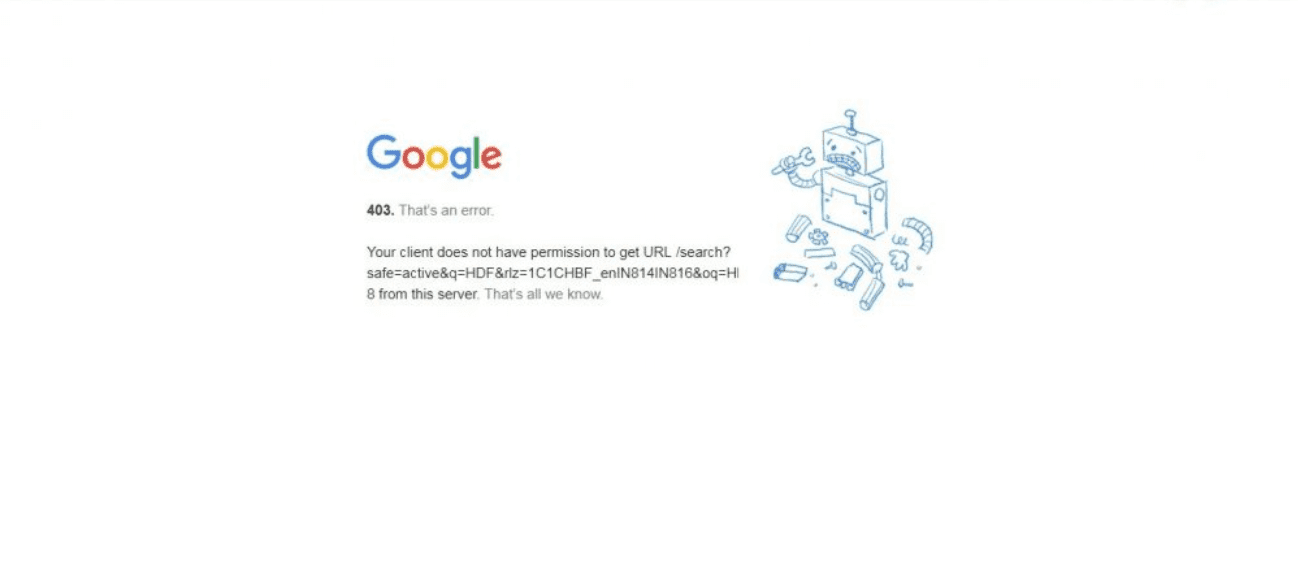
This is an HTTP (Hypertext Transfer Protocol) error often displayed in many different forms on the browser. However, it usually looks something like this:
Whenever you see this error message, it simply means you have been denied permission to access a certain web page. No doubt, this error can be upsetting!
But what if you are seeing this forbidden message on your WordPress website, and not on a random website? In this case, you must be eager to get this fixed as it is possible your readers are seeing the same error message.
Thankfully, the 403 HTTP response error can be fixed! In this tutorial, we will show you how to do so. But first, we will dive a bit deeper to understand what this error message is all about.
Content:
What is 403 Error?
From the technical point of view, 403 is an HTTP status error code. That is to say, it is one of the responses a web server throws up when there’s something wrong somewhere.
Whenever you see this error on a website, it indicates that the webserver is denying access to that site. This denial of access can be intentional or a mistake.
Sometimes, due to geographical location, you can be denied access to a website via 403 forbidden error. In such a case, it’s intentional. However, in other cases, this error can result from a faulty server configuration.
What Causes 403 Error?
Before troubleshooting any technical issue, it’s important to understand the root cause of it. Whenever you see 403 error on a website, it’s simply an indication that something is denying you access to that site.
That something could be:
- Absence of an index page
- Corrupted/absent htaccess file
- Wrongly configured file and folder permission
- Empty website directory
- Blocked IP address.
Now you’ve seen the possible causes of 403, let’s show you methods for fixing the error.
How to Fix 403 Forbidden Error
If you are currently seeing this error on your WordPress website, here are a couple of things you can do to fix it:
Check if The URL is Typed Properly
Let’s say you are trying to access a website, but you mistakenly typed the domain name wrongly. You will very likely get a 403 error message.
For example, instead of https://example.com, you typed https:://example.com, you will run into accessibility problems.
So, check to see there are no errors in the URL you typed.
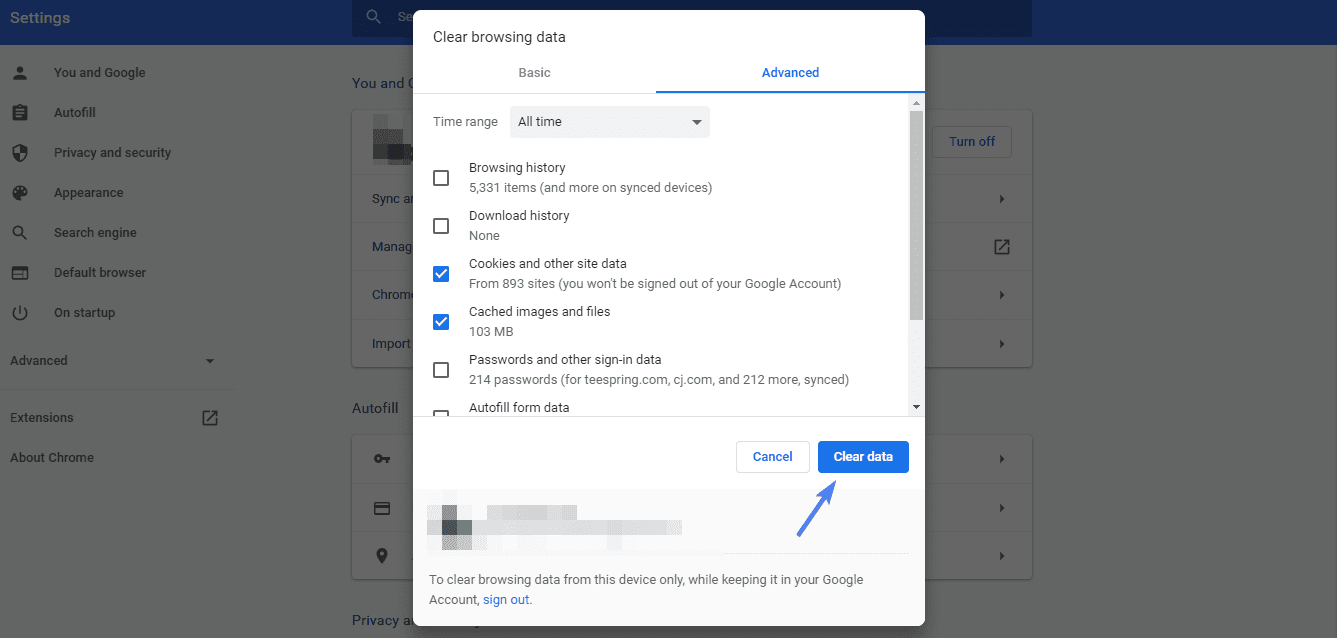
Clear Your Browser’s Cache
Clearing your browser’s cache can also help fix this problem, especially if it’s temporary. To do so, hold down Shift + Ctrl + Delete keys simultaneously on the PC.
Then, select All time from Time range (or a time range since you started seeing this error). Finally, click Clear Data.
Uninstall Any Recently Installed Plugin
At times, a poorly coded plugin can cause you to see ‘access denied’ error message on your website. If you started noticing this error shortly after installing a certain plugin, the best thing you can do is to uninstall it right away.
If you cannot access your WordPress admin dashboard, you would need to manually disable plugins. Read this guide to learn more: How to disable WordPress plugins using FTP.
Side note about the guide linked above: If you want to disable a particular plugin, open the plugins folder, locate that plugin, and rename the folder.
However, if nothing improves after uninstalling the plugin, then disable all active plugins. Again, follow the guide above if you cannot access wp-admin.
Next, refresh your site to see if the error has cleared. If you no longer see the error, it’s indicative there is a problematic plugin on your website.
To find the bad plugin, reactivate your plugins one at a time. Each time you do, refresh your site to see if the error returned. The problematic plugin will cause the error to resurface after reactivation.
If up to this point your website is still displaying a forbidden 403 error message, proceed to the next step.
Check Your Site’s htaccess File
Just so you know, htaccess file is where the configuration settings of a web server are stored. If it is missing or corrupted, a website can throw up an HTTP status error message. In such a situation, there are two things you can do to fix the problem:
- Delete the corrupted file
- Upload a fresh one
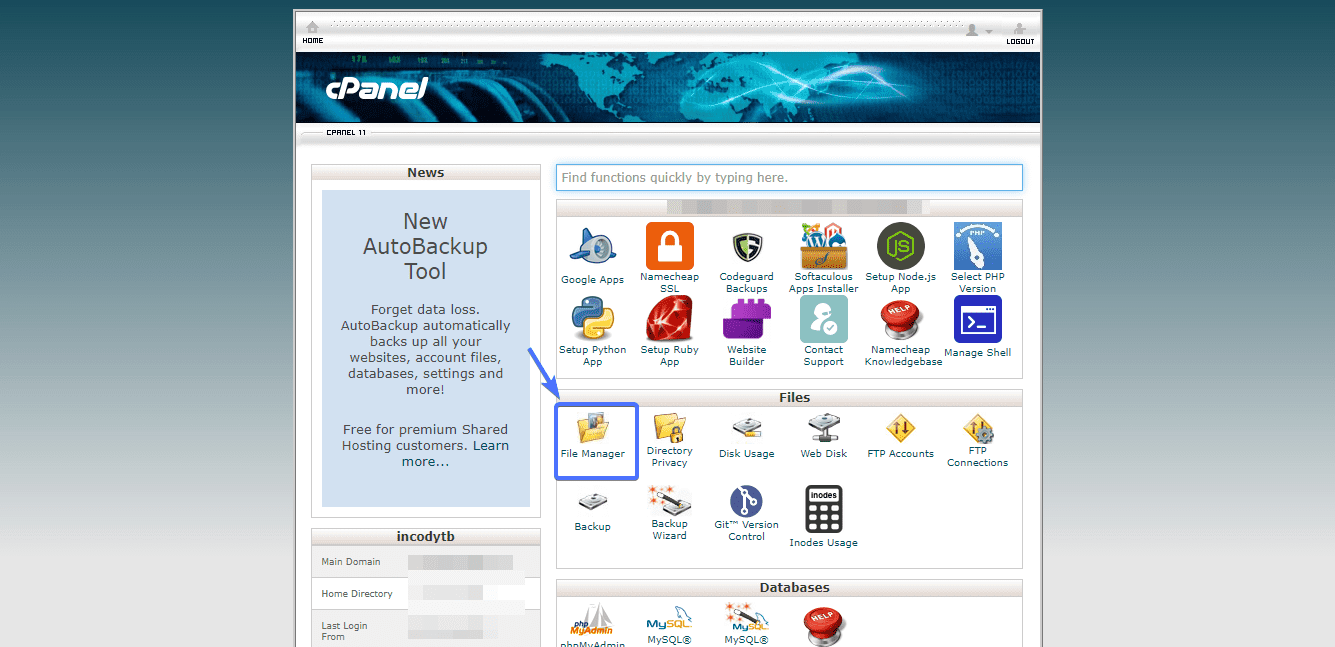
To begin with, you first need to access your site’s file directory via the cPanel or using FTP. Once you have gained access to your cPanel, locate File Manager.
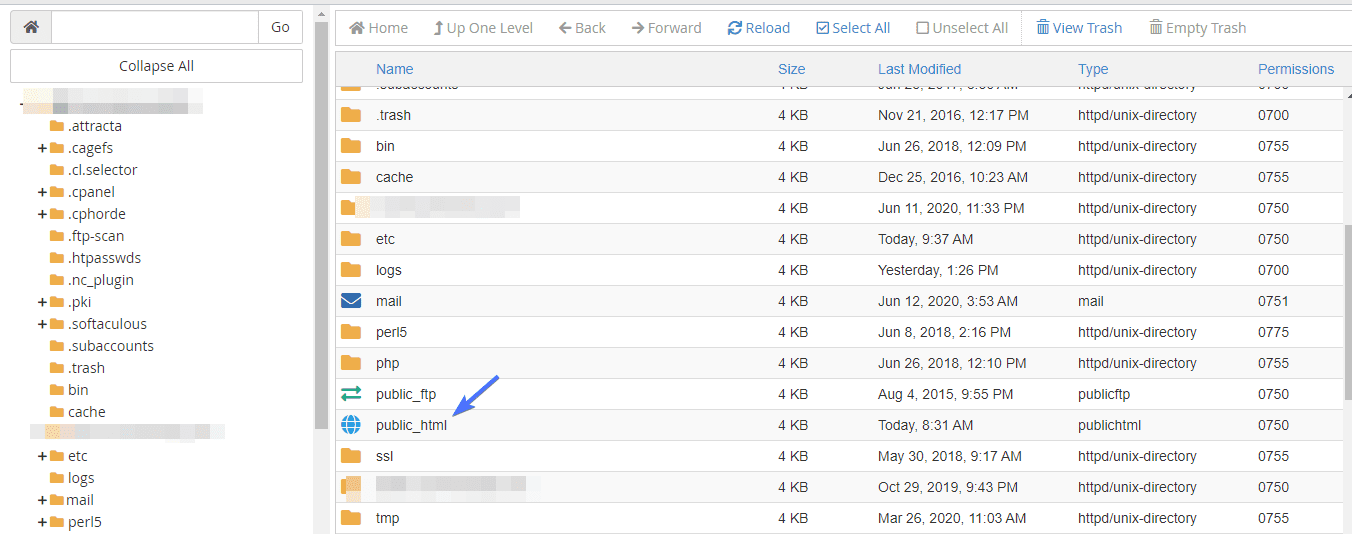
Next, scroll down until you find the public_html folder.
By default, you should see the .htaccess file like so:
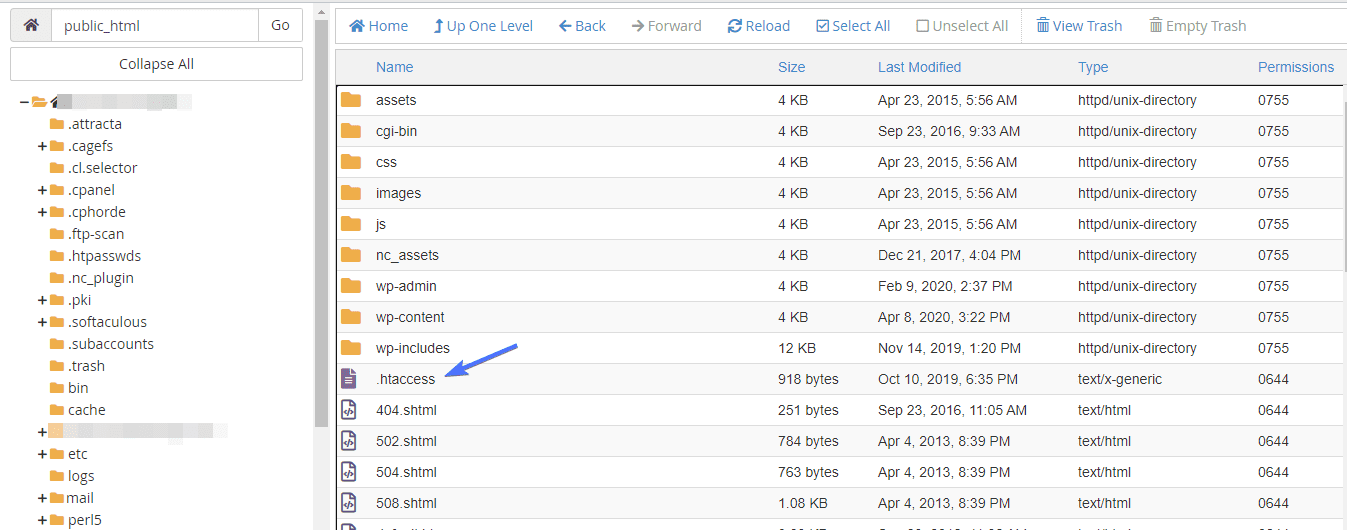
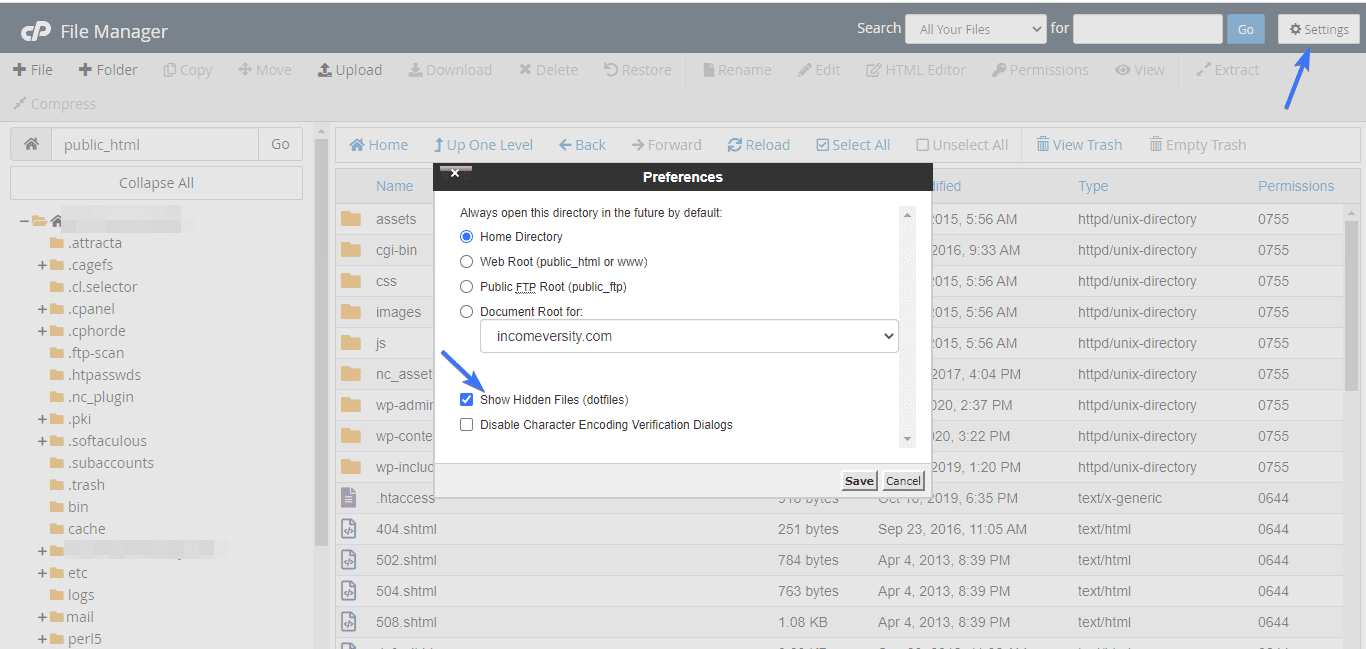
However, if it happens you couldn’t find this file, chances are it’s hidden. To unhide it, click Settings, and then check Show Hidden Files.
Once you’ve located the htaccess file, the next thing you would want to do is to find out if it’s been corrupted. How do you go about this? Well, it’s pretty simple. First, download a copy of this file as backup. Then right-click on the file and then select Delete.
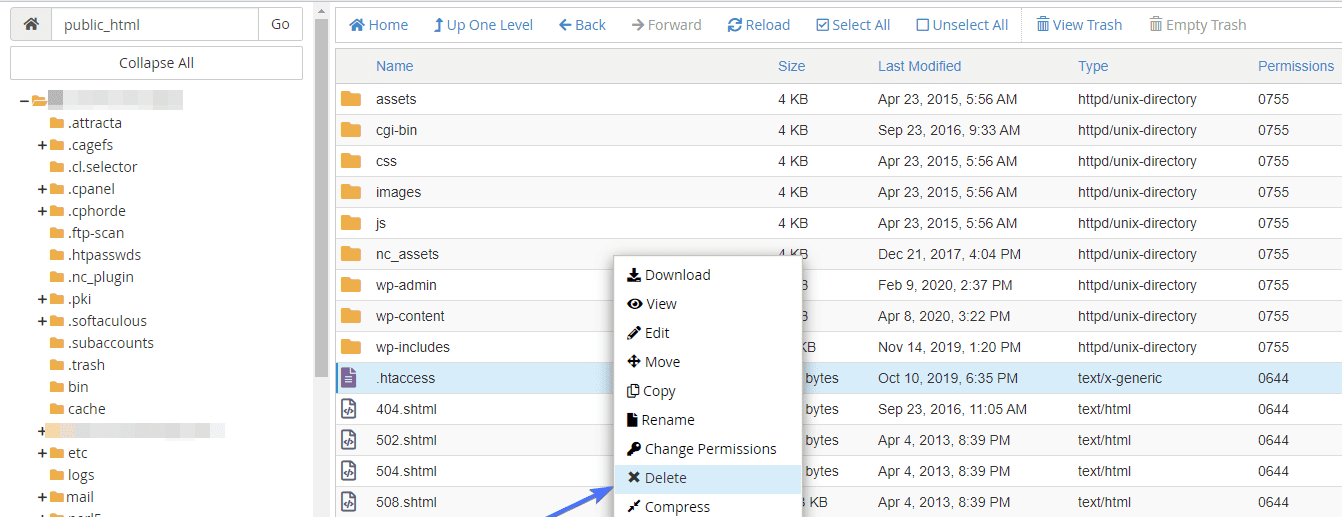
With the file deleted, head back to your website, refresh it, and see if the error has cleared away. If it has, then it’s obvious the htaccess file has been corrupted.
To generate a fresh copy of the deleted file, log into your WordPress dashboard. Then navigate to Settings >> Permalink.
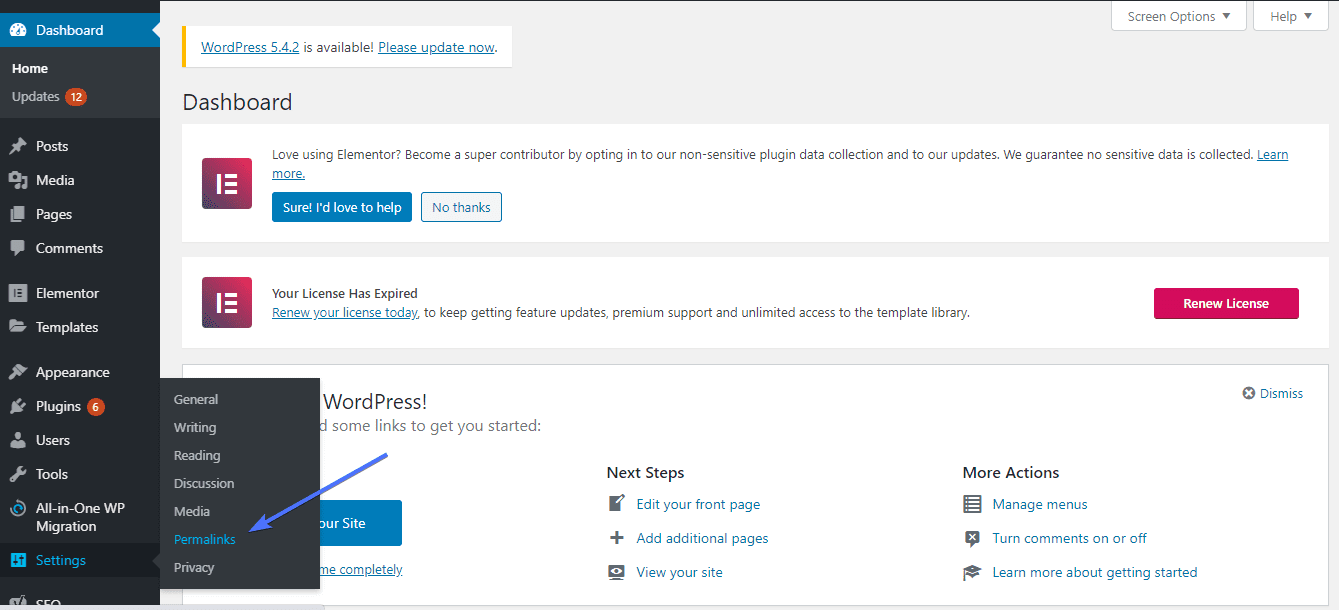
Without making any changes to the default settings, scroll down and click the Save changes button. Upon click, WordPress will automatically generate a fresh htaccess file for you.
Change Permissions Setting for Folders
Like we had earlier mentioned, if permission settings aren’t configured properly on your site’s folders and files, you will most likely encounter 403 forbidden error.
As such, if up to this point you are still experiencing this error, it’s about time you made alterations to your permission settings.
To do so, you will need an FTP client program like FileZilla to access your website folder, remotely.
Once you’ve gained access to your site’s backend via FTP, locate the public_html folder. Right-click on it and click File Attributes.
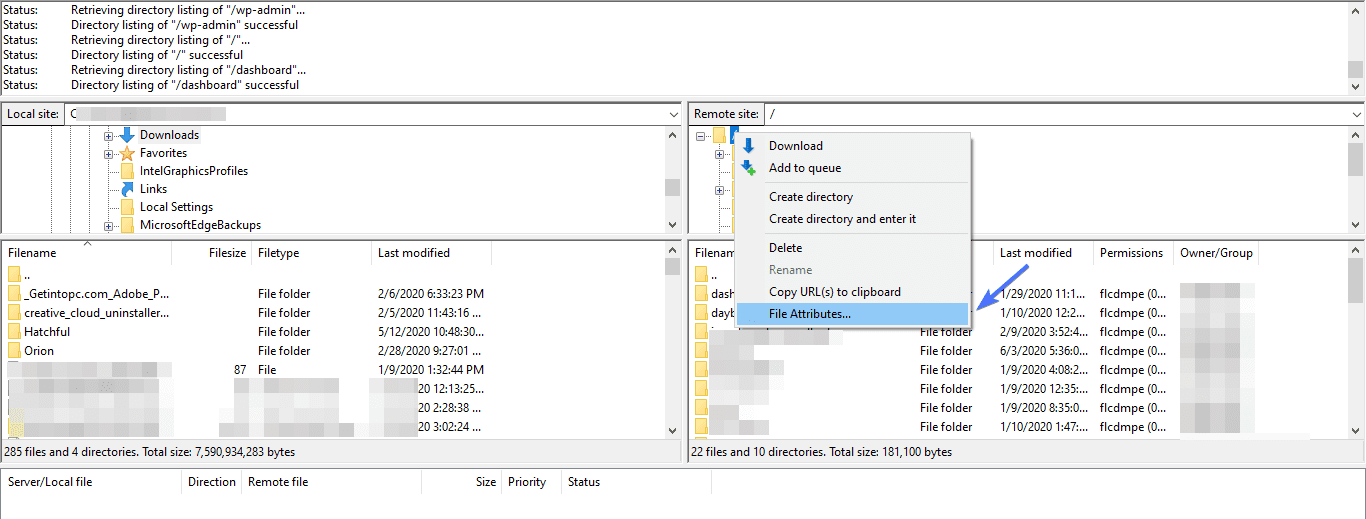
Next, check the Recurse into subdirectories and Apply to directories only buttons. Finally, in the Numeric value box, type in 755.
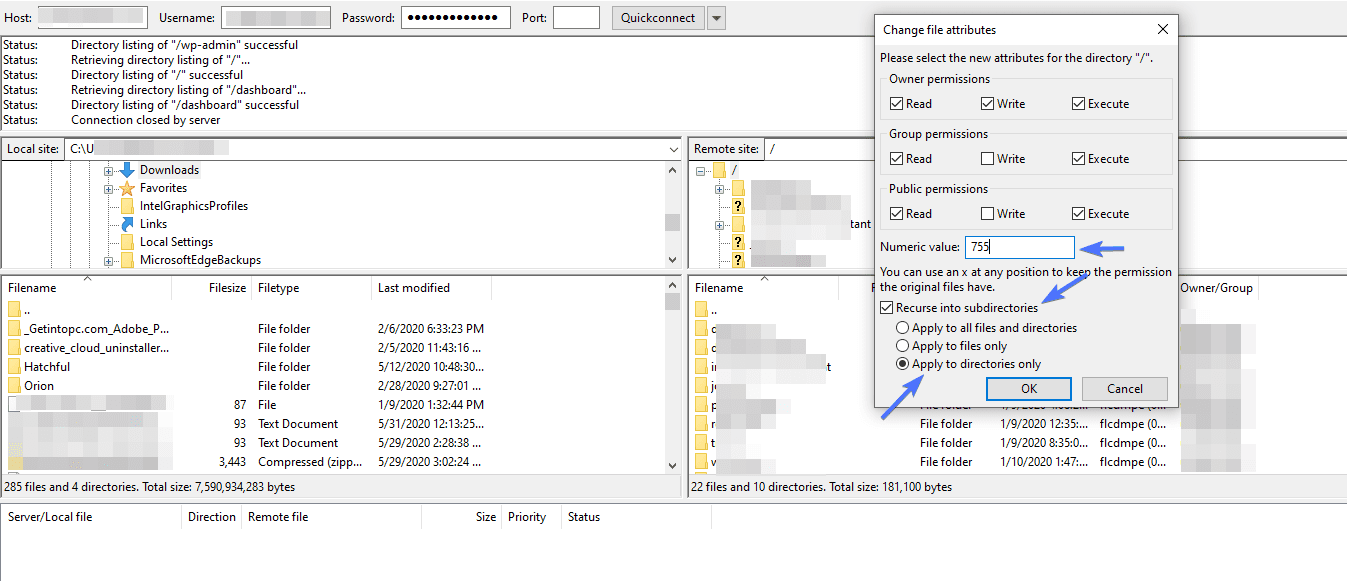
Now hit the OK button.
At this point, you are halfway through configuring your permission settings. To complete the process, repeat what you did to the public_html folder in the step above. But this time, check Recurse into subdirectories and Apply to files only, and in the Numeric value box, type in 644. Hit the OK button, and you are all set.
When this completes, your issue should be fixed.
Contact Your WordPress Hosting Provider
If nothing has worked up to this point, you might have to reach out to your hosting provider. Who knows, it might be an expired SSL certificate that has been the problem all along. They would be able to identify the source of the error from their end and help you with it.
But if the error isn’t coming from your site but someone else’s, you can always contact the website owner.
Conclusion
403 Forbidden error message can be frustrating. But thankfully, it can be fixed with a few troubleshooting steps.
In this post, we showed you methods you can use to fix this error. Some are pretty simple, while others will need some time investment from you.
We hope you found this article helpful! If you did, feel free to share it with others.